
Home>Outdoors & Camping>Hardscaping>How To Build A Walkway On A Slope
Hardscaping
How To Build A Walkway On A Slope
Published: March 6, 2024

Content Creator for Outdoors & Camping, Sophie turns any yard into a sustainable paradise. Her dedication to DIY outdoor projects and volunteer work in community gardens shares joy and knowledge.
Learn how to tackle the challenge of building a walkway on a slope with our expert hardscaping tips and techniques. Create a beautiful and functional pathway with our step-by-step guide.
(Many of the links in this article redirect to a specific reviewed product. Your purchase of these products through affiliate links helps to generate commission for Twigandthistle.com, at no extra cost. Learn more)
Introduction
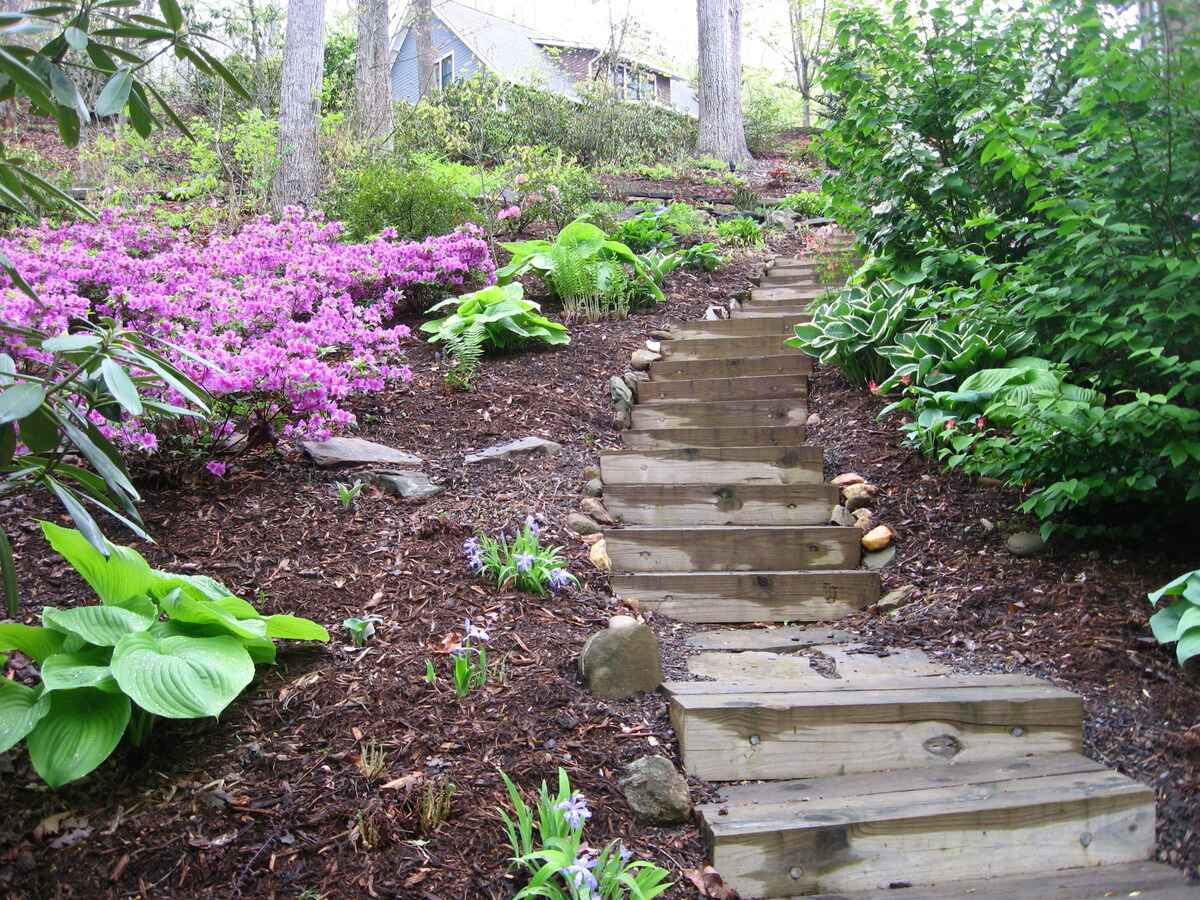
So, you've got a sloped yard and you're thinking about adding a walkway to make it more accessible and visually appealing. Building a walkway on a slope can be a challenging but rewarding DIY project. It not only enhances the functionality of your outdoor space but also adds an attractive feature to your landscape. In this article, we'll guide you through the process of building a walkway on a slope, from assessing the slope to adding the finishing touches. Let's get started!
Assessing the Slope
Assessing the slope of your yard is the first crucial step in building a walkway. Here's how to do it:
-
Use a Level: Begin by using a long level to determine the degree of the slope. Place the level on the ground and observe the bubble to see how steep the slope is.
-
Measure the Slope: Use a measuring tape to determine the vertical rise and horizontal run of the slope. This will help you calculate the slope's gradient and plan the walkway accordingly.
-
Consider Water Drainage: Take note of how water flows down the slope during rainfall. Proper water drainage is essential for preventing erosion and maintaining the integrity of your walkway.
-
Soil Stability: Assess the stability of the soil on the slope. Loose or unstable soil may require additional measures to ensure the walkway's durability.
By thoroughly assessing the slope, you'll have a better understanding of the challenges and opportunities it presents, allowing you to plan and build a walkway that complements the natural contours of your landscape.
Choosing the Right Materials
When it comes to building a walkway on a slope, selecting the right materials is essential for ensuring durability and visual appeal. Here are some key considerations for choosing the right materials:
-
Stone Pavers: Opt for stone pavers that are not only visually appealing but also provide a sturdy surface for the walkway. Natural stone such as flagstone or slate can complement the natural landscape and create an elegant look.
-
Wood: If you prefer a more rustic or natural aesthetic, wood can be a great choice for a sloped walkway. Pressure-treated wood or cedar can withstand outdoor elements and provide a charming, organic feel to the pathway.
-
Gravel: Gravel is a versatile and cost-effective option for a sloped walkway. It allows for natural water drainage and can be easily installed on uneven terrain. Consider using a stabilizing grid system to prevent gravel from shifting on the slope.
-
Concrete: For a more modern and uniform look, concrete pavers or poured concrete can be used to create a sleek walkway on a slope. Additionally, stamped or stained concrete can mimic the appearance of natural stone or wood.
-
Composite Materials: Composite decking or pavers made from recycled materials offer a low-maintenance and eco-friendly option for a sloped walkway. They are durable, resistant to rot and insects, and come in a variety of colors and textures.
-
Consider the Environment: When choosing materials, consider the climate and environmental factors in your area. Select materials that can withstand the local weather conditions and require minimal maintenance.
By carefully selecting the right materials for your sloped walkway, you can create a visually stunning and long-lasting feature that enhances the overall appeal of your outdoor space.
Planning the Walkway Design
Designing the walkway is a crucial step in the process of building a walkway on a slope. Here's how to plan the walkway design effectively:
-
Curved Pathways: Consider creating a curved pathway that follows the natural contours of the slope. Curved walkways not only add visual interest but also help to mitigate the steepness of the slope by creating a gradual transition.
-
Switchback or Zigzag Layout: If the slope is particularly steep, a switchback or zigzag layout can be an effective design choice. This involves creating a series of alternating turns or switchbacks that reduce the incline of the walkway, making it easier to navigate.
-
Terracing: Terracing involves creating multiple levels or platforms along the slope, connected by short sets of steps or gentle slopes. This design not only adds visual appeal but also provides functional resting points along the walkway.
-
Steps and Landings: Incorporating steps and landings into the design can help manage the slope effectively. By breaking up the walkway with strategically placed steps and landings, you can create a more manageable and visually dynamic pathway.
-
Consider Accessibility: If the walkway needs to be accessible to individuals with mobility challenges, ensure that the design meets accessibility standards. This may involve incorporating gentle slopes, wider pathways, and handrails where necessary.
-
Use Visual Cues: Incorporate visual cues such as borders, contrasting materials, or landscaping elements to define the edges of the walkway and guide users along the path.
-
Lighting and Safety: Consider the placement of lighting along the walkway to ensure visibility and safety, especially if the walkway will be used during evening hours.
By carefully planning the design of the walkway, you can create a functional, visually appealing, and safe pathway that seamlessly integrates with the natural slope of your landscape.
Preparing the Ground
Preparing the ground is a crucial step in building a walkway on a slope. Proper preparation ensures a stable foundation and helps prevent erosion and shifting of the walkway over time. Here's how to prepare the ground effectively:
-
Clear the Path: Begin by clearing the area where the walkway will be installed. Remove any vegetation, rocks, or debris from the slope to create a clean and level surface for the walkway.
-
Excavation: Depending on the slope's steepness, you may need to excavate the soil to create a level base for the walkway. Use a shovel or a small excavator to remove soil and create a flat surface. Consider the width and depth of the walkway when excavating to ensure sufficient space for the chosen materials.
-
Install Edging: To prevent the materials from shifting or spreading, install edging along the sides of the walkway. This can be done using plastic or metal landscape edging, stone or brick borders, or pressure-treated wood. The edging helps contain the materials and provides a defined edge for the walkway.
-
Add a Base Layer: Depending on the chosen materials, adding a base layer may be necessary to provide stability and proper drainage. For example, if using pavers or stone, a base layer of compacted gravel or sand can help distribute the weight and prevent settling. For wooden walkways, a layer of landscape fabric can be added to inhibit weed growth.
-
Consider Drainage: Proper drainage is essential for preventing water from pooling on the walkway. If the slope is prone to water runoff, consider incorporating a drainage system such as perforated pipes or French drains to redirect water away from the walkway.
-
Compact the Base: Once the base layer is in place, use a hand tamper or a plate compactor to compact the soil or base materials. This helps create a firm and stable foundation for the walkway, reducing the risk of settling or shifting over time.
By thoroughly preparing the ground, you can ensure a solid foundation for your walkway, promoting longevity and stability as it navigates the natural slope of your landscape.
Installing the Walkway
Once the ground is properly prepared, it's time to start installing the walkway on the slope. Here's a step-by-step guide to help you through the installation process:
-
Lay the First Layer: If you're using stone pavers or bricks, start by laying the first layer along the prepared base. Ensure that the pavers are snugly fitted together, and use a level to check for evenness. For wooden walkways, begin by laying the first row of planks, ensuring they are securely anchored to the ground.
-
Create a Sturdy Foundation: For sloped walkways, it's essential to create a sturdy foundation that can withstand the incline. Use additional base materials such as gravel or sand to fill in any gaps between the pavers or planks, providing stability and support.
-
Use Retaining Walls: If the slope is particularly steep, consider incorporating retaining walls to create terraced levels for the walkway. Retaining walls not only add structural support but also enhance the visual appeal of the walkway.
-
Secure the Edging: Ensure that the edging is securely in place to contain the walkway materials. This helps prevent shifting and maintains the integrity of the walkway, especially on a slope where the risk of erosion is higher.
-
Install Steps and Landings: If your walkway design includes steps and landings, carefully install these elements to ensure a safe and seamless transition along the slope. Use proper measurements and leveling to maintain consistency and stability.
-
Consider Drainage: As you continue to install the walkway, pay attention to the drainage needs of the slope. Ensure that the walkway allows for proper water runoff and consider incorporating drainage features if necessary.
-
Secure Wooden Walkways: If you've opted for a wooden walkway, ensure that the planks are securely fastened to the ground to prevent shifting or warping. Use weather-resistant screws or nails to secure the planks in place.
-
Test for Stability: Once the walkway is installed, carefully test its stability by walking along the path. Check for any areas that feel uneven or unstable and make adjustments as needed to ensure a safe and reliable walkway.
By following these steps, you can effectively install a walkway on a slope, creating a functional and visually appealing pathway that seamlessly integrates with the natural contours of your landscape.
Adding Finishing Touches
Once the walkway is installed, adding finishing touches can elevate its visual appeal and functionality. Here are some essential finishing touches to consider:
-
Landscaping: Enhance the walkway's surroundings with carefully chosen landscaping elements such as flower beds, shrubs, or ornamental grasses. These additions can soften the edges of the walkway and create a seamless transition between the path and the surrounding landscape.
-
Mulching: Applying a layer of mulch around the walkway not only provides a clean and polished look but also helps with weed control and moisture retention. Choose a mulch that complements the overall aesthetic of the walkway and the surrounding environment.
-
Seating Areas: If the walkway is long or traverses a particularly scenic area of your yard, consider incorporating seating areas or benches along the path. These resting spots can provide a place to enjoy the surroundings and break up the journey along the walkway.
-
Lighting: Install lighting along the walkway to ensure visibility and safety, especially during the evening hours. Solar-powered lights, low-voltage LED fixtures, or lanterns can add a warm and inviting ambiance while serving a practical purpose.
-
Handrails and Guardrails: For walkways with steeper inclines or steps, adding handrails or guardrails can enhance safety and accessibility. Choose materials and designs that complement the overall aesthetic of the walkway while providing necessary support.
-
Decorative Accents: Consider incorporating decorative accents such as mosaic patterns, inlaid designs, or colored stones to add visual interest to the walkway. These accents can create a unique and personalized touch to the pathway.
-
Maintenance Considerations: Finally, consider the long-term maintenance of the walkway. Apply a sealant to stone or concrete surfaces to protect them from the elements, and establish a regular maintenance routine to keep the walkway in top condition.
By adding these finishing touches, you can transform your walkway into a stunning and functional feature that enhances the beauty and usability of your outdoor space.
Conclusion
Building a walkway on a slope presents unique challenges, but with careful planning and the right approach, it can become a standout feature of your landscape. By assessing the slope, choosing the right materials, planning the design, preparing the ground, installing the walkway, and adding finishing touches, you can create a functional, visually appealing, and durable pathway that seamlessly integrates with the natural contours of your yard. Whether you opt for stone pavers, wooden planks, gravel, or concrete, the key is to work with the slope, not against it. With attention to detail and a creative touch, your sloped walkway can become a defining element of your outdoor space, enhancing accessibility, aesthetics, and overall enjoyment of your property. So, roll up your sleeves, gather your materials, and embark on the journey of building a walkway on a slope – the results will be well worth the effort.