
Home>Outdoors & Camping>Hardscaping>How To Make A Stone Walkway
Hardscaping
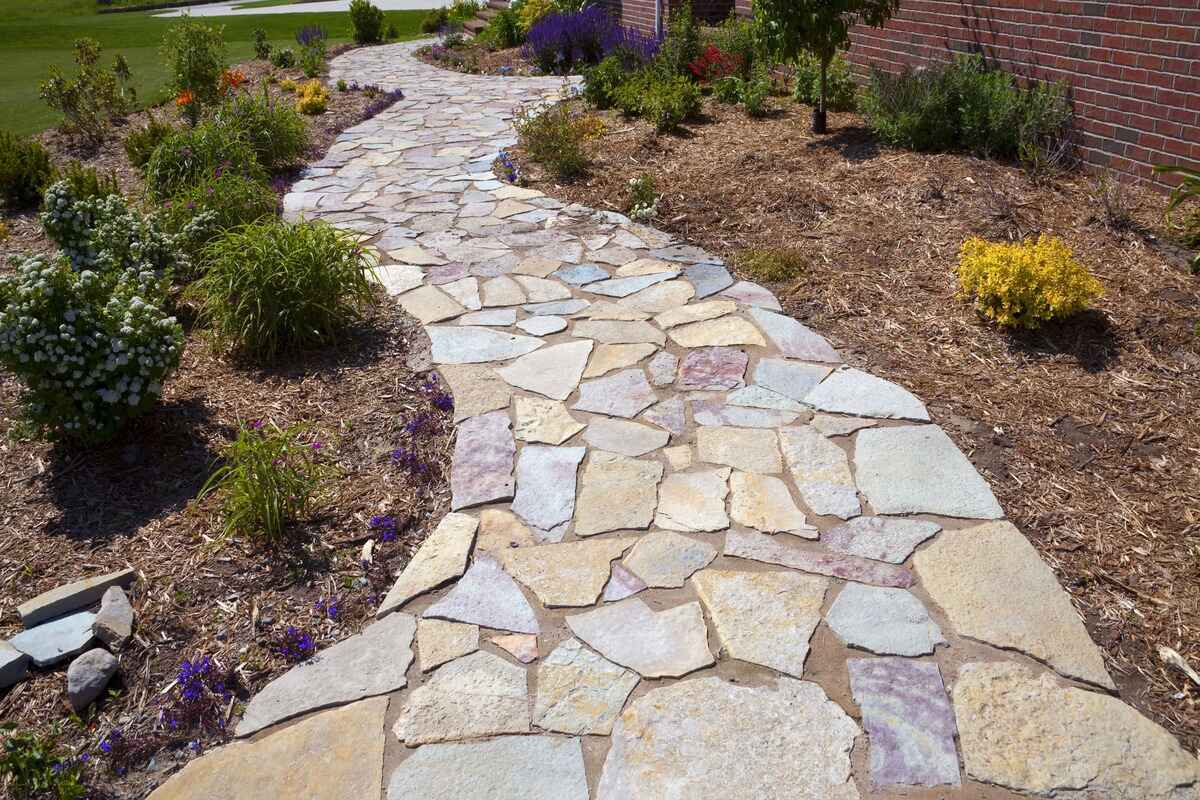
How To Make A Stone Walkway
Published: March 6, 2024

Content Creator for Outdoors & Camping, Sophie turns any yard into a sustainable paradise. Her dedication to DIY outdoor projects and volunteer work in community gardens shares joy and knowledge.
Learn how to create a stunning stone walkway with our comprehensive hardscaping guide. Transform your outdoor space today!
(Many of the links in this article redirect to a specific reviewed product. Your purchase of these products through affiliate links helps to generate commission for Twigandthistle.com, at no extra cost. Learn more)
Introduction
So, you've been dreaming of adding a touch of charm and elegance to your outdoor space, and you've decided that a stone walkway is just the thing to make it happen. But where do you start? How do you go about creating a beautiful and functional stone walkway that will stand the test of time? Well, you've come to the right place! In this guide, we'll walk you through the step-by-step process of creating your very own stunning stone walkway. From choosing the right stones to maintaining your walkway, we've got you covered. Let's get started on this exciting DIY journey!
Choosing the Right Stones
When it comes to creating a stone walkway, the first step is to choose the right stones. The type of stones you select will greatly impact the overall look and feel of your walkway. Here are some key factors to consider when choosing the right stones for your project:
-
Size and Shape: Consider the size and shape of the stones you want to use. Do you prefer uniform, geometric shapes, or are you drawn to the natural, irregular shapes of fieldstones? The size and shape of the stones will determine the overall aesthetic of your walkway.
-
Material: There are various types of stones to choose from, such as flagstone, slate, limestone, or granite. Each type of stone has its own unique characteristics and appearance. Consider the color, texture, and durability of the stones to ensure they complement your outdoor space.
-
Functionality: Think about the practicality of the stones. Will the walkway be used for heavy foot traffic, or is it primarily for decorative purposes? Ensure that the stones you choose are durable and suitable for the intended use of the walkway.
-
Budget: Set a budget for your project and explore stone options that align with your financial plan. Keep in mind that certain types of stones may be more expensive than others, so it's essential to consider the cost when making your selection.
-
Local Availability: Check if the stones you are interested in are readily available in your local area. Choosing locally sourced stones can not only reduce costs but also add a unique, regional touch to your walkway.
By carefully considering these factors, you can select the perfect stones for your walkway that align with your vision, budget, and practical needs.
Planning and Designing Your Walkway
Planning and designing your stone walkway is a crucial step that sets the foundation for a successful project. Here's how to approach this phase with creativity and precision:
-
Sketch Your Vision: Begin by sketching out your ideas for the walkway. Consider the shape, curves, and any specific patterns you want to incorporate. This initial visual representation will help you solidify your design concept.
-
Measure the Area: Take accurate measurements of the area where the walkway will be installed. This will guide you in determining the quantity of stones and materials needed for the project.
-
Consider the Landscape: Evaluate the existing landscape and terrain. Take note of any slopes, natural features, or obstacles that may influence the design and layout of the walkway. Adapting the walkway to the natural landscape can enhance its visual appeal and functionality.
-
Select a Layout Pattern: Decide on a layout pattern for the stones. Options include straight lines, gentle curves, or intricate designs like herringbone or basket weave. The chosen pattern should complement the overall aesthetic of your outdoor space.
-
Incorporate Landscaping Elements: If desired, plan for the integration of landscaping elements such as flower beds, shrubs, or lighting along the walkway. This can add an extra dimension of beauty and charm to the design.
-
Account for Drainage: Ensure that the walkway design allows for proper drainage to prevent water from pooling or causing erosion. Incorporating a slight slope or using permeable materials can help manage water runoff effectively.
-
Seek Inspiration: Look for inspiration in home improvement magazines, online resources, or even in your local area. Gathering ideas from various sources can spark creativity and help you refine your vision for the walkway.
By carefully planning and designing your stone walkway, you can create a layout that not only enhances the visual appeal of your outdoor space but also complements the natural landscape and architectural features of your home.
Preparing the Ground
Preparing the ground for your stone walkway is a crucial step that sets the stage for a durable and long-lasting installation. Here's a detailed breakdown of how to prepare the ground effectively:
-
Mark the Path: Begin by marking the path of the walkway using stakes and string. This visual guide will help you visualize the layout and ensure that the walkway aligns with your initial design.
-
Clear the Area: Remove any existing vegetation, debris, or obstacles from the marked path. This includes grass, weeds, rocks, and roots. Use a shovel, rake, or a sod cutter to clear the area thoroughly.
-
Excavate the Soil: Excavate the soil along the marked path to create a trench for the walkway. The depth of the trench will depend on the thickness of your stones and the base materials. Typically, a depth of 4 to 6 inches is suitable for accommodating the base layers and the stones.
-
Level the Trench: Use a level to ensure that the bottom of the trench is even and flat. This will provide a stable foundation for the walkway and prevent uneven settling over time.
-
Add Base Materials: Fill the trench with a base layer of crushed stone or gravel. This base layer serves as a stable foundation for the stones and aids in drainage. Compact the base materials using a hand tamper or a mechanical compactor to create a solid, level surface.
-
Install Edging: Consider installing edging along the sides of the walkway to define the boundaries and prevent the stones from shifting over time. Edging materials can include plastic or metal paver restraints, concrete curbing, or natural stone borders.
-
Add a Weed Barrier: To minimize weed growth and maintain the integrity of the walkway, lay a weed barrier fabric over the compacted base layer. This will help prevent weeds from penetrating the walkway while allowing for proper drainage.
By meticulously preparing the ground for your stone walkway, you can establish a stable and well-structured foundation that ensures the longevity and functionality of the installation. This groundwork is essential for creating a walkway that withstands the test of time and enhances the beauty of your outdoor space.
Laying the Stones
Now comes the exciting part of bringing your stone walkway to life by laying the carefully chosen stones. This phase requires precision and attention to detail to ensure a visually appealing and structurally sound walkway. Here's a step-by-step guide on how to lay the stones for your walkway:
-
Dry Layout: Before placing the stones, conduct a dry layout by arranging them along the prepared trench. This allows you to visualize the placement of the stones and make any necessary adjustments to the design.
-
Start at One End: Begin laying the stones at one end of the walkway and work your way towards the other end. This approach helps maintain a consistent pattern and alignment throughout the installation.
-
Maintain Spacing: Place the stones with consistent spacing between them to create an even and balanced look. You can use spacers or small stones to ensure uniform gaps between the larger stones.
-
Fit the Stones: As you lay each stone, ensure that it fits snugly against the adjacent stones without rocking or wobbling. This close fit is essential for creating a stable and secure walking surface.
-
Tap into Place: Use a rubber mallet to gently tap the stones into position, ensuring that they are level and firmly set in the base materials. Take care not to apply excessive force that could damage the stones.
-
Check for Level: Periodically check the level of the stones as you progress. Adjust the base materials or add/remove material as needed to maintain a consistent level throughout the walkway.
-
Create Smooth Transitions: Pay attention to the transitions between stones, especially in curved or irregular sections. Aim for smooth, flowing transitions that provide a comfortable and visually appealing walking surface.
-
Consider Patterns: If you've chosen a specific pattern for your walkway, such as a herringbone or basket weave, ensure that you follow the pattern consistently as you lay the stones.
-
Fill in the Gaps: As you lay the stones, fill in the gaps between them with fine sand or stone dust. This helps stabilize the stones and prevents shifting while allowing for drainage.
-
Step Back and Assess: Periodically step back and assess the overall appearance of the walkway as you lay the stones. This vantage point can help you identify any irregularities or adjustments that may be needed.
By following these steps and taking your time to lay the stones with care and precision, you can create a stunning stone walkway that adds beauty and functionality to your outdoor space. The process of laying the stones is where your vision truly begins to take shape, and the results will be a testament to your dedication to creating a captivating walkway.
Filling in the Gaps
Once the stones are securely in place, the next crucial step is to fill in the gaps between them. This process not only enhances the stability of the walkway but also contributes to its overall visual appeal. Here's a detailed guide on how to effectively fill in the gaps for a polished and durable finish:
-
Select the Filling Material: Choose a suitable material for filling the gaps between the stones. Common options include fine sand, stone dust, or polymeric sand. Consider the color and texture of the filling material to ensure it complements the stones and enhances the aesthetic of the walkway.
-
Apply the Filling Material: Carefully pour the chosen filling material over the surface of the walkway, ensuring that it reaches the gaps between the stones. Use a small shovel, brush, or broom to distribute the material evenly and work it into the gaps.
-
Work in Sections: Divide the walkway into manageable sections and focus on filling the gaps one section at a time. This approach allows you to maintain control over the filling process and achieve consistent results throughout the walkway.
-
Use a Push Broom or Brush: After applying the filling material, use a push broom or a stiff brush to sweep the material into the gaps. Work in a back-and-forth motion to encourage the material to settle and fill the spaces between the stones.
-
Compact the Filling Material: Once the gaps are filled, use a tamper or a hand compactor to gently compact the filling material. This helps secure the material in place and ensures a stable surface for walking.
-
Remove Excess Material: After compacting, sweep away any excess filling material from the surface of the stones. This step helps reveal the natural beauty of the stones and creates a clean, finished look for the walkway.
-
Mist with Water: If using polymeric sand, lightly mist the surface of the walkway with water to activate the binding properties of the sand. Follow the manufacturer's recommendations for the proper application and activation of the polymeric sand.
-
Revisit and Refill: After the initial filling, revisit the walkway and inspect the gaps between the stones. If any gaps have settled or appear less filled, add more filling material as needed to achieve a uniform and cohesive look.
By diligently filling in the gaps between the stones, you can create a visually striking and structurally sound stone walkway that enhances the beauty of your outdoor space. This final step adds the finishing touch to your project, ensuring that your walkway is not only functional but also a captivating feature of your home.
Maintaining Your Stone Walkway
Maintaining your stone walkway is essential for preserving its beauty and functionality over time. By implementing regular maintenance practices, you can ensure that your walkway remains an inviting and durable feature of your outdoor space. Here's a comprehensive guide on how to effectively maintain your stone walkway:
-
Regular Cleaning: Keep your stone walkway clean by regularly sweeping away debris, leaves, and dirt. Use a leaf blower or a stiff-bristled broom to remove surface debris and prevent it from accumulating between the stones.
-
Weed Control: Monitor the walkway for any signs of weed growth between the stones. Remove any weeds that emerge and consider applying a natural weed deterrent to prevent future growth.
-
Pressure Washing: Periodically use a pressure washer to clean the surface of the stones and remove any embedded dirt or stains. Use a gentle setting to avoid damaging the stones and ensure even cleaning.
-
Inspect for Damage: Routinely inspect the walkway for any signs of damage, such as loose stones, cracks, or uneven settling. Address any issues promptly to prevent further deterioration.
-
Replenish Joint Material: Over time, the filling material between the stones may wear away. Periodically inspect the gaps and replenish the joint material as needed to maintain stability and prevent shifting.
-
Sealing the Stones: Consider applying a stone sealer to protect the surface of the stones from moisture, stains, and weathering. Follow the manufacturer's recommendations for the proper application of the sealer.
-
Address Drainage Issues: Ensure that the walkway maintains proper drainage to prevent water from pooling or causing erosion. Adjust the surrounding landscape or drainage features as needed to maintain effective water runoff.
-
Repairing Damage: If you notice any significant damage to the stones or the walkway structure, such as cracks or uneven settling, consider seeking professional assistance to address the issues and restore the walkway's integrity.
-
Winter Maintenance: During the winter months, take precautions to protect the walkway from potential damage caused by freezing temperatures and ice. Use ice melt products sparingly and avoid using harsh chemicals that could harm the stones.
-
Professional Maintenance: Consider scheduling periodic professional maintenance and inspection of your stone walkway to address any underlying issues and ensure its long-term durability.
By incorporating these maintenance practices into your routine, you can preserve the beauty and functionality of your stone walkway, allowing it to continue enhancing your outdoor space for years to come.