
Home>Outdoors & Camping>Hardscaping>How To Build A Rock Fireplace
Hardscaping
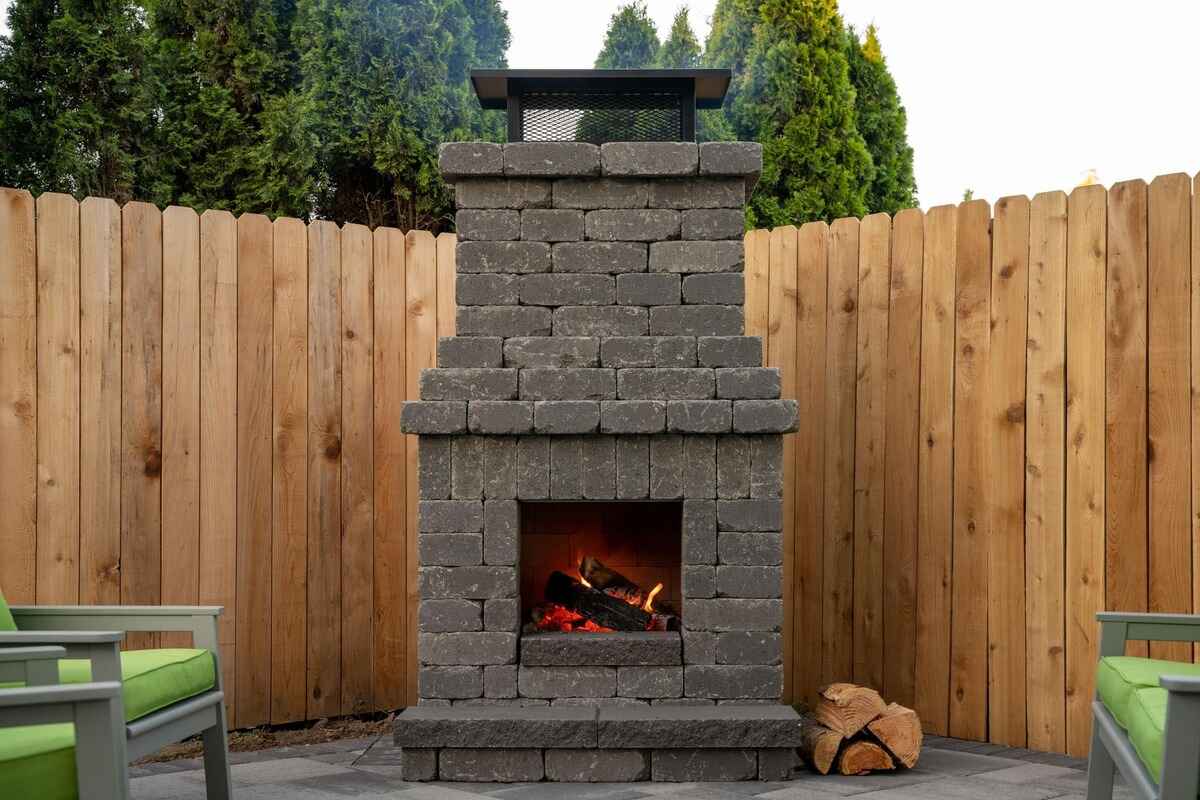
How To Build A Rock Fireplace
Published: March 6, 2024

Content Creator for Outdoors & Camping, Sophie turns any yard into a sustainable paradise. Her dedication to DIY outdoor projects and volunteer work in community gardens shares joy and knowledge.
Learn how to enhance your outdoor space with a stunning rock fireplace. Our hardscaping guide provides step-by-step instructions for creating a beautiful and functional focal point. Elevate your backyard with this timeless addition!
(Many of the links in this article redirect to a specific reviewed product. Your purchase of these products through affiliate links helps to generate commission for Twigandthistle.com, at no extra cost. Learn more)
Introduction
So, you've been dreaming of cozying up by a crackling fire in your very own home, and you've decided that a rock fireplace is just the thing to make that dream a reality. Building a rock fireplace can be a rewarding and visually stunning project that adds warmth and character to your living space. But where do you start? How do you even begin to build a rock fireplace? Well, fear not, because we're here to guide you through the process step by step. Whether you're a seasoned DIY enthusiast or a novice looking to take on a new challenge, building a rock fireplace is a project that can be accomplished with the right tools, materials, and a little bit of know-how. So, let's roll up our sleeves and get started on creating the fireplace of your dreams!
Choosing the Right Location
When it comes to building a rock fireplace, choosing the right location is crucial. Here are some key factors to consider when selecting the perfect spot for your fireplace:
-
Safety First: Ensure that the location you choose complies with local building codes and regulations. Keep the fireplace away from flammable materials and maintain proper clearances to prevent fire hazards.
-
Ventilation: Consider the ventilation requirements for your fireplace. It's essential to place the fireplace where it can be properly vented to the outside to prevent smoke and fume buildup inside your home.
-
Aesthetics: Think about the visual impact of the fireplace in the room. The location should allow for optimal viewing and create a focal point that enhances the overall ambiance of the space.
-
Accessibility: Choose a location that allows for easy access to the fireplace for maintenance and cleaning. This will make it easier to tend to the fire and keep the fireplace in good working condition.
-
Structural Considerations: Assess the structural integrity of the chosen location. Ensure that the floor can support the weight of the fireplace and that there are no obstacles that could impede the installation process.
By carefully considering these factors, you can select a location that not only meets practical requirements but also enhances the visual appeal and functionality of your rock fireplace.
Gathering Materials and Tools
Before you embark on building your rock fireplace, it's essential to gather all the necessary materials and tools to ensure a smooth and efficient construction process. Here's a comprehensive list of what you'll need:
Materials:
- Fireplace Kit or Firebox: Depending on your preference, you can opt for a pre-fabricated fireplace kit or a firebox that will serve as the foundation for your rock fireplace.
- Rocks or Stone Veneer: Select the type of rocks or stone veneer that will best suit the aesthetic of your home and the design of your fireplace.
- Mortar: Choose a high-quality mortar that is suitable for bonding the rocks together and can withstand high temperatures.
- Firebricks: These specialized bricks are designed to withstand the intense heat of the fire and are essential for lining the interior of the fireplace.
- Rebar and Metal Lath: These materials will provide structural support and reinforcement for the fireplace construction.
- Grout: You'll need grout to fill in the gaps between the rocks and create a cohesive, finished look.
- Fireplace Doors and Screen: If desired, select fireplace doors and a screen to enhance the safety and functionality of your fireplace.
Tools:
- Masonry Trowel: A masonry trowel is essential for applying mortar and grout during the construction process.
- Level: To ensure that your fireplace is constructed with precision and accuracy, a level is indispensable for maintaining straight and even lines.
- Masonry Saw or Hammer and Chisel: Depending on the type of rocks or stone veneer you choose, you'll need a masonry saw or a hammer and chisel to cut and shape the materials.
- Wire Brush: A wire brush will come in handy for cleaning and preparing the rocks before installation.
- Rubber Mallet: Use a rubber mallet to gently tap the rocks into place without causing damage.
- Safety Gear: Don't forget to prioritize safety by wearing gloves, safety goggles, and a dust mask to protect yourself during the construction process.
By ensuring that you have all the necessary materials and tools at your disposal, you'll be well-prepared to tackle the construction of your rock fireplace with confidence and efficiency.
Building the Foundation
The foundation of your rock fireplace is crucial for ensuring its stability and longevity. Here's a step-by-step guide to building a solid foundation for your fireplace:
-
Prepare the Site: Clear the area where the fireplace will be constructed, ensuring that it is level and free from any debris or obstructions. Mark the dimensions of the fireplace on the ground using stakes and string to provide a visual guide for the foundation.
-
Excavation: Use a shovel to excavate the marked area to a depth that allows for the foundation to be below the frost line. The depth of the excavation will depend on the local building codes and the soil conditions in your area.
-
Pour the Concrete Footings: Once the excavation is complete, it's time to pour the concrete footings. Construct a form using wooden boards to contain the concrete and ensure that it is poured to the required depth and width. Use a level to ensure that the footings are even and aligned.
-
Lay the Concrete Pad: After the footings have been poured and allowed to set, pour a concrete pad within the excavated area. The pad should be level and extend slightly beyond the dimensions of the fireplace to provide a stable base for the structure.
-
Install Rebar and Metal Lath: To reinforce the concrete foundation, place rebar within the footings and pad, creating a grid pattern for added strength. Additionally, attach metal lath to the surface of the concrete pad to provide a secure base for the application of mortar and rocks.
-
Allow for Curing: Once the concrete has been poured and the rebar and metal lath are in place, allow sufficient time for the concrete to cure and harden. This process is essential for ensuring the structural integrity of the foundation.
By following these steps, you can establish a solid and durable foundation for your rock fireplace, setting the stage for the next phases of construction.
Constructing the Frame
The construction of the frame is a pivotal stage in building a rock fireplace, as it provides the structure upon which the rock veneer will be applied. Here's a detailed breakdown of the process:
-
Measure and Cut the Studs: Begin by measuring and cutting the wooden studs to the appropriate lengths based on the dimensions of the fireplace design. The studs will form the vertical and horizontal framework for the fireplace.
-
Assemble the Frame: Using the cut studs, assemble the frame by securing them together with nails or screws. Ensure that the frame is square and level to maintain the structural integrity of the fireplace.
-
Attach the Frame to the Foundation: Position the frame on top of the concrete pad and secure it in place using anchor bolts or concrete screws. This will anchor the frame to the foundation, providing stability for the entire structure.
-
Install Firebox or Fireplace Kit: If you are using a pre-fabricated firebox or fireplace kit, carefully follow the manufacturer's instructions to install it within the frame. This will serve as the fire chamber for the fireplace.
-
Add Support for Mantel: If your fireplace design includes a mantel, add additional support within the frame to accommodate the weight of the mantel. This may involve attaching a horizontal beam or brackets to the frame.
-
Inspect for Stability: Once the frame is assembled and the firebox is in place, inspect the entire structure for stability and make any necessary adjustments to ensure that it is secure and level.
By meticulously constructing the frame, you establish a solid foundation for the rock veneer application and ensure that your rock fireplace is structurally sound and visually appealing.
Adding the Rock Veneer
The addition of the rock veneer is where your rock fireplace truly begins to take shape and come to life. Here's a step-by-step guide to adding the rock veneer to your fireplace frame:
-
Prepare the Surface: Before applying the rock veneer, ensure that the surface of the frame is clean and free of debris. Use a wire brush to remove any loose particles and create a rough texture that will promote better adhesion of the mortar.
-
Mix the Mortar: Prepare the mortar according to the manufacturer's instructions. The consistency of the mortar should be thick enough to hold the rocks in place but still workable for application.
-
Apply the Mortar: Using a masonry trowel, apply a layer of mortar to a small section of the frame. The layer should be thick enough to accommodate the depth of the rocks and create a strong bond.
-
Place the Rocks: Carefully select rocks or stone veneer pieces of varying shapes and sizes to create a visually appealing and natural-looking pattern. Press the rocks firmly into the mortar, ensuring that they are securely embedded and the mortar oozes out from the joints.
-
Fill in the Gaps: Once a section of rocks is in place, use additional mortar to fill in the gaps between the rocks. This will create a seamless and cohesive appearance while providing structural support.
-
Work in Sections: Continue applying mortar and placing rocks in small sections, working from the bottom up. This approach allows you to maintain control over the placement of the rocks and ensures that the mortar does not dry out before the rocks are applied.
-
Shape and Trim: As you progress, you may need to shape or trim the rocks to fit specific areas of the frame. A masonry saw or a hammer and chisel can be used to achieve the desired shapes and sizes.
-
Allow for Drying: Once the entire frame is covered with the rock veneer, allow the mortar to dry and cure according to the manufacturer's recommendations. This curing process is essential for the rocks to set firmly in place.
By following these steps, you can expertly apply the rock veneer to your fireplace frame, creating a stunning and durable rock fireplace that will be the focal point of your home.
Finishing Touches and Safety Considerations
Once the rock veneer is in place, it's time to add the finishing touches to your rock fireplace and ensure that it meets essential safety standards. Here's what you need to consider:
-
Grouting: After the mortar has dried, apply grout to the joints between the rocks to create a polished and cohesive look. Choose a grout color that complements the rocks and enhances the overall aesthetic of the fireplace.
-
Sealing: Consider applying a sealant to the rock veneer to protect it from stains and moisture. This step can prolong the lifespan of your rock fireplace and maintain its visual appeal over time.
-
Mantel Installation: If your fireplace design includes a mantel, carefully install it above the firebox, ensuring that it is securely anchored to the frame. The mantel adds a decorative element and provides a functional space for displaying decor or family mementos.
-
Fireplace Doors and Screen: Install fireplace doors and a screen to enhance safety and prevent sparks or embers from escaping the firebox. This is especially important if you have young children or pets in the home.
-
Clearance and Safety Considerations: Ensure that the surrounding area of the fireplace complies with clearance requirements to prevent the risk of fire. Keep flammable materials, such as curtains, furniture, and decorations, at a safe distance from the fireplace.
-
Carbon Monoxide and Smoke Detectors: Install carbon monoxide and smoke detectors in the vicinity of the fireplace to provide an additional layer of safety and early detection of potential hazards.
-
Chimney Inspection: If your rock fireplace includes a chimney, schedule regular inspections and cleanings to ensure that it functions efficiently and safely. A well-maintained chimney is essential for proper ventilation and the safe operation of your fireplace.
By attending to these finishing touches and safety considerations, you can ensure that your rock fireplace not only looks stunning but also provides a safe and enjoyable experience for you and your family.