
Home>Outdoors & Camping>Landscaping>How To Build A Rock Drainage Ditch
Landscaping
How To Build A Rock Drainage Ditch
Published: March 7, 2024

Content Creator for Outdoors & Camping, Sophie turns any yard into a sustainable paradise. Her dedication to DIY outdoor projects and volunteer work in community gardens shares joy and knowledge.
Learn how to build a rock drainage ditch for effective landscaping. Find step-by-step instructions and tips for creating a functional and attractive feature.
(Many of the links in this article redirect to a specific reviewed product. Your purchase of these products through affiliate links helps to generate commission for Twigandthistle.com, at no extra cost. Learn more)
Introduction
So, you've been dealing with some pesky drainage issues in your yard, and you're tired of dealing with the muddy mess every time it rains. Well, building a rock drainage ditch could be the solution you've been looking for. Not only will it help to redirect excess water away from your property, but it can also add a touch of natural beauty to your landscape. In this guide, we'll walk you through the steps to create your very own rock drainage ditch, so you can say goodbye to soggy lawns and hello to a more functional and visually appealing outdoor space. Let's get started!
Planning and Preparation
Before you start digging up your yard, it's essential to do some careful planning and preparation to ensure that your rock drainage ditch will be effective and long-lasting. Here's what you need to do:
-
Assess Your Yard: Take a good look at your yard and identify the areas where water tends to accumulate. This will help you determine the best location for your drainage ditch.
-
Check Local Regulations: Before you start any digging, check with your local authorities to see if there are any regulations or permits required for installing a drainage ditch on your property.
-
Measure and Mark: Once you've identified the location for your drainage ditch, measure and mark the area to outline where the trench will be dug. This will give you a clear guide to follow as you start the digging process.
-
Gather Necessary Tools: Make sure you have all the tools and materials you'll need for the project, including a shovel, wheelbarrow, landscaping fabric, gravel, and rocks. Having everything on hand will make the process go much more smoothly.
-
Consider Slope and Grade: Take into account the natural slope and grade of your yard when planning the route of your drainage ditch. It should follow the natural flow of water to ensure proper drainage.
By taking the time to plan and prepare, you'll set yourself up for success as you move on to the next steps of building your rock drainage ditch.
Choosing the Right Location
When it comes to building a rock drainage ditch, choosing the right location is crucial for its effectiveness. Here are some key factors to consider when selecting the perfect spot for your drainage ditch:
-
Assess Water Accumulation: Take note of the areas in your yard where water tends to accumulate after heavy rainfall. These are the areas where a drainage ditch will be most beneficial in redirecting excess water away from your property.
-
Observe Natural Slope: Look for the natural slope of your yard. The ideal location for your drainage ditch should follow this natural slope to ensure that water flows away from your property efficiently.
-
Avoid Utility Lines: Before digging, be sure to check for the location of any underground utility lines. It's crucial to avoid these areas to prevent any damage or disruption to essential services.
-
Consider Landscaping: Take into account any existing landscaping or features in your yard. You'll want to choose a location that complements the overall aesthetics of your outdoor space while effectively managing water flow.
-
Accessibility: Choose a location that is easily accessible for maintenance and upkeep. You'll want to be able to inspect and clear the drainage ditch regularly, so accessibility is key.
By carefully considering these factors, you can select the optimal location for your rock drainage ditch, ensuring that it not only serves its purpose effectively but also enhances the overall look and functionality of your yard.
Gathering Materials and Tools
Gathering the right materials and tools is essential for the successful construction of a rock drainage ditch. Here's what you'll need to have on hand before you start the project:
-
Shovel: A sturdy shovel will be your primary tool for digging the trench. Look for one with a comfortable grip and a durable blade to make the digging process more manageable.
-
Wheelbarrow: You'll need a wheelbarrow to transport gravel and rocks to the site. It will also come in handy for removing excess soil as you dig the trench.
-
Landscaping Fabric: This fabric will be used to line the bottom and sides of the trench. It helps to prevent soil from clogging the drainage system while allowing water to flow through.
-
Gravel: A layer of gravel at the bottom of the trench provides additional drainage and helps to stabilize the ditch. Choose a coarse gravel that allows water to pass through easily.
-
Rocks: Select a variety of rocks in different sizes to line the trench. These rocks will not only enhance the aesthetics of the drainage ditch but also provide structural support and aid in water dispersion.
-
Safety Gear: Don't forget to prioritize safety. Wear gloves, sturdy boots, and eye protection to keep yourself safe while working with tools and materials.
Having these materials and tools ready will streamline the construction process and ensure that you have everything you need to build a durable and effective rock drainage ditch.
Digging the Trench
Now that you've completed the planning and gathered all the necessary materials and tools, it's time to roll up your sleeves and start digging the trench for your rock drainage ditch. Here's a step-by-step guide to help you through the process:
-
Start at the Highest Point: Begin digging at the highest point of the planned trench area. This will allow water to flow naturally along the path of the ditch.
-
Maintain Consistent Depth: As you dig, aim to maintain a consistent depth for the trench. A depth of around 6-8 inches is generally suitable for residential drainage ditches.
-
Create a Slope: Ensure that the trench slopes gradually from the highest point to the desired outlet. A slope of 1-2% is typically recommended to facilitate proper water flow.
-
Use a Level: Periodically check the slope of the trench using a level to ensure that water will flow smoothly along the entire length of the ditch.
-
Remove Excavated Soil: As you dig, use a wheelbarrow to remove the excavated soil from the trench. This will help maintain a clear and consistent depth.
-
Line with Landscaping Fabric: Once the trench is dug to the desired depth and slope, line the bottom and sides with landscaping fabric. This will help prevent soil from clogging the drainage system.
-
Inspect for Obstructions: Before proceeding, inspect the trench for any potential obstructions such as roots or large rocks. Clearing these obstacles will ensure unobstructed water flow.
By following these steps, you'll be well on your way to creating a well-constructed trench for your rock drainage ditch. Remember to take your time and ensure that the trench is dug to the proper specifications for optimal drainage efficiency.
Adding Gravel and Rocks
Once the trench for your rock drainage ditch is dug and lined with landscaping fabric, it's time to add the essential elements that will facilitate proper drainage and enhance the visual appeal of the ditch. Here's how to go about adding gravel and rocks to complete the construction:
-
Layer of Gravel: Begin by adding a layer of coarse gravel to the bottom of the trench. This layer serves as a foundation for the rocks and provides additional drainage capacity. Spread the gravel evenly along the entire length of the trench, ensuring a uniform depth.
-
Level and Compact: Use a rake or shovel to level the layer of gravel, ensuring that it is uniformly distributed and compacted. A compacted layer of gravel will provide stability and support for the rocks that will be added next.
-
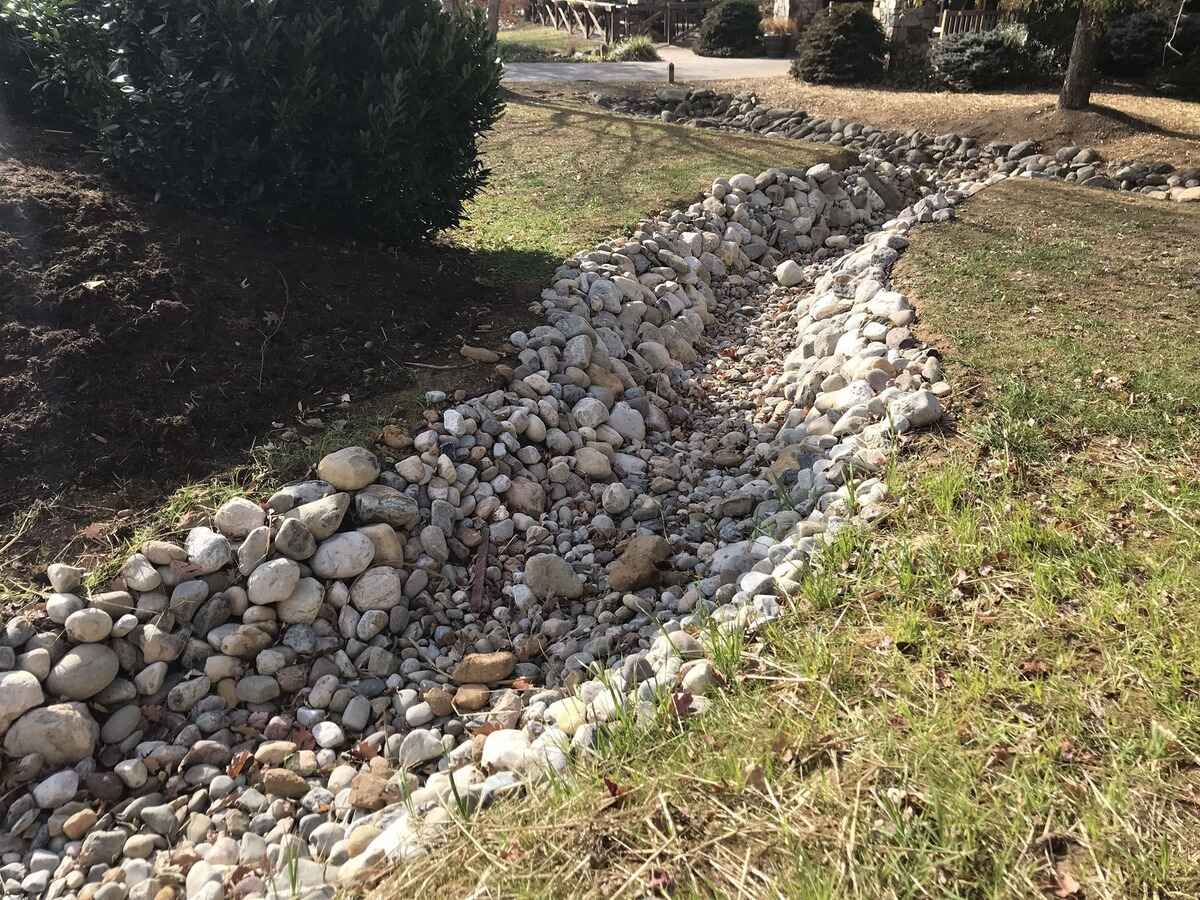
Selecting and Placing Rocks: Choose a variety of rocks in different sizes and shapes to create an aesthetically pleasing and structurally sound drainage ditch. Larger rocks can be placed along the edges of the trench to provide stability and prevent erosion, while smaller rocks can fill in the gaps.
-
Create a Natural Look: Arrange the rocks in a way that mimics the natural flow of a stream or watercourse. This not only adds visual interest but also helps guide the flow of water through the ditch.
-
Fill in Gaps: Once the larger rocks are in place, fill in the remaining gaps with smaller rocks and gravel. This will help ensure that the entire trench is lined with a combination of rocks and gravel, providing a solid and functional structure.
-
Check for Stability: As you add rocks and gravel, periodically check for stability and make adjustments as needed. The rocks should be securely positioned to withstand the flow of water and any external forces.
-
Test Water Flow: Before completing the construction, test the water flow through the drainage ditch. Pour water into the trench and observe how it flows along the path. Make any necessary adjustments to the arrangement of rocks and gravel to optimize water flow.
By following these steps, you'll be able to add gravel and rocks to your rock drainage ditch effectively, creating a functional and visually appealing feature in your yard. The combination of gravel and rocks not only enhances the drainage capacity but also adds a natural and rustic charm to your outdoor space.
Maintaining the Drainage Ditch
Once your rock drainage ditch is constructed, it's essential to establish a regular maintenance routine to ensure its continued effectiveness and longevity. Proper maintenance will help prevent clogging, erosion, and other issues that could compromise the functionality of the drainage ditch. Here's how to maintain your rock drainage ditch:
-
Clear Debris: Regularly inspect the drainage ditch for any debris, such as leaves, twigs, or sediment that may have accumulated. Remove any debris to prevent blockages and maintain unobstructed water flow.
-
Inspect for Erosion: Check the sides and bottom of the ditch for any signs of erosion. Heavy rainfall or excessive water flow can cause erosion, compromising the stability of the ditch. If erosion is detected, consider reinforcing the sides with additional rocks or gravel.
-
Weed Control: Keep an eye out for any weeds or vegetation that may be encroaching on the drainage ditch. Remove any weeds to prevent them from obstructing the flow of water and impeding drainage.
-
Check for Sediment Buildup: Over time, sediment may accumulate in the drainage ditch, reducing its capacity to channel water effectively. Periodically inspect the ditch and remove any sediment to maintain optimal drainage performance.
-
Inspect the Liner: If you used landscaping fabric to line the trench, periodically check its condition. Ensure that the fabric is intact and free from tears or damage that could allow soil to clog the drainage system.
-
Monitor Water Flow: During heavy rainfall or irrigation, observe the flow of water through the drainage ditch. Ensure that water is effectively diverted away from your property and that the ditch is handling the volume of water as intended.
-
Reposition Rocks: Over time, the rocks lining the drainage ditch may shift due to water flow or external factors. Periodically check the positioning of the rocks and make adjustments as needed to maintain stability and proper water dispersion.
-
Address Any Issues Promptly: If you notice any issues such as blockages, reduced water flow, or signs of erosion, address them promptly. Timely intervention can prevent minor issues from escalating into more significant problems.
By incorporating these maintenance practices into your regular yard care routine, you can ensure that your rock drainage ditch remains in optimal condition, effectively managing water flow and enhancing the overall functionality of your outdoor space. Regular maintenance will also extend the lifespan of the drainage ditch, providing long-term benefits for your property.
Conclusion
In conclusion, building a rock drainage ditch can be a highly effective solution for managing excess water in your yard while adding a touch of natural beauty to your landscape. By carefully planning the location, gathering the necessary materials and tools, and following the step-by-step process of digging the trench, adding gravel and rocks, and maintaining the drainage ditch, you can create a functional and visually appealing feature that enhances the overall functionality of your outdoor space.
Remember, proper planning and preparation are key to the success of your rock drainage ditch project. By assessing your yard, checking local regulations, and considering the natural slope and grade, you can ensure that your drainage ditch will effectively redirect water away from your property. Additionally, regular maintenance, including clearing debris, inspecting for erosion, and monitoring water flow, will help preserve the effectiveness of the drainage ditch over time.
With the right approach and attention to detail, you can say goodbye to soggy lawns and hello to a well-drained and aesthetically pleasing yard. So, roll up your sleeves, gather your tools, and get ready to build a rock drainage ditch that not only solves your drainage issues but also adds a charming touch to your outdoor environment.