
Home>Create & Decorate>DIY & Crafts>DIY Shed Foundation: A Step-by-Step Guide To Building A Solid Base
DIY & Crafts
DIY Shed Foundation: A Step-by-Step Guide To Building A Solid Base
Published: February 28, 2024

Senior Editor in Create & Decorate, Kathryn combines traditional craftsmanship with contemporary trends. Her background in textile design and commitment to sustainable crafts inspire both content and community.
Learn how to build a sturdy DIY shed foundation with our step-by-step guide. Perfect for your next DIY & Crafts project.
(Many of the links in this article redirect to a specific reviewed product. Your purchase of these products through affiliate links helps to generate commission for Twigandthistle.com, at no extra cost. Learn more)
Introduction
Building a shed can be a rewarding and practical DIY project, providing valuable storage space and enhancing the aesthetics of your outdoor area. However, before diving into the construction process, it's crucial to lay a solid foundation to ensure the longevity and stability of your shed. A well-constructed foundation not only supports the structure but also helps prevent issues such as shifting, settling, and moisture damage.
In this comprehensive guide, we will walk you through the step-by-step process of creating a sturdy and reliable shed foundation. Whether you're a seasoned DIY enthusiast or a novice looking to embark on your first construction project, this guide will equip you with the knowledge and confidence to tackle this essential aspect of shed building.
By following these detailed instructions and tips, you'll be able to lay the groundwork for a durable and long-lasting shed that meets your storage needs and complements your outdoor space. So, roll up your sleeves, gather your tools, and let's get started on the journey to building a solid base for your shed.
Step 1: Choosing the Right Location
Selecting the ideal location for your shed is the first crucial step in ensuring a successful foundation. The chosen spot should not only accommodate the size of the shed but also consider factors such as terrain, drainage, and accessibility. Here's a detailed breakdown of the key considerations when choosing the right location for your shed:
-
Terrain and Ground Stability: Assess the terrain where you plan to build your shed. Look for a level area that is free from any significant slopes or uneven ground. Building on a flat surface will simplify the foundation construction process and contribute to the overall stability of the shed.
-
Sunlight and Ventilation: Consider the path of the sun throughout the day and the prevailing wind direction. Positioning the shed to receive ample natural light and good ventilation can help prevent moisture buildup and create a more comfortable environment inside the shed.
-
Accessibility: Evaluate the accessibility of the chosen location. Ensure that there is sufficient space around the shed for easy maneuvering of equipment, tools, and materials during construction and future use. Additionally, consider how the shed's placement may impact the flow of foot traffic in your outdoor space.
-
Drainage: Pay attention to the natural drainage patterns of the area. Avoid low-lying areas that are prone to pooling water, as this can lead to moisture-related issues over time. If possible, position the shed in an area where water naturally drains away from the foundation.
-
Local Regulations: Check with local authorities or homeowner associations for any zoning restrictions or building codes that may dictate the placement of sheds on your property. Compliance with these regulations is essential to avoid potential legal issues in the future.
By carefully considering these factors, you can identify the optimal location for your shed, setting the stage for a successful foundation construction process and ensuring that your shed serves its intended purpose for years to come.
Step 2: Gathering Materials and Tools
Before diving into the construction of your shed foundation, it's essential to gather all the necessary materials and tools to ensure a smooth and efficient building process. Here's a comprehensive list of the items you'll need to have on hand before getting started:
Materials:
-
Concrete Blocks or Pavers: These will serve as the primary support for your shed foundation. Ensure that the blocks or pavers are durable and capable of withstanding the weight of the shed.
-
Gravel: A layer of gravel will be used to provide drainage and create a stable base for the foundation. Opt for high-quality, compactable gravel that will effectively support the weight of the shed.
-
Pressure-Treated Lumber: This will be used to construct the framework for the foundation. Choose lumber that is resistant to decay and insect damage, as it will be in direct contact with the ground.
-
Anchor Bolts or Screws: These fasteners will be used to secure the shed frame to the foundation, providing additional stability and resistance to shifting.
-
Landscape Fabric: This will help prevent weed growth and provide a barrier between the ground and the gravel layer, contributing to the longevity of the foundation.
-
Shims: These small, tapered pieces of wood or composite material will be used to level the foundation and ensure that it provides a stable base for the shed.
Tools:
-
Shovel: A sturdy shovel will be essential for excavating the ground and moving gravel during the foundation preparation process.
-
Level: A reliable level will help ensure that the foundation is perfectly even and free from any sloping or uneven areas.
-
Tape Measure: Accurate measurements are crucial when laying out the foundation and positioning the support blocks or pavers.
-
Hammer: A hammer will be needed for driving in anchor bolts or screws and making adjustments during the construction process.
-
Safety Gear: This includes gloves, safety glasses, and appropriate footwear to protect yourself during the construction process.
-
Circular Saw or Hand Saw: Depending on the size and complexity of your shed foundation, a saw will be necessary for cutting lumber to the required dimensions.
By gathering these materials and tools in advance, you'll be well-prepared to tackle the construction of your shed foundation with confidence and efficiency. Having everything at your disposal will minimize interruptions and ensure that the building process progresses smoothly, setting the stage for a sturdy and reliable foundation for your shed.
Step 3: Preparing the Ground
Preparing the ground for your shed foundation is a critical phase that sets the stage for the structural integrity and stability of the entire construction. This step involves clearing the area, excavating the soil, and creating a level surface to accommodate the foundation materials. Here's a detailed breakdown of the essential tasks involved in preparing the ground for your shed foundation:
-
Clearing the Area: Begin by clearing the designated area of any debris, vegetation, or obstacles that may impede the foundation construction process. Use a shovel or a rake to remove rocks, roots, and any other obstructions from the ground, ensuring that the area is clean and free from any potential hindrances.
-
Marking the Perimeter: Once the area is clear, use marking paint or stakes and string to outline the perimeter of the shed foundation. This will provide a visual guide for the excavation process and help ensure that the foundation is accurately positioned within the designated space.
-
Excavating the Soil: With the perimeter marked, proceed to excavate the soil to the required depth, taking into account the thickness of the gravel and base materials. Use a shovel or a mechanical excavator to remove the topsoil, creating a level and uniform depth across the entire area. It's essential to maintain a consistent depth to ensure the stability and evenness of the foundation.
-
Adding Gravel Base: Once the soil is excavated, spread a layer of compactable gravel evenly across the prepared area. The gravel will serve as a stable and well-draining base for the foundation, helping to prevent moisture buildup and providing additional support for the shed structure. Use a rake to level the gravel, ensuring a uniform thickness throughout the entire foundation footprint.
-
Compacting the Base: After the gravel is spread, use a compactor or a hand tamper to firmly compact the gravel base. This step is crucial for creating a solid and stable foundation that can effectively support the weight of the shed. Proper compaction will minimize the risk of settling and shifting over time, contributing to the long-term durability of the foundation.
-
Installing Landscape Fabric: To further enhance the stability and longevity of the foundation, consider laying a layer of landscape fabric over the compacted gravel base. The fabric will act as a barrier, preventing weed growth and minimizing the potential for soil erosion, thus preserving the integrity of the foundation over time.
By meticulously following these steps and paying close attention to detail during the ground preparation phase, you'll establish a solid and reliable base for your shed foundation. This meticulous approach will contribute to the overall stability and longevity of your shed, ensuring that it stands the test of time and serves its intended purpose effectively.
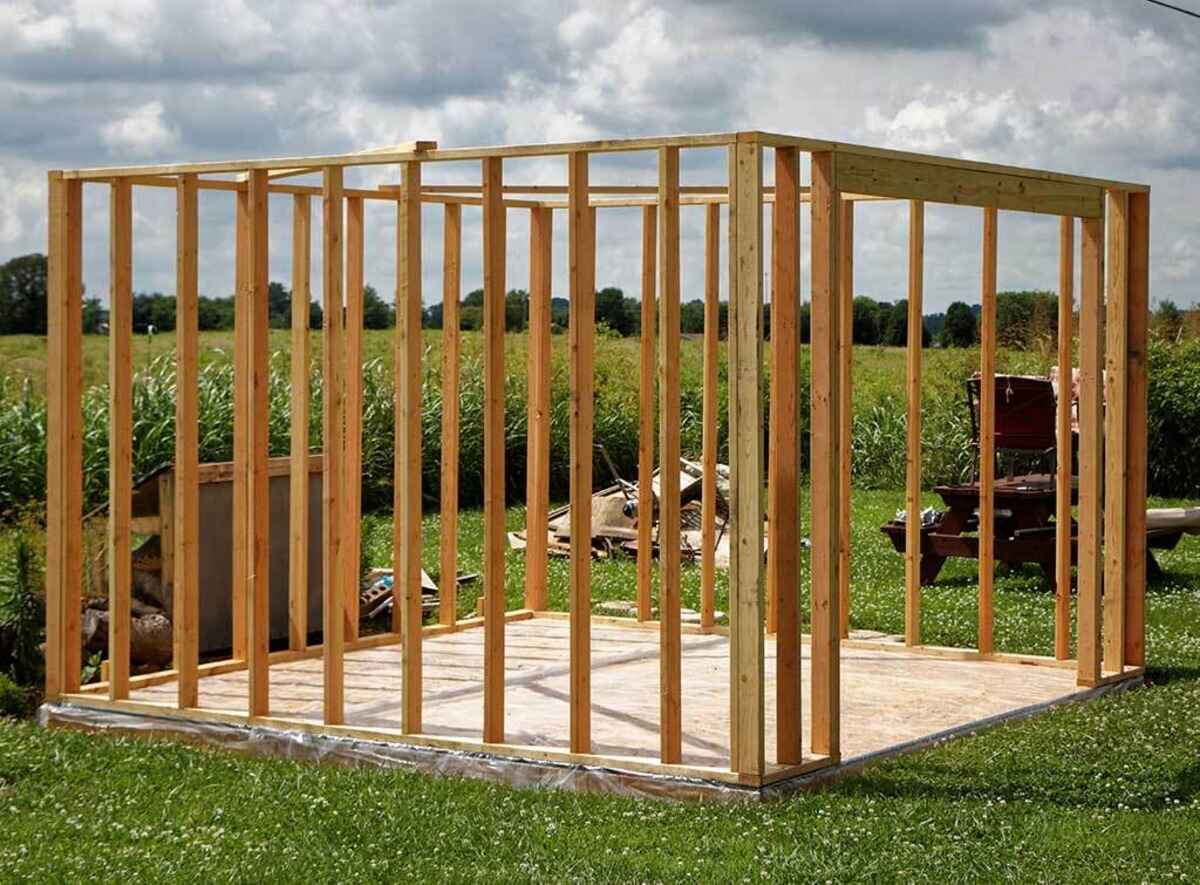
Step 4: Building the Base
With the ground meticulously prepared, it's time to transition to the pivotal phase of constructing the base for your shed. This step involves assembling the framework that will provide the foundational support for the shed structure. Here's a detailed walkthrough of the essential tasks involved in building the base for your shed:
-
Laying the Foundation Framework: Begin by positioning the concrete blocks or pavers at strategic intervals to serve as the primary support for the shed base. Ensure that the blocks are level and evenly spaced to provide a stable and uniform foundation for the shed. The number of blocks required will depend on the dimensions and weight of your shed, so refer to the shed plans for specific guidance.
-
Assembling the Lumber Frame: Once the support blocks are in place, it's time to construct the lumber frame that will sit atop the blocks and form the base of the shed. Use pressure-treated lumber to build a sturdy and durable frame, ensuring that it is precisely aligned with the dimensions of the shed. Secure the frame to the support blocks using anchor bolts or screws, ensuring a strong and stable connection between the frame and the foundation.
-
Leveling the Base: As you assemble the lumber frame, use a level to ensure that the base is perfectly even and free from any sloping or uneven areas. Adjust the placement of the frame and the support blocks as needed to achieve a level surface, as this will directly impact the stability and integrity of the shed structure.
-
Adding Shims for Stability: To further enhance the stability and levelness of the base, insert shims between the frame and the support blocks where necessary. Shims are tapered pieces of wood or composite material that can be used to fill gaps and ensure that the base remains level and secure. Pay close attention to this step, as it will contribute to the overall reliability of the shed foundation.
-
Securing the Frame Joints: Once the base frame is in position and leveled, secure the joints of the lumber frame using appropriate fasteners. This will reinforce the structural integrity of the base and minimize the risk of shifting or movement over time. Take care to follow the recommended fastening guidelines to ensure a robust and durable base for your shed.
By meticulously following these steps and paying close attention to detail during the base construction phase, you'll establish a solid and reliable foundation for your shed. This meticulous approach will contribute to the overall stability and longevity of your shed, ensuring that it stands the test of time and serves its intended purpose effectively.
Step 5: Leveling and Finishing Touches
After constructing the base for your shed, the final step involves meticulous attention to leveling and adding finishing touches to ensure the stability and functionality of the foundation. This phase is crucial in guaranteeing that your shed will stand the test of time and provide a reliable storage space for your needs. Here's a detailed breakdown of the essential tasks involved in leveling and adding finishing touches to your shed foundation:
-
Ensuring Evenness: Utilize a reliable level to meticulously check the entire base for any signs of unevenness. Pay close attention to all corners and midpoints, making necessary adjustments to achieve a uniformly level surface. This step is critical in preventing structural issues and ensuring that the shed sits securely on the foundation.
-
Verifying Alignment: Confirm that the base is precisely aligned with the dimensions of the shed. Double-check the measurements and ensure that the base accurately corresponds to the intended size of the shed structure. Accurate alignment is essential for the proper installation and stability of the shed.
-
Applying Protective Coating: Consider applying a protective coating or sealant to the lumber frame to enhance its resistance to moisture, decay, and insect damage. This additional layer of protection can significantly prolong the lifespan of the base, safeguarding it against environmental elements and preserving its structural integrity.
-
Adding Edge Restraints: Install edge restraints around the perimeter of the base to secure the gravel and prevent it from spreading beyond the designated area. Edge restraints can be made of durable materials such as plastic, metal, or pressure-treated wood, effectively containing the gravel and maintaining the stability of the foundation.
-
Final Inspection: Conduct a thorough final inspection of the entire foundation, checking for any loose fasteners, protruding objects, or potential hazards. Address any minor imperfections or issues that may compromise the stability or safety of the shed foundation, ensuring that it meets the highest standards of construction.
By meticulously attending to these leveling and finishing touches, you'll establish a robust and reliable foundation for your shed, setting the stage for the successful installation of the shed structure. This attention to detail will contribute to the overall durability and functionality of the shed, providing a secure and long-lasting storage solution for your outdoor space.
Conclusion
As you reach the conclusion of this comprehensive guide to building a solid DIY shed foundation, it's essential to reflect on the significance of a well-constructed base for your shed. The foundation serves as the fundamental support system for the entire structure, playing a pivotal role in ensuring stability, longevity, and functionality. By meticulously following the step-by-step process outlined in this guide, you have laid the groundwork for a durable and reliable shed foundation that will stand the test of time.
The journey to building a solid shed foundation begins with the careful selection of the location, considering factors such as terrain, sunlight, ventilation, accessibility, and drainage. By choosing the right spot for your shed, you set the stage for a successful construction process and ensure that the foundation aligns with the specific needs of your outdoor space.
Gathering the necessary materials and tools is a crucial preparatory step that sets the stage for a smooth and efficient construction process. By ensuring that you have all the essential components at your disposal, you minimize interruptions and streamline the building process, allowing you to focus on creating a sturdy and reliable foundation for your shed.
The meticulous preparation of the ground, including clearing the area, excavating the soil, adding a gravel base, and compacting the foundation, lays the groundwork for a stable and well-draining base. This phase is essential in creating a solid foundation that can effectively support the weight of the shed and withstand environmental factors over time.
Building the base itself involves assembling the framework, ensuring levelness, and securing the structural components. By paying close attention to detail during this phase, you establish a strong and stable foundation that forms the backbone of the shed structure, setting the stage for successful installation and long-term reliability.
The final steps of leveling and adding finishing touches ensure that the foundation meets the highest standards of construction, providing a secure and stable base for the shed. By meticulously attending to these details, you enhance the overall durability and functionality of the foundation, ensuring that it serves its intended purpose effectively.
In conclusion, the successful construction of a DIY shed foundation is a testament to your dedication to creating a reliable and long-lasting outdoor storage solution. By following the comprehensive guide and infusing your project with care and attention to detail, you have laid the groundwork for a sturdy and dependable foundation that will support your shed for years to come. As you embark on the next phases of your shed construction, you can proceed with confidence, knowing that the foundation is a solid and reliable base for your DIY endeavors.