
Home>Create & Decorate>DIY & Crafts>How To Build A Small Shed
DIY & Crafts
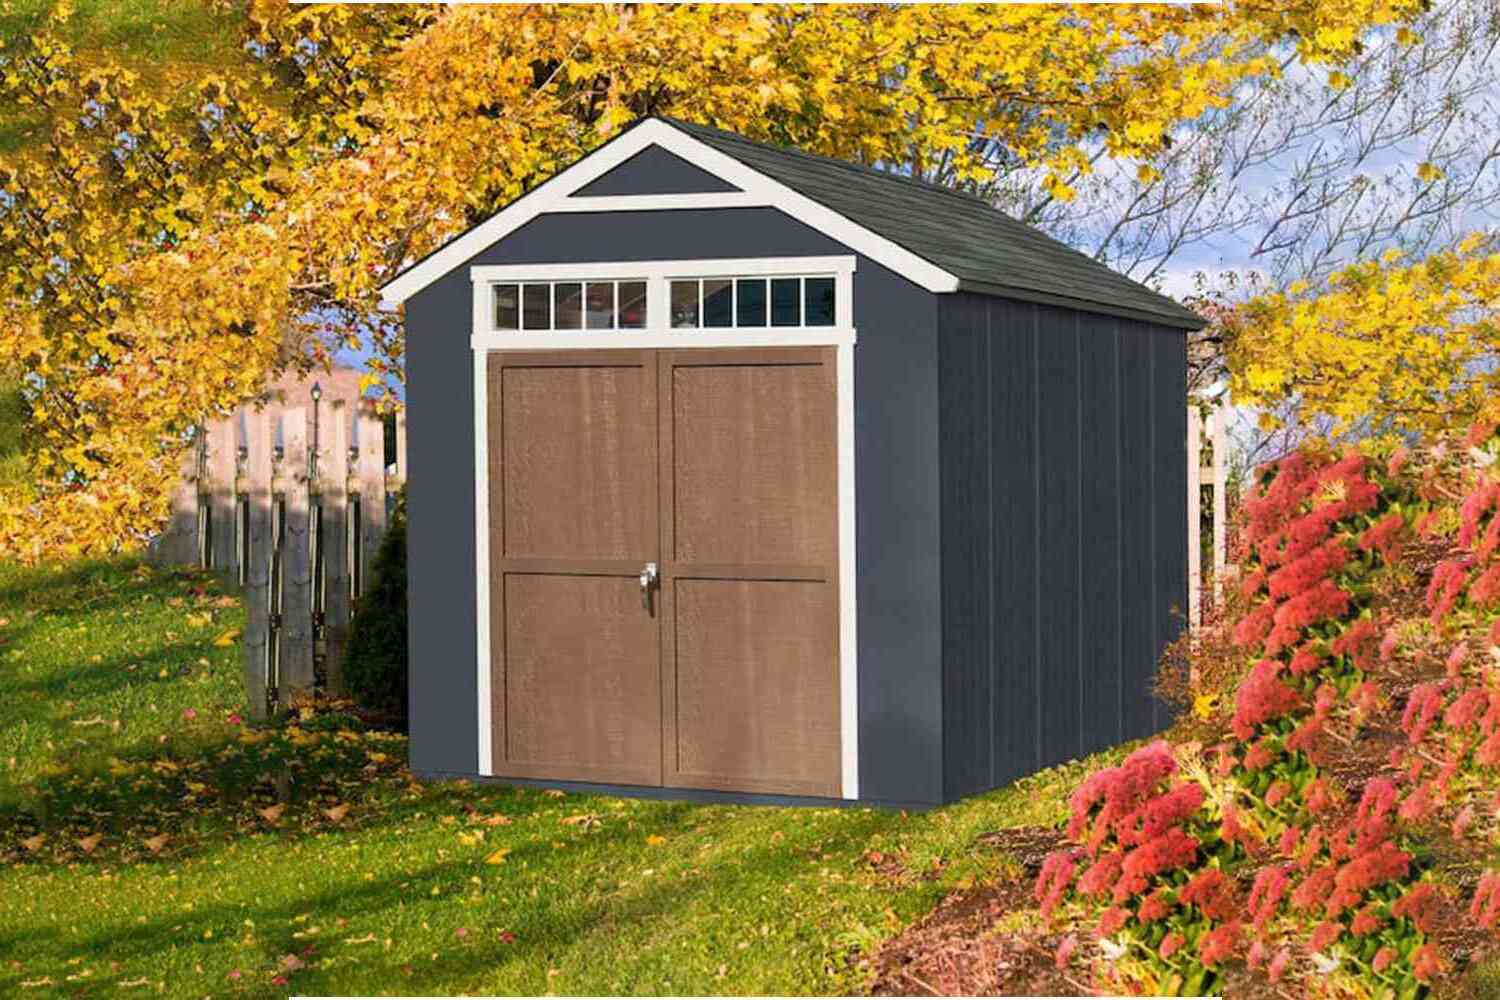
How To Build A Small Shed
Published: February 28, 2024

Senior Editor in Create & Decorate, Kathryn combines traditional craftsmanship with contemporary trends. Her background in textile design and commitment to sustainable crafts inspire both content and community.
Learn how to build a small shed with our DIY & Crafts guide. Get step-by-step instructions and tips for creating your own backyard storage solution. Start your project today!
(Many of the links in this article redirect to a specific reviewed product. Your purchase of these products through affiliate links helps to generate commission for Twigandthistle.com, at no extra cost. Learn more)
Introduction
Building a small shed can be a rewarding and practical DIY project that adds valuable storage space to your property. Whether you need a dedicated spot for gardening tools, outdoor equipment, or a cozy retreat for crafting, a well-constructed shed can serve a variety of purposes. In this comprehensive guide, we will walk you through the step-by-step process of building a small shed from start to finish. From planning and preparation to the finishing touches, you will gain the knowledge and confidence to embark on this fulfilling endeavor.
Constructing a small shed is not only a practical solution for storage needs but also an opportunity to unleash your creativity and craftsmanship. With careful planning and attention to detail, you can customize the shed to complement your home's aesthetic and meet your specific requirements. Whether you envision a charming cottage-style shed nestled in your garden or a sleek modern structure adorning your backyard, the possibilities are endless.
As we delve into the intricacies of shed construction, you will discover the satisfaction of working with your hands and witnessing a tangible structure take shape. From selecting the ideal location for your shed to choosing the right materials and executing precise measurements, each step is an integral part of the journey toward creating a functional and visually appealing outdoor space.
Throughout this guide, we will provide valuable insights and tips to streamline the building process and troubleshoot common challenges. By the end of this journey, you will not only have a newfound understanding of shed construction but also a newfound sense of accomplishment and pride in your handcrafted creation. So, roll up your sleeves, gather your tools, and let's embark on this fulfilling venture of building a small shed together.
Step 1: Planning and Preparation
Before embarking on the construction of a small shed, meticulous planning and thorough preparation are essential to ensure a smooth and successful building process. This initial phase lays the groundwork for the entire project, encompassing crucial decisions that will influence the shed's design, functionality, and longevity.
1.1 Selecting the Ideal Location
The first step in planning a small shed is to carefully choose its location within your property. Consider factors such as accessibility, sunlight exposure, and proximity to utilities. Ensure that the chosen spot complies with local building codes and zoning regulations.
1.2 Determining Shed Size and Design
Next, determine the size and design of the shed based on your storage needs and aesthetic preferences. Take into account the items you intend to store and any potential future uses for the shed. Sketch out a rough design or seek inspiration from architectural resources to visualize the structure.
1.3 Obtaining Necessary Permits
Check with your local building department to ascertain whether permits are required for constructing a small shed. Understanding and adhering to permit regulations is crucial to avoid potential legal issues and ensure the shed's compliance with building codes.
1.4 Creating a Material and Tool List
Compile a comprehensive list of materials and tools needed for the construction process. This includes lumber, roofing materials, fasteners, and essential tools such as a saw, hammer, level, and drill. Acquire high-quality materials to guarantee the shed's durability and structural integrity.
1.5 Establishing a Budget
Establish a realistic budget for the shed project, factoring in material costs, permit fees, and any additional expenses. Consider seeking quotations from suppliers and contractors to obtain a clear understanding of the overall expenditure.
1.6 Developing a Timeline
Create a timeline outlining the various stages of the construction process, from laying the foundation to adding finishing touches. Setting a timeline helps manage the project efficiently and ensures that each phase progresses in a timely manner.
1.7 Clearing and Preparing the Site
Prepare the chosen site by clearing any vegetation, debris, or obstacles that may impede the construction process. Level the ground and assess the soil condition to determine if any additional groundwork is necessary.
By meticulously planning and preparing for the construction of a small shed, you lay a solid foundation for a successful and fulfilling building experience. This initial phase sets the stage for the subsequent steps, guiding you toward the realization of a well-crafted and functional outdoor structure.
Step 2: Gathering Materials and Tools
The process of gathering materials and tools for building a small shed is a pivotal phase that sets the stage for the physical construction. It involves acquiring the necessary components and equipment to bring the shed design to life. By meticulously selecting high-quality materials and ensuring the availability of essential tools, you pave the way for a seamless and efficient building process.
2.1 Selecting Quality Materials
The foundation of a durable and visually appealing shed lies in the selection of high-quality materials. Begin by procuring lumber for the shed's frame, siding, and trim. Opt for pressure-treated or rot-resistant wood to enhance the shed's longevity, especially if it will be exposed to the elements. Additionally, choose weather-resistant roofing materials such as asphalt shingles or metal roofing panels to safeguard the shed from environmental factors.
2.2 Acquiring Essential Tools
Equipping yourself with the necessary tools is essential for executing precise and efficient construction. Ensure that you have a reliable circular saw for cutting lumber, a sturdy hammer for driving nails, a level for ensuring straight and even surfaces, and a power drill for assembling components. Other essential tools include a tape measure, framing square, and safety gear such as gloves and protective eyewear.
2.3 Gathering Fasteners and Hardware
Securing the shed's components requires an assortment of fasteners and hardware. Stock up on galvanized nails and screws suitable for outdoor use to ensure the structural integrity of the shed. Additionally, acquire hinges, latches, and other hardware necessary for installing doors and windows, ensuring that they are durable and capable of withstanding regular use.
2.4 Obtaining Additional Components
Depending on the shed design, you may need to acquire additional components such as windows, doors, and ventilation systems. Select windows that provide adequate natural light and ventilation while complementing the shed's aesthetic. Choose sturdy doors equipped with secure locks to safeguard the shed's contents and enhance its functionality.
2.5 Ensuring Safety Equipment
Prioritize safety by ensuring the availability of essential safety equipment, including a first-aid kit, fire extinguisher, and adequate lighting for the construction site. Additionally, consider investing in personal protective equipment such as work gloves, a dust mask, and hearing protection to mitigate potential hazards during the construction process.
By meticulously gathering high-quality materials, essential tools, and safety equipment, you set the stage for a successful and rewarding shed construction endeavor. This preparatory phase not only ensures the structural integrity and longevity of the shed but also fosters a safe and efficient working environment, laying the groundwork for the subsequent stages of the building process.
Step 3: Building the Foundation
The foundation serves as the anchor of the small shed, providing stability and structural support. A well-constructed foundation is essential for ensuring the shed's longevity and resilience against environmental factors. The process of building the foundation involves meticulous planning, precise measurements, and the use of durable materials to create a solid base for the shed.
3.1 Choosing the Foundation Type
The first step in building the foundation is determining the most suitable type for your shed. Common options include concrete slab, concrete blocks, and skids. Consider factors such as soil composition, local climate, and the shed's intended use when selecting the foundation type. A concrete slab offers a permanent and sturdy base, while concrete blocks provide versatility and elevation. Skids, consisting of pressure-treated lumber, are ideal for sheds requiring mobility.
3.2 Site Preparation
Prepare the foundation site by clearing the area of any debris, vegetation, or uneven surfaces. Use a shovel and a level to ensure the ground is adequately graded and compacted. If constructing a concrete foundation, excavate the site to the required depth and install formwork to contain the concrete. For skid foundations, position and level the skids according to the shed's dimensions, ensuring they are adequately supported and anchored to the ground.
3.3 Pouring Concrete or Installing Blocks
If opting for a concrete foundation, pour the concrete mixture into the prepared formwork, ensuring it is evenly distributed and leveled. Use a screed to smooth the surface and eliminate any air pockets. For concrete block foundations, lay the blocks in a level and staggered pattern, securing them with mortar for added stability. Verify the alignment and levelness of the blocks to create a uniform base for the shed.
3.4 Securing Skids and Anchors
For skid foundations, secure the pressure-treated skids to the prepared site using anchor bolts or concrete anchors. Ensure the skids are level and properly spaced to accommodate the shed's floor joists. Use a level to verify the horizontal alignment of the skids, making necessary adjustments to achieve a stable and even foundation.
3.5 Allowing for Proper Curing
If a concrete foundation is utilized, allow the concrete to cure for the recommended duration before proceeding with the shed construction. This curing period is crucial for the concrete to attain its maximum strength and stability. During this time, protect the concrete from excessive moisture and temperature fluctuations to facilitate optimal curing.
By meticulously executing the foundation-building process, you establish a robust and reliable base for the small shed, setting the stage for the subsequent stages of construction. The foundation serves as a critical element in ensuring the shed's structural integrity and long-term durability, underscoring the importance of precision and attention to detail in this foundational phase.
Step 4: Constructing the Frame
Constructing the frame is a pivotal phase in the construction of a small shed, as it forms the skeleton of the structure and provides the framework for the shed's walls, roof, and overall stability. This phase involves precise measurements, accurate assembly, and the integration of structural components to create a sturdy and resilient frame.
4.1 Measuring and Cutting Lumber
Begin by measuring and cutting the lumber according to the shed's design specifications. Use a reliable circular saw to achieve clean and precise cuts, ensuring that the dimensions align with the planned frame structure. Accurate measurements are essential to guarantee the frame's structural integrity and the seamless assembly of its components.
4.2 Assembling Wall Frames
Assemble the individual wall frames by joining the cut lumber pieces using framing nails or screws. Ensure that the corners are square and the frame is level, employing a framing square and a level to verify the accuracy of the assembly. The wall frames serve as the building blocks of the shed's structure, laying the groundwork for the subsequent stages of construction.
4.3 Installing Floor Joists
If the shed design incorporates a raised floor, install the floor joists within the foundation, ensuring they are securely anchored and evenly spaced. The floor joists provide the necessary support for the shed's flooring and contribute to the overall stability of the structure. Verify the levelness and alignment of the floor joists to facilitate the seamless installation of the shed's flooring material.
4.4 Erecting Roof Trusses
Erect the roof trusses atop the assembled wall frames, ensuring they are properly aligned and securely fastened. Roof trusses play a critical role in supporting the shed's roof structure and distributing its weight evenly. Verify the angles and connections of the trusses to guarantee the structural integrity of the shed's roof, which is essential for withstanding environmental elements.
4.5 Bracing and Reinforcement
Incorporate bracing and reinforcement elements within the frame to enhance its stability and resilience. Diagonal bracing and additional structural supports contribute to the overall rigidity of the frame, mitigating potential structural weaknesses and ensuring its capacity to withstand external forces. Verify the integrity of the frame's bracing to fortify its structural integrity.
4.6 Verifying Alignment and Plumb
Throughout the frame construction process, consistently verify the alignment and plumb of the assembled components. Utilize a level and plumb bob to ensure that the frame is straight, level, and vertically aligned, rectifying any deviations to maintain the structural precision of the shed. Attention to alignment and plumb is crucial for the seamless integration of subsequent construction phases.
By meticulously constructing the frame with precision and attention to detail, you establish the foundational framework for the small shed, laying the groundwork for the subsequent stages of construction. The frame serves as the structural backbone of the shed, dictating its stability, resilience, and overall structural integrity. With the frame in place, the shed begins to take shape, setting the stage for the addition of roofing, siding, and finishing touches.
Step 5: Adding the Roof
The addition of the roof marks a significant milestone in the construction of a small shed, as it not only provides protection from the elements but also contributes to the shed's overall aesthetic appeal. The process of adding the roof involves meticulous planning, precise installation, and the integration of weather-resistant materials to ensure durability and longevity.
5.1 Selecting Roofing Materials
The first step in adding the roof is selecting suitable roofing materials that align with the shed's design, climate considerations, and durability requirements. Common options include asphalt shingles, metal roofing panels, or cedar shakes, each offering distinct advantages in terms of longevity, weather resistance, and visual appeal. Consider factors such as cost, maintenance, and compatibility with the shed's architectural style when making this crucial decision.
5.2 Installing Roof Sheathing
Prior to installing the roofing material, it is essential to apply roof sheathing to the frame. Roof sheathing, typically composed of plywood or oriented strand board (OSB), serves as a sturdy base for the roofing material and contributes to the shed's structural integrity. Ensure that the sheathing is securely fastened to the frame, providing a stable and even surface for the subsequent roofing installation.
5.3 Applying Underlayment
Once the roof sheathing is in place, apply a weather-resistant underlayment to create a protective barrier against moisture and enhance the shed's insulation. The underlayment acts as a secondary defense against water infiltration, safeguarding the shed's interior from potential leaks and moisture-related damage. Proper installation and sealing of the underlayment are crucial for ensuring its effectiveness in shielding the shed from adverse weather conditions.
5.4 Installing Roofing Material
With the underlayment secured, proceed to install the selected roofing material according to the manufacturer's guidelines and best practices. Whether laying asphalt shingles in an overlapping pattern, fastening metal roofing panels, or arranging cedar shakes, meticulous attention to detail is essential to achieve a watertight and visually appealing roof. Ensure proper alignment, secure fastening, and adequate sealing to fortify the shed's defense against rain, snow, and wind.
5.5 Incorporating Roof Ventilation
Incorporate roof ventilation elements to promote air circulation and mitigate potential moisture buildup within the shed. Ridge vents, soffit vents, or gable vents facilitate the exchange of air, preventing excessive heat and humidity accumulation that could compromise the shed's interior environment. Proper ventilation contributes to the longevity of the roofing material and enhances the shed's overall functionality.
5.6 Verifying Roof Integrity
Upon completing the roof installation, conduct a thorough inspection to verify the integrity of the roofing system. Check for any loose fasteners, damaged shingles or panels, and potential areas of water penetration. Address any identified issues promptly to ensure the roof's resilience and long-term performance.
By meticulously adding the roof with precision and attention to detail, you fortify the shed's protection against the elements while enhancing its visual appeal. The completed roof not only signifies a crucial stage in the shed's construction but also contributes to its functionality and resilience, setting the stage for the final phases of the building process.
Step 6: Installing Doors and Windows
The installation of doors and windows represents a pivotal phase in the construction of a small shed, as it not only enhances the shed's functionality but also contributes to its aesthetic appeal and overall livability. This phase involves meticulous planning, precise measurements, and the integration of durable and weather-resistant components to create a secure and inviting interior space within the shed.
6.1 Selecting Suitable Doors and Windows
The first step in installing doors and windows is selecting components that align with the shed's design, size, and intended use. Consider factors such as natural light requirements, ventilation needs, and security considerations when choosing windows. Opt for durable and weather-resistant materials to ensure longevity and protection from the elements. Similarly, select a sturdy and well-constructed door that complements the shed's architectural style and provides secure access to the interior space.
6.2 Preparing Openings and Frames
Prepare the openings for the doors and windows by ensuring that the frame components are level, plumb, and adequately spaced to accommodate the selected components. Verify the dimensions of the openings to align with the size of the doors and windows, making any necessary adjustments to achieve a precise fit. Install flashing and weatherproofing elements around the openings to create a barrier against moisture infiltration and enhance the components' resilience.
6.3 Installing Windows
Begin the window installation by carefully positioning the window within the prepared opening, ensuring that it is level and securely anchored. Use shims to achieve a precise fit and verify that the window operates smoothly and seals effectively. Secure the window in place using appropriate fasteners and ensure that it is adequately insulated to prevent air and water infiltration. Test the functionality of the window to confirm its smooth operation and optimal sealing.
6.4 Mounting Doors
Mount the door within the designated opening, ensuring that it aligns properly with the frame and operates smoothly on its hinges. Verify that the door is plumb and level, making any necessary adjustments to achieve a seamless fit. Install secure locks, handles, and hinges to fortify the door's functionality and enhance the shed's security. Apply weather-stripping and insulation to create a tight seal around the door, safeguarding the interior space from external elements.
6.5 Enhancing Security and Functionality
Incorporate additional security features such as deadbolts, latches, and window locks to fortify the shed's security and provide peace of mind. Ensure that the doors and windows are equipped with adequate ventilation options to promote air circulation within the shed, contributing to a comfortable and functional interior environment. Verify the integrity of the installed components to guarantee their resilience against external forces and environmental factors.
By meticulously installing doors and windows with precision and attention to detail, you enhance the shed's functionality, security, and visual appeal. The completed installation not only signifies a crucial stage in the shed's construction but also contributes to its livability and versatility, setting the stage for the final touches that will transform the shed into a fully realized and functional outdoor space.
Step 7: Finishing Touches
As the small shed nears completion, the focus shifts to the meticulous addition of finishing touches that elevate its functionality, visual appeal, and overall cohesiveness. This phase encompasses a range of tasks aimed at refining the shed's interior and exterior, transforming it from a basic structure into a fully realized and inviting space.
7.1 Exterior Siding and Trim
Apply the chosen exterior siding to the shed's walls, ensuring precise alignment and secure fastening. Whether opting for traditional wood siding, durable vinyl panels, or low-maintenance fiber cement boards, meticulous installation is essential to create a seamless and visually appealing exterior. Additionally, add trim elements such as corner boards, fascia, and soffits to enhance the shed's architectural detailing and weather resistance.
7.2 Exterior Paint or Stain
If the shed's exterior features wood siding or trim, consider applying a protective coat of paint or stain to safeguard the surfaces from moisture, UV exposure, and environmental wear. Select a high-quality exterior paint or stain that complements the shed's surroundings and architectural style, adding a touch of color and character to the exterior while ensuring long-term durability.
7.3 Interior Finishing
Complete the interior space by adding insulation, wall sheathing, and interior paneling or drywall. Insulation contributes to the shed's energy efficiency and comfort, while interior paneling or drywall creates a polished and inviting interior environment. Pay attention to detail when finishing the interior, ensuring smooth surfaces and secure installations.
7.4 Flooring Installation
Install the chosen flooring material within the shed, whether opting for durable plywood, moisture-resistant laminate, or traditional hardwood. The flooring should be level, stable, and capable of withstanding regular use and potential moisture exposure. Consider adding a protective sealant or finish to enhance the flooring's resilience and visual appeal.
7.5 Lighting and Electrical
Incorporate lighting fixtures and electrical outlets within the shed to facilitate functionality and convenience. Install overhead lighting for adequate illumination, task lighting for specific work areas, and outlets for powering tools and equipment. Adhere to electrical codes and safety guidelines when integrating the shed's electrical components.
7.6 Shelving and Storage Solutions
Customize the shed's interior with practical shelving, storage racks, and organizational systems tailored to your specific storage needs. Maximize vertical space and utilize storage solutions that optimize accessibility and organization, creating a functional and efficient storage environment within the shed.
7.7 Landscaping and Exterior Accents
Enhance the shed's surroundings by incorporating landscaping elements such as flower beds, pathways, or decorative planters. Consider adding exterior accents such as window boxes, shutters, or decorative hardware to complement the shed's exterior and integrate it harmoniously with its outdoor environment.
7.8 Final Inspection and Touch-Ups
Conduct a comprehensive inspection of the completed shed, addressing any remaining touch-ups, adjustments, or minor imperfections. Verify the functionality of doors, windows, and lighting, and make any necessary refinements to ensure a polished and cohesive final result.
By meticulously attending to the finishing touches, the small shed undergoes a transformative process, evolving from a basic structure into a refined and functional outdoor space. Each detail contributes to the shed's overall character and usability, culminating in a handcrafted creation that reflects careful craftsmanship and attention to detail.
Conclusion
As we conclude this comprehensive guide to building a small shed, it's essential to reflect on the journey we've embarked upon and the transformative process that has unfolded. From the initial stages of planning and preparation to the meticulous execution of each construction phase, this endeavor has been a testament to the power of craftsmanship, creativity, and dedication.
Building a small shed is not merely a construction project; it is a manifestation of vision and ingenuity, culminating in the creation of a functional and aesthetically pleasing outdoor space. Throughout this journey, we have delved into the intricacies of shed construction, from laying the foundation to adding the finishing touches, each step contributing to the realization of a tangible and enduring structure.
The process of building a small shed is a testament to the rewards of hands-on craftsmanship and the satisfaction of witnessing a vision come to life. It is a testament to the rewards of hands-on craftsmanship and the satisfaction of witnessing a vision come to life. It is a testament to the rewards of hands-on craftsmanship and the satisfaction of witnessing a vision come to life. It is a testament to the rewards of hands-on craftsmanship and the satisfaction of witnessing a vision come to life. It is a testament to the rewards of hands-on craftsmanship and the satisfaction of witnessing a vision come to life. It is a testament to the rewards of hands-on craftsmanship and the satisfaction of witnessing a vision come to life.
As you stand back and admire the completed small shed, you not only behold a physical structure but also a testament to your dedication, perseverance, and creativity. Whether the shed serves as a storage space, a workshop, or a tranquil retreat, it stands as a testament to the fulfillment that comes from transforming raw materials into a purposeful and personalized space.
In the process of building a small shed, we have not only honed our practical skills but also cultivated a deeper appreciation for the art of construction and the potential for self-expression through DIY endeavors. The shed stands as a testament to the fulfillment that comes from transforming raw materials into a purposeful and personalized space.
As you embark on your own shed-building journey, may this guide serve as a source of inspiration, guidance, and encouragement. Whether you are a seasoned DIY enthusiast or a novice builder, may the process of constructing a small shed ignite your creativity, fuel your passion for craftsmanship, and instill a profound sense of pride in your handcrafted creation.
In the end, the small shed is more than a physical structure; it is a testament to the fulfillment that comes from transforming raw materials into a purposeful and personalized space. It is a testament to the fulfillment that comes from transforming raw materials into a purposeful and personalized space.