
Home>Create & Decorate>DIY & Crafts>8×10 Shed Plans: DIY Guide To Building Your Own Outdoor Storage Space
DIY & Crafts
8×10 Shed Plans: DIY Guide To Building Your Own Outdoor Storage Space
Published: February 28, 2024

Senior Editor in Create & Decorate, Kathryn combines traditional craftsmanship with contemporary trends. Her background in textile design and commitment to sustainable crafts inspire both content and community.
Discover how to build your own 8x10 shed with our comprehensive DIY guide. Perfect for DIY & Crafts enthusiasts looking to create extra outdoor storage space.
(Many of the links in this article redirect to a specific reviewed product. Your purchase of these products through affiliate links helps to generate commission for Twigandthistle.com, at no extra cost. Learn more)
Introduction
Are you in need of extra storage space for your outdoor equipment, tools, or gardening supplies? Building a 8×10 shed can be a rewarding and practical DIY project that provides a solution to your storage needs. Whether you're a seasoned DIY enthusiast or a novice looking to embark on your first major construction project, this comprehensive guide will walk you through the process of constructing your own outdoor storage space.
Building a shed from scratch allows you to customize the design to perfectly suit your needs and aesthetic preferences. From choosing the ideal location for your shed to adding the finishing touches, this guide will cover each step in detail, providing you with the knowledge and confidence to tackle this project with ease.
Not only will constructing a shed add functional value to your property, but it can also serve as a fulfilling and enjoyable endeavor. Imagine the satisfaction of stepping back and admiring the sturdy structure you've built with your own hands, knowing that it will serve a practical purpose for years to come.
Throughout this guide, you'll learn about the essential materials and tools required, the step-by-step process of building the foundation, framing the structure, and adding the roof and siding. Additionally, you'll gain insights into installing doors and windows to make your shed accessible and well-lit. Furthermore, we'll delve into the finishing touches and provide valuable maintenance tips to ensure the longevity of your outdoor storage space.
Whether you're aiming to declutter your garage, create a dedicated workspace, or simply enhance the organization of your outdoor area, embarking on this DIY journey will empower you to create a functional and visually appealing 8×10 shed. So, roll up your sleeves, gather your tools, and let's dive into the exciting world of building your very own outdoor storage space.
Choosing the Right Location
Selecting the optimal location for your 8×10 shed is a crucial first step in the construction process. The chosen spot should not only accommodate the size of the shed but also consider practicality and aesthetics. Here's a detailed look at the key factors to consider when choosing the right location for your outdoor storage space:
-
Accessibility: Ensure that the location of your shed allows for easy access. This is particularly important if you plan to store large or heavy items inside the shed. Additionally, consider the pathway to the shed, ensuring it is clear and easily navigable.
-
Sunlight Exposure: Assess the sunlight exposure in different areas of your property. Choosing a location that receives ample natural light can help prevent dampness and mold inside the shed. Moreover, adequate sunlight can create a more pleasant environment when accessing the shed.
-
Drainage: Pay attention to the natural drainage patterns of your property. It's essential to place the shed in an area that is not prone to pooling water, especially during heavy rainfall. Proper drainage will help protect the shed's foundation and contents from water damage.
-
Landscaping and Aesthetics: Consider the visual impact of the shed's placement on your property. While the shed should be conveniently located, it's also important to integrate it harmoniously into the landscape. Take into account the existing vegetation, neighboring structures, and overall aesthetics when choosing the location.
-
Property Boundaries and Regulations: Familiarize yourself with local building codes and regulations regarding the placement of sheds. Ensure that the chosen location complies with setback requirements and property boundaries to avoid any legal issues in the future.
-
Utility Access: If you plan to incorporate electricity, water, or other utilities into your shed, proximity to existing utility connections should be considered. This can streamline the installation process and minimize additional costs.
By carefully considering these factors, you can identify the most suitable location for your 8×10 shed. Once you've selected the ideal spot, you'll be ready to move on to the next steps of gathering materials and tools, laying the foundation, and bringing your vision of a functional outdoor storage space to life.
Gathering Materials and Tools
Before embarking on the construction of your 8×10 shed, it's essential to gather all the necessary materials and tools to ensure a smooth and efficient building process. Here's a comprehensive list of the items you'll need to acquire before getting started:
Materials:
-
Lumber: Purchase high-quality lumber for framing, siding, and trim. Opt for pressure-treated wood for the foundation to protect against moisture and decay.
-
Fasteners: Stock up on galvanized nails, screws, and other fasteners suitable for outdoor use. Ensure you have a variety of sizes to accommodate different construction needs.
-
Roofing Materials: Depending on your preference, select asphalt shingles, metal roofing panels, or other suitable roofing materials. Don't forget to include underlayment and flashing to ensure a watertight roof.
-
Foundation Materials: If you're opting for a concrete foundation, gather concrete mix, gravel, and formwork materials. For a skid foundation, acquire pressure-treated skids and concrete blocks.
-
Siding and Trim: Choose durable siding material such as plywood, oriented strand board (OSB), or vinyl siding. Additionally, select trim boards to add a polished look to the exterior.
-
Doors and Windows: If your design includes doors and windows, purchase these items along with the necessary hardware. Ensure they are suitable for outdoor use and appropriately sized for the shed.
-
Moisture Barrier: Invest in a high-quality moisture barrier to protect the interior of the shed from water infiltration. This is especially important if you live in a region with high humidity or frequent rainfall.
-
Paint and Sealant: Select exterior-grade paint and sealant to protect the shed from the elements. Choose colors that complement your property's aesthetic while providing long-lasting protection.
Tools:
-
Measuring and Marking Tools: Acquire a tape measure, carpenter's square, and chalk line for accurate measurements and layout markings.
-
Cutting Tools: Invest in a circular saw, jigsaw, and handsaw for cutting lumber, siding, and other materials to the required dimensions.
-
Fastening Tools: Ensure you have a hammer, nail gun, and power drill with screwdriver bits for fastening various components during construction.
-
Leveling and Plumbing Tools: Obtain a spirit level and plumb bob to ensure the shed's foundation, walls, and roof are perfectly level and plumb.
-
Safety Gear: Prioritize safety by acquiring protective gear such as gloves, safety glasses, and a dust mask to safeguard yourself during the construction process.
By gathering these materials and tools in advance, you'll be well-prepared to commence the construction of your 8×10 shed. Having everything at your disposal will streamline the building process and minimize interruptions, allowing you to focus on bringing your vision of a functional and durable outdoor storage space to fruition.
Building the Foundation
The foundation serves as the backbone of your 8×10 shed, providing stability and structural integrity. Properly constructing the foundation is crucial for ensuring the longevity and durability of the entire structure. Here's a detailed overview of the steps involved in building a solid foundation for your outdoor storage space:
Step 1: Site Preparation
Begin by clearing and leveling the area where the shed will be situated. Remove any vegetation, rocks, or debris, and use a shovel and rake to create a level surface. It's essential to ensure that the ground is compact and free from any obstructions that could compromise the foundation's stability.
Step 2: Choosing the Foundation Type
Select the most suitable foundation type based on your specific requirements and local building codes. Common options include concrete slab, concrete piers, or skid foundation. Each type has its advantages, and the choice may depend on factors such as soil composition, climate, and intended shed usage.
Step 3: Building a Concrete Slab
If you opt for a concrete slab foundation, the next step involves constructing the formwork and pouring the concrete. Begin by creating a sturdy formwork using wooden boards to define the perimeter of the slab. Ensure the formwork is level and square before pouring the concrete mix. Once poured, use a screed board to level the concrete and eliminate any excess.
Step 4: Installing Concrete Piers
For a concrete pier foundation, dig holes at designated locations and pour concrete into cylindrical forms to create sturdy support piers. It's crucial to ensure that the piers are evenly spaced and aligned to support the shed's weight evenly. Additionally, consider adding anchor bolts to secure the shed's frame to the piers for added stability.
Step 5: Constructing a Skid Foundation
A skid foundation involves placing pressure-treated skids on a bed of gravel or concrete blocks to support the shed's floor framing. Ensure the skids are level and properly spaced to accommodate the shed's dimensions. This type of foundation is advantageous for its portability and ability to adapt to uneven terrain.
Step 6: Allowing for Proper Curing
Regardless of the chosen foundation type, it's essential to allow the concrete to cure or the skids to settle before proceeding with the construction of the shed's frame. Adequate curing time ensures that the foundation achieves its maximum strength and stability, laying a solid groundwork for the rest of the construction process.
By meticulously following these steps and paying attention to detail during the foundation-building phase, you'll establish a sturdy and reliable base for your 8×10 shed. A well-constructed foundation sets the stage for the subsequent stages of framing, roofing, and finishing, ensuring that your outdoor storage space stands the test of time.
Constructing the Frame
With the foundation in place, the next pivotal phase in building your 8×10 shed is constructing the frame. This step forms the skeleton of the structure, providing support for the walls, roof, and overall stability. Here's a detailed breakdown of the process involved in framing your outdoor storage space:
Step 1: Laying Out the Bottom Plates
Begin by laying out the pressure-treated bottom plates on the foundation, ensuring they are precisely positioned according to the shed's dimensions. Use a tape measure and carpenter's square to guarantee accuracy, and mark the locations for anchor bolts or fasteners to secure the plates to the foundation.
Step 2: Assembling the Wall Framing
Once the bottom plates are in place, proceed to assemble the wall framing using 2×4 or 2×6 lumber, depending on the structural requirements. Cut the studs to the appropriate length and space them evenly along the bottom plates, ensuring they are plumb and securely fastened. Incorporate openings for doors and windows as per your shed design.
Step 3: Erecting the Wall Sections
With the wall framing assembled, carefully lift and position each wall section onto the bottom plates. Ensure the walls are aligned with the markings on the foundation and brace them temporarily to maintain stability. Once all wall sections are in place, secure them to the bottom plates and to each other, creating a unified structure.
Step 4: Adding Roof Supports
Following the completion of the wall framing, add roof supports such as rafters or trusses to provide the framework for the roof. These components play a critical role in distributing the weight of the roof evenly and ensuring structural integrity. Install the supports according to the shed's design and local building codes, securing them firmly to the walls.
Step 5: Ensuring Structural Stability
Throughout the framing process, prioritize structural stability by using diagonal bracing and ensuring all connections are secure. Verify that the walls are plumb and the roof supports are level, making any necessary adjustments to guarantee a solid and balanced frame.
Step 6: Inspecting for Quality and Precision
Before proceeding to the next phase of adding the roof and siding, conduct a thorough inspection of the frame to ensure it meets quality standards. Verify that all components are securely fastened, the walls are straight, and the roof supports are properly aligned. Address any discrepancies or deficiencies to maintain the structural integrity of the shed.
By meticulously following these steps and paying attention to detail during the frame construction, you'll establish a robust and reliable framework for your 8×10 shed. The completed frame sets the stage for the subsequent stages of adding the roof, siding, doors, and windows, bringing you closer to the realization of your functional and durable outdoor storage space.
Adding the Roof and Siding
After successfully constructing the frame of your 8×10 shed, the next crucial step is adding the roof and siding to enclose the structure and provide protection from the elements. This phase not only enhances the shed's durability but also contributes to its visual appeal. Here's a detailed overview of the process involved in adding the roof and siding to your outdoor storage space:
Roof Installation
-
Selecting Roofing Materials: Begin by choosing the roofing materials that best suit your climate and aesthetic preferences. Options include asphalt shingles, metal roofing panels, or cedar shakes. Ensure the selected materials are durable and capable of withstanding the local weather conditions.
-
Applying Underlayment: Before installing the roofing material, apply a high-quality underlayment to provide an additional layer of protection against moisture. The underlayment acts as a barrier, preventing water infiltration and enhancing the shed's resilience.
-
Installing Roofing Material: Whether you opt for shingles, metal panels, or another roofing material, follow the manufacturer's guidelines for proper installation. Pay close attention to the alignment and overlap of the roofing components to ensure a watertight seal and optimal weather resistance.
-
Adding Flashing and Trim: Incorporate flashing around roof penetrations such as vents and chimneys to prevent water seepage. Additionally, install trim along the roof edges to create a clean and finished look while providing further protection against the elements.
Siding Application
-
Choosing Siding Material: Select siding material that complements the overall design of your property while offering durability and low maintenance. Common options include plywood, oriented strand board (OSB), vinyl siding, or cedar clapboard.
-
Cutting and Fitting Siding Panels: Measure and cut the siding panels to the appropriate dimensions, ensuring they align seamlessly with the shed's frame. Properly fitting the siding panels is essential for a professional and weather-resistant finish.
-
Securing Siding Panels: Utilize galvanized nails or screws to secure the siding panels to the frame, following the recommended spacing and fastening guidelines. Pay attention to vertical alignment and ensure the panels are securely attached to withstand wind and weather.
-
Applying Moisture Barrier: To further safeguard the shed's interior, consider applying a moisture barrier beneath the siding. This additional layer of protection helps prevent water intrusion and enhances the longevity of the structure.
By meticulously following these steps and paying attention to detail during the roof and siding installation, you'll effectively enclose your 8×10 shed, providing it with the necessary protection and visual appeal. The completed roof and siding not only contribute to the shed's functionality but also enhance its aesthetic integration with your outdoor space.
Installing Doors and Windows
The installation of doors and windows is a pivotal phase in the construction of your 8×10 shed, as it introduces accessibility, natural light, and ventilation to the interior space. Properly installing these components ensures functionality, aesthetics, and overall comfort within the shed. Here's a detailed breakdown of the process involved in installing doors and windows to enhance the utility and visual appeal of your outdoor storage space:
Selecting Suitable Doors and Windows
Begin by selecting doors and windows that align with the design and functional requirements of your shed. Consider factors such as durability, weather resistance, and aesthetic compatibility with the overall structure. Opt for doors and windows designed for outdoor use, featuring materials that can withstand varying weather conditions and provide adequate insulation.
Preparing Openings
Before installing the doors and windows, prepare the openings in the shed's frame to accommodate these components. Ensure the openings are accurately sized to fit the selected doors and windows, allowing for a proper fit and secure installation. Use a level and square to verify the alignment and dimensions of the openings, making any necessary adjustments to ensure precision.
Installing Doors
When installing the door, begin by positioning the door frame within the designated opening, ensuring it is plumb and level. Secure the frame in place using shims and screws, adjusting as needed to achieve a snug and even fit. Once the frame is securely positioned, hang the door on its hinges, verifying smooth operation and proper alignment. Install appropriate weather-stripping and hardware to enhance the door's functionality and weather resistance.
Adding Windows
For window installation, carefully place the window frame within the prepared opening, ensuring it is level and securely positioned. Use shims to adjust the frame as needed, maintaining even spacing and alignment. Once the frame is in place, secure it by fastening screws through the frame and into the shed's structure. Install the window sashes, ensuring they operate smoothly and provide a tight seal when closed. Apply weather-resistant caulking around the perimeter of the window to prevent water infiltration and enhance insulation.
Enhancing Security and Functionality
Incorporate appropriate locking mechanisms for both the doors and windows to enhance security and safeguard the shed's contents. Additionally, consider adding screens to the windows to allow for ventilation while keeping insects and debris out. Verify that all components operate smoothly and provide a secure seal when closed, ensuring the shed's interior remains protected and comfortable.
By meticulously following these steps and paying attention to detail during the installation of doors and windows, you'll introduce functionality, natural light, and ventilation to your 8×10 shed. The completed installation not only enhances the accessibility and comfort of the space but also contributes to the overall aesthetic appeal of your outdoor storage area.
Finishing Touches and Maintenance Tips
With the construction of your 8×10 shed nearing completion, attention to finishing touches and maintenance tips is essential to ensure the longevity and functionality of your outdoor storage space. Here's a detailed look at the final steps and valuable maintenance guidelines to keep your shed in optimal condition for years to come.
Finishing Touches
Exterior Finishing
Apply a protective coat of high-quality exterior paint or stain to the shed's siding and trim. Choose a color that complements your property's aesthetic while providing durable protection against weather elements. Proper finishing not only enhances the shed's visual appeal but also shields the exterior from moisture and UV damage.
Interior Organization
Install shelving, hooks, and storage solutions to maximize the shed's interior space. Organizing tools, equipment, and supplies will not only optimize functionality but also contribute to a clutter-free and efficient workspace.
Landscaping Integration
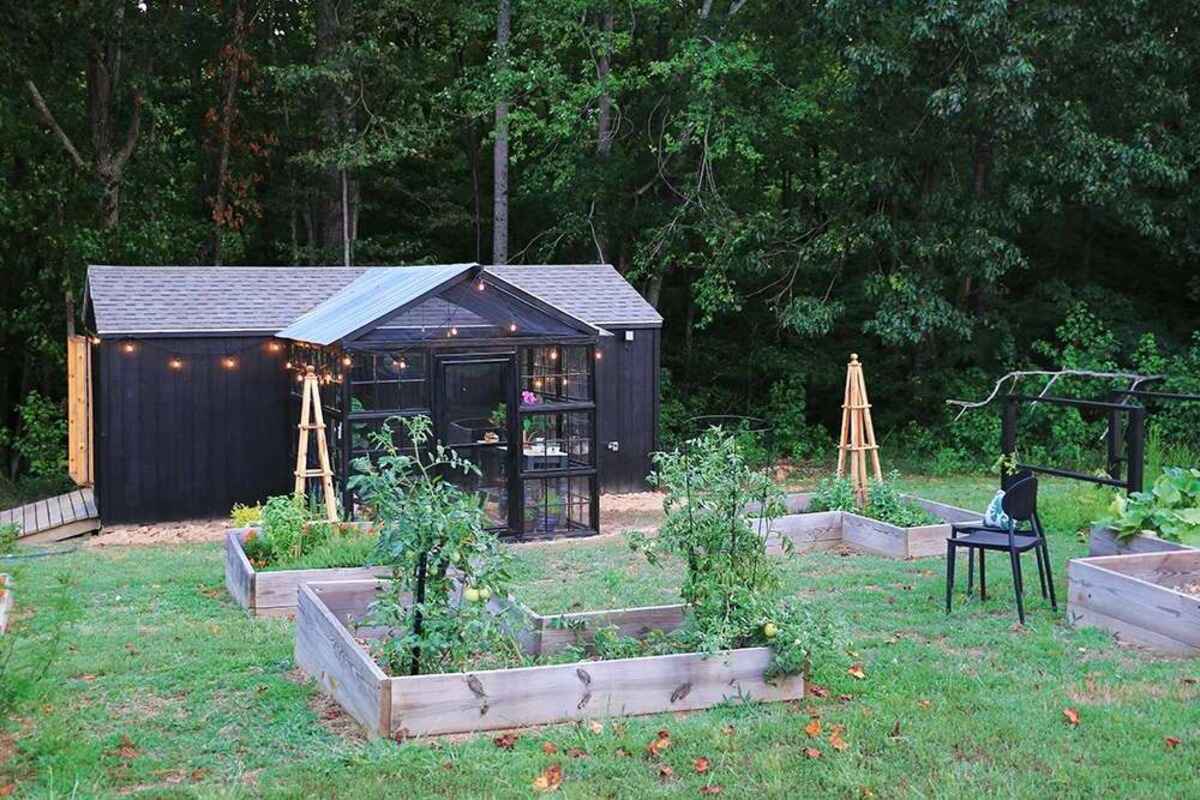
Integrate the shed into your property's landscape by adding plantings, pathways, or decorative elements around its perimeter. Thoughtful landscaping enhances the shed's visual impact and creates a cohesive outdoor environment.
Maintenance Tips
Regular Inspections
Schedule routine inspections of the shed's exterior and interior to identify any signs of wear, damage, or pest intrusion. Promptly addressing issues can prevent minor concerns from escalating into more significant problems.
Cleaning and Ventilation
Regularly clean the shed's exterior to remove dirt, debris, and organic matter that can compromise the siding and trim. Additionally, ensure adequate ventilation within the shed to prevent moisture buildup, which can lead to mold and mildew.
Seasonal Maintenance
Prioritize seasonal maintenance tasks such as inspecting the roof for damage, clearing gutters, and addressing any exterior paint or sealant issues. Seasonal upkeep ensures that the shed remains resilient in the face of changing weather conditions.
Pest Control
Implement pest control measures to safeguard the shed against unwanted intruders such as insects, rodents, and wildlife. Seal any potential entry points and consider using safe and effective pest deterrents to protect the shed's interior and contents.
Structural Integrity
Regularly check the shed's foundation, frame, and roofing for any signs of structural compromise. Address any concerns promptly to maintain the shed's stability and durability over time.
By attending to these finishing touches and adhering to proactive maintenance practices, you'll ensure that your 8×10 shed remains a functional, visually appealing, and reliable outdoor storage space for years to come. Embracing these final steps and ongoing maintenance guidelines will contribute to the long-term satisfaction and utility of your DIY construction project.