
Home>Create & Decorate>DIY & Crafts>DIY Shed Project: Building Rafters For Your Perfect Outdoor Retreat
DIY & Crafts
DIY Shed Project: Building Rafters For Your Perfect Outdoor Retreat
Published: February 27, 2024

Content Creator specializing in woodworking and interior transformations. Caegan's guides motivate readers to undertake their own projects, while his custom furniture adds a personal touch.
Learn how to build sturdy and stylish rafters for your DIY shed project with our step-by-step guide. Create the perfect outdoor retreat with our DIY & Crafts tips.
(Many of the links in this article redirect to a specific reviewed product. Your purchase of these products through affiliate links helps to generate commission for Twigandthistle.com, at no extra cost. Learn more)
Introduction
Embarking on a do-it-yourself (DIY) shed project can be an exciting and rewarding endeavor. Whether you're a seasoned DIY enthusiast or a novice looking to unleash your creativity, building a shed offers a perfect opportunity to enhance your outdoor space. One crucial aspect of constructing a sturdy and reliable shed is the proper installation of rafters. These essential components provide structural support to the roof, ensuring its stability and longevity.
In this comprehensive guide, we will delve into the intricacies of building rafters for your DIY shed project. From understanding the significance of rafters to providing a step-by-step construction guide, this article aims to equip you with the knowledge and confidence to tackle this essential aspect of shed building. Additionally, we will explore the tools and materials required, along with valuable tips to ensure the durability and resilience of your rafter construction.
As you embark on this journey, envision the end result: a functional and aesthetically pleasing outdoor retreat that reflects your craftsmanship and dedication. With the right guidance and a willingness to learn, you can transform your backyard into a space that not only serves a practical purpose but also exudes charm and character.
So, roll up your sleeves, gather your tools, and let's dive into the world of DIY shed construction, starting with the fundamental element of building strong and reliable rafters.
Planning Your DIY Shed Project
Before diving into the physical construction of your DIY shed, meticulous planning is essential to ensure a smooth and successful project. This phase sets the foundation for the entire endeavor, encompassing crucial aspects such as design, budgeting, and obtaining necessary permits. By dedicating ample time to planning, you can mitigate potential challenges and streamline the construction process.
Design and Layout
Begin by envisioning the purpose of your shed. Will it serve as a storage space for gardening tools, a workshop for DIY projects, or a cozy retreat for relaxation? Determining the shed's intended use will influence its design and size. Consider factors such as the available space in your yard, local building codes, and any aesthetic preferences you may have.
Budgeting and Material Selection
Establishing a realistic budget is paramount to prevent overspending and financial strain. Research the cost of materials, tools, and any professional assistance you may require. Additionally, consider the long-term maintenance costs of the shed. Selecting durable and weather-resistant materials may entail a higher initial investment but can contribute to the shed's longevity.
Obtaining Permits and Regulations
Check with your local building authority to determine if permits are required for constructing a shed on your property. Familiarize yourself with zoning regulations, setback requirements, and any restrictions pertaining to shed size and height. Adhering to these regulations is crucial to avoid potential legal issues and ensure the structural compliance of your shed.
Timeline and Project Milestones
Create a realistic timeline for your DIY shed project, factoring in potential delays due to inclement weather or unforeseen challenges. Establishing project milestones can help you track progress and stay organized throughout the construction process. Consider breaking the project into manageable phases, such as foundation preparation, framing, roofing, and interior finishing.
Environmental Considerations
Assess the environmental impact of your shed project, particularly if you plan to incorporate sustainable practices. Explore eco-friendly building materials, energy-efficient design options, and potential opportunities for recycling or repurposing materials. By integrating environmentally conscious elements into your shed project, you can contribute to a greener and more sustainable living space.
By meticulously planning your DIY shed project, you lay the groundwork for a successful and fulfilling construction journey. Embrace the opportunity to unleash your creativity, and approach each planning phase with enthusiasm and attention to detail. With a well-thought-out plan in place, you can confidently proceed to the next stages of your DIY shed construction, including the critical task of building sturdy and reliable rafters.
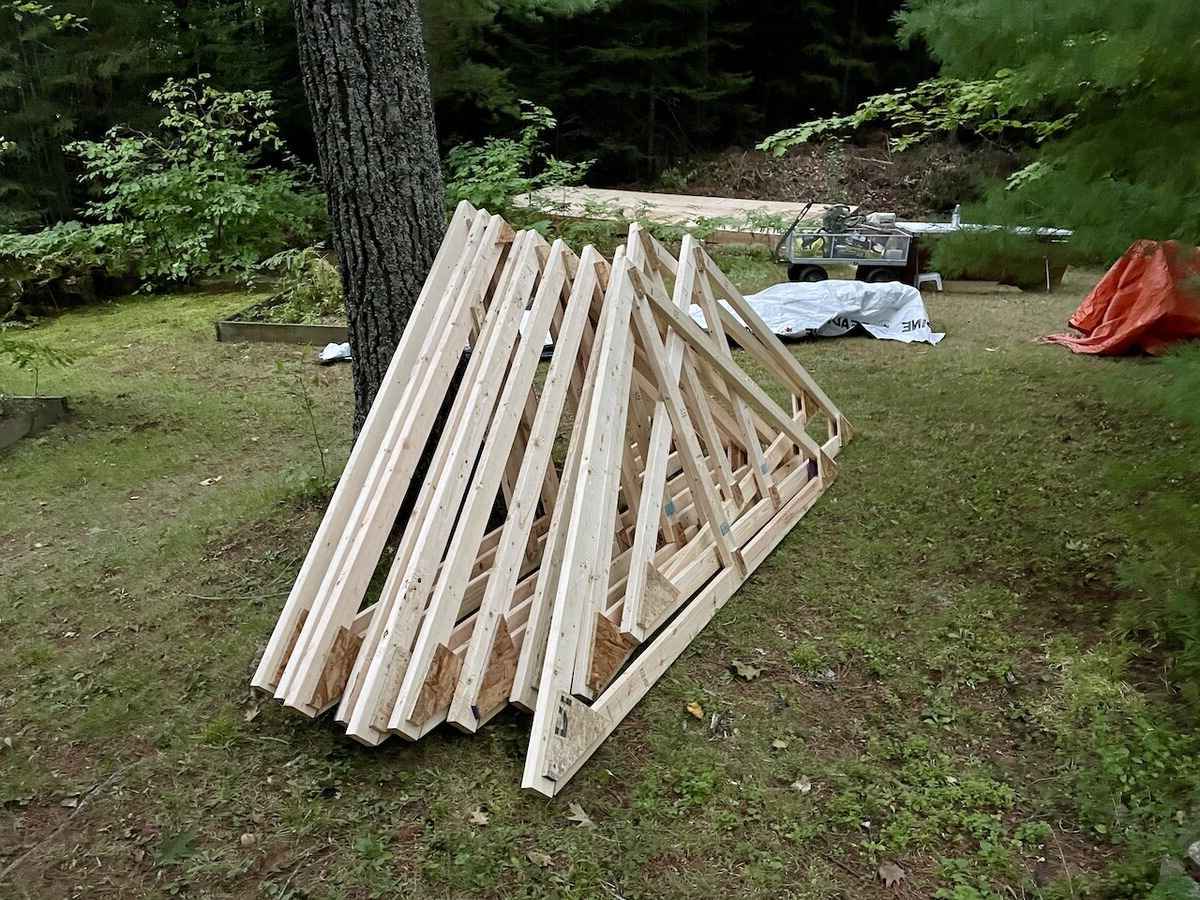
Understanding Rafters and Their Importance
Rafters are integral components of a shed's roof structure, playing a pivotal role in providing support, stability, and load-bearing capacity. Understanding the significance of rafters is essential for ensuring the structural integrity and longevity of your DIY shed. These inclined structural members form the framework upon which the roof covering is installed, effectively transferring the weight of the roof to the walls and ultimately to the foundation of the shed.
The primary function of rafters is to distribute the weight of the roof evenly, preventing excessive stress on any single point of the structure. By dispersing the load, rafters contribute to the overall stability of the shed, safeguarding it against potential structural failure and weather-related challenges. Additionally, well-constructed rafters help to resist the forces exerted by wind, snow, and other environmental elements, thereby enhancing the shed's resilience.
In essence, the proper installation of rafters is crucial for maintaining the structural soundness of the entire shed. By understanding the role of rafters in supporting the roof and distributing loads, you can appreciate their significance in ensuring the safety and durability of your DIY construction.
Furthermore, the design and placement of rafters directly impact the shed's overall aesthetic appeal. Thoughtfully crafted rafters can contribute to the visual charm of the structure, adding character and architectural interest to the outdoor space. Whether opting for a traditional rafter design or exploring modern variations, the careful consideration of rafter aesthetics can elevate the shed's visual impact, transforming it into a captivating focal point within your property.
As you embark on your DIY shed project, recognizing the importance of rafters empowers you to approach their construction with precision and foresight. By prioritizing the structural and aesthetic aspects of rafters, you can lay the foundation for a well-built and visually appealing shed that stands the test of time.
Understanding the role of rafters and their significance in the overall shed construction sets the stage for a successful and rewarding building experience. With this knowledge in hand, you are ready to delve into the practical aspects of constructing sturdy and reliable rafters for your DIY shed project.
Tools and Materials Needed
Before embarking on the construction of rafters for your DIY shed project, it's essential to gather the necessary tools and materials to ensure a smooth and efficient building process. Equipping yourself with the right tools and high-quality materials is crucial for achieving sturdy and reliable rafter construction. Here's a comprehensive list of the essential tools and materials needed for building rafters:
Tools:
- Circular Saw: A versatile tool for cutting lumber to the required dimensions, facilitating precise and efficient rafter construction.
- Power Drill: Essential for drilling pilot holes, driving screws, and assembling the rafter components securely.
- Level: Ensures the horizontal alignment of the rafters, contributing to the structural integrity and stability of the shed's roof.
- Speed Square: Facilitates the marking of accurate and consistent angles, essential for creating properly aligned rafter cuts.
- Chalk Line: Enables the creation of straight and uniform layout lines on the lumber, aiding in the precise assembly of rafters.
- Hammer: Used for securing connectors, fasteners, and bracing elements during the rafter construction process.
- Measuring Tape: Essential for taking accurate measurements, ensuring the precise dimensions of the rafter components.
- Workbench or Sawhorses: Provides a stable and elevated surface for cutting and assembling the rafter components, enhancing work efficiency and safety.
- Safety Gear: Including protective eyewear, gloves, and a dust mask to ensure personal safety during the construction process.
Materials:
- Lumber: Select high-quality, pressure-treated lumber for the rafter components, ensuring durability and resistance to decay and insect damage.
- Roofing Nails or Screws: Used for securing the rafter components and attaching them to the ridge board and wall plates.
- Metal Connectors: Including hurricane ties, rafter ties, and joist hangers to reinforce the connections between the rafters and other structural elements.
- Wood Sealer or Preservative: Protects the lumber from moisture and environmental elements, extending the lifespan of the rafters.
- Rafter Bracing: Provides additional lateral support to the rafters, enhancing their stability and load-bearing capacity.
- Roof Sheathing: Required for covering and reinforcing the rafters, serving as the base for the roof covering material.
By ensuring that you have the necessary tools and materials at your disposal, you can approach the rafter construction phase of your DIY shed project with confidence and preparedness. With these essential resources in hand, you are ready to embark on the step-by-step process of building durable and resilient rafters for your outdoor retreat.
Step-by-Step Guide to Building Rafters
-
Determine Rafter Size and Spacing: Begin by calculating the required rafter size and spacing based on the shed's dimensions and the chosen roof pitch. Consult building codes and structural guidelines to ensure compliance with load-bearing requirements.
-
Cut Rafter Components: Using a circular saw and the appropriate safety measures, cut the lumber to the precise dimensions required for the rafters. Ensure uniformity in the cuts to maintain structural integrity.
-
Mark and Cut Bird's Mouth: Mark the bird's mouth notch on each rafter to facilitate a secure connection with the wall plates. Use a speed square to ensure accurate and consistent cuts for the bird's mouth.
-
Assemble Ridge Board and Rafter Layout: Position the ridge board on the shed's end walls and mark the rafter locations along the board. Use a chalk line to create straight layout lines for aligning the rafters.
-
Cut Rafter Angles: Determine the appropriate angles for the rafter cuts based on the chosen roof pitch. Use a speed square to mark and cut the angles accurately, ensuring a snug fit with the ridge board and wall plates.
-
Install Rafter Bracing: Cut and install bracing elements between the rafters to provide lateral support and enhance the overall stability of the roof structure.
-
Secure Rafter Connections: Utilize metal connectors, such as hurricane ties and rafter ties, to reinforce the connections between the rafters, ridge board, and wall plates. Ensure secure fastening to withstand potential wind and load forces.
-
Attach Roof Sheathing: Once the rafters are in place, secure the roof sheathing to the rafter framework, providing a solid base for the roof covering material and enhancing the structural integrity of the shed's roof.
-
Inspect and Reinforce: Thoroughly inspect the rafter assembly to ensure proper alignment, secure connections, and overall stability. Reinforce any weak points or areas of concern to guarantee the resilience of the rafter structure.
-
Apply Wood Sealer or Preservative: Prior to installing the roof covering, apply a wood sealer or preservative to the rafter components to protect them from moisture, decay, and environmental damage, prolonging their lifespan.
By following this step-by-step guide, you can effectively construct durable and reliable rafters for your DIY shed project. Attention to detail, precision in measurements and cuts, and adherence to structural guidelines are essential for achieving a robust rafter framework that forms the backbone of your outdoor retreat.
Tips for a Sturdy and Durable Rafter Construction
Building sturdy and durable rafters is essential for ensuring the long-term resilience and structural integrity of your DIY shed. By incorporating the following tips into your rafter construction process, you can elevate the quality and reliability of your shed's roof framework.
1. Select High-Quality Lumber:
Opt for pressure-treated or naturally durable lumber for constructing the rafters. This choice enhances the resistance of the rafters to decay, insect damage, and moisture, prolonging their lifespan and ensuring long-term structural stability.
2. Precision in Cuts and Measurements:
Maintain meticulous attention to detail when cutting and measuring the rafter components. Accurate cuts and consistent measurements are crucial for achieving a snug and secure fit, minimizing gaps, and optimizing the load-bearing capacity of the rafters.
3. Implement Proper Bracing:
Incorporate diagonal bracing between the rafters to enhance their lateral stability and resistance to wind forces. Well-placed bracing contributes to the overall rigidity of the rafter framework, reducing the risk of structural deformation and improving the shed's ability to withstand external pressures.
4. Ensure Adequate Ventilation:
Integrate ventilation channels or baffles within the rafter assembly to facilitate proper airflow in the roof space. Adequate ventilation helps mitigate moisture buildup, reducing the risk of condensation-related issues and preserving the structural integrity of the rafters and roof sheathing.
5. Optimize Rafter Spacing:
Adhere to recommended rafter spacing guidelines based on the shed's dimensions and the chosen roof pitch. Proper spacing distributes the load evenly across the roof structure, minimizing stress on individual rafters and promoting uniform weight distribution.
6. Secure Rafter Connections:
Utilize high-quality metal connectors, such as hurricane ties and rafter ties, to reinforce the connections between the rafters, ridge board, and wall plates. Secure fastening of these connections is crucial for withstanding potential wind uplift and ensuring the overall stability of the rafter framework.
7. Apply Protective Coatings:
Prior to installing the roof covering, apply a protective wood sealer or preservative to the rafter components. This protective layer shields the lumber from environmental elements, enhancing its durability and resistance to decay, thereby extending the lifespan of the rafters.
By integrating these tips into your rafter construction process, you can elevate the structural robustness and longevity of your DIY shed's roof framework. Attention to detail, the use of high-quality materials, and adherence to best practices are fundamental in achieving a sturdy and durable rafter assembly that forms the backbone of your outdoor retreat.
Conclusion
As you reach the culmination of your DIY shed project, the construction of sturdy and reliable rafters stands as a testament to your dedication and craftsmanship. The journey from meticulous planning to the practical execution of rafter construction has been a transformative experience, empowering you to create a functional and visually appealing outdoor retreat.
The significance of rafters in providing structural support and load-bearing capacity cannot be overstated. By understanding their role in distributing the weight of the roof and ensuring the stability of the shed, you have laid the foundation for a resilient and enduring outdoor structure. The careful consideration of rafter aesthetics further enhances the shed's visual appeal, elevating it from a mere utility space to a captivating architectural feature within your property.
Throughout the planning phase, you meticulously deliberated on design, budgeting, and regulatory considerations, setting the stage for a well-organized and successful construction journey. Your attention to environmental considerations and sustainable practices reflects a commitment to creating a shed that harmonizes with its surroundings while minimizing its ecological footprint.
Equipped with the essential tools and high-quality materials, you embarked on the step-by-step process of rafter construction, guided by precision, attention to detail, and adherence to best practices. The deliberate selection of pressure-treated lumber, precise cuts, and the implementation of proper bracing and ventilation channels have culminated in a rafter framework that embodies durability and resilience.
As you applied protective coatings to the rafters, safeguarding them against environmental elements, you demonstrated a commitment to ensuring the long-term integrity of your shed's roof structure. The integration of these protective measures reflects a forward-looking approach, acknowledging the importance of proactive preservation and maintenance.
In conclusion, your DIY shed project, encompassing the meticulous planning, the practical execution of rafter construction, and the integration of sustainability principles, has not only resulted in the creation of a functional outdoor space but also stands as a testament to your creativity and determination. The knowledge and skills acquired throughout this endeavor will continue to inspire future projects, fostering a deeper appreciation for craftsmanship and the art of transforming ideas into tangible, enduring structures.
As you step back and admire the culmination of your efforts, envision the countless moments of enjoyment and productivity that await within your newly constructed shed. Whether it serves as a sanctuary for relaxation, a hub for creative endeavors, or a haven for storage and organization, your DIY shed stands as a reflection of your vision and dedication, enriching your outdoor living space for years to come.