Home>Create & Decorate>DIY & Crafts>10×10 Shed Plans: DIY Guide To Building Your Own Outdoor Storage Space

DIY & Crafts
10×10 Shed Plans: DIY Guide To Building Your Own Outdoor Storage Space
Published: February 22, 2024

Senior Editor in Create & Decorate, Kathryn combines traditional craftsmanship with contemporary trends. Her background in textile design and commitment to sustainable crafts inspire both content and community.
Discover step-by-step DIY 10x10 shed plans for creating your own outdoor storage space. Get expert tips and guidance for your DIY & Crafts project.
(Many of the links in this article redirect to a specific reviewed product. Your purchase of these products through affiliate links helps to generate commission for Twigandthistle.com, at no extra cost. Learn more)
Introduction
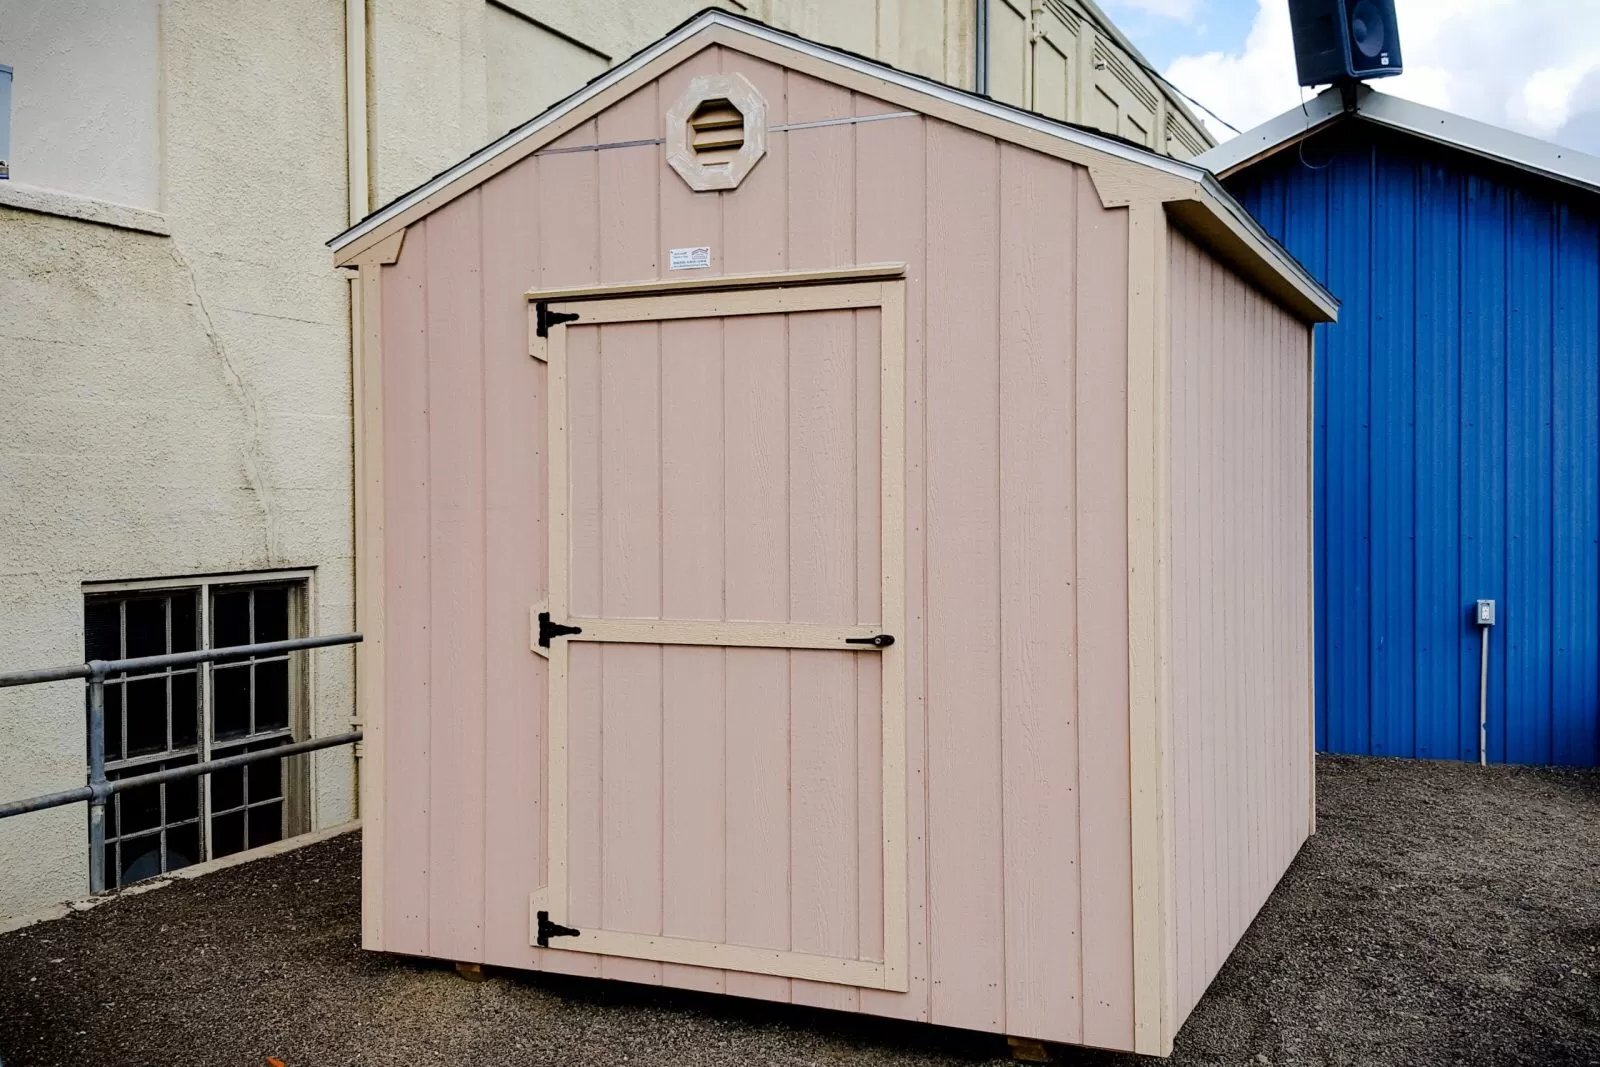
Welcome to the ultimate DIY guide to building your very own outdoor storage space with 10×10 shed plans. Whether you're a seasoned DIY enthusiast or a novice looking to embark on your first major construction project, this comprehensive guide will walk you through the step-by-step process of creating a functional and stylish shed to meet your storage needs.
Building a 10×10 shed offers a versatile solution for storing garden tools, outdoor equipment, bicycles, and other items that tend to clutter your yard or garage. Not only does it provide ample storage space, but it also adds a charming and practical element to your outdoor living area.
By constructing your own shed, you have the freedom to customize the design, materials, and finishing touches to suit your preferences and complement your home's aesthetic. Whether you envision a rustic barn-style shed or a modern, sleek structure, this guide will equip you with the knowledge and confidence to bring your vision to life.
Throughout this guide, you'll learn about the essential considerations for choosing the right location for your shed, gathering the necessary materials and tools, building a solid foundation, constructing the frame, adding the roof and siding, installing doors and windows, and adding finishing touches to ensure longevity and functionality.
Embarking on a DIY shed-building project is not only a rewarding endeavor but also a cost-effective way to enhance your property and expand your storage options. With careful planning, attention to detail, and a willingness to roll up your sleeves, you can create a durable and visually appealing outdoor storage space that will serve you for years to come.
So, roll up your sleeves, gather your tools, and let's dive into the exciting world of DIY shed construction. Whether you're a weekend warrior or a seasoned craftsman, this guide will empower you to take on this fulfilling project with confidence and enthusiasm.
Read more: DIY Garage Shed Plans Guide
Choosing the Right Location for Your Shed
Selecting the optimal location for your 10×10 shed is a crucial first step in the construction process. The chosen spot should not only accommodate the size of the shed but also consider practicality, aesthetics, and local building regulations. Here's a detailed breakdown of the key factors to consider when choosing the right location for your shed:
-
Accessibility: Ensure that the location provides easy access to the shed. This includes considering pathways from your home, driveway, or garden. Accessibility is essential for transporting tools, equipment, and other items in and out of the shed.
-
Sunlight and Shade: Assess the sun's movement throughout the day to determine the ideal placement of your shed. While ample sunlight is beneficial for drying out the shed and its contents, it's also important to consider providing some shade to prevent overheating during the warmer months.
-
Ground Stability: The ground where the shed will be placed should be stable and level. Avoid areas prone to pooling water or experiencing excessive runoff during heavy rain. A level foundation ensures the structural integrity of the shed and prevents potential water damage.
-
Landscaping and Aesthetics: Consider how the shed will complement the overall landscaping of your property. Placing the shed near trees or shrubbery can provide natural shading and enhance the visual appeal of the structure. Additionally, integrating the shed into the landscape design can create a cohesive and harmonious outdoor environment.
-
Local Regulations: Check with your local building authority or homeowner's association to understand any regulations or restrictions regarding shed placement. This may include setback requirements from property lines, maximum allowable height, and other zoning considerations.
-
Utility Access: If you plan to use the shed for storing tools or equipment that require electricity or water, proximity to utility connections should be taken into account. Access to power outlets and water sources can influence the shed's location.
By carefully evaluating these factors, you can identify the most suitable location for your 10×10 shed. Once the ideal spot is determined, you can proceed with confidence to the next steps of gathering materials and preparing the site for construction.
Gathering Materials and Tools
Before diving into the construction of your 10×10 shed, it's essential to gather all the necessary materials and tools to ensure a smooth and efficient building process. By having everything at your disposal, you can minimize interruptions and focus on bringing your shed to life. Here's a comprehensive list of materials and tools you'll need to kickstart your DIY shed-building journey:
Materials:
- Lumber: Purchase high-quality lumber for framing, flooring, and trusses. Opt for pressure-treated wood to resist decay and insect damage, especially for the foundation and base structure.
- Plywood: Select sturdy plywood for sheathing the walls, roof, and floor. Consider the thickness based on the shed's intended use and local weather conditions.
- Roofing Materials: Choose durable roofing shingles or metal panels to protect the shed from the elements. Ensure proper flashing and underlayment for weatherproofing.
- Siding: Decide on the type of siding, such as wood, vinyl, or metal, based on your aesthetic preferences and maintenance considerations.
- Fasteners: Stock up on nails, screws, and other fasteners suitable for outdoor use. Stainless steel or galvanized options offer corrosion resistance.
- Concrete: If your shed requires a concrete foundation, gather the necessary concrete mix and reinforcement materials.
- Insulation and Vapor Barrier: Depending on your climate, insulation and a vapor barrier may be needed to regulate temperature and moisture inside the shed.
- Doors and Windows: If not included in a shed kit, purchase sturdy doors, windows, and associated hardware for installation.
Tools:
- Measuring and Marking Tools: Ensure you have a tape measure, level, speed square, and marking tools for accurate layout and cutting.
- Cutting Tools: A circular saw, jigsaw, and handsaw will be essential for cutting lumber, plywood, and other materials to size.
- Fastening Tools: Invest in a quality hammer, cordless drill/driver, and impact driver for driving nails and screws efficiently.
- Foundation Tools: If pouring a concrete foundation, you'll need a wheelbarrow, shovel, and trowel for mixing and pouring concrete.
- Safety Gear: Prioritize safety with protective eyewear, gloves, and a dust mask to safeguard against potential hazards during construction.
By procuring these materials and tools, you'll set the stage for a successful and rewarding shed-building experience. With everything in hand, you can confidently move on to the next phase of constructing the foundation, knowing that you're well-prepared to bring your 10×10 shed to fruition.
Read more: DIY Outdoor Kitchen Gazebo Build
Building the Foundation
The foundation serves as the backbone of your 10×10 shed, providing stability and protection against ground moisture. A solid and well-constructed foundation is essential for ensuring the longevity and structural integrity of the entire shed. Here's a detailed overview of the steps involved in building a sturdy foundation for your outdoor storage space:
Site Preparation
Before commencing the foundation work, it's crucial to prepare the site by clearing the area of any debris, vegetation, or obstacles. Use a shovel and rake to level the ground, ensuring that the site is free from any unevenness or obstructions. Additionally, consider excavating the soil to the required depth, accounting for the thickness of the foundation materials.
Choosing the Foundation Type
The choice of foundation type depends on various factors, including local building codes, soil composition, and personal preferences. Common options for shed foundations include concrete slabs, concrete piers, and pressure-treated skids. Each type offers distinct advantages in terms of cost, durability, and ease of installation.
Building a Concrete Slab
For a permanent and robust foundation, a concrete slab is a popular choice. After determining the dimensions of the slab, excavate the area to the specified depth and construct a formwork to contain the concrete. Reinforce the slab with steel mesh or rebar to enhance its strength and prevent cracking. Once the concrete is poured and leveled, allow it to cure according to the manufacturer's recommendations.
Read more: DIY Outdoor Concrete Countertops
Installing Concrete Piers
Concrete piers are an alternative foundation option, particularly suitable for regions with expansive soils or areas prone to frost heave. To install concrete piers, dig holes at designated intervals and pour concrete into the cavities, ensuring that the piers are level and aligned. Once the concrete sets, attach pressure-treated beams to the piers to support the shed's floor framing.
Utilizing Pressure-Treated Skids
Pressure-treated skids, also known as runners, offer a cost-effective and straightforward foundation solution. These treated lumber pieces are placed directly on the ground, providing a stable base for the shed. When using skids, it's essential to position them on a bed of gravel or compacted crushed stone to promote drainage and prevent moisture accumulation.
By meticulously executing the foundation construction process, you'll establish a solid groundwork for the rest of the shed-building project. A well-built foundation not only ensures the structural stability of the shed but also contributes to its resilience against environmental factors, ultimately prolonging its lifespan and functionality. With the foundation in place, you're ready to progress to the next phase of constructing the shed's frame, bringing you one step closer to realizing your DIY storage space.
Constructing the Frame
With the foundation set, the next pivotal phase in building your 10×10 shed is constructing the frame. The frame serves as the skeletal structure of the shed, providing support for the walls, roof, and overall stability. Here's a comprehensive breakdown of the steps involved in constructing the frame for your outdoor storage space:
1. Laying Out the Bottom Plates
Begin by laying out the pressure-treated bottom plates on the foundation, ensuring they are positioned accurately according to the shed's dimensions. Use a framing square to ensure the corners are at right angles, and secure the plates to the foundation using anchor bolts or concrete screws.
Read more: How to Build a Traeger Outdoor Kitchen
2. Assembling the Wall Framing
Once the bottom plates are in place, proceed to assemble the wall framing using 2×4 or 2×6 lumber, depending on the shed's design and structural requirements. Cut the studs to the appropriate length and space them at regular intervals, typically 16 inches on center. Ensure the walls are plumb and square as you secure the framing members together.
3. Adding Door and Window Openings
If your shed design includes doors and windows, frame out the openings accordingly. Install headers above the door and window openings to support the weight of the structure above them. Take precise measurements to ensure the openings are sized correctly for the doors and windows you plan to install.
4. Erecting the Wall Sections
With the wall framing complete, raise the wall sections into position on the bottom plates. Enlist the help of assistants to hold the walls steady as you secure them to the bottom plates and to each other. Use braces to ensure the walls remain plumb and aligned during the installation process.
5. Installing the Roof Trusses or Rafters
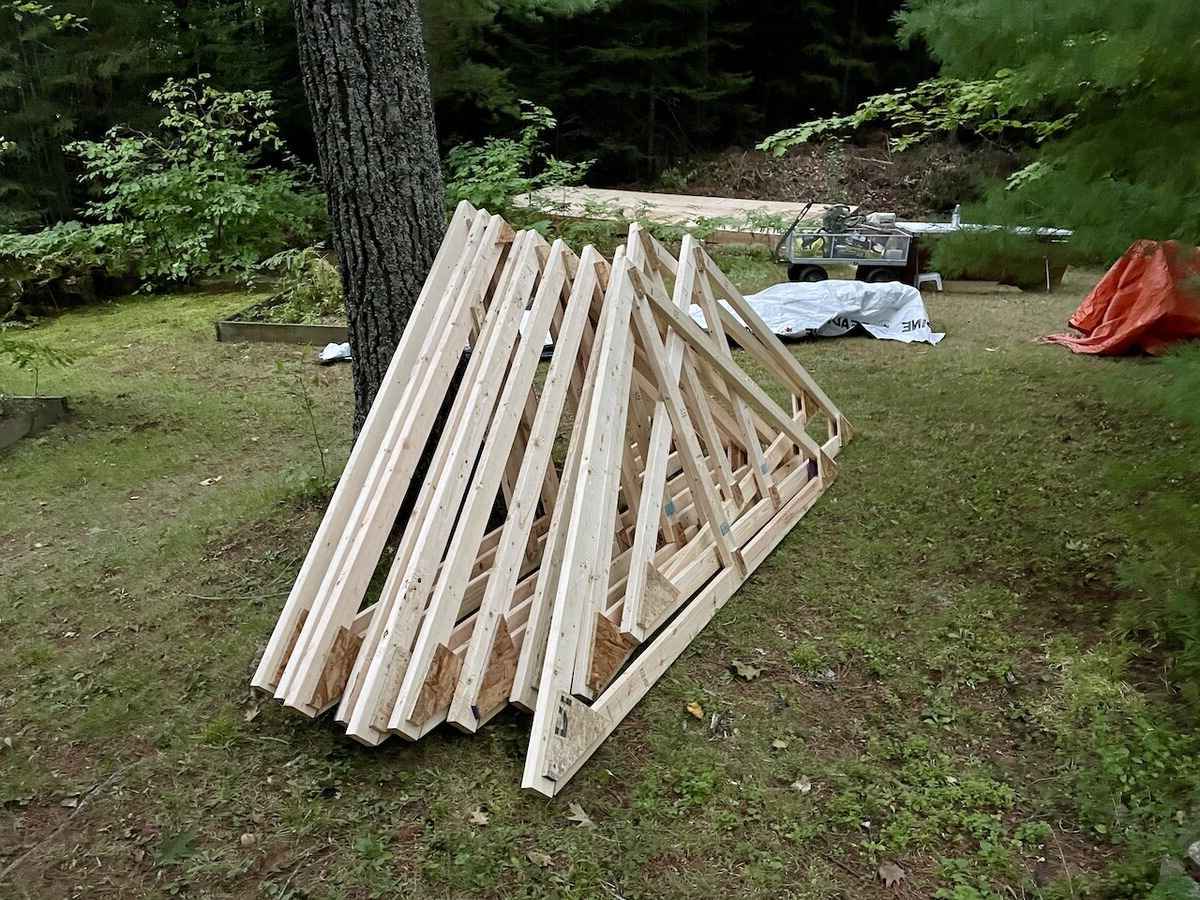
Depending on your shed's design, you'll either install pre-built roof trusses or construct rafters on-site. Position the trusses or rafters at the specified intervals and secure them to the top plates of the walls. Ensure they are aligned and properly braced to support the roof load effectively.
Read more: DIY Outdoor Bathroom Renovation Guide
6. Adding Structural Bracing
To reinforce the frame's stability, add diagonal bracing to the walls and secure them to the bottom plates and top plates. Additionally, install blocking between the studs to enhance the rigidity of the frame and prevent lateral movement.
By meticulously executing the frame construction process, you'll establish a robust and reliable framework for your 10×10 shed. The completed frame sets the stage for the subsequent steps of adding the roof, siding, doors, and windows, bringing you closer to the fulfillment of your DIY storage space vision.
Adding the Roof and Siding
Once the frame of your 10×10 shed is in place, the next crucial step is adding the roof and siding to enclose the structure and provide protection from the elements. This phase not only contributes to the shed's structural integrity but also significantly influences its aesthetic appeal. Here's a detailed guide on the process of adding the roof and siding to your DIY outdoor storage space:
Roof Installation
-
Sheathing: Begin by installing plywood sheathing on the roof trusses or rafters. Use exterior-grade plywood of appropriate thickness to ensure a sturdy and reliable base for the roofing material.
-
Underlayment: Apply roofing underlayment over the sheathing to provide an additional layer of protection against moisture and enhance the shed's weather resistance. Choose an underlayment material suitable for the roofing type you plan to install.
-
Roofing Material: Select the roofing material that best suits your shed's design and local climate. Options include asphalt shingles, metal roofing panels, or cedar shakes. Follow the manufacturer's guidelines for proper installation, ensuring that the roofing material is securely fastened and adequately overlapped to prevent water infiltration.
-
Flashing and Edging: Install flashing along the roof edges, valleys, and penetrations to create watertight seals and prevent water from seeping into vulnerable areas. Additionally, add drip edge along the eaves and rakes to promote water runoff and protect the roof's edges.
Siding Installation
-
Selecting Siding: Choose the siding material that aligns with your shed's design, maintenance preferences, and durability requirements. Common options include wood, vinyl, metal, or composite siding. Consider factors such as weather resistance, ease of installation, and visual appeal when making your selection.
-
Installing Siding Panels: Begin installing the siding panels from the bottom of the shed, ensuring that each panel overlaps the one below it to prevent water infiltration. Use appropriate fasteners recommended by the siding manufacturer and follow the recommended spacing and nailing patterns.
-
Corner and Trim Installation: Install corner trim pieces and decorative trim elements to provide a finished look and protect the edges of the siding. Properly installed trim enhances the shed's visual appeal and contributes to its weather resistance.
-
Sealing and Painting: Once the siding is in place, seal any gaps or joints with caulk to prevent water intrusion. If desired, apply a coat of exterior paint or stain to the siding to enhance its longevity and complement your property's aesthetic.
By meticulously following these steps, you'll successfully add the roof and siding to your 10×10 shed, transforming it into a fully enclosed and weather-resistant structure. This phase brings you closer to the completion of your DIY outdoor storage space, setting the stage for the installation of doors, windows, and finishing touches that will elevate the shed's functionality and visual appeal.
Read more: How to Build a Walk-In Closet
Installing Doors and Windows
The installation of doors and windows is a pivotal phase in completing your 10×10 shed, as it not only enhances the functionality of the structure but also contributes to its visual appeal and overall livability. Here's a detailed guide on the process of installing doors and windows to elevate your DIY outdoor storage space:
Installing the Doors
-
Selecting the Doors: Begin by choosing doors that align with your shed's design, security needs, and accessibility requirements. Options range from single or double hinged doors to sliding or overhead garage-style doors. Consider factors such as material, insulation, and durability when making your selection.
-
Preparing the Door Opening: Ensure the door opening is framed to the correct dimensions, allowing sufficient clearance for the door to operate smoothly. Install a sturdy header above the door to support the weight of the structure above it.
-
Mounting the Door: With the help of assistants, carefully position the door in the opening, ensuring it is plumb and level. Secure the door to the framing using appropriate hinges and fasteners, following the manufacturer's guidelines. Test the door for smooth operation and make any necessary adjustments.
-
Adding Weather Stripping and Hardware: Install weather stripping around the door frame to create a tight seal and prevent drafts and moisture infiltration. Add handles, locks, and any desired hardware to complete the door installation, ensuring it provides both security and ease of use.
Installing the Windows
-
Choosing the Windows: Select windows that complement the shed's design, provide adequate natural light, and offer ventilation options. Consider factors such as window size, material, and energy efficiency to meet your specific needs.
-
Preparing the Window Openings: Frame out the window openings to accommodate the selected window size, ensuring they are square and level. Install a sill pan or flashing to direct water away from the window and prevent water damage.
-
Securing the Windows: Carefully place the windows in the openings and secure them using appropriate fasteners. Ensure the windows are plumb and level, and shim them as needed to achieve a precise fit. Seal the gaps around the window frames with caulk to prevent air and water infiltration.
-
Adding Finishing Touches: Install window trim to provide a polished look and protect the edges of the window frames. Consider adding window screens or shutters for additional functionality and aesthetic appeal.
By meticulously following these steps, you'll successfully install doors and windows, transforming your 10×10 shed into a fully functional and inviting space. The addition of doors and windows not only enhances the shed's accessibility and natural lighting but also elevates its overall charm and usability, making it a valuable and versatile asset to your property.
Finishing Touches and Maintenance
With the structural elements of your 10×10 shed in place, it's time to focus on the finishing touches that will elevate its functionality, aesthetics, and longevity. Additionally, implementing a proactive maintenance plan will ensure that your DIY outdoor storage space remains in top condition for years to come.
Read more: DIY Outdoor Grill Station with Roof
Exterior Finishing Touches
-
Trim and Molding: Adding decorative trim and molding to the exterior of the shed can provide a polished look while also protecting the edges of the siding. Choose trim elements that complement the shed's design and ensure they are securely installed to withstand weather exposure.
-
Gutters and Downspouts: Installing gutters and downspouts can effectively manage rainwater runoff, preventing soil erosion around the shed and minimizing water infiltration near the foundation. Properly directing water away from the shed can significantly contribute to its long-term durability.
-
Exterior Lighting: Consider installing exterior lighting to enhance the shed's usability and security, especially during evening hours. Solar-powered lights or low-voltage fixtures can illuminate pathways and the immediate vicinity of the shed, adding both practicality and visual appeal.
Interior Finishing Touches
-
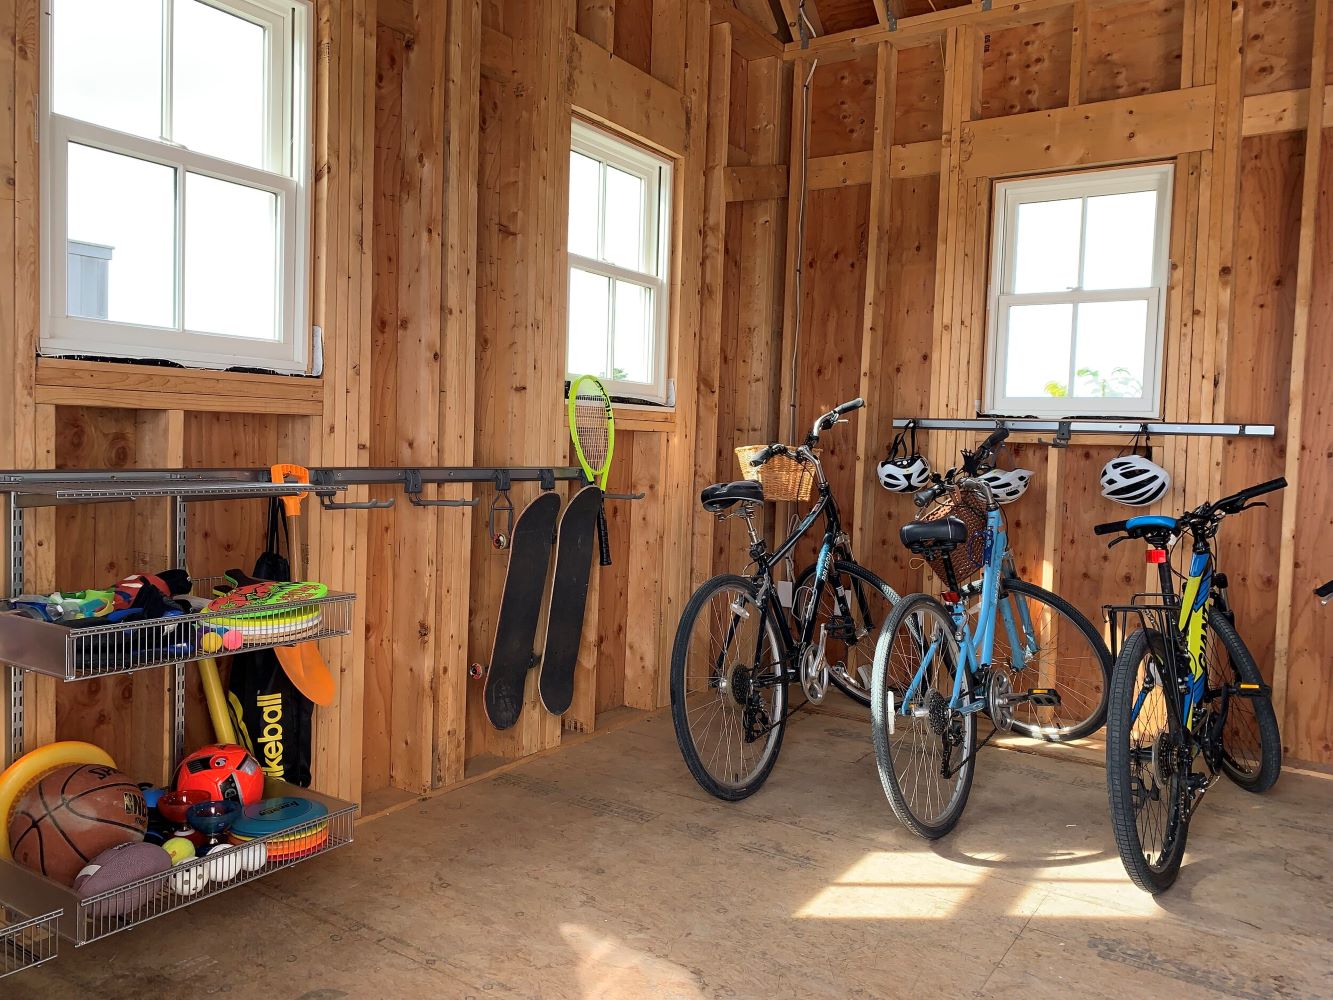
Organization and Storage Solutions: Incorporate shelving, hooks, and storage racks inside the shed to maximize its storage capacity and keep items neatly organized. Utilizing vertical space can free up floor area and make the most of the shed's interior.
-
Insulation and Ventilation: Depending on your climate, adding insulation to the shed's walls and ceiling can regulate interior temperatures, making the space more comfortable for storage and occasional use. Additionally, consider installing vents to promote air circulation and prevent moisture buildup.
-
Interior Lighting: Ensure adequate interior lighting by installing LED fixtures or battery-powered lights. Proper illumination makes it easier to locate items and enhances the shed's usability, especially during darker hours.
Maintenance Guidelines
-
Regular Inspections: Schedule periodic inspections of the shed to check for signs of wear, damage, or pest intrusion. Addressing issues promptly can prevent minor problems from escalating and ensure the shed remains in optimal condition.
-
Exterior Maintenance: Regularly clean the exterior surfaces of the shed to remove dirt, debris, and mildew. Additionally, inspect the roof, siding, and trim for any damage and make necessary repairs to prevent water infiltration and deterioration.
-
Interior Upkeep: Keep the interior of the shed organized and free from clutter to facilitate easy access and maintenance. Address any moisture issues promptly to prevent mold and mildew growth.
-
Seasonal Considerations: Adjust your maintenance routine based on seasonal changes. For example, in colder climates, take measures to protect the shed from snow accumulation and ice formation, while in warmer climates, focus on pest control and ventilation.
By attending to these finishing touches and implementing a proactive maintenance regimen, you can ensure that your 10×10 shed remains a valuable and reliable asset, providing functional storage space and enhancing the overall appeal of your property.
Conclusion
Congratulations on completing the construction of your 10×10 shed! This DIY endeavor has not only added a practical and versatile storage space to your property but has also showcased your creativity, craftsmanship, and dedication to enhancing your outdoor living environment. As you stand back and admire the finished shed, it's evident that the time and effort invested in this project have yielded a valuable and rewarding addition to your home.
Your 10×10 shed stands as a testament to your ability to envision, plan, and execute a significant construction project. From carefully selecting the ideal location for the shed to meticulously crafting the foundation, frame, roof, and siding, each step has been a testament to your commitment to quality and attention to detail. The doors and windows now provide accessibility, natural light, and ventilation, transforming the shed into a functional and inviting space.
The finishing touches, both inside and out, have added a touch of personalization and practicality to the shed. The thoughtful addition of trim, gutters, lighting, and interior organization solutions has elevated the shed's functionality and aesthetic appeal. Furthermore, your proactive approach to maintenance ensures that the shed will remain a durable and reliable asset for years to come.
Beyond the tangible outcomes, the journey of building your 10×10 shed has likely provided a sense of fulfillment, accomplishment, and newfound skills. Whether you embarked on this project as a seasoned DIY enthusiast or as someone venturing into the world of construction for the first time, the knowledge and experience gained throughout this process are invaluable.
As you move forward, the 10×10 shed stands ready to serve as a hub for storing tools, equipment, and outdoor essentials, contributing to a more organized and efficient living space. Additionally, it offers the potential for creative repurposing, such as a workshop, hobby space, or a cozy retreat for relaxation amidst the beauty of your outdoor surroundings.
In conclusion, the completion of your 10×10 shed marks not only the end of a construction project but the beginning of a new chapter in your property's functionality and aesthetics. Your dedication to this endeavor has not only enriched your living environment but has also empowered you with the confidence and skills to take on future DIY projects with enthusiasm and expertise. The 10×10 shed stands as a testament to your creativity, resourcefulness, and commitment to enhancing your home, and it will continue to do so for years to come.

