
Home>Create & Decorate>DIY & Crafts>20×20 Shed Plans: DIY Guide To Building A Spacious Outdoor Retreat
DIY & Crafts
20×20 Shed Plans: DIY Guide To Building A Spacious Outdoor Retreat
Published: February 23, 2024

Senior Editor in Create & Decorate, Kathryn combines traditional craftsmanship with contemporary trends. Her background in textile design and commitment to sustainable crafts inspire both content and community.
Discover step-by-step 20x20 shed plans for creating your own DIY outdoor haven. Get expert tips and tricks for building a spacious retreat with this comprehensive guide. Ideal for DIY & Crafts enthusiasts.
(Many of the links in this article redirect to a specific reviewed product. Your purchase of these products through affiliate links helps to generate commission for Twigandthistle.com, at no extra cost. Learn more)
Introduction
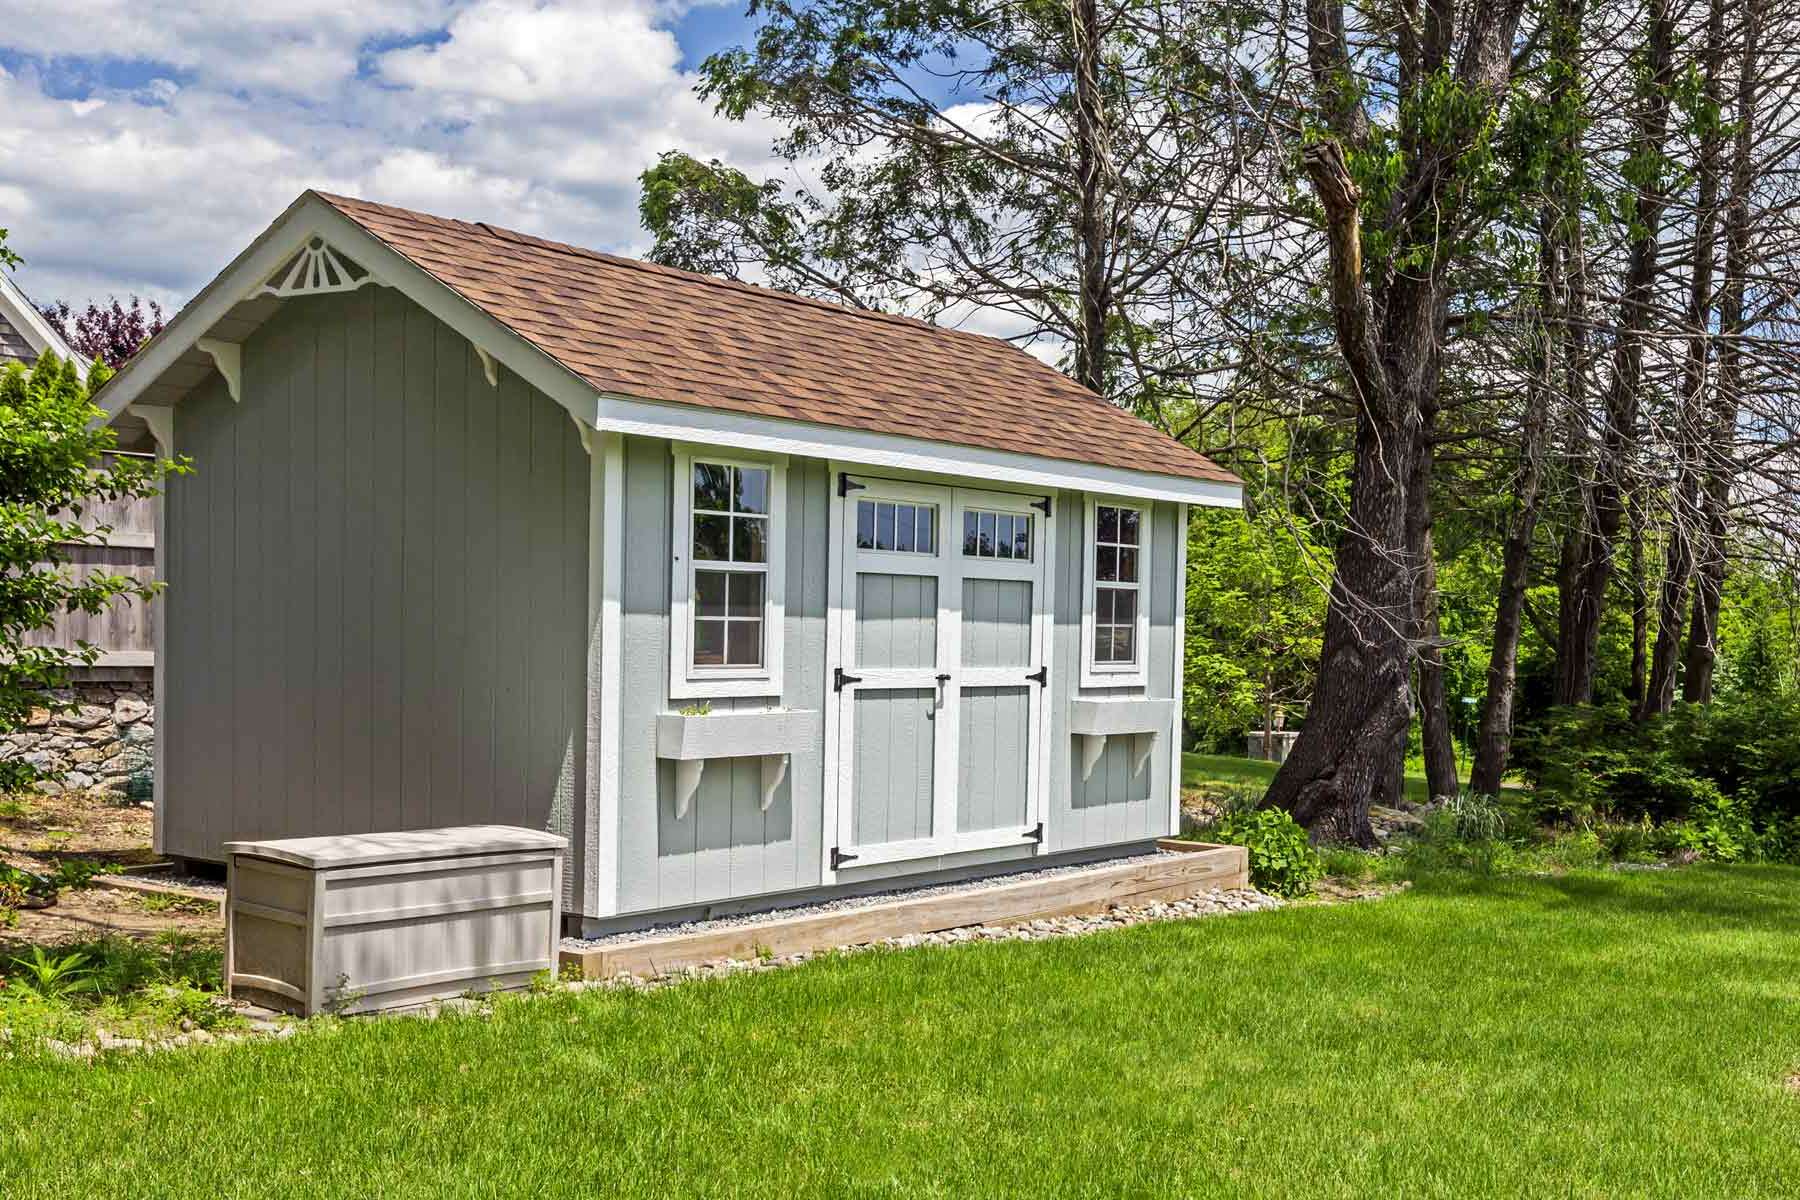
Building a 20×20 shed can be an exciting and rewarding DIY project that offers a multitude of benefits. Whether you're looking to create a spacious outdoor retreat, a workshop for your hobbies, or a storage space for your tools and equipment, a well-constructed shed can serve as a versatile addition to your property. In this comprehensive guide, we'll walk you through the step-by-step process of building a 20×20 shed, from selecting the ideal location to adding the finishing touches to the interior design.
Constructing a shed from scratch allows you to customize the space to suit your specific needs and preferences. With careful planning and attention to detail, you can create a functional and aesthetically pleasing structure that complements your outdoor space. Additionally, taking on this DIY project provides an opportunity to develop new skills, gain a sense of accomplishment, and potentially save on the costs associated with hiring a professional contractor.
By following this guide, you'll gain valuable insights into the essential considerations for building a 20×20 shed, including selecting the right location, gathering the necessary materials and tools, preparing the foundation, constructing the frame, installing the roof and siding, adding windows and doors, and putting the finishing touches on the interior. Throughout the process, we'll provide tips, tricks, and best practices to help you navigate each stage with confidence and precision.
Whether you're an experienced DIY enthusiast or embarking on your first major construction project, this guide is designed to empower you with the knowledge and resources needed to bring your vision of a 20×20 shed to life. So, roll up your sleeves, gather your tools, and let's embark on this fulfilling journey of creating a spacious and functional outdoor retreat right in your own backyard.
Choosing the Right Location for Your Shed
Selecting the optimal location for your 20×20 shed is a crucial first step in the construction process. The placement of your shed can significantly impact its functionality, accessibility, and overall aesthetic appeal. Here are essential factors to consider when choosing the right location for your shed:
-
Zoning Regulations: Before determining the shed's placement, familiarize yourself with local zoning regulations and building codes. These guidelines often dictate setback requirements, which specify the minimum distance your shed must be from property lines, fences, and other structures. Adhering to these regulations is essential to avoid potential legal issues and ensure compliance with local ordinances.
-
Accessibility: Consider how easily accessible you want your shed to be. If you plan to use it as a workshop or storage space for tools and equipment, placing it within a convenient distance from your home can streamline your daily activities. Additionally, assess the pathway to the shed, ensuring it is clear of obstacles and easily navigable.
-
Sunlight and Shade: Evaluate the sun's path throughout the day to determine the shed's exposure to sunlight and shade. Depending on your intended use for the shed, you may prefer a location that receives ample natural light or one that offers shade during the hottest parts of the day. Understanding the sun's patterns can help you optimize the shed's comfort and energy efficiency.
-
Ground Stability: Assess the stability of the ground where you plan to install the shed. Ideally, the location should have firm, level ground to provide a solid foundation for the structure. Avoid areas prone to water accumulation or significant ground shifting, as these conditions can compromise the shed's stability over time.
-
Landscaping and Aesthetics: Take into account the surrounding landscape and how the shed will integrate visually with its environment. Consider factors such as existing trees, shrubs, and other landscaping features that may enhance or obstruct the shed's appearance. Additionally, think about how the shed's placement can contribute to the overall aesthetic of your outdoor space.
By carefully evaluating these factors, you can make an informed decision about the ideal location for your 20×20 shed. Once you've identified a suitable spot, you can proceed with confidence to the next steps of gathering materials and preparing the foundation for your exciting DIY project.
Gathering Materials and Tools
Gathering the necessary materials and tools is a pivotal phase in the construction of a 20×20 shed. By ensuring that you have all the required items at the outset, you can streamline the building process and minimize interruptions. Here's a comprehensive list of materials and tools you'll need to embark on this DIY endeavor:
Materials
- Lumber: Purchase high-quality lumber in the appropriate dimensions for framing the shed's walls, roof, and floor. Opt for pressure-treated wood for enhanced durability and resistance to decay.
- Plywood: Acquire plywood for sheathing the walls and roof. Choose a thickness that aligns with your structural requirements and local building codes.
- Roofing Materials: Select roofing shingles, metal panels, or other roofing materials based on your design preferences and the shed's intended use.
- Siding: Choose siding materials such as vinyl, wood, or composite panels to enclose the exterior walls of the shed.
- Fasteners: Stock up on nails, screws, and other fasteners suitable for securing the various components of the shed's structure.
- Concrete: If your shed will have a concrete foundation, procure the necessary concrete mix and reinforcement materials.
- Insulation and Vapor Barrier: Depending on your climate, consider insulation and a vapor barrier to regulate the shed's temperature and moisture levels.
- Windows and Doors: If your design includes windows and doors, acquire these components along with the necessary hardware for installation.
Tools
- Measuring and Marking Tools: Ensure you have a tape measure, carpenter's square, and marking tools to accurately measure and layout the shed's components.
- Cutting Tools: Equip yourself with a circular saw, jigsaw, and handsaw for cutting lumber, plywood, and other materials to the required dimensions.
- Fastening Tools: Have a hammer, nail gun, and screwdriver on hand for fastening the structural elements and finishing details.
- Level and Plumb Line: Use a level and plumb line to ensure that the shed's components are aligned and positioned correctly during construction.
- Safety Gear: Prioritize safety by wearing protective gear, including gloves, safety glasses, and a dust mask, especially when cutting and handling materials.
By procuring these materials and tools, you'll set the stage for a smooth and efficient construction process. With everything in place, you can proceed confidently to the next phase of preparing the foundation for your 20×20 shed, bringing you one step closer to realizing your vision of a functional and inviting outdoor retreat.
Preparing the Foundation
The foundation serves as the anchor for your 20×20 shed, providing stability and structural integrity. Properly preparing the foundation is essential to ensure the longevity and functionality of the entire structure. Here's a detailed overview of the steps involved in preparing the foundation for your shed:
Clearing and Leveling the Site
Begin by clearing the chosen site of any debris, vegetation, or obstructions. Use a shovel, rake, or a small excavator to remove rocks, roots, and other impediments that could interfere with the foundation. Once the area is clear, assess the ground for levelness. If the ground is uneven, use a shovel and a long straight board, known as a screed, to level the site. This step is crucial for establishing a solid and stable base for the shed.
Marking the Foundation Layout
With the site cleared and leveled, mark the layout of the foundation according to your shed's dimensions. Use stakes and string to outline the perimeter of the foundation, ensuring that the lines are straight and the corners are square. Double-check the measurements to guarantee accuracy, as any discrepancies at this stage can impact the entire construction process.
Excavating and Forming the Footings
Next, excavate the marked area to create trenches for the footings. The depth of the trenches will depend on the local building codes and the soil conditions in your area. Typically, the footings should extend below the frost line to prevent shifting and settling. Use a shovel or a mechanical excavator to dig the trenches to the required depth and width. Once the trenches are excavated, construct the footing forms using sturdy boards and stakes, ensuring that they are level and properly aligned.
Pouring the Concrete Footings
After the forms are in place, it's time to pour the concrete for the footings. Prepare the concrete mix according to the manufacturer's instructions, ensuring the proper ratio of cement, aggregate, and water. Carefully pour the concrete into the forms, filling them to the top. Use a screed or a trowel to level the surface of the concrete and eliminate any air pockets. Allow the concrete to cure and harden according to the recommended timeframe before proceeding to the next stage of the foundation construction.
Installing the Foundation Piers or Slab
Depending on your shed design and local building requirements, you may need to install foundation piers or a concrete slab within the perimeter of the footings. If using piers, carefully place them on top of the cured footings, ensuring they are evenly spaced and aligned. For a concrete slab, prepare the area within the footings by compacting the soil and installing a layer of gravel for drainage. Then, pour and level the concrete to create a smooth and level surface for the shed's floor.
By meticulously following these steps, you'll establish a robust and reliable foundation for your 20×20 shed, setting the stage for the subsequent phases of building the frame, installing the roof and siding, and adding the finishing touches. With the foundation in place, you're one step closer to realizing your vision of a functional and inviting outdoor retreat right in your own backyard.
Building the Frame
With the foundation set, it's time to embark on the pivotal phase of building the frame for your 20×20 shed. The frame serves as the structural skeleton of the shed, providing support for the walls, roof, and overall stability of the structure. Here's a comprehensive overview of the steps involved in constructing the frame:
1. Assembling the Lumber
Begin by gathering the pre-cut lumber for framing the walls and roof. Ensure that the lumber is of high quality and free from any defects that could compromise the structural integrity of the shed. Lay out the pieces according to the construction plan, organizing them by size and purpose to streamline the assembly process.
2. Constructing the Wall Frames
Start by constructing the wall frames on a level surface, such as the shed's foundation or a separate work area. Use the appropriate size and type of lumber to build the frames, following the precise measurements and layout specified in the construction plan. Secure the frame components together using nails or screws, ensuring that the corners are square and the frame is rigid and stable.
3. Erecting the Wall Frames
Once the wall frames are assembled, carefully lift and position them on the foundation, aligning them according to the layout plan. Use temporary bracing to hold the frames in place while ensuring they are plumb and level. Secure the frames to the foundation using anchor bolts or other suitable fasteners, anchoring them securely to provide stability and resistance to external forces.
4. Installing the Roof Trusses
With the wall frames in place, it's time to install the roof trusses. Position the pre-assembled trusses on top of the wall frames, ensuring they are spaced evenly according to the design specifications. Secure the trusses to the wall plates using metal connectors or framing hardware, ensuring they are aligned and properly braced to support the roof's weight and withstand external loads.
5. Adding Structural Bracing
To reinforce the frame's stability, add diagonal bracing between the wall studs and roof trusses. These braces help distribute the structural loads and prevent the frame from twisting or shifting under stress. Install the bracing according to the recommended angles and positions, ensuring they are securely fastened to the frame components.
6. Checking for Alignment and Stability
Once the frame is fully assembled, carefully inspect it to ensure that all components are aligned, secure, and structurally sound. Use a level and measuring tools to verify that the walls are plumb, the roof trusses are level, and the entire frame is free from any structural deficiencies. Address any issues promptly to ensure the frame meets the required standards for stability and safety.
By meticulously following these steps, you'll successfully construct the frame for your 20×20 shed, laying the groundwork for the subsequent phases of installing the roof and siding, adding windows and doors, and putting the finishing touches on the interior. With the frame in place, you're one step closer to realizing your vision of a functional and inviting outdoor retreat right in your own backyard.
Installing the Roof and Siding
After successfully constructing the frame for your 20×20 shed, the next crucial phase involves installing the roof and siding to enclose and protect the structure from the elements. This phase not only enhances the shed's durability and weather resistance but also contributes to its overall aesthetic appeal. Here's a detailed overview of the steps involved in installing the roof and siding for your shed:
1. Roof Installation
Begin by preparing the roof sheathing, which serves as the base for the roofing materials. Cut the sheathing panels to the required dimensions and securely fasten them to the roof trusses using nails or screws. Ensure that the sheathing is installed evenly and aligns with the edges of the roof, providing a smooth and uniform surface for the roofing materials.
Next, select the roofing materials based on your design preferences and local climate conditions. Whether you opt for asphalt shingles, metal panels, or another roofing option, carefully follow the manufacturer's guidelines for installation. Start from the bottom of the roof, overlapping the rows of shingles or panels to ensure proper water drainage and weatherproofing. Secure the roofing materials according to the recommended fastening methods, paying attention to the edges and ridges for a watertight seal.
2. Siding Installation
With the roof in place, turn your attention to installing the siding to enclose the shed's exterior walls. Select the siding materials that align with your design vision and provide the desired level of durability and visual appeal. Whether you choose vinyl, wood, or composite siding, carefully measure and cut the panels to fit the dimensions of the walls.
Begin installing the siding from the bottom of the walls, ensuring that each panel overlaps the one below it to prevent water infiltration. Use appropriate fasteners to secure the siding to the wall frames, ensuring that the panels are aligned and level. Pay attention to corner and edge details, ensuring that the siding provides a seamless and weather-resistant barrier for the shed's exterior.
3. Finishing Touches
Once the roof and siding are installed, take the time to inspect the entire exterior for any gaps, loose components, or imperfections. Address any areas that require additional sealing, caulking, or adjustments to ensure that the roof and siding provide complete protection and visual cohesion. Consider adding trim details, such as fascia boards and soffits, to enhance the shed's appearance and provide additional weather resistance.
By meticulously following these steps, you'll successfully install the roof and siding for your 20×20 shed, bringing you one step closer to completing this rewarding DIY project. With the exterior fully enclosed and weatherproofed, you can proceed to the next phase of adding windows and doors, followed by the exciting stage of putting the finishing touches on the shed's interior design.
Adding Windows and Doors
The addition of windows and doors to your 20×20 shed marks a significant step in enhancing both its functionality and aesthetic appeal. Windows not only allow natural light to illuminate the interior but also facilitate ventilation, creating a more comfortable and inviting space. Similarly, doors provide essential access while contributing to the shed's overall design. Here's a detailed overview of the process of adding windows and doors to your shed:
Selecting Windows
Begin by selecting windows that align with your design preferences and the shed's intended use. Consider factors such as size, style, and energy efficiency when choosing the windows. Double-hung, casement, or awning windows are popular options, each offering unique benefits in terms of ventilation and visual appeal. Additionally, assess the placement of the windows to maximize natural light and airflow within the shed.
Installing Windows
Carefully measure and mark the locations for the windows on the shed's exterior walls, ensuring precise alignment and spacing. Use a saw to create openings for the windows, following the manufacturer's guidelines for the specific window type. Once the openings are prepared, position the windows securely within the frames, ensuring a snug fit. Use shims and fasteners to secure the windows in place, ensuring they are level and properly sealed to prevent air and water infiltration.
Choosing Doors
When selecting doors for your shed, consider the primary function of the space and the level of security and insulation required. Options range from traditional hinged doors to sliding or overhead doors, each offering distinct advantages in terms of accessibility and space utilization. Additionally, consider the material and finish of the doors to complement the shed's exterior and provide long-term durability.
Installing Doors
Prepare the door openings by carefully measuring and framing the spaces to accommodate the selected doors. Ensure that the door frames are plumb and level, providing a solid foundation for the installation. Position the doors within the frames, adjusting them to ensure smooth operation and a proper seal. Install hinges, handles, and locks according to the manufacturer's instructions, ensuring that the doors are secure and functional.
By adding windows and doors to your 20×20 shed, you not only enhance its practicality and visual appeal but also create a more welcoming and versatile space. With these essential elements in place, you're one step closer to completing your DIY project and enjoying the benefits of a well-designed and functional outdoor retreat.
Finishing Touches and Interior Design
As the exterior of your 20×20 shed nears completion, attention turns to the crucial phase of adding the finishing touches and designing the interior space. This stage presents an opportunity to infuse your personal style and preferences into the shed, creating a functional and visually appealing environment. Here's a detailed exploration of the steps involved in adding the finishing touches and designing the interior of your shed:
1. Exterior Detailing
Enhance the visual appeal of the shed's exterior by adding decorative elements and trim details. Consider installing fascia boards, soffits, and corner trims to provide a polished and cohesive look. Additionally, explore options for exterior lighting to illuminate the surroundings and enhance the shed's accessibility and security during evening hours.
2. Interior Layout and Organization
Plan the layout of the interior space to optimize functionality and accommodate your specific needs. If the shed will serve as a workshop, consider incorporating workbenches, tool storage solutions, and shelving to maximize efficiency. For a leisure or relaxation space, explore seating options, storage for recreational equipment, and decorative elements to create a welcoming atmosphere.
3. Lighting and Ventilation
Evaluate the shed's lighting and ventilation needs to ensure a comfortable and well-lit interior. Consider installing windows strategically to maximize natural light and airflow. Explore options for interior lighting, such as overhead fixtures or task lighting, to create a well-lit environment for various activities.
4. Insulation and Climate Control
Depending on your local climate, consider adding insulation to regulate the shed's temperature and improve energy efficiency. Insulation materials can help maintain a comfortable interior environment throughout the year, making the shed suitable for year-round use. Additionally, explore options for climate control, such as portable heaters or fans, to further enhance comfort.
5. Personalization and Decor
Infuse your personality into the shed's interior by adding decorative elements, artwork, and personal touches. Consider incorporating plants, wall art, or decorative accents to create a welcoming and personalized space. Explore color schemes and design themes that resonate with your style and create a cohesive look throughout the interior.
By meticulously attending to these finishing touches and interior design considerations, you'll transform your 20×20 shed into a functional, inviting, and personalized space that aligns with your vision. With the completion of this phase, your DIY journey culminates in the realization of a versatile and aesthetically pleasing outdoor retreat right in your own backyard.
Conclusion
In conclusion, the journey of building a 20×20 shed is a fulfilling and rewarding endeavor that culminates in the creation of a versatile and functional outdoor retreat. Throughout the comprehensive DIY guide, we've explored the essential steps and considerations involved in constructing a shed from the ground up, from selecting the ideal location to adding the finishing touches to the interior design.
By carefully choosing the right location for the shed, considering factors such as zoning regulations, accessibility, sunlight exposure, ground stability, and aesthetic integration, you can lay the foundation for a successful construction project. This initial phase sets the stage for the subsequent steps, ensuring that the shed harmonizes with its surroundings and serves its intended purpose effectively.
Gathering the necessary materials and tools is a pivotal phase that streamlines the construction process and minimizes interruptions. By procuring high-quality lumber, roofing materials, siding, windows, doors, and a comprehensive set of tools, you set the stage for a smooth and efficient building experience.
The meticulous preparation of the foundation, including clearing and leveling the site, marking the foundation layout, excavating and forming the footings, pouring the concrete, and installing the foundation piers or slab, establishes a robust and reliable base for the shed. This critical phase ensures the stability and longevity of the structure, laying the groundwork for the subsequent stages of construction.
Building the frame, installing the roof and siding, adding windows and doors, and designing the interior space are transformative phases that bring the shed to life, infusing it with structural integrity, weather resistance, functionality, and personal style. These stages represent the culmination of careful planning, precise execution, and a creative vision coming to fruition.
As the finishing touches are added and the interior design takes shape, the shed evolves into a welcoming and personalized space that reflects the unique preferences and needs of its creator. From exterior detailing to interior layout, lighting, insulation, and decor, every aspect contributes to the shed's overall appeal and usability.
In essence, the process of building a 20×20 shed transcends the physical construction; it embodies a journey of creativity, skill development, and the fulfillment of a vision. Whether the shed serves as a workshop, storage space, leisure retreat, or a combination of purposes, its creation represents a significant achievement and a valuable addition to the property.
Ultimately, the completion of a 20×20 shed is a testament to the power of DIY craftsmanship, thoughtful planning, and the satisfaction of bringing a vision to life. As the doors of the shed open to reveal a space that seamlessly integrates with its surroundings and fulfills its intended purpose, the sense of accomplishment and pride is a testament to the transformative nature of DIY construction.