
Home>Home & Furniture>Garage & Basement>How To Build A Portable Shed
Garage & Basement
How To Build A Portable Shed
Published: February 20, 2024
Editor-in-Chief with a decade in home renovation and a passion for vintage furniture. Diane is known for her weekend treasure hunts at flea markets, enriching our content with unique style insights.
Learn how to build a portable shed for your garage & basement with our step-by-step guide. Get expert tips and advice for a sturdy and functional storage solution.
(Many of the links in this article redirect to a specific reviewed product. Your purchase of these products through affiliate links helps to generate commission for Twigandthistle.com, at no extra cost. Learn more)
Introduction
Building a portable shed can be a rewarding and practical project for homeowners seeking additional storage space or a dedicated workspace. Whether you need a place to store gardening tools, outdoor equipment, or create a workshop, a portable shed offers flexibility and convenience. By following a few simple steps and utilizing basic tools and materials, you can construct a portable shed that meets your specific needs.
A portable shed provides the advantage of mobility, allowing you to easily relocate it within your property or even transport it to a new location if necessary. This flexibility is particularly beneficial for renters or individuals who may need to move in the future. Additionally, a well-built portable shed can enhance the aesthetic appeal of your outdoor space while serving a practical purpose.
In this comprehensive guide, we will walk you through the step-by-step process of building a portable shed. From gathering the necessary materials and tools to adding the finishing touches, each stage of the construction will be thoroughly explained to ensure a successful and satisfying outcome. Whether you are a seasoned DIY enthusiast or a novice builder, this guide will equip you with the knowledge and confidence to embark on this fulfilling project.
So, roll up your sleeves, gather your tools, and let's dive into the exciting world of building a portable shed. With careful planning and attention to detail, you'll soon have a versatile and functional structure that complements your property and meets your storage or workspace requirements.
Step 1: Gather Materials and Tools
Before embarking on the construction of a portable shed, it is essential to gather all the necessary materials and tools. This step lays the foundation for a smooth and efficient building process, ensuring that you have everything required to bring your project to fruition.
Materials
- Lumber: Select high-quality, pressure-treated lumber for the shed's framework and floor joists. The dimensions of the lumber will depend on the size of the shed you plan to build.
- Plywood: Acquire sturdy plywood for the shed's flooring, walls, and roof sheathing. Opt for plywood with a thickness suitable for structural support.
- Siding: Choose durable and weather-resistant siding material, such as T1-11 or vinyl siding, to protect the shed from the elements.
- Roofing Materials: Consider asphalt shingles or metal roofing panels to ensure proper protection from rain and other environmental factors.
- Fasteners: Stock up on nails, screws, and other fasteners suitable for outdoor construction. Stainless steel or galvanized fasteners are ideal for withstanding outdoor conditions.
- Doors and Windows: If your design includes doors and windows, ensure you have these components ready for installation. Select doors and windows designed for outdoor use, equipped with proper sealing and security features.
Tools
- Circular Saw: A reliable circular saw will be indispensable for cutting lumber and plywood to the required dimensions.
- Hammer and Nail Gun: Both a hammer and a nail gun will come in handy for securing framing members and attaching siding and roofing materials.
- Level and Square: These essential tools will help ensure that the shed's foundation and framework are accurately aligned and squared during construction.
- Power Drill: A power drill with screwdriver bits will expedite the assembly process by swiftly driving screws into place.
- Measuring Tape: Accurate measurements are crucial in construction, making a measuring tape an indispensable tool for this project.
- Safety Gear: Prioritize safety by equipping yourself with protective gear, including goggles, gloves, and a dust mask, to safeguard against potential hazards during construction.
By meticulously gathering the required materials and tools, you set the stage for a successful and efficient construction process. With these essentials at your disposal, you are ready to move on to the next step: choosing an optimal location for your portable shed.
Step 2: Choose a Location
Selecting the ideal location for your portable shed is a crucial decision that significantly impacts its functionality and longevity. Before proceeding with the construction, carefully assess your property to determine the most suitable placement for the shed. Consider the following factors to make an informed choice:
Accessibility and Convenience
Choose a location that offers convenient access to the shed. This ensures that retrieving and storing items becomes a hassle-free task. Additionally, consider the proximity of the shed to areas where you frequently require its contents, such as the garden, driveway, or outdoor workspace.
Ground Stability and Drainage
Opt for a level and well-drained area for the shed's placement. A stable foundation is essential for the structural integrity of the shed, preventing issues such as uneven settling or water accumulation. Ensure that the chosen location promotes proper drainage to safeguard the shed from potential water damage.
Sunlight and Ventilation
Take into account the sun's path and prevailing wind direction when selecting the shed's location. Positioning the shed to receive ample natural light and ventilation can help prevent moisture buildup and create a comfortable environment inside the structure. Adequate sunlight also supports the longevity of the shed's materials by reducing the risk of mold and mildew growth.
Property Boundaries and Regulations
Respect property boundaries and local regulations when choosing the shed's location. Ensure that the shed is positioned within your property lines and complies with any zoning or building codes in your area. This proactive approach prevents potential disputes with neighbors and ensures legal compliance.
Aesthetic Considerations
Harmonize the shed's placement with the overall aesthetics of your property. While aiming for practicality, consider how the shed's location contributes to the visual appeal of your outdoor space. Strategic placement can enhance the landscape and contribute to a cohesive and attractive property layout.
By carefully considering these factors, you can confidently select a location that optimizes the functionality, durability, and visual appeal of your portable shed. Once the location is determined, you can proceed to the next step: building the foundation for the shed.
Step 3: Build the Foundation
The foundation serves as the anchor of any structure, providing stability and support. When constructing a portable shed, the foundation plays a pivotal role in ensuring the longevity and structural integrity of the entire building. Here's a detailed overview of the essential steps involved in building a solid foundation for your portable shed.
Assess the Ground
Before commencing the foundation construction, carefully assess the ground where the shed will be placed. Ensure that the chosen area is level and free from any obstructions such as rocks, tree roots, or debris. If the ground is uneven, consider using a shovel or a small excavator to level the area and remove any impediments that could compromise the foundation's stability.
Choose the Foundation Type
There are various foundation options to consider, depending on your specific needs and the shed's size. Common foundation types for portable sheds include concrete piers, concrete blocks, and skids. Concrete piers provide excellent support and stability, while concrete blocks offer a versatile and cost-effective solution. Skids, which are pressure-treated beams placed directly on the ground, are ideal for smaller sheds and offer portability.
Prepare the Foundation Site
Once the foundation type is determined, prepare the site by marking the locations where the foundation elements will be placed. If using concrete piers or blocks, mark the spots where each pier or block will be positioned. For skids, clear the ground of any vegetation and debris, ensuring a clean and level surface for the beams to rest upon.
Install the Foundation Elements
If opting for concrete piers or blocks, begin by digging holes at the marked locations and then carefully place the piers or blocks in position. Ensure that they are level and properly aligned to support the shed's weight evenly. For skids, position the pressure-treated beams parallel to each other, ensuring they are adequately spaced to accommodate the shed's dimensions.
Secure the Foundation
Once the foundation elements are in place, it's crucial to secure them to prevent shifting or movement. If using concrete piers or blocks, backfill the holes with soil and compact it firmly around the piers or blocks to secure them in position. For skids, use metal ground anchors or heavy-duty stakes to secure the beams to the ground, enhancing stability and preventing shifting.
By meticulously following these steps, you can establish a robust and reliable foundation for your portable shed. A well-constructed foundation sets the stage for the subsequent stages of shed construction, ensuring a sturdy and durable structure that meets your storage or workspace needs. With the foundation in place, you are ready to proceed to the next phase of building the frame for your portable shed.
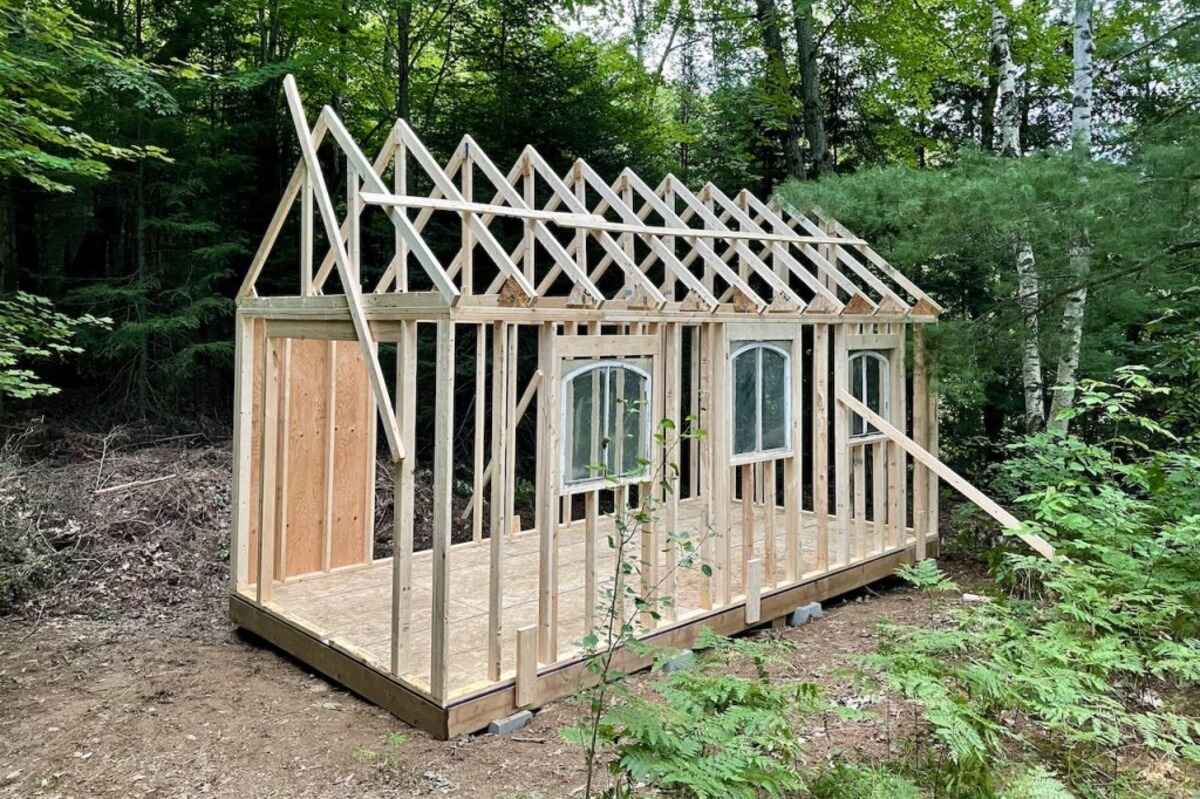
Step 4: Construct the Frame
The construction of the frame is a pivotal stage in building a portable shed, as it forms the structural skeleton that supports the entire edifice. A well-built frame ensures the shed's stability, durability, and resilience against external elements. Here's a comprehensive guide to constructing the frame for your portable shed.
Frame Design and Planning
Before commencing the construction, it's essential to have a clear understanding of the shed's design and dimensions. Whether you opt for a traditional gable roof or a more contemporary design, precise measurements and a detailed blueprint are crucial. Plan the placement of wall studs, roof trusses, and door and window openings to ensure a cohesive and functional frame.
Cut and Assemble Lumber
Using the gathered lumber and a reliable circular saw, carefully cut the framing members according to the predetermined dimensions. The framing components typically include wall studs, top and bottom plates, roof trusses, and any additional bracing required for structural integrity. Once cut, organize the lumber based on its purpose to streamline the assembly process.
Frame Assembly
Begin by constructing the walls of the shed, starting with the placement of the bottom plates on the foundation. Secure the wall studs vertically between the bottom and top plates, ensuring they are evenly spaced according to the shed's design. Use a level to guarantee that the walls are plumb and square, essential for the overall stability of the structure.
Next, assemble the roof trusses according to the shed's roof design. Carefully position and secure the trusses on top of the walls, ensuring they are adequately braced and aligned. This step is critical in providing the shed with a robust and reliable roof structure capable of withstanding various weather conditions.
Bracing and Reinforcement
To fortify the frame, incorporate diagonal bracing within the walls and roof structure. Diagonal bracing enhances the shed's resistance to lateral forces, such as wind, and prevents the frame from twisting or shifting. Additionally, consider adding reinforcement to areas where doors and windows will be installed to ensure adequate support for these openings.
Quality Assurance
Throughout the frame construction process, consistently assess the alignment, levelness, and overall integrity of the structure. Address any discrepancies promptly to maintain the frame's stability and ensure that it aligns with the intended design. Prioritize precision and attention to detail to lay a solid foundation for the subsequent stages of shed construction.
By meticulously following these steps, you can successfully construct a sturdy and reliable frame for your portable shed. The completion of this stage sets the stage for adding siding, roofing, and other finishing touches, bringing your vision of a functional and versatile shed closer to reality. With the frame in place, you are ready to progress to the next phase of building your portable shed.
Step 5: Add Siding and Roofing
With the frame of your portable shed securely in place, the next crucial step is to add siding and roofing to enclose and protect the structure. This phase not only enhances the shed's visual appeal but also ensures its resilience against the elements. Here's a detailed guide on adding siding and roofing to your portable shed.
Siding Installation
-
Selecting the Siding: Choose a durable and weather-resistant siding material that complements the overall aesthetics of your property. Options such as T1-11 plywood siding, vinyl siding, or metal panels offer varying degrees of durability and visual appeal.
-
Preparing the Walls: Before installing the siding, ensure that the walls are clean, dry, and free from any protrusions. Address any protruding nails or uneven surfaces to provide a smooth and even foundation for the siding.
-
Cutting and Fitting: Measure and cut the siding panels to the appropriate dimensions, ensuring a precise fit. Begin installing the siding from the bottom of the shed, overlapping each panel to prevent water infiltration. Use galvanized nails or screws to secure the siding to the frame, maintaining consistent spacing between fasteners.
-
Corner and Trim Installation: Install corner trims and other decorative elements to provide a polished and professional finish to the shed's exterior. Properly fitted trims and corners enhance the structural integrity of the siding while adding aesthetic appeal.
Roofing Installation
-
Choosing the Roofing Material: Select a roofing material that suits your climate and aesthetic preferences. Common options include asphalt shingles, metal roofing panels, or corrugated fiberglass panels. Ensure that the chosen material offers adequate protection against rain, snow, and UV exposure.
-
Applying Underlayment: Before installing the roofing material, apply a weather-resistant underlayment to the roof sheathing. This underlayment acts as a secondary barrier against moisture and enhances the shed's overall weatherproofing.
-
Installing the Roofing Material: Commence the installation of the roofing material, starting from the bottom and working your way up. Follow the manufacturer's guidelines for the specific roofing material to ensure proper overlap and fastening. Secure the roofing material using appropriate fasteners, such as roofing nails or screws, to withstand wind uplift and other environmental stressors.
-
Flashing and Edging: Install flashing around roof penetrations, such as vents and chimneys, to prevent water intrusion. Additionally, apply edge trims and ridge caps to provide a clean and watertight finish to the roof's edges and ridges.
By meticulously following these steps, you can effectively add siding and roofing to your portable shed, transforming it into a fully enclosed and weather-resistant structure. This phase brings you closer to the completion of your portable shed, setting the stage for the installation of doors, windows, and other finishing touches. With the siding and roofing in place, your shed is well on its way to becoming a functional and visually appealing addition to your property.
Step 6: Install Doors and Windows
The installation of doors and windows marks a significant milestone in the construction of a portable shed, as it adds functionality, accessibility, and natural light to the structure. Properly installed doors and windows not only enhance the shed's aesthetic appeal but also contribute to its overall usability and comfort. Here's a detailed guide on the essential steps involved in installing doors and windows for your portable shed.
Preparing for Installation
Before installing the doors and windows, carefully measure the openings to ensure a precise fit for the selected components. Ensure that the frame surrounding each opening is structurally sound and free from any obstructions that could impede the installation process. Additionally, verify that the openings are adequately flashed and sealed to prevent water infiltration and ensure long-term durability.
Installing the Doors
Begin by installing the doors, starting with the attachment of the door frame to the shed's structure. Ensure that the frame is securely anchored and aligned to facilitate smooth operation and a proper seal. Once the frame is in place, carefully hang the door on its hinges, ensuring that it swings freely and closes securely. Install appropriate weather-stripping and door sweeps to enhance the shed's energy efficiency and weather resistance. Finally, test the door's functionality and make any necessary adjustments to ensure a proper fit and smooth operation.
Adding Windows
When installing windows, carefully position the window frames within the designated openings, ensuring a snug and secure fit. Use shims to level and square the frames, providing a stable foundation for the windows. Secure the frames in place using appropriate fasteners, ensuring that they are firmly anchored to withstand external forces. Once the frames are secure, install the window sashes, ensuring smooth operation and a tight seal. Apply exterior caulking around the window frames to prevent water infiltration and enhance the shed's weatherproofing.
Enhancing Security and Functionality
Incorporate appropriate locking mechanisms for the doors and windows to enhance security and safeguard the shed's contents. Consider adding window screens to promote ventilation while preventing pests from entering the shed. Additionally, install window treatments, such as blinds or curtains, to control light and privacy within the shed. Prioritize the functionality and safety of the doors and windows to create a comfortable and secure environment within the shed.
By meticulously following these steps, you can successfully install doors and windows, elevating the functionality, aesthetics, and comfort of your portable shed. With these essential components in place, your shed is poised to fulfill its intended purpose, whether as a storage space, workshop, or recreational area. The installation of doors and windows brings you closer to the completion of your portable shed, setting the stage for the final phase of adding finishing touches and personalizing the space to suit your specific needs and preferences.
Step 7: Finishing Touches
As you approach the final phase of building your portable shed, it's time to add the finishing touches that will elevate its functionality, aesthetics, and overall appeal. These details not only contribute to the shed's visual charm but also enhance its usability and comfort. Here's a comprehensive overview of the essential finishing touches to complete your portable shed construction.
Interior and Exterior Treatment
Begin by addressing the interior and exterior surfaces of the shed. Apply a protective coat of paint or wood stain to the exterior siding and trim to safeguard the structure from the elements and enhance its visual appeal. Consider using a color that complements your property's overall aesthetic while providing long-lasting protection. For the interior, apply a durable and easy-to-clean finish to the walls and flooring, ensuring a welcoming and functional space.
Shelving and Storage Solutions
Customize the interior of the shed to accommodate your specific storage needs. Install sturdy shelving units or storage racks to maximize vertical space and keep tools, equipment, and other items organized. Consider incorporating hooks, pegboards, or hanging storage systems to efficiently utilize wall space, creating a clutter-free environment within the shed.
Lighting and Electrical Considerations
Enhance the shed's functionality by installing adequate lighting fixtures to illuminate the interior space. Consider energy-efficient LED lights or solar-powered options to minimize electricity consumption. If applicable, consult a qualified electrician to assess the feasibility of adding electrical outlets or wiring to power tools, appliances, or electronic devices within the shed.
Ventilation and Climate Control
Prioritize ventilation to maintain a comfortable and well-ventilated environment inside the shed. Install vents or louvers to promote air circulation and prevent moisture buildup. Additionally, consider incorporating a portable fan or small air conditioning unit to regulate the shed's temperature, ensuring a pleasant workspace or storage area year-round.
Personalization and Landscaping
Add personal touches to the shed's exterior by incorporating landscaping elements around its perimeter. Planting shrubs, flowers, or creating a small garden bed near the shed can enhance its visual integration with the surrounding landscape. Consider adding decorative elements such as outdoor seating, potted plants, or a pathway to create an inviting and harmonious outdoor space.
By meticulously attending to these finishing touches, you can transform your portable shed into a functional, visually appealing, and personalized space that seamlessly integrates with your property. These details not only enhance the shed's practicality but also contribute to the overall ambiance of your outdoor environment. With the completion of these finishing touches, your portable shed stands ready to serve its intended purpose and enrich your property with its versatile presence.
Conclusion
In conclusion, the construction of a portable shed presents a fulfilling journey that culminates in the creation of a versatile and valuable addition to your property. From the initial gathering of materials and tools to the meticulous installation of finishing touches, each step in the process contributes to the realization of a functional and visually appealing structure.
Building a portable shed offers numerous benefits, including the provision of additional storage space, the creation of a dedicated workshop or hobby area, and the enhancement of outdoor organization. The mobility of a portable shed provides the flexibility to adapt to evolving needs, whether relocating within your property or transporting the shed to a new location.
Throughout the construction process, attention to detail and precision are paramount, ensuring the structural integrity, weather resistance, and overall quality of the shed. From selecting an optimal location and building a sturdy foundation to adding siding, roofing, doors, and windows, every aspect of the construction contributes to the shed's durability and functionality.
The finishing touches, including interior and exterior treatments, storage solutions, lighting, ventilation, and personalization, elevate the shed into a personalized and inviting space that seamlessly integrates with your property. These details not only enhance the shed's practicality but also contribute to the overall ambiance of your outdoor environment.
As you stand back and admire the completed portable shed, you can take pride in the accomplishment of creating a structure that not only meets your storage or workspace needs but also enhances the visual appeal and functionality of your property. Whether it serves as a sanctuary for hobbies, a shelter for outdoor equipment, or a workshop for DIY projects, the portable shed stands as a testament to your creativity, craftsmanship, and dedication to enhancing your living space.
In the end, the construction of a portable shed is not just about assembling materials and following steps; it's about creating a space that enriches your lifestyle and adds value to your property. With careful planning, attention to detail, and a touch of creativity, you have successfully brought to life a versatile and enduring structure that will serve you well for years to come.