
Home>Home & Furniture>Garage & Basement>How To Build A Cheap Boat Shed
Garage & Basement
How To Build A Cheap Boat Shed
Published: February 20, 2024
Editor-in-Chief with a decade in home renovation and a passion for vintage furniture. Diane is known for her weekend treasure hunts at flea markets, enriching our content with unique style insights.
Learn how to build a cost-effective boat shed for your garage or basement with our expert tips and DIY guides. Create a functional and affordable storage solution today!
(Many of the links in this article redirect to a specific reviewed product. Your purchase of these products through affiliate links helps to generate commission for Twigandthistle.com, at no extra cost. Learn more)
Introduction
Building a boat shed can be a rewarding and practical project for anyone who loves spending time on the water. Whether you're an avid sailor, a fishing enthusiast, or simply someone who enjoys the tranquility of being near the water, having a dedicated space to store and work on your boat can make a world of difference. Not only does a boat shed provide protection from the elements, but it also offers a convenient space for maintenance, repairs, and storage of boating gear.
In this comprehensive guide, we'll walk you through the step-by-step process of building a cost-effective boat shed that meets your needs without breaking the bank. From selecting the ideal location to putting the finishing touches on your new structure, we'll cover everything you need to know to bring your boat shed vision to life.
Whether you're a seasoned DIY enthusiast or a first-time builder, this guide is designed to provide you with the knowledge and confidence to embark on this exciting project. By the end of this journey, you'll not only have a functional and budget-friendly boat shed but also a sense of accomplishment and pride in creating a space that enhances your boating experience. So, let's dive in and explore the essential steps to building a cheap boat shed that doesn't compromise on quality or durability.
Step 1: Choosing the Right Location
Selecting the perfect location for your boat shed is a crucial first step in the construction process. The ideal spot should not only accommodate the size of your boat but also provide convenient access and protection from the elements. Here's a detailed look at the key considerations when choosing the right location for your boat shed:
-
Accessibility: When scouting for a location, prioritize accessibility. The site should allow for easy maneuvering of your boat in and out of the shed. Consider the proximity to the water and ensure that the chosen spot enables a smooth transition from the shed to the launch area.
-
Ground Stability: Assess the stability of the ground where the shed will be situated. Opt for a level and firm foundation to ensure the structural integrity of the shed. Avoid areas prone to flooding or erosion, as these can compromise the stability of the shed over time.
-
Protection from Elements: Evaluate the natural elements such as wind direction and exposure to sunlight. Position the shed in a way that minimizes direct exposure to prevailing winds and harsh sunlight. This not only protects your boat but also enhances the longevity of the shed itself.
-
Local Regulations: Before finalizing the location, familiarize yourself with local building codes and regulations. Some areas may have specific zoning requirements or restrictions on building near water bodies. Ensure compliance with these regulations to avoid any potential legal issues in the future.
-
Future Expansion: Consider the potential for future expansion or modifications to the shed. Selecting a location that allows for future growth can be advantageous, especially if you plan to accommodate additional boats or storage needs down the line.
-
Aesthetic Appeal: While functionality is paramount, it's also worth considering the visual impact of the shed on its surroundings. A location that complements the overall aesthetics of the waterfront or your property can enhance the appeal of the boat shed.
By carefully evaluating these factors, you can identify the optimal location for your boat shed, setting the stage for a successful and functional addition to your boating lifestyle.
Step 2: Gathering Materials
Gathering the right materials is a critical aspect of building a cost-effective boat shed. By selecting quality yet affordable materials, you can ensure the durability and longevity of your shed without exceeding your budget. Here's a detailed breakdown of the essential materials needed for constructing a cheap boat shed:
Lumber:
The backbone of any shed construction, lumber serves as the primary material for framing and structural support. Opt for pressure-treated or weather-resistant lumber to withstand the outdoor elements. Common choices include 2×4 and 4×4 lumber for framing, while plywood is suitable for sheathing and roofing.
Fasteners:
Selecting the appropriate fasteners is crucial for ensuring the stability and strength of the shed. Nails, screws, and bolts are essential for securing the structural components together. Galvanized or stainless steel fasteners are recommended to prevent corrosion and rust, enhancing the shed's longevity.
Roofing Materials:
For a budget-friendly approach, consider corrugated metal roofing or asphalt shingles. These materials offer durability and weather resistance without breaking the bank. Additionally, they are relatively easy to install, making them ideal for a DIY construction project.
Foundation Components:
Depending on the chosen foundation type, you may need concrete blocks, gravel, or treated lumber for creating a stable base. Assess the soil conditions and drainage in the selected location to determine the most suitable foundation materials for your boat shed.
Hardware and Accessories:
Don't overlook the importance of hardware and accessories such as hinges, door handles, and latches. These components contribute to the functionality and security of the shed. Opt for durable and weather-resistant hardware to ensure long-term reliability.
Protective Coatings:
To enhance the weather resistance of the shed, consider applying protective coatings or sealants to the lumber and exterior surfaces. Waterproofing solutions and wood preservatives can safeguard the shed against moisture, UV exposure, and fungal decay, prolonging its lifespan.
Optional Additions:
Depending on your preferences, you may consider additional features such as windows, ventilation systems, or skylights. While these are not essential, they can enhance the functionality and aesthetics of the boat shed.
By carefully sourcing these materials from reputable suppliers and leveraging cost-effective options, you can lay the foundation for a sturdy and affordable boat shed that meets your boating needs. With the materials in hand, you're ready to move on to the next phase of the construction process.
Step 3: Building the Foundation
The foundation serves as the anchor of any structure, providing stability and support. When it comes to building a boat shed, the foundation is particularly crucial, as it must withstand the weight of the shed, the boat, and potential environmental stressors. Here's a detailed exploration of the essential steps involved in constructing a solid foundation for your boat shed:
Assessing Soil Conditions:
Before laying the foundation, it's imperative to assess the soil conditions at the chosen location. Conduct a thorough examination to determine the soil type, drainage patterns, and any potential issues such as soft spots or high water tables. Understanding the soil composition enables you to make informed decisions regarding the foundation design and materials.
Choosing the Foundation Type:
Several foundation options are suitable for boat sheds, including concrete slabs, concrete blocks, and skids. The choice of foundation type depends on factors such as soil stability, local building codes, and personal preferences. A concrete slab offers a durable and level surface, while concrete blocks provide versatility and elevation. Skids, consisting of treated lumber beams, are ideal for sheds that may require relocation in the future.
Excavation and Site Preparation:
Once the foundation type is determined, the next step involves excavation and site preparation. Clear the designated area of any vegetation, debris, or obstructions. Excavate the site to the required depth, ensuring uniformity and proper drainage. If necessary, compact the soil to create a stable base for the foundation.
Installing the Foundation Components:
With the site prepared, proceed to install the foundation components according to the chosen design. For a concrete slab, formwork is erected to contain the concrete while it sets. Rebar or wire mesh may be added to reinforce the slab. In the case of concrete blocks, they are laid in a leveled and staggered pattern, providing a stable base for the shed. Skids are positioned and anchored to the ground, offering a portable yet sturdy foundation.
Allowing for Proper Curing and Setting:
For concrete-based foundations, allowing sufficient time for curing and setting is essential. This process ensures that the concrete achieves its full strength and stability. Adhere to the recommended curing period before proceeding with the construction of the shed superstructure.
By meticulously executing the foundation construction process, you establish a solid and reliable base for your boat shed, laying the groundwork for the subsequent stages of the project. With the foundation in place, you're ready to advance to the next phase of building your cost-effective boat shed.
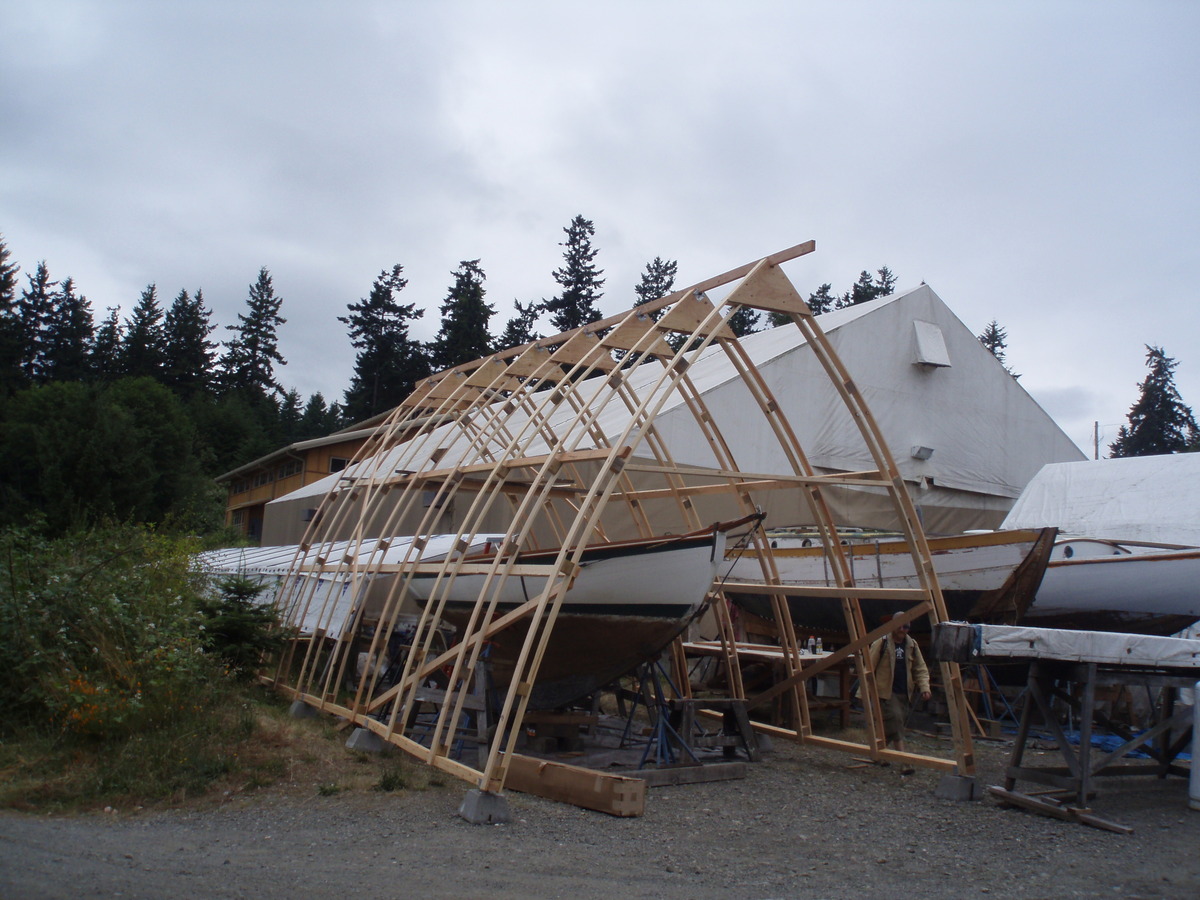
Step 4: Constructing the Frame
Constructing the frame is a pivotal phase in the construction of a cheap boat shed, as it forms the structural skeleton that supports the entire shed. The frame provides stability, defines the shape of the shed, and serves as the framework for attaching walls, roof, and other components. Here's a comprehensive overview of the essential steps involved in constructing the frame for your boat shed:
Design and Layout:
Before diving into the physical construction, it's crucial to have a well-defined design and layout for the frame. The design should account for the dimensions of the shed, the desired roof pitch, and any specific structural considerations. Utilizing detailed plans or blueprints can streamline the construction process and ensure accuracy in measurements and assembly.
Cutting and Assembling Lumber:
With the design in hand, the next step involves cutting and assembling the lumber to form the frame components. Utilize the previously acquired pressure-treated or weather-resistant lumber to construct the frame. Commonly used lumber sizes include 2×4 and 4×4 for framing members. Precision in cutting the lumber to the specified lengths is essential to ensure a snug and secure fit during assembly.
Wall Framing:
Begin by constructing the wall frames, which form the vertical structure of the shed. The frames are assembled using the cut lumber and fastened together using appropriate nails or screws. The frames should be squared and braced to maintain structural integrity. Door and window openings, if included in the design, are framed accordingly during this phase.
Roof Truss or Rafter Assembly:
Depending on the chosen roof design, the next step involves assembling the roof trusses or rafters. Trusses are pre-fabricated structural components that provide support for the roof, while rafters are individual beams that form the framework for the roof. Carefully follow the design specifications to ensure the correct angle and dimensions of the trusses or rafters.
Erecting the Frame:
Once the wall frames and roof trusses/rafters are assembled, it's time to erect the frame at the designated location. Enlist the help of additional hands to safely lift and position the frame components into place. Secure the frame to the foundation using appropriate fasteners, ensuring a solid connection between the frame and the foundation.
Bracing and Alignment:
After the frame is in place, it's essential to brace and align the components to maintain structural stability. Diagonal bracing and temporary supports may be employed to prevent any shifting or movement of the frame. Checking for plumb, level, and square at this stage is crucial to ensure the frame is accurately positioned.
By meticulously executing these steps, you establish a robust and well-constructed frame for your boat shed. The completed frame sets the stage for the subsequent phases of adding the roof, walls, and finishing touches, bringing you closer to the realization of your cost-effective boat shed.
Step 5: Adding the Roof
Adding the roof to your boat shed is a pivotal phase that not only provides protection from the elements but also contributes to the overall structural integrity and aesthetic appeal of the shed. The roof serves as a shield against rain, snow, and harsh sunlight, safeguarding your boat and the contents of the shed. Here's a detailed exploration of the essential steps involved in adding the roof to your cost-effective boat shed:
Roof Design Considerations:
Before commencing the roof construction, it's crucial to consider the design aspects such as the roof pitch, overhang dimensions, and the choice of roofing materials. The roof pitch, or slope, plays a significant role in shedding water and preventing accumulation. Additionally, overhangs can enhance the shed's protection by providing additional coverage for the walls and entry points. When selecting roofing materials, factors such as durability, weather resistance, and cost-effectiveness should be taken into account.
Sheathing and Underlayment:
The first step in adding the roof involves installing the sheathing, which provides a stable base for the roofing materials. Oriented Strand Board (OSB) or plywood panels are commonly used for sheathing. Once the sheathing is in place, an underlayment, such as roofing felt or synthetic underlayment, is applied to create a waterproof barrier and further protect the shed from moisture infiltration.
Roofing Material Installation:
The choice of roofing material significantly influences the shed's durability and weather resistance. Corrugated metal roofing, known for its affordability and longevity, is a popular option for boat sheds. Alternatively, asphalt shingles offer a traditional and cost-effective roofing solution. Carefully follow the manufacturer's guidelines for the installation of the chosen roofing material, ensuring proper fastening and weatherproofing.
Flashing and Edge Trim:
To prevent water intrusion at vulnerable areas such as roof intersections, vents, and edges, flashing is installed. Flashing, typically made of metal or waterproof membrane, creates a watertight seal and directs water away from critical areas. Additionally, edge trim or fascia is affixed to the roof perimeter, providing a finished look and protecting the roof edges from environmental exposure.
Ventilation and Drainage:
Proper ventilation is essential to prevent moisture buildup and maintain a favorable environment within the shed. Ridge vents, soffit vents, or gable vents can be incorporated to facilitate air circulation. Additionally, ensuring adequate drainage through gutters and downspouts prevents water accumulation on the roof and around the shed, contributing to its longevity.
By meticulously executing these steps, you complete the vital process of adding the roof to your boat shed, culminating in a well-protected and structurally sound structure. The addition of the roof brings you closer to the realization of your cost-effective boat shed, setting the stage for the final phase of finishing touches and personalization.
Step 6: Finishing Touches
With the main structural components in place, the final phase of building a cost-effective boat shed involves adding the finishing touches to enhance functionality, aesthetics, and overall usability. This phase allows for personalization and customization, transforming the shed into a tailored space that meets your specific boating needs. Here's a detailed exploration of the essential steps involved in adding the finishing touches to your boat shed:
Exterior Siding and Trim:
The choice of exterior siding not only contributes to the visual appeal of the shed but also provides an additional layer of protection against the elements. Options such as vinyl siding, T1-11 plywood, or board and batten siding offer durability and low maintenance. Additionally, adding trim elements around windows, doors, and corners provides a polished and cohesive look to the exterior.
Doors and Windows:
Installing sturdy and weather-resistant doors is crucial for securing the shed and providing convenient access. Consider options such as roll-up doors for larger openings and pre-hung entry doors for pedestrian access. Similarly, incorporating windows not only allows natural light into the shed but also enhances ventilation. Ensure that the doors and windows are properly sealed to prevent water infiltration.
Interior Organization and Storage:
Maximize the functionality of the boat shed by incorporating storage solutions and organizational features. Utilize wall-mounted racks, shelving units, and pegboards to efficiently store boating gear, tools, and equipment. Customizing the interior layout to accommodate specific storage needs ensures a clutter-free and functional space.
Lighting and Electrical:
Enhance the usability of the shed by integrating adequate lighting and electrical outlets. LED lighting fixtures offer energy efficiency and ample illumination for working on boat maintenance tasks. Installing electrical outlets allows for the operation of power tools and charging of electronic devices within the shed.
Personalization and Customization:
Adding personal touches to the boat shed creates a space that reflects your individual style and preferences. Consider incorporating decorative elements, signage, or paint colors that resonate with your boating passion. Customizing the shed to align with your personality enhances the overall experience of using the space.
Maintenance and Weatherproofing:
Prioritize the application of weatherproofing treatments to protect the exterior surfaces of the shed. Utilize exterior-grade paint or stains to safeguard the wood from moisture and UV exposure. Additionally, inspect the shed for any potential maintenance needs, such as caulking gaps and addressing any signs of wear and tear.
By meticulously attending to these finishing touches, you elevate the boat shed from a basic structure to a fully functional and personalized space tailored to your boating lifestyle. The completion of this phase marks the realization of your vision for a cost-effective boat shed that seamlessly integrates practicality and individuality.
Conclusion
In conclusion, the journey of building a cost-effective boat shed is not just about constructing a shelter for your watercraft; it's a testament to the passion and dedication that boating enthusiasts bring to their craft. As you reach the culmination of this project, you stand before a structure that embodies practicality, resilience, and personalization, reflecting your commitment to the boating lifestyle.
The process of building a cheap boat shed encompasses a series of deliberate and calculated steps, each contributing to the creation of a space that enhances your boating experience. From the initial selection of the ideal location to the meticulous construction of the frame, addition of the roof, and the final touches that infuse character and functionality, every phase is a testament to your vision and determination.
As you stand back and admire the completed boat shed, you not only see a shelter for your boat but a haven that embodies your love for the water. It's a space where you'll tinker with boat maintenance, organize your gear, and seek solace in the tranquility that comes with being near the water. The boat shed becomes an extension of your boating adventures, a reliable partner that stands ready to protect and support your nautical pursuits.
Moreover, the journey of building a boat shed is a testament to resourcefulness and creativity. By carefully selecting materials, optimizing construction techniques, and infusing personal touches, you've demonstrated the ability to create a functional and visually appealing space without exceeding your budget. This resourcefulness not only saves costs but also instills a sense of pride in the accomplishment of building a structure that meets your needs while staying within your means.
Ultimately, the completion of the boat shed marks the beginning of a new chapter in your boating journey. It's a space that beckons you to embark on new adventures, pursue your passion for the water, and create lasting memories. As you step into this new chapter, the boat shed stands as a symbol of your dedication to the boating lifestyle and a tangible reminder of the joy that comes with being on the water.
In the end, the boat shed is more than just a structure; it's a testament to your unwavering love for boating and a tangible expression of the adventures that await. With the completion of this project, you've not only built a cost-effective boat shed but also a space that encapsulates the essence of your boating passion.