Home>Create & Decorate>DIY & Crafts>How To Make A Cardboard Boat

DIY & Crafts
How To Make A Cardboard Boat
Published: May 26, 2024

Senior Editor in Create & Decorate, Kathryn combines traditional craftsmanship with contemporary trends. Her background in textile design and commitment to sustainable crafts inspire both content and community.
Learn how to make a cardboard boat with this DIY & Crafts guide. Get step-by-step instructions for creating your own unique watercraft. Start your cardboard boat project today!
(Many of the links in this article redirect to a specific reviewed product. Your purchase of these products through affiliate links helps to generate commission for Twigandthistle.com, at no extra cost. Learn more)
Introduction
So, you've got a bunch of cardboard lying around and you're wondering what to do with it. How about building a cardboard boat? Yes, you read that right! With some creativity, a few materials, and a bit of elbow grease, you can construct a fully functional boat out of cardboard. Whether you're looking for a fun DIY project or a unique way to spend a day on the water, making a cardboard boat can be a rewarding and enjoyable experience. In this article, we'll guide you through the process of creating your very own cardboard boat from start to finish. Let's dive in and get started on this exciting adventure!
Materials Needed
To get started on your cardboard boat-building journey, you'll need to gather the following materials:
-
Cardboard: Look for sturdy, corrugated cardboard that will provide the structural integrity needed for your boat. You can use large sheets for the main body of the boat and smaller pieces for reinforcement and details.
-
Utility Knife or Box Cutter: A sharp utility knife or box cutter will be essential for cutting through the cardboard with precision.
-
Ruler and Pencil: These tools will help you measure and mark the cardboard for accurate cutting and assembly.
-
Duct Tape: Duct tape will be your best friend during the construction process. It's not only great for securing the cardboard pieces together but also for adding extra waterproofing.
-
Waterproof Sealant: To ensure your boat stays afloat, you'll need a waterproof sealant to coat the cardboard and protect it from water damage.
-
Paint and Brushes: Once your boat is assembled, you can add a personal touch with colorful paint and brushes.
-
Paddle: Don't forget a sturdy paddle to propel your cardboard creation through the water.
-
Life Jacket: Safety first! A well-fitted life jacket is essential for any boating adventure, even in a cardboard vessel.
Gather these materials, and you'll be well-equipped to embark on the exciting journey of building your very own cardboard boat.
Designing the Boat
When it comes to designing your cardboard boat, the possibilities are virtually endless. Before you start cutting and assembling, take some time to sketch out your boat's design on paper. Consider the size and shape of the boat, as well as any additional features you'd like to incorporate. Are you aiming for a sleek speedboat design, or perhaps a sturdy and stable rowboat? The choice is yours!
Once you have a clear vision of your boat's design, it's time to transfer those ideas onto the cardboard. Use your ruler and pencil to mark out the dimensions and shapes of each piece. Remember, precision is key here, as accurate measurements will ensure that your boat comes together seamlessly.
As you plan the design, think about the structural integrity of the boat. Consider adding reinforcements in key areas to provide extra support. This could involve doubling up on cardboard layers or adding supportive beams to the frame. The goal is to create a design that not only looks great but also holds up well in the water.
Don't be afraid to get creative with the details. Whether it's adding a decorative bow or incorporating cut-out windows, these little touches can elevate the overall look of your cardboard boat. Once you're satisfied with the design, it's time to move on to the exciting part – assembling your boat!
Assembling the Boat
Now that you have all your cardboard pieces cut out according to your design, it's time to start assembling your boat. Follow these steps to bring your cardboard creation to life:
-
Lay Out the Pieces: Begin by laying out all the cardboard pieces in the order they will be assembled. This will give you a clear visual of how the boat will come together and ensure that you have all the necessary components.
-
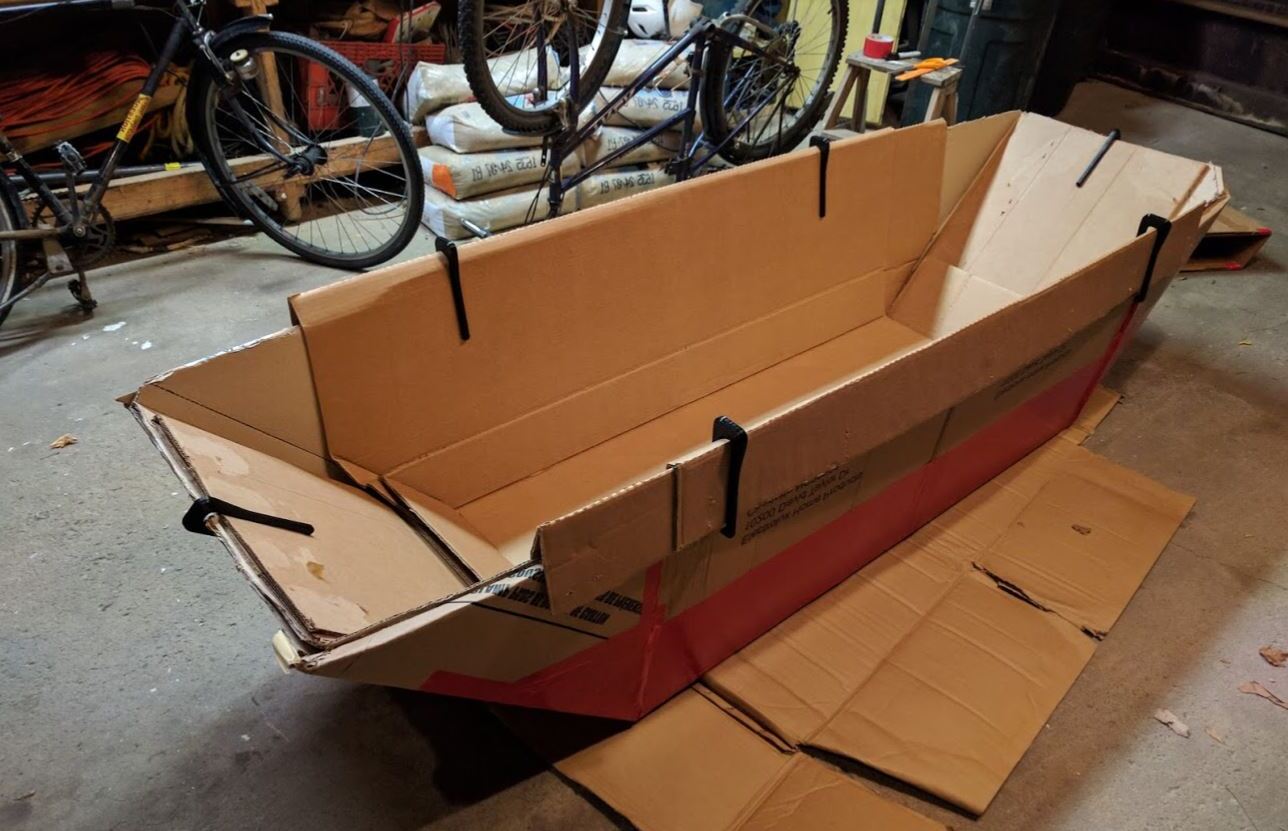
Secure the Hull: Start by assembling the main hull of the boat. Use duct tape to securely attach the pieces together, ensuring that the seams are well-sealed. Pay close attention to the corners and edges, as these areas will need extra reinforcement.
-
Add Structural Supports: Depending on the size and design of your boat, you may need to add additional structural supports to enhance stability. This could involve creating a framework inside the hull using cardboard beams or braces.
-
Attach the Deck: Once the hull is secure, it's time to add the deck of the boat. Carefully position the deck pieces and fasten them to the hull using duct tape. This step will further strengthen the overall structure of the boat.
-
Reinforce the Seams: After the main components are assembled, go back and reinforce all the seams with additional layers of duct tape. This will provide extra durability and help prevent water from seeping into the cardboard.
-
Detailing and Finishing Touches: With the basic structure in place, you can now add any detailing or finishing touches to personalize your boat. Whether it's painting the exterior, adding a mast and sail, or creating seating inside the boat, this is where you can let your creativity shine.
By following these steps, you'll be well on your way to assembling a sturdy and seaworthy cardboard boat. Once the boat is fully assembled, it's time to move on to the next crucial step – waterproofing.
Waterproofing the Boat
Waterproofing is a critical step in ensuring that your cardboard boat remains afloat and seaworthy. Without proper waterproofing, the cardboard can become waterlogged and compromise the structural integrity of the boat. Here's how to effectively waterproof your cardboard boat:
Read more: How To Build A Boat Ramp
Apply Waterproof Sealant
Begin by applying a generous coat of waterproof sealant to the entire exterior of the boat. This sealant will create a protective barrier that prevents water from penetrating the cardboard. Be sure to use a sealant that is specifically designed for use on cardboard or porous materials. Apply the sealant evenly, covering every inch of the boat's surface to ensure comprehensive protection.
Seal All Seams and Joints
Pay special attention to the seams and joints of the boat, as these areas are particularly vulnerable to water infiltration. Use additional sealant or waterproof tape to reinforce these areas and create a watertight seal. Press the sealant firmly into the seams to fill any gaps and create a strong barrier against water.
Multiple Coats for Durability
To enhance the effectiveness of the waterproofing, consider applying multiple coats of sealant. Allow each coat to dry completely before applying the next one. This will create a more resilient and durable waterproof layer, reducing the risk of water damage during the boat's use.
Test for Water Resistance
After applying the waterproof sealant, it's a good idea to conduct a simple water resistance test. Use a spray bottle or hose to lightly mist the exterior of the boat. Observe how the water behaves on the surface – it should bead up and roll off, indicating that the sealant is effectively repelling water. If the water begins to soak into the cardboard, apply additional sealant to the affected areas.
Read more: How To Build A Cheap Boat Shed
Consider Additional Waterproofing Measures
In addition to sealant, you can explore other waterproofing measures to further protect your boat. For example, applying a layer of marine-grade epoxy or fiberglass resin can provide an extra level of waterproofing and durability. These materials create a strong, waterproof coating that can significantly extend the lifespan of your cardboard boat.
By thoroughly waterproofing your cardboard boat, you'll ensure that it remains buoyant and resilient in the water. With a well-sealed and protected exterior, your boat will be ready for the next and most exciting step – testing it out on the water!
Testing the Boat
Once your cardboard boat is assembled and waterproofed, it's time for the moment of truth – testing it out on the water. Here's how to conduct a thorough and safe test of your newly constructed cardboard boat:
Choose a Safe Testing Location
Select a calm and shallow body of water for the initial test. A small pond or a calm section of a lake is ideal for testing the boat's stability and buoyancy. Avoid areas with strong currents or rough waters for the first trial run.
Safety Preparations
Before launching the boat, ensure that you have all necessary safety precautions in place. This includes wearing a life jacket, having a safety rope on hand, and having a support person nearby in case of any unforeseen circumstances.
Launching the Boat
Gently place the boat in the water and observe how it floats. Keep a close eye on the boat's stability and ensure that it remains afloat without taking on water. Use a paddle to gently push the boat away from the shore and into slightly deeper water.
Observing Stability
Once the boat is in deeper water, observe its stability and how it handles the gentle movement of the water. Look for any signs of tilting or instability, and make adjustments as needed to ensure the boat maintains its balance.
Testing Maneuverability
Use the paddle to navigate the boat in different directions, testing its maneuverability and responsiveness. Pay attention to how the boat handles turns and changes in direction, and make note of any areas that may require reinforcement or adjustments.
Monitoring for Leaks
Throughout the testing process, keep an eye out for any signs of water seeping into the boat. If you notice any leaks or areas where water is entering, carefully paddle back to shore and address the issues before continuing the test.
Gradual Progression
As you gain confidence in the boat's performance, gradually increase the distance and duration of the test runs. This will allow you to thoroughly evaluate the boat's seaworthiness and identify any areas that may need improvement.
Celebrate Your Success
If your cardboard boat passes the test with flying colors, congratulations are in order! You've successfully built a functional and seaworthy boat out of cardboard. Now, it's time to enjoy the fruits of your labor and embark on more adventurous voyages with your unique creation.
By following these testing steps, you'll be able to assess the performance of your cardboard boat and make any necessary adjustments to ensure its seaworthiness. With a successful test under your belt, you can confidently set sail and enjoy the thrill of navigating the waters in your very own cardboard boat.
Conclusion
In conclusion, building a cardboard boat is a fun and rewarding DIY project that offers the satisfaction of creating something unique and functional. From designing and assembling the boat to waterproofing and testing it on the water, the process is filled with creativity and excitement. By following the steps outlined in this guide and unleashing your imagination, you can transform simple cardboard into a vessel that defies expectations. Whether it's for a leisurely cruise on a calm pond or a friendly boat race, your cardboard creation is sure to turn heads and spark conversations. So, gather your materials, roll up your sleeves, and set sail on the adventure of building your very own cardboard boat. The possibilities are as vast as the open water, and the experience is bound to make a splash!

