
Home>Create & Decorate>DIY & Crafts>How To Make Chairs
DIY & Crafts
How To Make Chairs
Published: May 1, 2024

Content Creator specializing in woodworking and interior transformations. Caegan's guides motivate readers to undertake their own projects, while his custom furniture adds a personal touch.
Discover the best DIY & Crafts tips for making chairs at home. Get step-by-step instructions and creative ideas for your next project. Start crafting today!
(Many of the links in this article redirect to a specific reviewed product. Your purchase of these products through affiliate links helps to generate commission for Twigandthistle.com, at no extra cost. Learn more)
Introduction
So, you want to learn how to make chairs, huh? Well, you've come to the right place! Making your own chairs can be a rewarding and practical DIY project. Whether you're a seasoned woodworker or just starting out, crafting your own chairs allows you to customize the design to fit your unique style and needs. Plus, there's something special about sitting in a chair that you've built with your own two hands. In this guide, we'll walk you through the process of making your own chairs from start to finish. So, roll up your sleeves and get ready to dive into the wonderful world of chair making!
Choosing the Right Materials
When it comes to making chairs, selecting the right materials is crucial for both the aesthetics and the structural integrity of your final piece. Here are some key materials to consider for your chair-making project:
1. Wood
The type of wood you choose will greatly impact the look and durability of your chair. Hardwoods such as oak, maple, and cherry are popular choices for their strength and attractive grain patterns. Softwoods like pine and cedar are more affordable and easier to work with, making them suitable for beginners.
2. Seat Material
Depending on the design of your chair, you may need to select a suitable material for the seat. Options include upholstery fabric, leather, or woven materials like cane or rush. Each material offers a different aesthetic and level of comfort, so consider the overall style and function of your chair when making this choice.
3. Hardware
Don't overlook the importance of high-quality hardware such as screws, bolts, and brackets. These components play a critical role in the stability and longevity of your chair. Opt for hardware that is durable and corrosion-resistant to ensure your chair stands the test of time.
4. Finishing Supplies
To protect and enhance the appearance of your chair, you'll need finishing supplies such as wood stain, varnish, or paint. These materials not only add color and character to your chair but also provide a protective layer against wear and tear.
By carefully selecting the right materials for your chair-making project, you can ensure that your finished piece is not only visually appealing but also sturdy and long-lasting.
Designing Your Chair
Designing your chair is where the magic happens. This is your chance to let your creativity run wild and tailor the chair to your specific tastes and needs. Here are some key considerations when designing your chair:
-
Functionality: Think about how the chair will be used. Will it be a dining chair, a lounge chair, or a decorative accent piece? The intended function will influence the overall design and dimensions of the chair.
-
Style: Consider the aesthetic you want to achieve. Do you prefer a sleek, modern look, or are you drawn to the rustic charm of farmhouse-style furniture? Look for inspiration in magazines, online galleries, or even nature to help shape the style of your chair.
-
Ergonomics: Pay attention to the ergonomics of the chair to ensure it is comfortable and supportive. Consider factors such as seat height, backrest angle, and armrest placement to promote good posture and relaxation.
-
Proportions: Balance and proportion are key elements of good design. Take into account the overall size of the chair in relation to its intended space, as well as the proportions of individual components such as the seat, backrest, and legs.
-
Joinery and Construction: Think about how the chair will be assembled. Will you use traditional joinery techniques like mortise and tenon joints, or opt for modern methods such as pocket screws? The choice of joinery will impact both the aesthetics and the structural integrity of the chair.
By carefully considering these design elements, you can create a chair that not only looks great but also serves its intended purpose flawlessly. So, grab a pencil and sketch out your ideas – it's time to bring your chair design to life!
Cutting and Shaping the Wood
Now comes the exciting part – bringing your chair design to life through the cutting and shaping of the wood. This step requires precision, patience, and a keen eye for detail. Here's how to tackle this crucial phase of chair making:
-
Prepare Your Workspace: Before diving into cutting and shaping the wood, ensure that your workspace is well-organized and equipped with the necessary tools. A spacious workbench, a reliable sawhorse, and a variety of cutting tools such as a handsaw, jigsaw, or circular saw will be essential for this stage.
-
Take Accurate Measurements: Carefully measure and mark the wood according to your chair design's specifications. Use a combination square, measuring tape, and marking gauge to ensure accuracy. Remember the old adage – measure twice, cut once!
-
Cutting the Components: Using the appropriate cutting tools, carefully cut the wood into the various components of your chair, such as the seat, legs, backrest, and armrests. Take your time and follow your marked lines precisely to achieve clean and accurate cuts.
-
Shaping and Smoothing: Once the basic components are cut, it's time to shape and smooth the wood to achieve the desired contours and edges. A combination of hand tools such as chisels, rasps, and spokeshaves, as well as power tools like a router or belt sander, can be used to refine the shape and texture of the wood.
-
Joinery Preparation: If your chair design involves traditional joinery techniques, this is the stage where you'll prepare the wood for joinery. This may include cutting mortises, tenons, or other joinery elements to ensure a strong and secure assembly.
-
Test Assembly: Before moving on to the final assembly, perform a test fit of the components to ensure that everything aligns properly and that any joinery fits snugly. This step allows you to make any necessary adjustments before proceeding to the next phase.
By carefully cutting and shaping the wood with precision and attention to detail, you'll set the stage for a successful chair-making project. Remember, this phase is where the raw materials begin to transform into the beautiful and functional chair you envisioned. So, roll up your sleeves, put on your safety goggles, and let the sawdust fly!
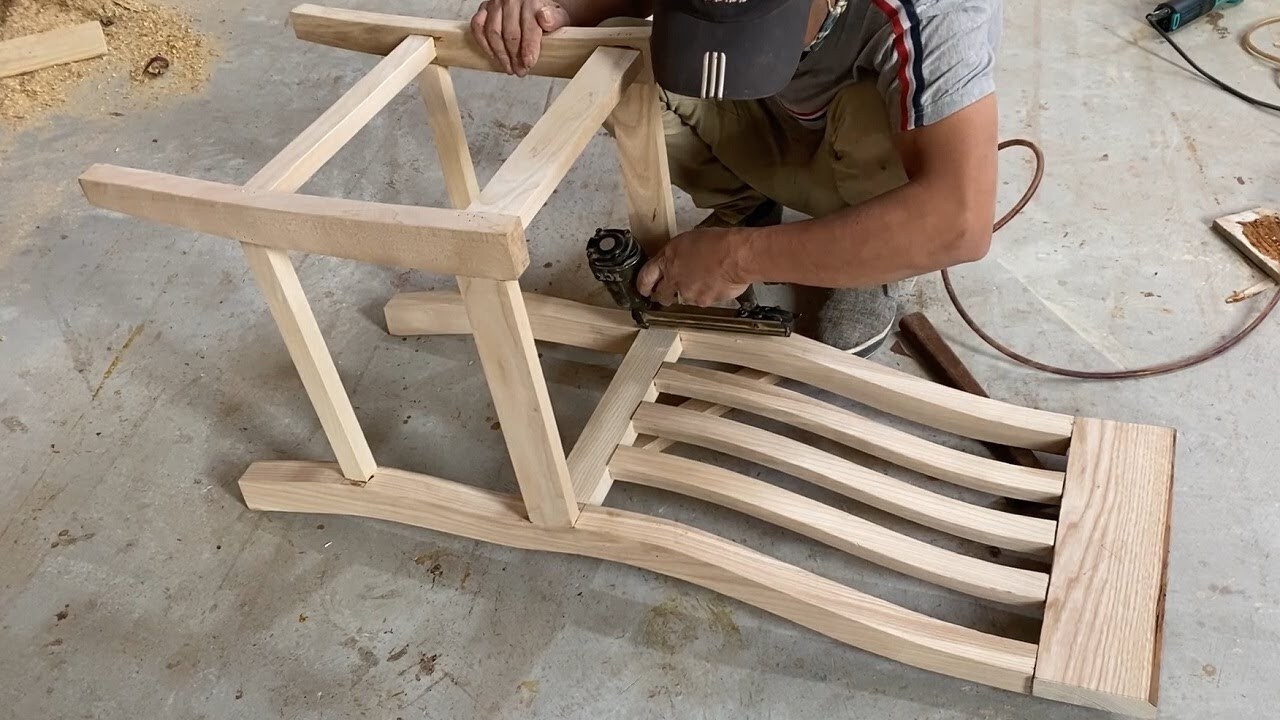
Assembling the Chair
Now that all the individual components of your chair are cut, shaped, and prepared, it's time to bring them together in the exciting assembly phase. This is where your vision starts to take tangible form, and each step brings you closer to the finished piece. Here's how to tackle the assembly of your chair:
-
Dry Fit: Before applying any glue or fasteners, perform a dry fit of all the components. This involves assembling the chair without any adhesive to ensure that everything fits together as intended. This step allows you to identify any potential issues and make adjustments before committing to the final assembly.
-
Gluing and Clamping: Once you're satisfied with the dry fit, it's time to apply wood glue to the joining surfaces and carefully assemble the components. Use clamps to hold everything together firmly while the glue sets. Pay close attention to alignment and ensure that the chair is square and level as it dries.
-
Reinforcement: Depending on the design of your chair, you may need to reinforce the joints with screws, dowels, or other fasteners for added strength. This step is particularly important for chairs that will bear significant weight or undergo frequent use.
-
Seat Attachment: If your chair design includes a separate seat, this is the stage where you'll attach it to the frame. Whether it's screwing the seat to the frame or installing it with traditional upholstery techniques, ensure that it is securely and evenly attached for stability and comfort.
-
Hardware Installation: If your chair design incorporates hardware such as brackets, hinges, or decorative elements, this is the time to install them. Pay attention to the manufacturer's instructions and ensure that all hardware is securely fastened.
-
Final Touches: Once the main assembly is complete, take a moment to inspect the chair for any rough edges, excess glue, or imperfections. Use a chisel, sandpaper, or a wood file to smooth out any rough spots and ensure that the chair is both structurally sound and visually appealing.
By following these steps, you'll transform a collection of individual parts into a fully assembled chair that is ready for the next phase: sanding and finishing. So, grab your tools, take a deep breath, and revel in the satisfaction of seeing your chair come together before your eyes.
Sanding and Finishing
Sanding and finishing are the final touches that elevate your chair from a raw assembly of wood to a polished, functional piece of furniture. This phase not only enhances the visual appeal of the chair but also protects the wood and ensures a smooth, comfortable surface for sitting. Here's how to approach the sanding and finishing process:
-
Sanding Preparation: Before diving into sanding, ensure that the chair is free of any dust or debris from the assembly phase. Use a tack cloth or a vacuum with a brush attachment to clean the surfaces thoroughly. This step sets the stage for a smooth and even sanding process.
-
Selecting the Right Grit: Start with a coarse-grit sandpaper (around 80-100 grit) to remove any rough spots, tool marks, or uneven surfaces. As the wood becomes smoother, progress to finer grits (150-180 grit) for intermediate sanding, and finally, use a very fine grit (220-320 grit) for the finishing touches. This gradual progression ensures a uniform and silky-smooth surface.
-
Sanding Technique: When sanding, move the sandpaper in the direction of the wood grain to avoid creating scratches or uneven patches. Apply even pressure and make sure to sand all surfaces, including edges and hard-to-reach areas. For curved or contoured surfaces, consider using sanding sponges or flexible sanding pads to maintain the shape of the wood.
-
Removing Dust: After each sanding stage, use a clean, dry brush or a tack cloth to remove the sanding dust. This step is crucial to prevent the dust from settling back onto the wood during the finishing process, which can mar the final result.
-
Choosing a Finish: The choice of finish – whether it's a clear varnish, wood stain, or paint – greatly influences the appearance and durability of the chair. Clear finishes enhance the natural beauty of the wood, while stains can add color and depth. Paints offer endless possibilities for customization. Consider the intended use and the overall aesthetic of the chair when selecting the finish.
-
Applying the Finish: Follow the manufacturer's instructions for applying the chosen finish. Whether brushing, spraying, or wiping on the finish, ensure even coverage and pay attention to drips or pooling. Multiple thin coats are often preferable to a single heavy coat, as they provide better coverage and minimize the risk of runs or streaks.
-
Drying and Curing: Allow the finish to dry and cure according to the manufacturer's recommendations. This may involve a period of air-drying or, in the case of certain finishes, baking in a low-heat environment. Patience is key during this phase to ensure that the finish sets properly.
-
Final Inspection: Once the finish has fully cured, inspect the chair for any imperfections or areas that may require additional touch-ups. Address any issues with light sanding and reapplication of the finish as needed.
By meticulously sanding and finishing your chair, you'll not only achieve a professional-looking result but also protect the wood from moisture, wear, and other environmental factors. With the finishing touches complete, step back and admire the transformation of raw materials into a stunning, handcrafted chair that's ready to take its place in your home.
Conclusion
Congratulations! You've successfully completed the journey of making your own chair from scratch. From selecting the right materials to sanding and finishing, each step has been a labor of love and dedication. As you stand back and admire the chair you've created, take pride in the craftsmanship and attention to detail that have gone into every aspect of its construction. Whether it's a cozy armchair for reading, a stylish dining chair for family gatherings, or a statement piece for your living space, your handcrafted chair is a testament to your creativity and skill.
As you reflect on the process, remember that chair making is not just about creating a functional piece of furniture – it's about the satisfaction of bringing an idea to life, the joy of working with your hands, and the pride of owning a one-of-a-kind creation. Whether this is your first venture into chair making or one of many projects, the skills and knowledge you've gained along the way will continue to inspire and empower you in your DIY endeavors.
So, as you settle into the seat of your handmade chair, take a moment to appreciate the craftsmanship, the memories of the process, and the countless hours of hard work that have culminated in this beautiful, tangible result. Your chair is more than just a piece of furniture – it's a reflection of your passion for DIY and home improvement, and a reminder that with dedication and creativity, you can bring your visions to life. Now, go ahead, sit back, relax, and enjoy the fruits of your labor. You've earned it!