
Home>Create & Decorate>DIY & Crafts>DIY Walk-in Cooler: How To Build Your Own Cold Storage Solution
DIY & Crafts
DIY Walk-in Cooler: How To Build Your Own Cold Storage Solution
Published: June 3, 2024

Content Creator specializing in woodworking and interior transformations. Caegan's guides motivate readers to undertake their own projects, while his custom furniture adds a personal touch.
Learn how to create your own DIY walk-in cooler for storing your produce and goods with our step-by-step guide. Save money and enjoy the convenience of having your own cold storage solution at home. Perfect for DIY & Crafts enthusiasts.
(Many of the links in this article redirect to a specific reviewed product. Your purchase of these products through affiliate links helps to generate commission for Twigandthistle.com, at no extra cost. Learn more)
Introduction
Are you tired of constantly running out of cold storage space for your fruits, vegetables, and other perishable items? Have you ever considered building your own walk-in cooler at home? In this article, we will guide you through the process of creating your very own DIY walk-in cooler. Whether you're a homesteader looking to preserve your harvest or a small business owner in need of extra cold storage, this step-by-step guide will help you design, build, and maintain a cost-effective and efficient cold storage solution right in your own backyard. Let's dive in and explore the world of DIY walk-in coolers!
Understanding the Basics of Walk-in Coolers
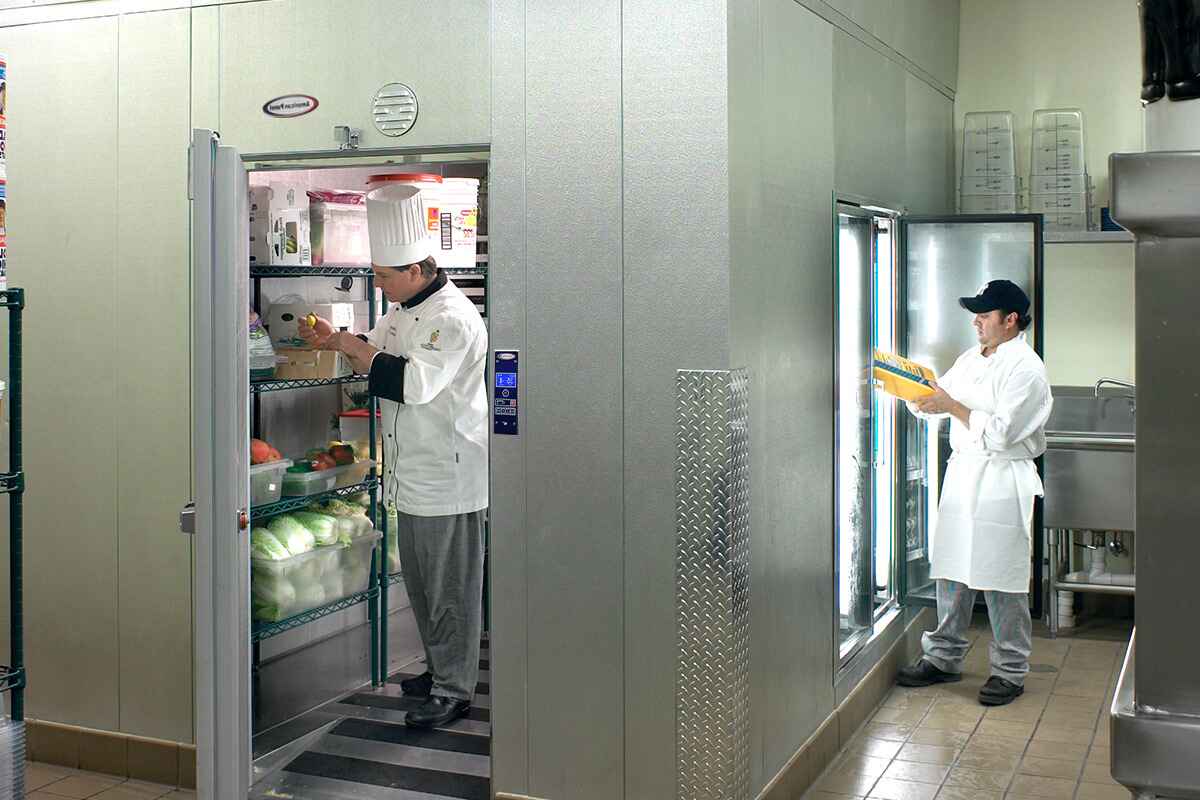
When it comes to understanding the basics of walk-in coolers, it's essential to grasp their primary function. A walk-in cooler is a large refrigerated storage space designed to maintain a consistently low temperature, typically between 35 to 40 degrees Fahrenheit. This controlled environment helps to extend the shelf life of perishable items, such as fruits, vegetables, flowers, and other temperature-sensitive products. Walk-in coolers are commonly used in commercial settings, such as restaurants, grocery stores, and floral shops, but they can also be a valuable addition to a residential property for individuals who require ample cold storage space.
Benefits of DIY Walk-in Coolers
- Cost-Effective: Building your own walk-in cooler can be a cost-effective alternative to purchasing a pre-built unit, especially if you have some DIY skills and are willing to put in the effort.
- Customization: DIY walk-in coolers offer the flexibility to customize the size, layout, and features based on your specific needs and available space.
- Sustainability: By constructing your own walk-in cooler, you have the opportunity to incorporate energy-efficient components and sustainable materials, reducing your environmental impact.
Considerations for DIY Walk-in Coolers
- Space Requirements: Assess the available space for your DIY walk-in cooler, considering both the interior storage capacity and the physical footprint of the structure.
- Insulation and Sealing: Understanding the importance of proper insulation and airtight sealing to maintain the desired temperature and prevent energy wastage.
- Cooling System Options: Research different cooling system options, such as traditional refrigeration units, coolbot systems, or other innovative solutions, to determine the most suitable choice for your DIY project.
By familiarizing yourself with the fundamental principles and advantages of walk-in coolers, you can make informed decisions as you embark on the journey of creating your own DIY cold storage solution.
Planning and Designing Your DIY Walk-in Cooler
Before you roll up your sleeves and start building, it’s crucial to invest time in meticulous planning and thoughtful design for your DIY walk-in cooler. This phase sets the foundation for a successful and functional cold storage space tailored to your specific needs.
Assess Your Storage Needs
Begin by evaluating the quantity and types of items you intend to store in the walk-in cooler. Consider the dimensions of the products, the frequency of restocking, and any special storage requirements. This assessment will help determine the optimal size and layout of your cold storage space.
Choose the Location
Selecting the right location for your DIY walk-in cooler is crucial. Look for an area with easy access and sufficient space for the cooler’s footprint. Consider proximity to electrical outlets, drainage options, and the potential for future expansion if needed.
Create a Detailed Floor Plan
Sketch a detailed floor plan that outlines the internal layout of your walk-in cooler. Determine the placement of shelving, the location of the cooling unit, and any additional features such as a work area or storage for packaging materials. This plan will serve as a roadmap during the construction phase.
Consider Insulation and Sealing
Research and select high-quality insulation materials to ensure efficient temperature control within the cooler. Additionally, plan for proper sealing of all joints and openings to prevent air leakage, which can compromise the effectiveness of the cooling system.
Account for Ventilation and Drainage
Integrate ventilation systems to ensure proper air circulation within the cooler, preventing the buildup of excess moisture. Plan for a drainage system to manage any condensation or spills, maintaining a clean and safe storage environment.
Incorporate Lighting and Accessibility
Include adequate lighting fixtures to facilitate visibility within the cooler. Plan for easy accessibility, considering the installation of durable and easy-to-clean flooring, as well as the design of the entryway for seamless entry and exit.
By dedicating time to comprehensive planning and design, you can lay the groundwork for a well-organized and efficient DIY walk-in cooler that meets your specific storage needs and operational requirements.
Choosing the Right Materials and Equipment
Selecting the appropriate materials and equipment is a critical step in the construction of your DIY walk-in cooler. The choices you make will directly impact the functionality, durability, and energy efficiency of the cold storage space. Here's a detailed breakdown of the key considerations for choosing the right materials and equipment:
Insulation Materials
Invest in high-quality insulation materials with excellent thermal resistance to minimize heat transfer. Common options include rigid foam board insulation, spray foam insulation, and insulated metal panels. Evaluate the R-value of the insulation to ensure it meets the required thermal performance for maintaining a consistent temperature within the cooler.
Structural Components
Opt for durable and sturdy structural components to build the framework of the walk-in cooler. This may include pressure-treated lumber, steel studs, or aluminum framing, depending on your specific requirements and budget. Ensure that the structural materials are capable of supporting the weight of the insulation, shelving, and cooling equipment.
Airtight Seals and Gaskets
Choose reliable airtight seals and gaskets for all door openings and panel joints to prevent air leakage. Look for materials that are resistant to temperature fluctuations and provide a secure seal when the cooler is in operation. Proper sealing is essential for maintaining the desired temperature and maximizing energy efficiency.
Cooling System
Select a suitable cooling system based on the size of your walk-in cooler and the intended storage temperature. Options range from traditional refrigeration units to innovative solutions like coolbot systems, which utilize a standard air conditioning unit in conjunction with a controller to regulate the temperature. Consider the energy efficiency, maintenance requirements, and long-term operational costs of the cooling equipment.
Shelving and Storage Accessories
Invest in durable and hygienic shelving units designed for cold storage environments. Stainless steel wire shelving or food-grade plastic shelving are popular choices due to their resistance to corrosion and ease of cleaning. Additionally, consider storage accessories such as bins, crates, and labeling systems to optimize organization and accessibility within the cooler.
Lighting Fixtures
Choose lighting fixtures that are specifically designed for cold storage applications, ensuring they are rated for low temperatures and moisture resistance. LED lighting is a preferred option for walk-in coolers due to its energy efficiency, long lifespan, and minimal heat output, which helps maintain a consistent temperature.
By carefully selecting the right materials and equipment, you can create a well-insulated, structurally sound, and efficiently cooled walk-in cooler that meets your storage needs and operates with optimal energy efficiency.
Building the Structure of Your Walk-in Cooler
Building the structure of your walk-in cooler is a pivotal phase that sets the foundation for a reliable and functional cold storage space. The structural integrity of the cooler directly impacts its ability to maintain the desired temperature and support the insulation and cooling components. Here's a detailed guide to help you navigate the process of constructing the structure of your DIY walk-in cooler:
Frame Construction
Begin by constructing the frame of the walk-in cooler using durable and weather-resistant materials. Pressure-treated lumber, steel studs, or aluminum framing are commonly used for this purpose. Ensure that the frame is designed to withstand the weight of the insulation, shelving, and any additional equipment that will be installed within the cooler.
Wall Assembly
Once the frame is in place, proceed with the assembly of the walls. Depending on your chosen insulation materials, you may need to create a cavity within the frame to accommodate the insulation. Secure the insulation in place, ensuring a snug fit to minimize thermal bridging and heat transfer. Consider using vapor barriers to control moisture and prevent condensation within the walls.
Roof and Ceiling Installation
If your walk-in cooler design includes a roof, carefully install the roofing materials to provide protection from external elements. Ensure that the roof is sloped to facilitate proper drainage and prevent the accumulation of water or snow. For the ceiling, follow similar insulation and sealing procedures to maintain consistent temperature control within the cooler.
Door Construction
The construction of a sturdy and well-insulated door is essential for maintaining the integrity of the walk-in cooler. Choose a high-quality, insulated door that provides a tight seal when closed. Consider the installation of strip curtains or air curtains to minimize temperature fluctuations when the door is opened for access.
Flooring Considerations
Select flooring materials that are durable, easy to clean, and capable of withstanding the low temperatures within the cooler. Non-slip surfaces are essential to ensure safety when navigating the storage space. Additionally, plan for proper drainage to manage any spills or condensation that may occur.
Consideration for Expansion
If you anticipate the need for future expansion of your cold storage space, incorporate design elements that allow for seamless expansion. This may include leaving space for additional panels, ensuring accessibility for future modifications, and planning for the integration of new cooling equipment if the storage capacity is increased.
By meticulously constructing the framework, walls, roof, door, and flooring of your walk-in cooler, you can create a robust and well-insulated structure that forms the basis for an efficient and reliable cold storage solution.
Installing the Insulation and Cooling System
Installing the insulation and cooling system is a critical phase in the construction of your DIY walk-in cooler, as it directly impacts the ability of the space to maintain the desired low temperature consistently. Proper insulation and an efficient cooling system are essential for preserving the quality and shelf life of perishable items stored within the cooler. Here's a detailed guide to help you navigate the installation of insulation and the cooling system:
Insulation Installation
- Selecting the Right Insulation: Choose high-quality insulation materials such as rigid foam board insulation, spray foam insulation, or insulated metal panels. Consider the R-value of the insulation to ensure it meets the required thermal performance for maintaining a consistent temperature within the cooler.
- Wall Insulation: Install the selected insulation material within the cavity of the walls, ensuring a snug fit to minimize thermal bridging and heat transfer. Secure the insulation in place and consider the use of vapor barriers to control moisture and prevent condensation within the walls.
- Roof and Ceiling Insulation: Apply the chosen insulation material to the roof and ceiling, following the manufacturer's guidelines for proper installation. Ensure that the insulation provides comprehensive coverage to maintain uniform temperature distribution within the cooler.
Cooling System Installation
- Selecting the Cooling Equipment: Choose a cooling system that aligns with the size of your walk-in cooler and the intended storage temperature. Options include traditional refrigeration units, coolbot systems, or other innovative solutions. Consider factors such as energy efficiency, maintenance requirements, and long-term operational costs.
- Positioning the Cooling Unit: Install the cooling unit in a strategic location within the walk-in cooler, ensuring it is easily accessible for maintenance and repairs. Follow the manufacturer's guidelines for proper placement and ventilation requirements to optimize the performance of the cooling equipment.
- Electrical and Plumbing Connections: If applicable, connect the cooling unit to the electrical supply and any necessary plumbing for drainage. Ensure that all connections are secure and comply with safety standards to prevent electrical hazards and potential leaks.
Testing and Calibration
- Temperature Calibration: Once the insulation and cooling system are installed, conduct thorough testing to calibrate the temperature settings of the cooler. Use a reliable thermometer to verify that the interior temperature consistently aligns with the desired storage conditions for your specific items.
- Airflow and Ventilation: Evaluate the airflow and ventilation within the cooler to ensure proper circulation of cold air. Adjust any ventilation systems or fans to optimize air distribution and minimize temperature differentials within the storage space.
By meticulously installing the insulation and cooling system, you can create a well-insulated and efficiently cooled walk-in cooler that provides the ideal environment for preserving perishable items and extending their shelf life.
Adding Shelving and Organization
Organizing the interior of your DIY walk-in cooler with efficient shelving and storage solutions is essential for maximizing the available space and maintaining a well-organized environment. Proper shelving and organization not only enhance accessibility but also contribute to the preservation of perishable items by minimizing handling and optimizing airflow. Here's a detailed guide to help you effectively add shelving and organization to your walk-in cooler:
Assessing Storage Needs
Begin by assessing the types of items you plan to store in the walk-in cooler and their respective storage requirements. Consider the dimensions of the products, the frequency of access, and any specific handling considerations. This assessment will guide the design and layout of the shelving and storage solutions.
Selecting Shelving Materials
Choose shelving materials that are durable, corrosion-resistant, and suitable for cold storage environments. Stainless steel wire shelving and food-grade plastic shelving are popular choices due to their hygienic properties and ability to withstand low temperatures. Ensure that the selected shelving materials are easy to clean and maintain.
Optimizing Shelving Layout
Design the layout of the shelving to maximize the use of available space while allowing for efficient organization and accessibility. Consider adjustable shelving options to accommodate items of varying sizes and shapes. Create designated areas for different categories of products to streamline inventory management.
Implementing Storage Accessories
Incorporate storage accessories such as bins, crates, and containers to further organize the items within the cooler. Utilize labeling systems to clearly identify the contents of each storage area, facilitating quick and accurate retrieval of items. Implement FIFO (first in, first out) practices to ensure proper rotation of perishable goods.
Maintaining Airflow and Visibility
Arrange the shelving to promote adequate airflow throughout the cooler, preventing the formation of cold spots and ensuring uniform temperature distribution. Avoid overcrowding shelves to allow for proper air circulation. Additionally, ensure that the shelving layout provides clear visibility and accessibility to all stored items.
Cleaning and Maintenance Considerations
Plan for easy cleaning and maintenance of the shelving and storage accessories. Select materials that are resistant to corrosion and can be sanitized regularly. Establish a routine maintenance schedule to inspect the shelving for any signs of wear or damage, ensuring the longevity of the storage solutions.
By thoughtfully adding shelving and organization to your DIY walk-in cooler, you can create a well-structured and efficient storage space that optimizes accessibility, airflow, and preservation of perishable items.
Maintaining and Troubleshooting Your DIY Walk-in Cooler
Maintaining and troubleshooting your DIY walk-in cooler is essential to ensure its long-term functionality and optimal performance. Regular maintenance and proactive troubleshooting can help identify and address potential issues before they escalate, minimizing downtime and preserving the quality of the stored items. Here's a comprehensive guide to maintaining and troubleshooting your DIY walk-in cooler:
Regular Maintenance Practices
-
Temperature Monitoring: Regularly monitor the interior temperature of the walk-in cooler using reliable thermometers or temperature monitoring systems. Verify that the temperature remains within the desired range to preserve the quality and safety of the stored items.
-
Cleaning and Sanitization: Establish a routine cleaning schedule to remove any debris, spills, or residue from the interior surfaces of the cooler. Use approved cleaning agents and sanitizers to maintain a hygienic storage environment and prevent the growth of mold or bacteria.
-
Inspecting Seals and Gaskets: Periodically inspect the seals and gaskets of the cooler door for signs of wear, damage, or air leakage. Replace any worn seals to ensure a tight and efficient seal, preventing temperature fluctuations and energy wastage.
-
Checking Cooling Equipment: Regularly inspect the cooling equipment, including the compressor, condenser, and evaporator, for any signs of malfunction or unusual noise. Clean the coils and fans to optimize the efficiency of the cooling system.
-
Testing Emergency Systems: If applicable, test the emergency alarm and backup power systems to ensure they are fully functional in the event of a power outage or equipment failure.
Troubleshooting Common Issues
-
Temperature Fluctuations: If you notice temperature fluctuations within the cooler, check for obstructions to the airflow, malfunctioning fans, or improper thermostat settings. Ensure that the cooling system is operating within its specified parameters.
-
Condensation and Moisture: Address any excessive condensation or moisture buildup within the cooler by evaluating the insulation, ventilation, and drainage systems. Properly sealed joints and effective ventilation can help mitigate condensation issues.
-
Door Seal Integrity: If the door seal is compromised, leading to air leakage and temperature inconsistencies, consider replacing the seal or adjusting the door alignment to achieve a secure closure.
-
Cooling System Malfunctions: In the event of cooling system malfunctions, such as inadequate cooling or unusual noises, consult the manufacturer's guidelines for troubleshooting or seek professional assistance to diagnose and rectify the issue.
-
Energy Efficiency: Continuously assess the energy efficiency of the walk-in cooler by identifying and addressing any sources of energy wastage, such as air leaks, inadequate insulation, or inefficient cooling equipment.
By implementing regular maintenance practices and being proactive in troubleshooting potential issues, you can ensure that your DIY walk-in cooler operates reliably, maintains optimal storage conditions, and prolongs the shelf life of perishable items.
Conclusion and Final Tips
As you wrap up the construction and setup of your DIY walk-in cooler, it's important to keep a few final tips in mind to ensure the long-term success and efficiency of your cold storage solution.
Regular Monitoring and Adjustment
- Monitor Temperature: Continuously monitor the temperature within the cooler and make adjustments as needed to maintain the ideal storage conditions for your perishable items.
- Inspect Seals and Insulation: Regularly inspect the seals, gaskets, and insulation for any signs of wear or damage, addressing issues promptly to prevent energy loss and temperature fluctuations.
Efficient Organization and Inventory Management
- Optimize Shelving: Periodically reassess the shelving layout and organization to accommodate changes in inventory and maximize the use of available space.
- Implement FIFO: Adhere to the FIFO (first in, first out) method to ensure proper rotation of perishable goods and minimize waste.
Energy Efficiency and Sustainability
- Energy Conservation: Explore energy-efficient practices and consider renewable energy sources to minimize the environmental impact of operating your walk-in cooler.
- Recycling and Waste Management: Implement recycling and waste management strategies to reduce the environmental footprint of your cold storage operations.
Professional Maintenance and Servicing
- Scheduled Maintenance: Consider scheduling professional maintenance and servicing for the cooling equipment to ensure optimal performance and longevity.
- Emergency Preparedness: Develop a contingency plan and familiarize yourself with emergency procedures in the event of equipment failure or power outages.
Continuous Improvement and Innovation
- Seek Feedback: Gather feedback from users of the walk-in cooler to identify areas for improvement and innovation in the storage and organization of perishable items.
- Explore New Technologies: Stay informed about advancements in cold storage technology and consider integrating innovative solutions to enhance the efficiency of your DIY walk-in cooler.
By incorporating these final tips into your maintenance and operational practices, you can ensure that your DIY walk-in cooler remains a reliable and efficient cold storage solution, meeting your specific storage needs and contributing to the preservation of perishable items.