
Home>Create & Decorate>DIY & Crafts>How To Build A Cheap Swimming Pool
DIY & Crafts
How To Build A Cheap Swimming Pool
Published: May 16, 2024

Content Creator specializing in woodworking and interior transformations. Caegan's guides motivate readers to undertake their own projects, while his custom furniture adds a personal touch.
Learn how to build a budget-friendly swimming pool with our DIY & Crafts guide. Create your own oasis without breaking the bank.
(Many of the links in this article redirect to a specific reviewed product. Your purchase of these products through affiliate links helps to generate commission for Twigandthistle.com, at no extra cost. Learn more)
Introduction
So, you've always dreamed of having a swimming pool in your backyard, but the cost of installing one from scratch is just too high. Well, what if I told you that you can build your very own cheap swimming pool? Yes, you heard that right! With a bit of creativity, hard work, and the right guidance, you can have your own refreshing oasis without breaking the bank. In this article, we'll walk you through the step-by-step process of building a budget-friendly swimming pool that will provide endless hours of fun and relaxation for you and your family. Let's dive in!
Choosing the Right Location
When it comes to building a cheap swimming pool, the first step is to choose the right location in your backyard. Here are some key factors to consider when selecting the perfect spot for your pool:
-
Sunlight Exposure: Look for an area that receives plenty of sunlight throughout the day. This will help keep the water warm and inviting, making your swimming experience more enjoyable.
-
Accessibility: Ensure that the location is easily accessible from your home. You don't want to trek across the entire yard just to take a quick dip in the pool.
-
Utility Lines: Before digging, check for any underground utility lines such as water pipes, electrical cables, or gas lines. It's crucial to avoid these areas to prevent any accidents or damage to the utilities.
-
Drainage: Consider the natural drainage of the area. You'll want to avoid low-lying spots that may collect water or cause flooding during heavy rains.
-
Privacy: If privacy is important to you, choose a location that is shielded from the view of neighbors or passersby. This can be achieved by positioning the pool near existing fences, hedges, or trees.
By carefully considering these factors, you can ensure that the location of your cheap swimming pool is not only practical but also enhances the overall enjoyment of your outdoor space.
Selecting the Pool Design
When it comes to selecting the design for your cheap swimming pool, there are several options to consider. Each design has its own unique features and benefits, so it's important to choose one that best suits your budget, space, and personal preferences. Here are some popular pool design options to explore:
-
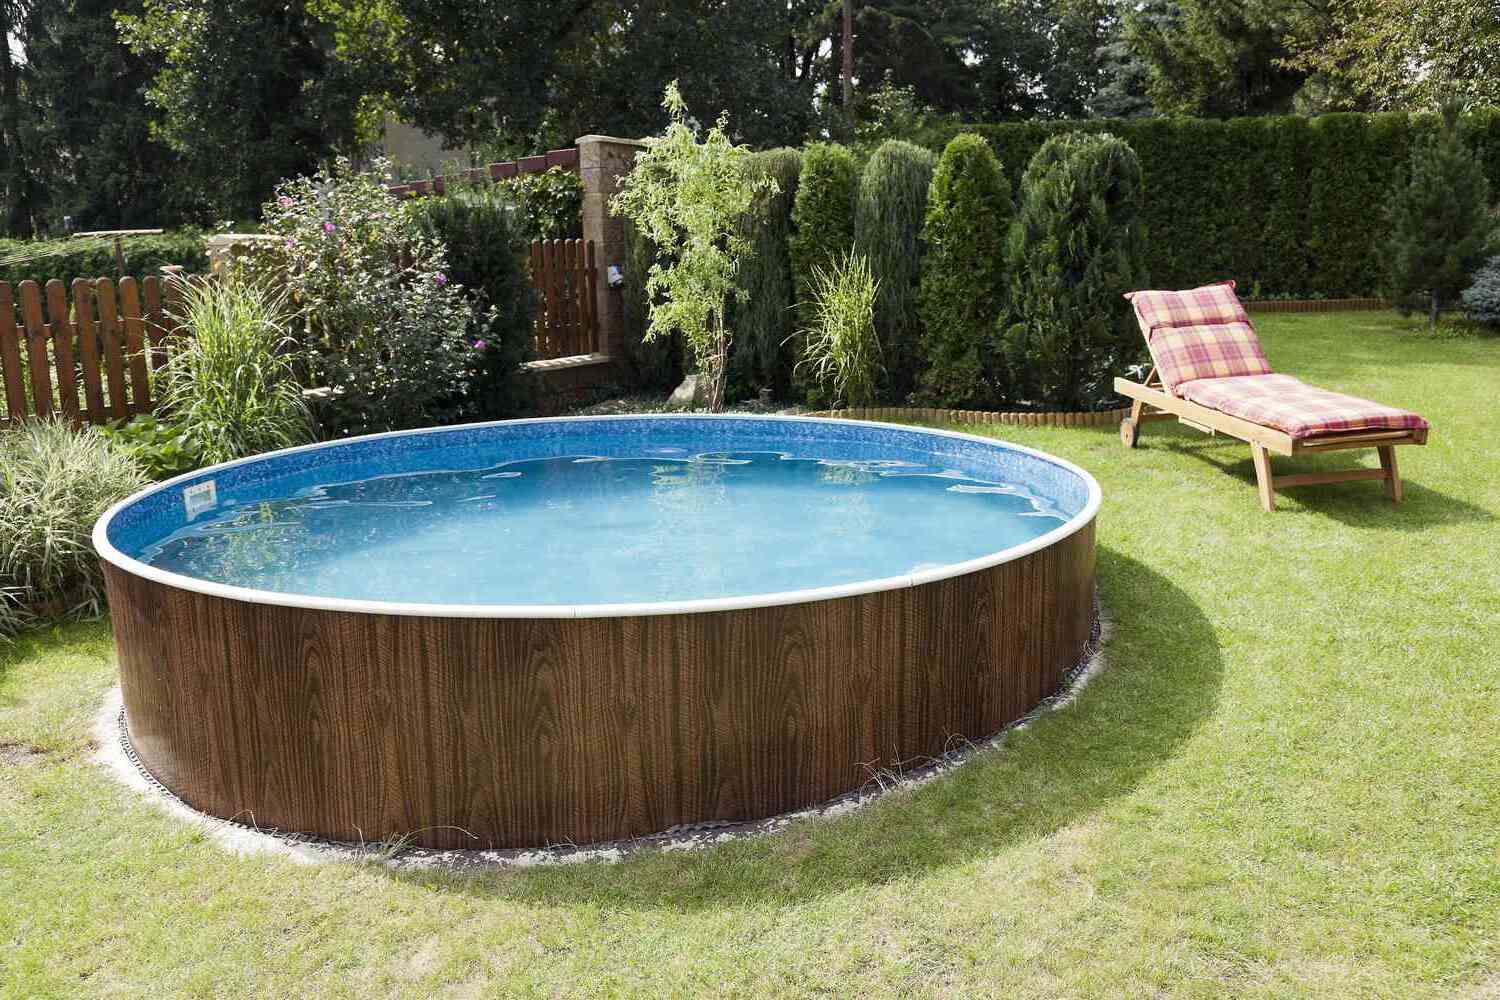
Above-Ground Pool: This type of pool is often the most cost-effective and easiest to install. It typically comes in pre-fabricated kits that can be assembled without the need for extensive excavation. Above-ground pools are available in various shapes and sizes, allowing you to find the perfect fit for your backyard.
-
Stock Tank Pool: A creative and budget-friendly alternative, stock tank pools are made from large, galvanized metal tanks typically used for watering livestock. These tanks can be repurposed as stylish and durable swimming pools, offering a rustic charm to your outdoor space.
-
Natural Swimming Pool: If you're looking for a more eco-friendly option, consider building a natural swimming pool. These pools use a combination of aquatic plants and natural filtration systems to maintain water quality, creating a serene and environmentally conscious swimming experience.
-
DIY Concrete Pool: For those with a bit more construction experience, building a small concrete pool can be a cost-effective option. While it requires more labor and expertise, a DIY concrete pool allows for greater customization in terms of shape and design.
-
Shipping Container Pool: Repurposing a shipping container into a swimming pool is a trendy and budget-friendly choice. With some modifications and a pool liner, a shipping container can be transformed into a modern and eye-catching pool that stands out in any backyard.
When selecting the pool design, consider factors such as your available space, desired aesthetic, maintenance requirements, and long-term durability. By choosing a design that aligns with your vision and budget, you can create a cheap swimming pool that not only meets your needs but also adds value to your home.
Gathering Materials and Tools
Before you embark on building your cheap swimming pool, it's crucial to gather all the necessary materials and tools to ensure a smooth and efficient construction process. Here's a comprehensive list of items you'll need to acquire:
Materials
- Pool Liner: Depending on the design of your pool, you'll need a durable and waterproof pool liner to contain the water. Measure the dimensions of your pool to determine the appropriate size of the liner.
- Frame Materials: If you're building an above-ground pool, gather the necessary materials for the pool frame, such as treated lumber, galvanized steel, or composite materials. For other designs, ensure you have the required materials for the pool structure.
- Filtration System: Select a budget-friendly filtration system that suits the size of your pool. This may include a pump, filter, hoses, and other related components.
- Excavation Tools: Depending on the scale of your project, you may need excavation tools such as shovels, a mini excavator, or a backhoe for digging the pool area.
- Decorative Elements: If desired, consider decorative elements such as tiles, coping stones, or decking materials to enhance the aesthetics of your pool.
Tools
- Measuring Tools: Ensure you have a tape measure, level, and chalk line for accurate measurements and layout.
- Cutting Tools: Depending on the materials used, gather cutting tools such as a circular saw, reciprocating saw, or angle grinder for precision cuts.
- Fastening Tools: Stock up on screws, nails, bolts, and a reliable power drill for assembling the pool structure and securing components.
- Safety Equipment: Prioritize safety by obtaining personal protective equipment including gloves, safety goggles, and ear protection.
- Water Testing Kit: To maintain water quality, acquire a water testing kit to monitor the chemical balance of your pool.
By ensuring you have all the necessary materials and tools at the outset, you can streamline the construction process and minimize delays or interruptions. Additionally, consider sourcing materials from local hardware stores, online marketplaces, or repurposing items to keep costs low while maintaining quality and functionality.
Excavating the Area
Excavating the area for your cheap swimming pool is a crucial step that requires careful planning and execution. Here's a detailed guide to help you navigate the excavation process with confidence:
-
Marking the Area: Begin by marking the perimeter of the pool area using spray paint, stakes, or a garden hose. This will provide a clear outline for the excavation and help you visualize the size and shape of the pool.
-
Clearing the Site: Remove any obstacles such as rocks, roots, or vegetation from the marked area. Use a shovel, rake, or a small excavator to clear the site and create a clean working space.
-
Digging the Pool: Depending on the design and size of your pool, you may need to excavate the area to a specific depth. Use a mini excavator, backhoe, or manual labor to dig the pool according to the dimensions outlined in your plan.
-
Sloping the Sides: If you're building an in-ground pool, consider sloping the sides of the excavation to create a gradual incline. This will provide structural stability and prevent cave-ins during the construction process.
-
Checking for Level: Throughout the excavation, regularly check the level of the pool area to ensure uniform depth and a consistent slope if applicable. Adjust the excavation as needed to achieve the desired dimensions and contours.
-
Reserving Excavated Soil: As you excavate, set aside the excavated soil for later use. This soil can be utilized for backfilling around the pool, creating landscaping features, or leveling other areas of your property.
-
Inspecting the Base: Once the excavation is complete, inspect the base of the pool area for any sharp objects, debris, or irregularities. Remove any obstructions and ensure the base is smooth and free of potential hazards.
By following these steps and exercising caution during the excavation process, you can lay a solid foundation for your cheap swimming pool. Keep in mind that excavation requirements may vary based on the chosen pool design, so refer to specific guidelines and consult with professionals if needed to ensure a successful excavation phase.
Installing the Pool Liner
Installing the pool liner is a critical step in the construction of your cheap swimming pool, as it serves as the waterproof barrier that contains the water and maintains the structural integrity of the pool. Here's a comprehensive guide to help you navigate the process of installing the pool liner with precision and care:
-
Preparing the Pool Base: Before laying the pool liner, ensure that the pool base is clean, smooth, and free of any sharp objects or debris. If necessary, use a layer of sand or protective underlayment to provide a cushioning effect and protect the liner from potential damage.
-
Unfolding the Liner: Carefully unfold the pool liner in close proximity to the pool area, taking care to avoid dragging or tearing the material. Allow the liner to acclimate to the ambient temperature and stretch out fully to remove any wrinkles or folds.
-
Positioning the Liner: With the help of a few assistants, position the pool liner within the excavated pool area, ensuring that it aligns with the contours and dimensions of the pool. Smooth out the liner and adjust its placement to achieve a snug and uniform fit.
-
Securing the Liner: Begin securing the pool liner in place by attaching it to the pool frame or structure using appropriate fastening methods. Depending on the design, this may involve using coping strips, track systems, or other securing mechanisms to hold the liner securely in position.
-
Eliminating Wrinkles and Air Pockets: As the liner is secured, carefully smooth out any wrinkles or air pockets that may have formed during the installation process. Work methodically from the center towards the edges, ensuring a tight and wrinkle-free surface.
-
Trimming Excess Material: Once the pool liner is securely in place and free of wrinkles, carefully trim any excess material using sharp scissors or a utility knife. Take care to leave a sufficient overhang to accommodate the final securing and finishing steps.
-
Finalizing the Edges: Complete the installation by securing the edges of the pool liner to the designated areas of the pool structure. This may involve tucking the liner into retaining channels, fastening it to coping strips, or employing other finishing techniques to achieve a clean and polished appearance.
By following these detailed steps and exercising patience and precision, you can successfully install the pool liner for your cheap swimming pool, ensuring a watertight and visually appealing foundation for your aquatic oasis. Remember to refer to the specific guidelines provided with your pool liner and seek professional assistance if needed to achieve optimal results.
Building the Pool Frame
Building the pool frame is a pivotal stage in the construction of your cheap swimming pool, as it provides the structural support and framework for the entire pool. Whether you're constructing an above-ground pool, a stock tank pool, or a DIY concrete pool, the process of building the pool frame requires careful planning, precise measurements, and the use of durable materials. Here's a detailed guide to help you navigate the construction of the pool frame with confidence and expertise:
1. Selecting the Frame Materials
Before commencing the construction of the pool frame, carefully select the appropriate materials based on the design and size of your pool. Common materials for pool frames include treated lumber, galvanized steel, composite materials, or repurposed items such as shipping containers. Consider factors such as durability, resistance to corrosion, and compatibility with the pool design when choosing the frame materials.
2. Planning the Frame Layout
Using the dimensions and specifications outlined in your pool design plan, lay out the precise location and dimensions of the pool frame within the excavated area. Utilize measuring tools such as a tape measure, level, and chalk line to ensure accuracy and uniformity in the layout. Mark the positions for the frame components, including the walls, supports, and bracing elements.
3. Assembling the Frame Components
Begin assembling the pool frame components according to the predetermined layout. If you're building an above-ground pool, this may involve constructing the perimeter walls, vertical supports, and bracing elements. For other pool designs, follow the specific assembly instructions provided for the chosen materials and construction methods. Use fastening tools such as screws, nails, or bolts to securely join the frame components together.
4. Ensuring Structural Integrity
As the pool frame takes shape, regularly assess the structural integrity of the assembly. Check for levelness, alignment, and stability of the frame components to ensure a solid and reliable structure. Make any necessary adjustments to address any discrepancies and reinforce the frame as needed to withstand the weight of the water and usage.
5. Incorporating Reinforcement and Stabilization
Depending on the size and design of the pool, consider incorporating additional reinforcement and stabilization features to enhance the strength and longevity of the frame. This may include diagonal bracing, cross-supports, or anchoring systems to fortify the structural integrity and minimize potential shifting or movement over time.
6. Customizing the Frame Features
If desired, customize the frame features to accommodate specific design elements or functional requirements. This may involve integrating entry steps, seating ledges, or equipment mounts into the frame design to enhance the usability and aesthetics of the pool.
By following these detailed steps and adhering to best practices in construction, you can successfully build the pool frame for your cheap swimming pool, laying the groundwork for a durable, functional, and visually appealing aquatic retreat. Remember to refer to the specific guidelines provided with your chosen frame materials and seek professional assistance if needed to achieve optimal results.
Adding the Filtration System
The filtration system is a vital component of any swimming pool, as it is responsible for maintaining water clarity, cleanliness, and overall hygiene. When adding a filtration system to your cheap swimming pool, it's essential to select an efficient and cost-effective system that aligns with the size and usage of your pool. Here's a comprehensive guide to help you seamlessly integrate a filtration system into your pool setup:
1. Choosing the Right Filtration System
Before proceeding with the installation, carefully evaluate the available options for filtration systems, taking into account factors such as pool size, water capacity, maintenance requirements, and budget constraints. Common types of filtration systems include sand filters, cartridge filters, and diatomaceous earth (DE) filters. Each type offers unique benefits in terms of filtration efficiency, ease of maintenance, and longevity. Consider consulting with pool supply professionals or researching online resources to determine the most suitable filtration system for your specific needs.
2. Determining the Installation Location
Select an appropriate location for installing the filtration system, ensuring easy access for maintenance and servicing. For above-ground pools, the filtration system is typically positioned near the pool's edge, while in-ground pools may have dedicated equipment areas or enclosures. Ensure that the chosen location allows for proper plumbing connections, electrical access, and adequate ventilation to support the filtration system's operation.
3. Assembling the Filtration Components
Once the installation location is determined, proceed with assembling the filtration components, including the pump, filter, hoses, valves, and related accessories. Follow the manufacturer's instructions and guidelines for each component, ensuring proper alignment, secure connections, and adherence to recommended installation practices. Pay close attention to the orientation of the pump and filter, as well as the routing of inlet and outlet hoses to optimize water flow and filtration efficiency.
4. Establishing Plumbing Connections
Carefully establish the plumbing connections between the pool, filtration system, and any additional features such as skimmers, drains, or return jets. Use PVC pipes, fittings, and appropriate sealants to create a watertight and durable plumbing network. Ensure that the plumbing layout promotes efficient water circulation, minimizes pressure loss, and facilitates easy access for future maintenance or repairs.
5. Electrical Wiring and Safety Considerations
If the filtration system requires electrical power, enlist the assistance of a qualified electrician to handle the wiring and connection to a dedicated power source. Adhere to local building codes and safety standards when installing electrical components, and consider incorporating ground fault circuit interrupters (GFCIs) or other safety devices to protect against electrical hazards in a pool environment.
6. Testing and Commissioning
Upon completing the installation and connections, thoroughly test the filtration system to verify its functionality and performance. Prime the pump, check for leaks, and observe the water circulation and filtration process to ensure proper operation. Conduct a comprehensive inspection of the entire system, addressing any issues or deficiencies before commissioning the filtration system for regular use.
7. Establishing Maintenance Protocols
Develop a routine maintenance schedule and protocols for the filtration system, including filter cleaning, pump maintenance, water chemistry testing, and overall system checks. Familiarize yourself with the recommended maintenance tasks outlined by the filtration system manufacturer, and proactively address any maintenance needs to uphold water quality and system longevity.
By following these detailed steps and prioritizing the selection, installation, and maintenance of the filtration system, you can effectively integrate a reliable and efficient filtration system into your cheap swimming pool. A well-maintained filtration system not only ensures crystal-clear water but also contributes to a safe and enjoyable swimming experience for you and your family.
Filling and Maintaining the Pool
Filling and maintaining your cheap swimming pool is a crucial aspect of ensuring its longevity, water quality, and overall enjoyment. From the initial filling of the pool with water to the ongoing maintenance routines, each step plays a significant role in preserving the pristine condition of your aquatic oasis. Here's a comprehensive guide to help you navigate the process of filling and maintaining your pool with efficiency and care:
1. Filling the Pool
Once the construction of your pool is complete, it's time to fill it with water. Depending on the size of your pool and the availability of water sources, you may choose to fill it using a garden hose, a water delivery service, or other suitable methods. Here are some key considerations for filling the pool:
-
Water Source: Ensure that the water source used for filling the pool meets local regulations and quality standards. If using tap water, consider testing the initial fill water for pH, alkalinity, and chlorine levels to establish a baseline for water chemistry.
-
Filling Rate: Monitor the rate of water filling to prevent overflows and to allow for adjustments to water chemistry as the pool fills. Avoid rapid filling, which can disturb the pool's foundation and lead to uneven water distribution.
-
Water Level: As the pool fills, regularly check and adjust the water level to ensure it aligns with the recommended depth for safe and optimal swimming conditions.
2. Water Chemistry and Testing
Maintaining proper water chemistry is essential for preserving water clarity, preventing algae growth, and ensuring a safe swimming environment. Regular testing and adjustment of water chemistry parameters are fundamental to effective pool maintenance. Here's how to manage water chemistry:
-
pH Balance: Test the pH level of the pool water using a reliable water testing kit. The ideal pH range for pool water is typically between 7.2 and 7.8. Adjust the pH as needed using pH increasers or decreasers to maintain a balanced environment for swimmers and pool equipment.
-
Chlorine Levels: Monitor the chlorine levels in the pool water to ensure effective disinfection and sanitation. Maintain a chlorine level within the recommended range to combat bacteria, viruses, and organic contaminants.
-
Alkalinity and Calcium Hardness: Regularly test and adjust the alkalinity and calcium hardness levels to promote water stability and prevent corrosion or scaling issues.
3. Skimming and Cleaning
To keep the pool water clear and free of debris, establish a routine for skimming the surface, vacuuming the pool floor, and cleaning the pool walls. Here's how to effectively manage skimming and cleaning:
-
Skimming: Use a skimmer net to remove leaves, insects, and other floating debris from the pool surface on a daily basis. This helps prevent debris from sinking and affecting water quality.
-
Vacuuming: Utilize a pool vacuum to clean the pool floor and walls, removing dirt, sediment, and algae buildup. Regular vacuuming helps maintain a clean and inviting pool environment.
4. Filter Maintenance
The filtration system plays a pivotal role in removing impurities and maintaining water clarity. To ensure the optimal performance of the filtration system, adhere to the following maintenance practices:
-
Regular Cleaning: Clean or backwash the pool filter according to the manufacturer's recommendations to prevent clogging and maintain efficient filtration.
-
Inspection and Replacement: Periodically inspect the filter media, cartridges, and components for wear and tear, and replace them as needed to sustain filtration effectiveness.
5. Water Circulation and Aeration
Promoting proper water circulation and aeration is essential for preventing stagnation and maintaining water quality. Consider the following practices to enhance water circulation and aeration:
-
Run the Pump: Operate the pool pump and filtration system for an adequate duration each day to facilitate water circulation and filtration.
-
Use Water Features: If applicable, utilize water features such as fountains, waterfalls, or aerators to enhance water movement and aeration, promoting a healthier pool environment.
By diligently following these guidelines and incorporating regular pool maintenance into your routine, you can ensure that your cheap swimming pool remains a refreshing and inviting retreat for years to come. Remember that consistent care and attention to water quality and pool cleanliness are essential for preserving the value and enjoyment of your pool investment.
Conclusion
In conclusion, building a cheap swimming pool is an achievable and rewarding endeavor that can transform your outdoor space into a refreshing retreat. By carefully selecting the right location, choosing a suitable pool design, gathering the necessary materials and tools, and following the step-by-step construction process, you can create a budget-friendly pool that provides endless enjoyment for you and your family.
Remember to prioritize safety, proper planning, and adherence to local regulations throughout the construction process. Additionally, maintaining the pool with regular cleaning, water testing, and equipment upkeep is essential for preserving water quality and ensuring a safe and inviting swimming environment.
With the right guidance, creativity, and a willingness to roll up your sleeves, you can bring your dream of owning a swimming pool to life without breaking the bank. So, go ahead and dive into the exciting world of DIY pool construction – your backyard oasis awaits!