Home>Create & Decorate>DIY & Crafts>How To Build A Pool Deck

DIY & Crafts
How To Build A Pool Deck
Published: February 22, 2024

Content Creator specializing in woodworking and interior transformations. Caegan's guides motivate readers to undertake their own projects, while his custom furniture adds a personal touch.
Learn how to build a pool deck with our step-by-step DIY guide. Get creative with your outdoor space and enhance your pool area with these crafty ideas.
(Many of the links in this article redirect to a specific reviewed product. Your purchase of these products through affiliate links helps to generate commission for Twigandthistle.com, at no extra cost. Learn more)
Introduction
Building a pool deck can transform your backyard into a luxurious oasis, providing a perfect spot for relaxation, entertainment, and soaking up the sun. Whether you're envisioning a sleek and modern design or a rustic and natural aesthetic, a well-crafted pool deck can elevate the overall appeal of your outdoor space. As you embark on this DIY project, it's essential to approach it with careful planning, attention to detail, and a creative vision.
A well-constructed pool deck not only enhances the visual appeal of your pool area but also serves as a functional and safe platform for various activities. From hosting lively poolside gatherings to enjoying quiet moments of solitude, a thoughtfully designed pool deck can cater to a myriad of needs and preferences. Additionally, a carefully planned pool deck can increase the overall value of your property, making it a worthwhile investment for both your present enjoyment and future resale value.
In this comprehensive guide, we will walk you through the step-by-step process of building a pool deck, from the initial planning and design phase to the final touches that add personality and charm. By following these detailed instructions and tips, you'll gain the confidence and knowledge needed to embark on this rewarding DIY endeavor. So, roll up your sleeves, gather your tools, and let's dive into the exciting world of pool deck construction.
Read more: How To Build A Small Pool Deck
Step 1: Planning and Designing Your Pool Deck
Before diving into the construction phase, it's crucial to meticulously plan and design your pool deck. This initial step sets the foundation for a successful and visually appealing outcome. Here's a detailed breakdown of the essential considerations and tasks involved in this crucial phase:
Assess Your Needs and Preferences
Begin by envisioning how you intend to use the pool deck. Are you aiming for a spacious entertainment area with ample seating, or do you prefer a more intimate setting for relaxation? Consider factors such as sun exposure, privacy, and the integration of landscaping elements. Understanding your specific needs and preferences will guide the design process and ensure that the final result aligns with your vision.
Determine the Deck Size and Layout
Take precise measurements of the pool area and determine the ideal size and layout for your deck. Consider the flow of traffic, designated activity zones, and any existing features, such as trees or shrubbery, that you wish to incorporate into the design. Visualize how the deck will complement the overall landscape and architectural style of your home, ensuring a harmonious integration with the surroundings.
Select Suitable Materials
Choose materials that not only enhance the aesthetic appeal of your pool deck but also withstand the elements and provide long-term durability. Options such as composite decking, natural wood, or concrete pavers offer diverse aesthetics and maintenance requirements. Consider factors such as slip resistance, heat retention, and ease of maintenance when making your selection.
Incorporate Safety Features
Prioritize safety by integrating essential features such as sturdy railings, non-slip surfaces, and adequate lighting. These elements not only enhance the safety of the pool deck but also contribute to its overall functionality and visual appeal. Additionally, consider local building codes and regulations to ensure compliance with safety standards.
Seek Inspiration and Guidance
Gather inspiration from various sources, including home improvement magazines, online platforms, and professional design portfolios. Explore different styles, color palettes, and layout ideas to refine your vision and gain valuable insights into the latest trends and design possibilities. Additionally, consulting with experienced professionals or seeking guidance from reputable DIY resources can provide valuable perspectives and practical advice.
By meticulously planning and designing your pool deck, you lay the groundwork for a successful construction phase and a stunning end result that reflects your unique style and preferences. This thoughtful approach ensures that every aspect of the design aligns with your vision, resulting in a pool deck that seamlessly integrates with your outdoor space while enhancing its functionality and visual appeal.
Step 2: Gathering Materials and Tools
Gathering the necessary materials and tools is a pivotal step in the process of building a pool deck. The careful selection of high-quality materials and the acquisition of essential tools are crucial for ensuring a smooth and efficient construction phase. Here's a detailed breakdown of the key components required for this stage:
Materials
-
Decking Materials: Depending on your design preferences and budget, select the appropriate decking materials such as composite boards, pressure-treated lumber, or natural wood options like cedar or redwood. Consider factors such as durability, resistance to moisture and UV exposure, and overall aesthetic appeal when choosing the decking material that best suits your vision for the pool deck.
-
Support Structure: Acquire the necessary materials for constructing the support structure of the deck, including pressure-treated lumber for joists, beams, and posts. These components form the foundational framework that provides stability and structural integrity to the pool deck.
-
Hardware and Fasteners: Ensure that you have a sufficient supply of corrosion-resistant screws, nails, and joist hangers to secure the various components of the deck structure. Opt for fasteners specifically designed for outdoor use to prevent rust and degradation over time.
-
Concrete Footings or Piers: If your deck design requires the use of concrete footings or piers to support the structural posts, procure the necessary concrete mix, form tubes, and rebar for this foundational element.
-
Railings and Balusters: If your design incorporates railings, select the appropriate materials such as wood, metal, or composite components. Ensure that the chosen railing system complies with safety regulations and complements the overall aesthetic of the deck.
-
Finishing Touches: Consider any additional materials needed for finishing touches, such as fascia boards, trim pieces, and decorative elements that add visual interest and refinement to the completed deck.
Read more: How To Build A Pool
Tools
-
Power Tools: Essential power tools for deck construction include a circular saw, power drill, impact driver, and a miter saw for precision cutting and assembly of various components.
-
Hand Tools: Gather a comprehensive set of hand tools, including a hammer, tape measure, level, framing square, adjustable wrench, and a pry bar for tasks that require manual precision and adjustment.
-
Safety Gear: Prioritize safety by acquiring personal protective equipment such as safety glasses, work gloves, and hearing protection. Additionally, consider the use of a dust mask and knee pads for added comfort and protection during the construction process.
-
Concrete Mixing Tools: If concrete footings or piers are part of your deck design, ensure that you have the necessary tools for mixing and pouring concrete, such as a mixing tub, shovel, and trowel.
-
Lifting and Transport Equipment: Depending on the size and weight of the materials, consider the need for equipment such as a hand truck or wheelbarrow to facilitate the movement of heavy items during the construction phase.
By meticulously gathering the required materials and tools, you set the stage for a well-prepared and efficient construction process. This proactive approach ensures that you have everything needed to execute each phase of the project with precision and confidence, ultimately leading to a professionally crafted pool deck that enhances the beauty and functionality of your outdoor space.
Step 3: Preparing the Ground
Preparing the ground for your pool deck is a critical phase that sets the foundation for a stable and long-lasting structure. This step involves a series of meticulous tasks aimed at ensuring proper drainage, stability, and compatibility with the chosen decking materials. Here's a detailed breakdown of the essential processes involved in preparing the ground for your pool deck:
Clearing and Leveling the Site
Begin by clearing the designated area of any vegetation, debris, or obstructions that may impede the construction process. Use a shovel, rake, or a rented skid-steer loader to remove grass, rocks, and roots, ensuring a clean and level surface for the deck foundation. Pay close attention to the overall slope of the site, as achieving a uniform and level base is crucial for the structural integrity of the deck.
Marking the Layout
Using wooden stakes, string, and a tape measure, mark the precise layout of the pool deck, outlining the perimeter and any designated features such as stairways or integrated seating areas. This step allows for visualizing the final dimensions of the deck and ensures accurate placement within the surrounding landscape.
Read more: How To Build A Natural Swimming Pool
Excavation and Soil Compaction
If the ground exhibits unevenness or requires adjustments to accommodate the deck's support structure, excavation may be necessary. Use a compact excavator or a manual digging tool to remove soil as needed, taking care to maintain the desired depth and slope. Once the excavation is complete, compact the soil using a plate compactor or a hand tamper to create a stable and uniform base for the deck foundation.
Installation of Drainage Systems
Incorporate proper drainage measures to prevent water accumulation and potential damage to the deck structure. Consider installing a French drain or a perforated pipe system to redirect excess water away from the deck area, ensuring that the underlying soil remains stable and free from moisture-related issues.
Weed Barrier and Gravel Bed
To inhibit weed growth and enhance soil stability, lay a high-quality weed barrier fabric over the prepared ground. This barrier acts as a protective layer, preventing weed penetration while allowing for adequate water drainage. Once the weed barrier is in place, spread a layer of compacted gravel to create a firm and well-drained base for the deck foundation.
By meticulously preparing the ground for your pool deck, you establish a solid and reliable base that supports the structural integrity and longevity of the entire project. This preparatory phase lays the groundwork for the subsequent construction steps, ensuring that the deck is built upon a stable and well-engineered foundation that enhances its overall performance and durability.
Step 4: Building the Frame
Building the frame of your pool deck is a pivotal phase that forms the structural backbone of the entire construction. This step involves precise measurements, strategic assembly, and meticulous attention to detail to ensure the stability and longevity of the deck. Here's a comprehensive guide to the essential processes involved in constructing the frame of your pool deck:
Read more: How To Build A Cheap Swimming Pool
Establishing the Ledger Board
Begin by attaching a ledger board to the exterior wall of your home, ensuring that it is securely anchored and level. The ledger board serves as a primary support element for the deck frame, providing stability and structural connection to the existing structure. Use lag screws or through-bolts to secure the ledger board, taking care to align it with the predetermined deck height and ensuring proper flashing to prevent water intrusion.
Installing the Joists
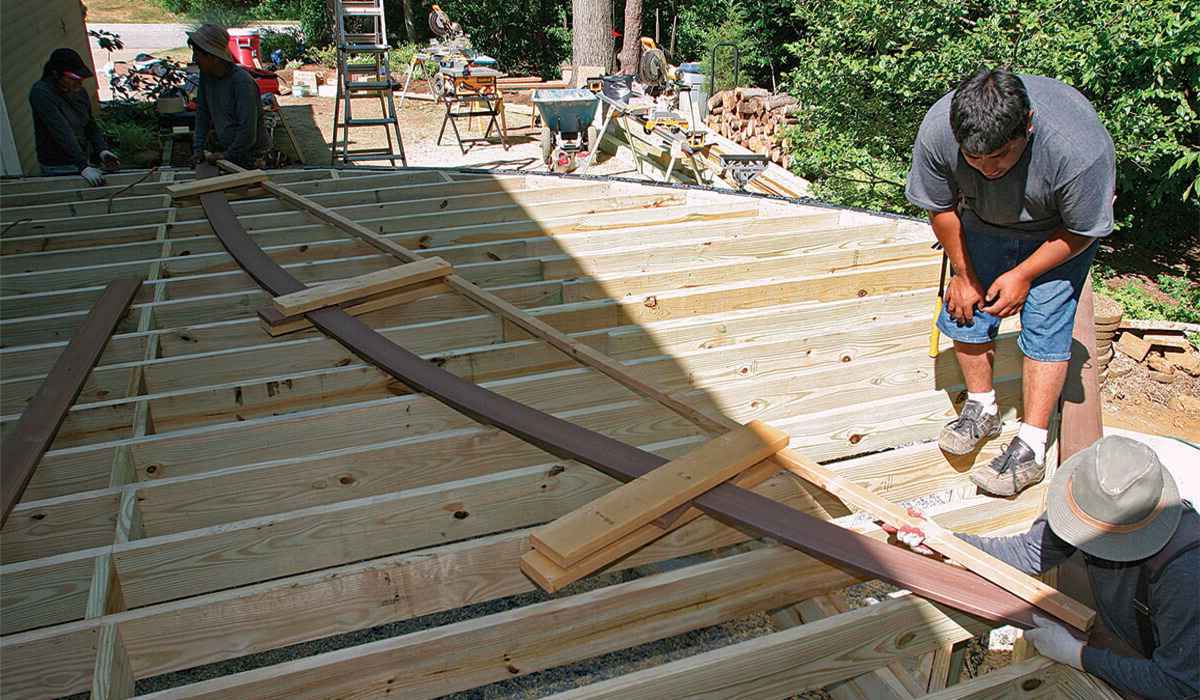
With the ledger board in place, proceed to install the joists, which form the horizontal framework of the deck. Space the joists according to the predetermined layout, ensuring uniformity and structural integrity. Utilize joist hangers to secure the joists to the ledger board and beams, maintaining precise alignment and levelness throughout the installation process. Additionally, incorporate blocking between the joists to enhance stability and prevent lateral movement.
Adding Support Beams and Posts
Integrate support beams and posts to reinforce the structural framework of the deck. Position the beams perpendicular to the joists, providing essential support and load distribution for the decking material. Secure the beams to the posts using appropriate hardware, such as carriage bolts or adjustable post caps, ensuring a secure and stable connection. Verify that the beams are level and properly aligned to maintain the integrity of the frame.
Incorporating Additional Structural Elements
Depending on the design and size of your pool deck, consider incorporating additional structural elements such as diagonal bracing, cantilevered sections, or specialized framing techniques to enhance stability and load-bearing capacity. These elements contribute to the overall strength and resilience of the frame, ensuring that it can withstand the demands of regular use and environmental factors.
Read more: How to Build a DIY Flat Roofing System
Ensuring Alignment and Levelness
Throughout the frame construction process, prioritize precise alignment and levelness to guarantee a uniform and structurally sound foundation for the deck. Utilize a spirit level, string lines, and adjustable supports to verify the accuracy of the frame components, making any necessary adjustments to maintain optimal alignment and levelness.
By meticulously executing the process of building the frame, you establish a robust and reliable foundation for the pool deck, setting the stage for the subsequent phases of decking installation and finishing touches. This critical step forms the structural framework that supports the aesthetic and functional aspects of the deck, ensuring a well-engineered and enduring outdoor space for relaxation, entertainment, and enjoyment.
Step 5: Installing the Decking
With the frame of your pool deck meticulously constructed, the next pivotal phase involves the precise installation of the decking material, transforming the structural framework into a visually stunning and functional outdoor space. This step requires careful attention to detail, precision cutting, and strategic placement to achieve a seamless and visually appealing deck surface. Here's a comprehensive guide to the essential processes involved in installing the decking for your pool deck:
Selecting the Installation Pattern
Before commencing the installation, consider the layout and pattern in which the decking material will be placed. Whether opting for traditional parallel planks, intricate herringbone patterns, or innovative diagonal arrangements, visualize the aesthetic impact and structural considerations of each layout option. Additionally, determine the optimal starting point for the installation, ensuring a balanced and symmetrical appearance across the entire deck surface.
Preparing the Decking Material
If utilizing natural wood decking, ensure that the boards have been acclimated to the outdoor environment to minimize warping or dimensional changes after installation. For composite or PVC decking, verify that the material is free from defects and damage, allowing for a smooth and consistent installation process. Prior to installation, inspect each board for quality and uniformity, making any necessary adjustments or replacements as needed.
Read more: How To Build A Deck Railing
Securing the First Row
Commence the installation by securing the first row of decking material, ensuring proper alignment and spacing between the boards. Utilize stainless steel or corrosion-resistant fasteners to prevent rust and degradation over time, maintaining the structural integrity and visual appeal of the deck surface. Employ specialized fastening systems or hidden fastener options for a sleek and unblemished appearance, minimizing visible hardware and enhancing the overall aesthetic.
Precision Cutting and Trimming
As the installation progresses, precise cutting and trimming of the decking material may be necessary to accommodate the deck's unique contours, features, and architectural elements. Utilize a circular saw, jigsaw, or specialized decking tools to achieve clean and accurate cuts, ensuring a seamless fit and professional finish. Pay close attention to detail when cutting around posts, edges, and intricate design elements, maintaining a cohesive and polished appearance throughout the installation process.
Ensuring Proper Drainage and Ventilation
Throughout the installation, prioritize proper drainage and ventilation to safeguard the longevity and performance of the deck. Incorporate strategic spacing between the decking boards to facilitate water runoff and airflow, preventing moisture accumulation and potential issues such as rot or decay. Additionally, consider the integration of specialized drainage systems or under-deck waterproofing solutions to enhance the overall functionality and durability of the deck surface.
Verifying Structural Integrity
As the decking installation nears completion, thoroughly inspect the structural integrity and alignment of the installed boards, making any necessary adjustments to ensure uniformity and stability. Utilize a spirit level and straightedge to verify the evenness of the deck surface, addressing any discrepancies or irregularities to achieve a flawless and visually appealing result.
By meticulously executing the process of installing the decking material, you transform the foundational framework into a captivating and functional pool deck, ready to accommodate a myriad of outdoor activities and leisurely pursuits. This meticulous phase sets the stage for the final touches and embellishments that add personality and charm to the completed deck, culminating in a stunning outdoor space that reflects your unique style and enhances the overall appeal of your home.
Read more: How To Build A Tech Deck
Step 6: Adding Finishing Touches
As the construction of your pool deck nears completion, the addition of finishing touches elevates the overall aesthetic appeal and functionality of the outdoor space. This phase involves the integration of design elements, safety features, and personalized enhancements that contribute to the deck's visual allure and practicality. Here's a detailed exploration of the essential processes involved in adding the finishing touches to your pool deck:
Railing and Balustrades
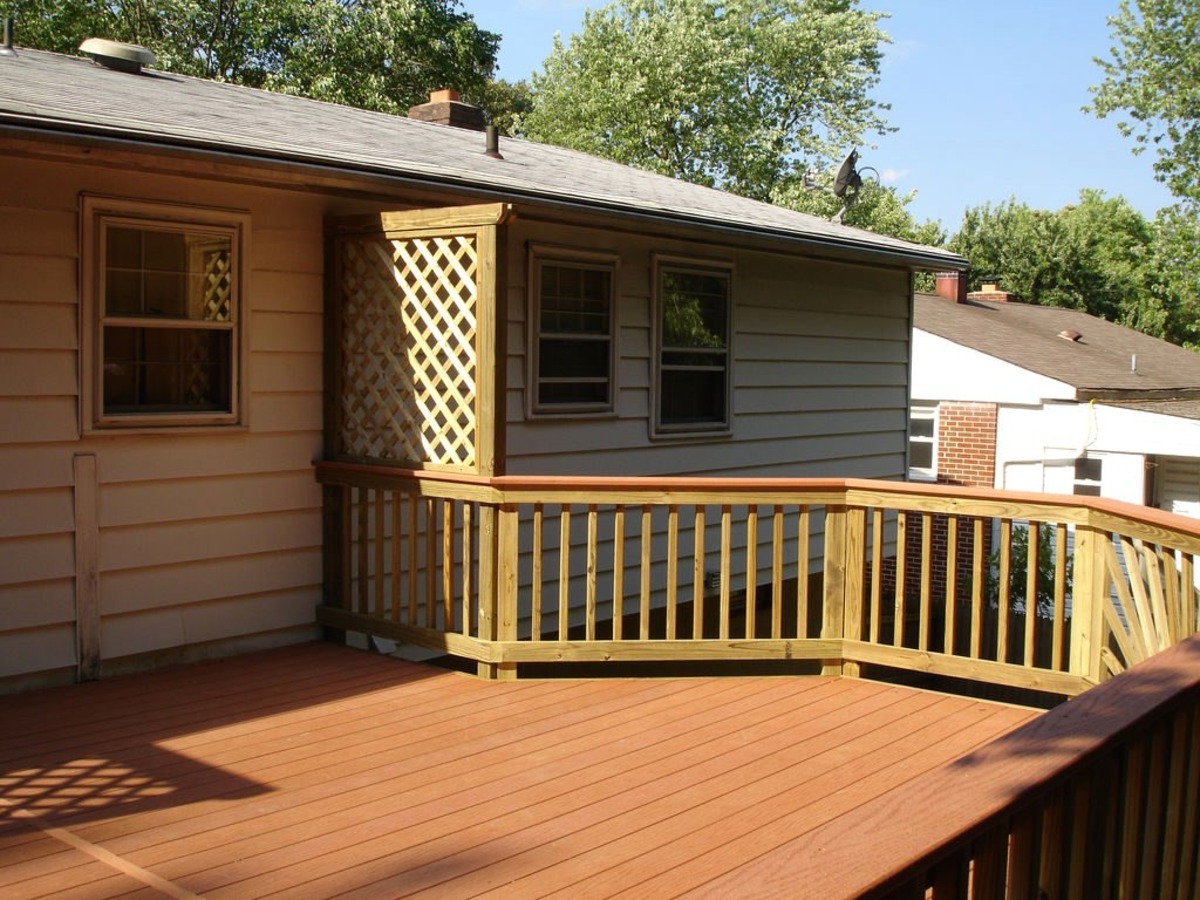
Incorporate stylish and secure railing systems to enhance safety and visual appeal. Whether opting for sleek metal railings, traditional wood balustrades, or modern glass panels, select a design that complements the overall aesthetic of the deck while providing essential support and protection.
Lighting Solutions
Illuminate the deck area with strategically placed lighting fixtures to extend its functionality into the evening hours. Consider options such as low-voltage LED deck lights, solar-powered pathway lighting, or elegant string lights to create a captivating ambiance and ensure safe navigation after dark.
Seating and Storage
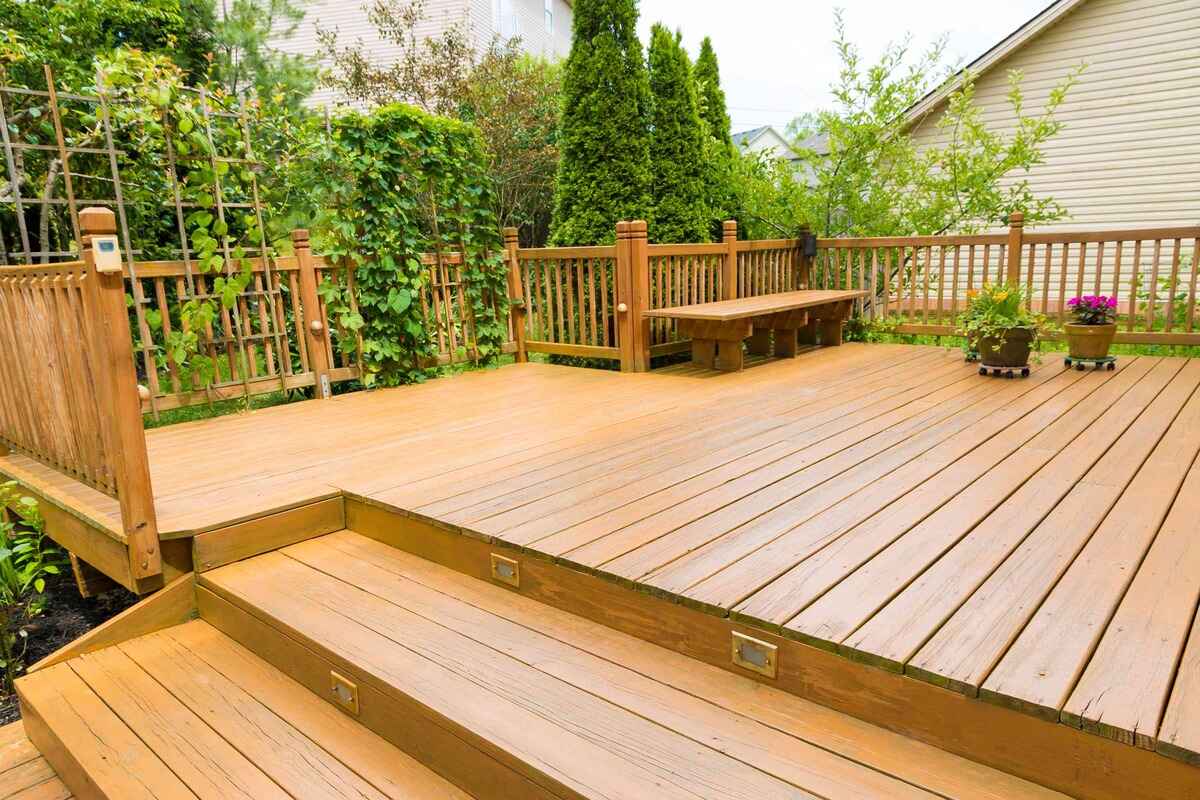
Integrate built-in seating elements or dedicated storage solutions to maximize the deck's versatility and convenience. Incorporate benches with hidden storage compartments, stylish outdoor furniture, or custom seating arrangements that cater to relaxation and social gatherings while optimizing space utilization.
Read more: How To Build Deck Stairs
Landscaping Integration
Enhance the natural beauty of the deck area by integrating landscaping elements such as potted plants, decorative shrubs, or vibrant flower beds. Create a seamless transition between the deck and the surrounding landscape, infusing the space with color, texture, and a touch of natural charm.
Personalized Accents
Add personalized accents and decorative elements that reflect your unique style and personality. Consider features such as custom signage, artistic sculptures, or handcrafted embellishments that infuse the deck with character and individuality, creating a welcoming and inviting atmosphere.
Maintenance Considerations
Implement maintenance-friendly features such as integrated hose reels, outdoor storage cabinets, or durable deck finishes that simplify upkeep and preserve the deck's pristine appearance. Prioritize materials and design elements that resist weathering, staining, and wear, ensuring long-term durability and minimal maintenance requirements.
By meticulously attending to the process of adding finishing touches, you elevate the pool deck from a functional structure to a captivating outdoor retreat that embodies your vision and enhances the overall appeal of your home. These thoughtful enhancements contribute to a well-rounded and inviting outdoor space, ready to accommodate leisure, entertainment, and cherished moments with family and friends.
Conclusion
As you stand back and admire the completed pool deck, it's evident that this transformative DIY project has not only enhanced the visual appeal of your outdoor space but also created a versatile and inviting area for relaxation, entertainment, and cherished gatherings. The meticulous planning and execution of each phase, from the initial design considerations to the integration of finishing touches, have culminated in a stunning and functional pool deck that seamlessly integrates with the surrounding landscape and elevates the overall ambiance of your home.
The careful selection of materials, strategic placement of structural elements, and precision in decking installation have resulted in a robust and visually captivating outdoor space. The addition of personalized accents, safety features, and thoughtful embellishments has infused the deck with character and individuality, creating an inviting atmosphere that beckons both leisurely moments of solitude and lively social interactions.
Moreover, the integration of landscaping elements, lighting solutions, and maintenance-friendly features ensures that the pool deck is not only a visual centerpiece but also a practical and enduring asset to your property. The seamless transition between the deck and the surrounding landscape, coupled with the incorporation of personalized accents, reflects your unique style and preferences, making the outdoor space a true extension of your home's identity.
As you envision the countless moments of relaxation, laughter, and enjoyment that await on your new pool deck, it's clear that this DIY endeavor has not only added value to your property but has also enriched your lifestyle. Whether basking in the sun's warmth, hosting vibrant gatherings, or simply unwinding amidst the tranquility of your outdoor sanctuary, the pool deck stands as a testament to your creativity, craftsmanship, and dedication to creating a space that harmoniously blends beauty, functionality, and personal expression.
In conclusion, the journey of building a pool deck has been a rewarding and transformative experience, resulting in a captivating outdoor retreat that embodies your vision and enhances the overall appeal of your home. As you embark on this new chapter of outdoor living, may the pool deck serve as a backdrop for countless cherished memories and moments of joy, creating a legacy of warmth and hospitality for years to come.

