Home>Create & Decorate>DIY & Crafts>How To Build Deck Stairs

DIY & Crafts
How To Build Deck Stairs
Published: February 28, 2024

Senior Editor in Create & Decorate, Kathryn combines traditional craftsmanship with contemporary trends. Her background in textile design and commitment to sustainable crafts inspire both content and community.
Learn how to build deck stairs with our easy DIY & Crafts guide. Follow our step-by-step instructions for a sturdy and safe staircase.
(Many of the links in this article redirect to a specific reviewed product. Your purchase of these products through affiliate links helps to generate commission for Twigandthistle.com, at no extra cost. Learn more)
Introduction
Building deck stairs is a rewarding DIY project that can enhance the functionality and aesthetic appeal of your outdoor space. Whether you're constructing a new deck or renovating an existing one, well-built stairs are essential for safe and convenient access. By following the proper steps and utilizing the right tools and materials, you can create sturdy and visually appealing deck stairs that will stand the test of time.
When it comes to designing and constructing deck stairs, precision and attention to detail are crucial. From measuring and planning to cutting and installing, each step in the process plays a vital role in ensuring the structural integrity and overall look of the stairs. Additionally, incorporating handrails and balusters not only adds to the visual appeal but also provides essential safety features for anyone using the stairs.
In this comprehensive guide, we will walk you through the step-by-step process of building deck stairs. You will learn how to gather the necessary materials and tools, measure and plan for the stairs, cut and install stringers, attach treads and risers, and add handrails and balusters. By the end of this guide, you will have the knowledge and confidence to tackle this project and create a set of deck stairs that seamlessly blend with your outdoor living space.
So, roll up your sleeves, grab your tools, and let's dive into the exciting world of building deck stairs. Whether you're a seasoned DIY enthusiast or a novice looking to expand your skills, this guide will equip you with the know-how to complete this project with finesse. Let's get started on this fulfilling journey of crafting functional and visually appealing deck stairs that will elevate the charm and accessibility of your outdoor oasis.
Read more: How To Build Deck Stairs With A Landing
Step 1: Gather Materials and Tools
Before embarking on the construction of deck stairs, it's essential to gather all the necessary materials and tools. By ensuring that you have everything at your disposal, you can streamline the building process and minimize interruptions. Here's a comprehensive list of materials and tools you'll need for this project:
Materials:
- Pressure-treated lumber for stringers, treads, and risers
- Galvanized or stainless steel screws and nails
- Concrete mix (if attaching the stairs to a concrete pad)
- Gravel or crushed stone (for creating a stable base)
- Metal brackets and hardware for securing the stringers
- Wood preservative or sealant for protecting the lumber from the elements
- Handrail and baluster components (if adding handrails)
Tools:
- Measuring tape
- Carpenter's square
- Circular saw or miter saw for cutting lumber
- Power drill with screwdriver bits
- Level for ensuring precise installation
- Shovel for digging if necessary
- Hammer
- Safety goggles and ear protection
- Work gloves for handling lumber and hardware
- Paintbrush for applying wood preservative or sealant
By gathering these materials and tools, you'll be well-equipped to proceed with the subsequent steps in building your deck stairs. It's important to prioritize safety throughout the project, so be sure to use appropriate safety gear and exercise caution when handling tools and materials.
With the materials and tools in hand, you're now ready to move on to the next step: measuring and planning for the construction of your deck stairs. This phase is crucial for laying the groundwork and ensuring that the stairs will be structurally sound and visually appealing. So, let's dive into the exciting process of measuring and planning, where precision and attention to detail will be key to your success.
Step 2: Measure and Plan
Before diving into the physical construction of deck stairs, it's crucial to meticulously measure and plan the layout. This phase sets the foundation for a successful and visually appealing staircase that seamlessly integrates with your deck and outdoor space.
Read more: How To Build Outdoor Stairs
Measure Twice, Cut Once
Begin by determining the total rise and run of the stairs. The rise refers to the vertical height from the top of the deck to the ground, while the run denotes the horizontal distance the stairs will cover. Accurate measurements are essential for ensuring that the stairs are proportionate and meet building code requirements.
Consider Building Codes and Regulations
Familiarize yourself with local building codes and regulations pertaining to deck stairs. These guidelines often dictate specific requirements for rise, run, tread width, and handrail height. Adhering to these standards is crucial for safety and compliance.
Sketch the Design
Create a detailed sketch or blueprint of the planned staircase. This visual representation should include the dimensions, placement of stringers, positioning of treads and risers, and any additional features such as handrails and balusters. A clear blueprint serves as a roadmap for the construction process, minimizing errors and ensuring a cohesive design.
Evaluate the Terrain
Assess the terrain and the area where the stairs will be installed. Consider any obstacles, slopes, or landscaping features that may impact the placement and design of the stairs. Adapting the staircase to the natural contours of the landscape can enhance both functionality and visual appeal.
Read more: How To Build Stairs
Plan for Safety and Accessibility
Incorporate safety features into the design, such as evenly spaced treads, secure handrails, and appropriate lighting if the stairs will be used after dark. Additionally, ensure that the stairs are easily accessible and accommodate individuals with varying mobility levels.
Double-Check Measurements
Once the initial measurements and planning are complete, double-check all dimensions and calculations. Precision is paramount in this phase, as inaccuracies can lead to significant issues during the construction process.
By meticulously measuring and planning the layout of your deck stairs, you set the stage for a smooth and successful construction process. This preparatory phase not only ensures structural integrity and compliance with regulations but also allows for the seamless integration of the stairs into your outdoor living space. With the measurements finalized and the plan in place, you're now ready to move on to the next phase: cutting the stringers and preparing for the installation of the stairs.
Step 3: Cut Stringers
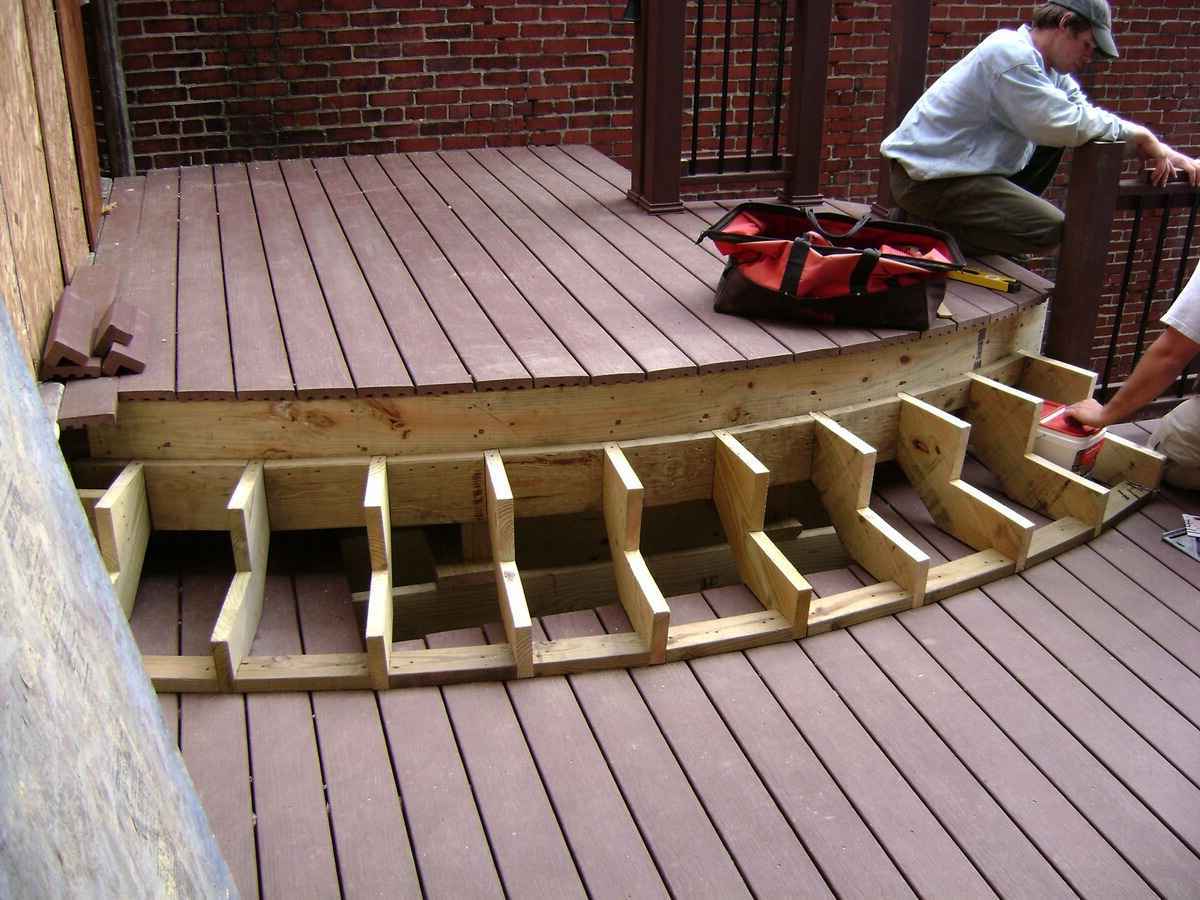
Cutting the stringers is a critical step in the construction of deck stairs. Stringers are the structural supports that hold the treads and risers in place, providing the framework for the stairs. Precision and accuracy are paramount during this phase to ensure that the stringers fit securely and support the weight of individuals using the stairs.
Marking and Layout
Begin by marking and laying out the stringers. Use a framing square to mark the rise and run measurements on the stringer board. The rise and run dimensions, determined during the planning phase, dictate the angle and length of the cuts. Ensure that the layout adheres to the planned design and complies with building codes.
Read more: How To Build A Loft Bed With Stairs
Cutting the Stringers
Carefully cut along the marked lines to create the notches for the treads and risers. A circular saw or a handsaw can be used for this purpose, depending on the thickness of the stringer board. Take your time to make precise cuts, as any inaccuracies can compromise the structural integrity of the stairs.
Test Fit and Adjustments
Once the notches are cut, perform a test fit of the stringers to ensure that they align correctly with the deck and the ground. Make any necessary adjustments to the notches or angles to achieve a snug and secure fit. It's essential to double-check the alignment and levelness of the stringers to prevent issues during the installation phase.
Preserving the Stringers
To protect the stringers from moisture and decay, consider applying a wood preservative or sealant to the cut edges and surfaces. This extra step can prolong the lifespan of the stringers and contribute to the overall durability of the stairs, especially if they are exposed to the elements.
By meticulously cutting the stringers according to the predetermined measurements and layout, you set the stage for the successful installation of the deck stairs. This phase requires attention to detail and a focus on precision to ensure that the stringers provide a sturdy and reliable foundation for the stairs. With the stringers cut and prepared, you're now ready to proceed to the next phase: installing the stringers and bringing the staircase to life.
Step 4: Install Stringers
With the stringers cut to precision and prepared for installation, it's time to bring the structural framework of the deck stairs to life. Installing the stringers is a pivotal phase that sets the stage for the subsequent assembly of treads, risers, and additional components. This step demands meticulous attention to detail and a focus on ensuring the secure attachment of the stringers to the deck and the ground.
Read more: How To Build Stair Stringers
Positioning and Alignment
Begin by positioning the stringers in their designated location, ensuring that they align perfectly with the layout and measurements established during the planning phase. Use a level to confirm that the stringers are plumb and level, as any misalignment at this stage can lead to instability and safety concerns once the stairs are in use.
Attachment to the Deck
Secure the top of the stringers to the deck frame using galvanized or stainless steel screws and appropriate metal brackets. The attachment points should be reinforced to withstand the weight and traffic the stairs will bear. It's crucial to follow best practices for deck attachment to ensure the structural integrity of the entire staircase.
Ground Contact
If the stairs extend to the ground, ensure that the bottom of the stringers makes solid contact with a stable surface. Depending on the terrain, this may involve digging and leveling the ground to create a secure foundation for the stairs. Proper ground contact is essential for the stability and longevity of the staircase.
Additional Support
For added stability, consider installing support posts or braces beneath the stringers, especially for longer staircases. These additional supports can enhance the load-bearing capacity of the stairs and minimize any potential for sagging or shifting over time.
Read more: How To Build 2 Step Stairs
Double-Check and Adjust
Once the stringers are in place, double-check their alignment, levelness, and overall stability. Any necessary adjustments should be made at this stage to ensure that the stringers provide a solid and secure foundation for the subsequent installation of treads and risers.
By meticulously installing the stringers with a focus on alignment, attachment, and stability, you lay the groundwork for a robust and reliable set of deck stairs. This phase is instrumental in ensuring that the stairs not only meet safety standards but also exhibit the craftsmanship and attention to detail that characterize a well-executed DIY project. With the stringers securely in place, you're now poised to progress to the next phase: attaching the treads and risers to complete the construction of the deck stairs.
Step 5: Attach Treads and Risers
Attaching the treads and risers is a pivotal phase in the construction of deck stairs, as it transforms the structural framework into functional and safe steps for accessing your outdoor space. This step requires precision and attention to detail to ensure that the treads and risers are securely installed and provide a stable and comfortable walking surface.
Tread and Riser Preparation
Before attaching the treads and risers, it's essential to prepare these components for installation. If using pressure-treated lumber, ensure that the treads and risers are cut to the precise dimensions determined during the planning phase. Additionally, consider applying a non-slip coating to the treads to enhance traction and safety, especially in outdoor environments where exposure to moisture is a concern.
Secure Attachment
Begin by attaching the risers to the front face of each step, ensuring a snug fit and secure attachment using galvanized or stainless steel screws. The risers play a crucial role in providing structural support and preventing debris from accumulating beneath the stairs. Once the risers are in place, proceed to attach the treads, ensuring that they are evenly spaced and securely fastened to the stringers.
Read more: How To Build A Ramp Over Stairs
Consistent Alignment
Maintain consistent alignment and levelness across all treads and risers to create a uniform and visually appealing staircase. The use of a level during this phase is essential to confirm that each tread is flat and each riser is plumb. Consistency in alignment not only enhances the aesthetic appeal of the stairs but also contributes to safety and ease of use.
Consider Aesthetic Details
While focusing on the structural aspects, consider the aesthetic details of the treads and risers. Be mindful of grain patterns and knots in the wood, arranging the treads to create a visually pleasing pattern. Additionally, consider rounding the front edges of the treads to soften the appearance and minimize the risk of splinters.
Finishing Touches
Once the treads and risers are securely attached, take the time to inspect the entire staircase for any protruding screws or rough edges. Sand any rough areas and ensure that all fasteners are countersunk to create a smooth walking surface. Additionally, consider applying a protective sealant to the treads and risers to safeguard the wood from weathering and prolong the lifespan of the stairs.
By meticulously attaching the treads and risers with a focus on precision, alignment, and aesthetic considerations, you bring the deck stairs to completion. This phase marks the transition from a structural framework to a functional and visually appealing staircase that seamlessly integrates with your outdoor living space. With the treads and risers securely in place, the final phase of adding handrails and balusters will further enhance the safety and charm of your newly constructed deck stairs.
Step 6: Add Handrails and Balusters
The addition of handrails and balusters is the final touch that elevates the safety and visual appeal of your newly constructed deck stairs. Handrails provide essential support and stability, especially for individuals with varying mobility levels, while balusters contribute to the overall aesthetic and safety of the staircase. This phase requires attention to detail and adherence to building codes to ensure that the handrails and balusters not only enhance the functionality of the stairs but also comply with safety standards.
Read more: How To Build A Deck Railing
Selecting Materials
Begin by selecting the materials for the handrails and balusters. Opt for durable and weather-resistant materials such as pressure-treated lumber, composite, or metal that can withstand outdoor elements. Consider the design and style of your deck and choose handrail and baluster components that complement the overall aesthetic while providing the necessary support and protection.
Handrail Installation
Secure the handrails to the designated posts or the side of the deck using appropriate mounting brackets and hardware. Ensure that the handrails are positioned at a comfortable height and provide a secure grip for individuals using the stairs. It's essential to follow local building codes regarding handrail height and clearance to guarantee compliance with safety regulations.
Baluster Placement
Once the handrails are in place, proceed to install the balusters. Space the balusters evenly to prevent any gaps that could pose a safety hazard, especially for children or pets. Depending on the design, balusters can be installed vertically or horizontally, with each orientation offering its own aesthetic and functional benefits. Ensure that the balusters are securely attached to the handrails and the bottom rail, if applicable, to provide stability and prevent any wobbling or movement.
Finishing Touches
After installing the handrails and balusters, inspect the entire staircase to ensure that all components are securely fastened and aligned. Make any necessary adjustments to achieve uniform spacing and a cohesive appearance. Consider adding decorative caps to the tops of the posts and balusters to enhance the visual appeal and provide a polished finishing touch to the staircase.
By meticulously adding handrails and balusters with a focus on safety, functionality, and aesthetic considerations, you complete the construction of your deck stairs with a flourish. This final phase not only enhances the safety and accessibility of the stairs but also adds a touch of craftsmanship and attention to detail that characterizes a well-executed DIY project. With the handrails and balusters securely in place, your deck stairs are now ready to serve as a safe and visually appealing gateway to your outdoor oasis.
Read more: How To Build A Tech Deck
Conclusion
In conclusion, the construction of deck stairs is a gratifying DIY endeavor that combines practical functionality with aesthetic appeal. By following the step-by-step process outlined in this guide, you have gained the knowledge and confidence to embark on this project and create a set of sturdy, visually appealing stairs that seamlessly integrate with your outdoor living space.
Throughout the journey of building deck stairs, precision and attention to detail have been paramount. From gathering the necessary materials and tools to meticulously measuring, cutting, and installing each component, you have embraced the craftsmanship and dedication required for a successful outcome. The careful planning and execution have not only resulted in a structurally sound staircase but also reflect your commitment to creating a safe and inviting environment for accessing your deck.
As you reflect on the completion of this project, take pride in the craftsmanship and attention to detail that have gone into every aspect of the construction. The secure attachment of the stringers, the uniform alignment of treads and risers, and the addition of handrails and balusters all contribute to the overall functionality and visual appeal of the stairs. Your dedication to precision and safety has culminated in a set of deck stairs that not only serve as a practical means of access but also enhance the overall charm of your outdoor space.
Moreover, the skills and knowledge acquired through this project extend beyond the construction of deck stairs. The attention to measurement, planning, and execution can be applied to future DIY endeavors, empowering you to take on new projects with confidence and proficiency. Whether it's a deck renovation, a garden enhancement, or other home improvement projects, the experience gained from building deck stairs equips you with valuable skills that transcend this specific undertaking.
As you admire the completed deck stairs, envision the countless moments and gatherings that will take place on these steps. From leisurely mornings sipping coffee on the deck to lively gatherings with friends and family, the stairs you have constructed will serve as a gateway to cherished memories and experiences. Your commitment to creating a safe, inviting, and visually appealing outdoor space has laid the foundation for countless moments of joy and connection.
In essence, the construction of deck stairs is not merely a practical task but a testament to your dedication to craftsmanship, safety, and the enhancement of your living environment. As you admire the finished project, take pride in the skills you have honed, the knowledge you have acquired, and the transformative impact your efforts have had on your outdoor space. With the completion of this project, you have not only built a set of stairs but have also woven a story of creativity, dedication, and the pursuit of a welcoming and beautiful home.

