Home>Create & Decorate>DIY & Crafts>How To Build A Treehouse

DIY & Crafts
How To Build A Treehouse
Published: February 28, 2024

Content Creator specializing in woodworking and interior transformations. Caegan's guides motivate readers to undertake their own projects, while his custom furniture adds a personal touch.
Learn how to build a treehouse with our step-by-step DIY guide. Get creative with these DIY & Crafts ideas for your backyard project.
(Many of the links in this article redirect to a specific reviewed product. Your purchase of these products through affiliate links helps to generate commission for Twigandthistle.com, at no extra cost. Learn more)
Introduction
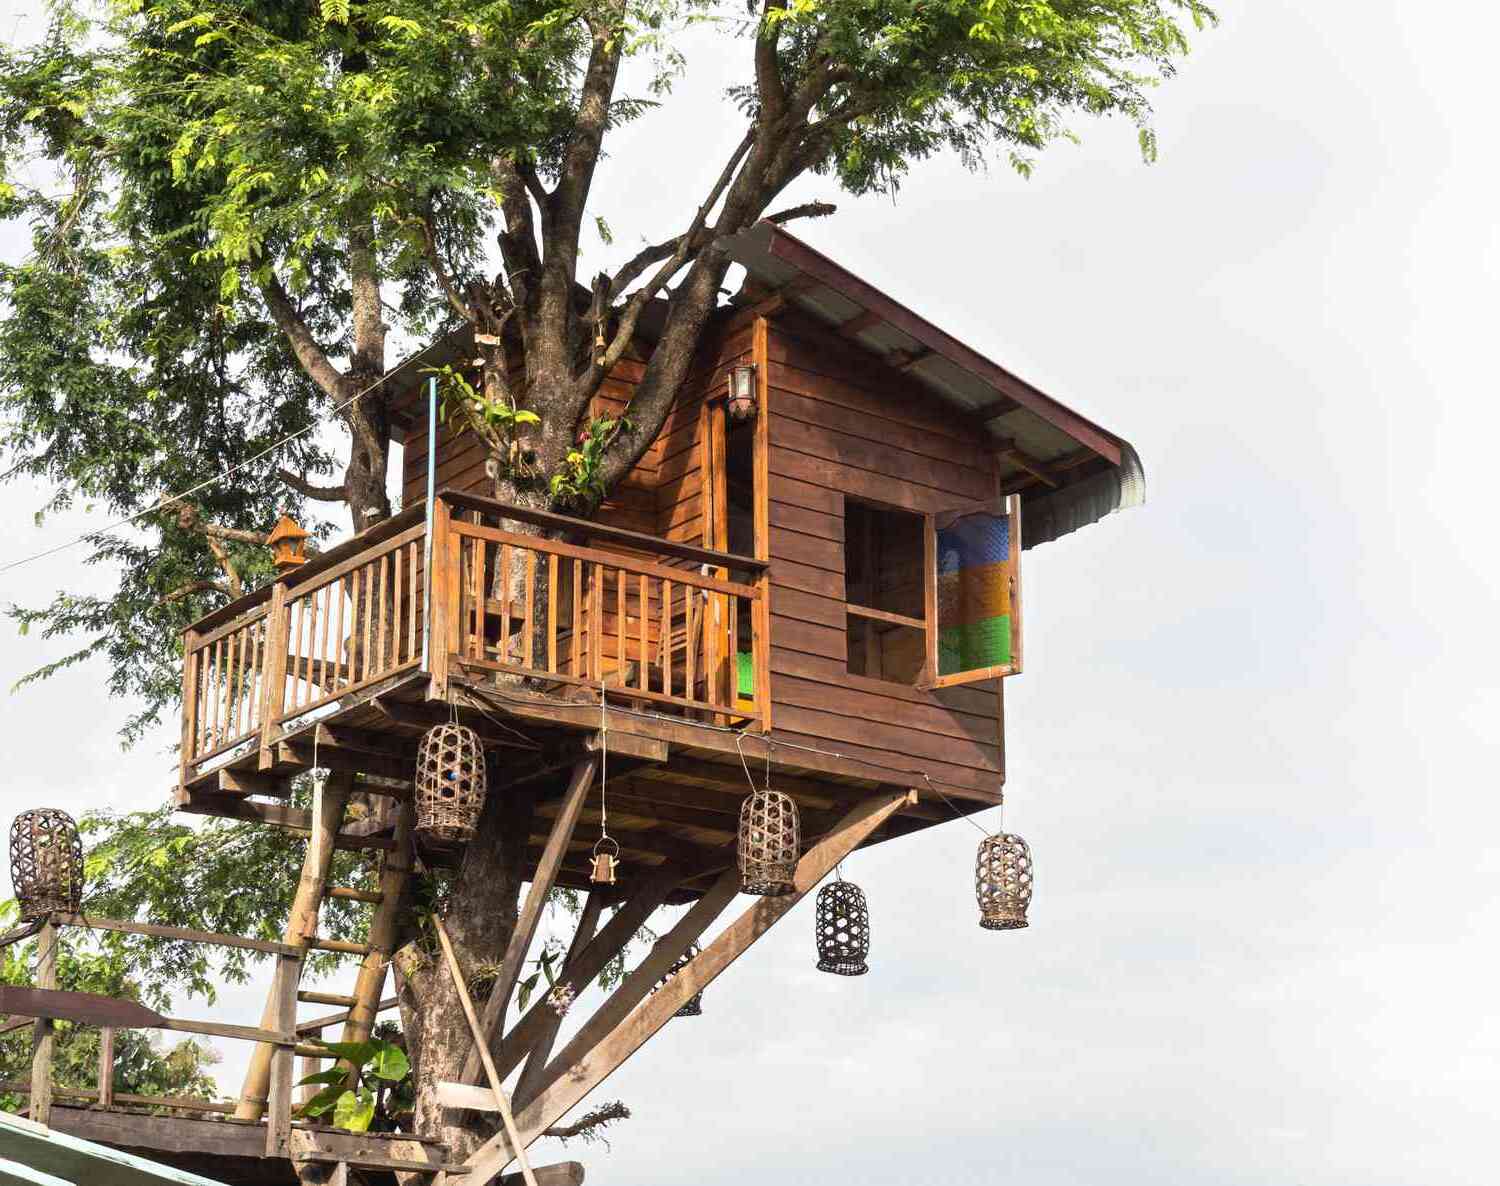
Building a treehouse is a timeless and rewarding DIY project that allows you to create a magical retreat nestled among the branches. Whether you're looking to create a whimsical play space for your children or a peaceful oasis for relaxation, a well-built treehouse can become a cherished addition to your property. The process of constructing a treehouse is not only a practical endeavor but also an opportunity to unleash your creativity and craftsmanship.
As you embark on this adventure, it's essential to approach the project with careful planning and a clear vision. From selecting the perfect tree to gathering the necessary tools and materials, each step plays a crucial role in bringing your treehouse dreams to life. By following a systematic approach and paying attention to detail, you can ensure that your treehouse is not only structurally sound but also a charming and inviting space for enjoyment.
In the following sections, we will guide you through the step-by-step process of building a treehouse, offering valuable insights and practical tips to help you navigate each stage with confidence. From choosing the right tree as the foundation of your treehouse to adding the finishing touches that infuse personality and comfort, you will gain a comprehensive understanding of what it takes to create a remarkable treehouse.
So, roll up your sleeves, unleash your imagination, and get ready to embark on an exciting journey into the world of treehouse construction. With the right guidance and a willingness to embrace the challenges and joys of DIY craftsmanship, you'll soon find yourself perched among the branches, savoring the fruits of your labor in a treehouse that stands as a testament to your ingenuity and dedication.
Read more: How To Build A Clubhouse
Step 1: Choosing the Right Tree
Selecting the right tree is the foundational step in building a sturdy and secure treehouse. The ideal tree should be strong, healthy, and able to support the weight of the structure without causing harm to the tree itself. Here are essential factors to consider when choosing the tree for your treehouse:
-
Tree Species: Opt for a robust and mature tree species, such as oak, maple, or fir, known for their strength and durability. Avoid trees that are prone to rot or disease, as they may compromise the stability of the treehouse.
-
Location and Surroundings: Assess the surrounding area to ensure that the chosen tree is situated in a suitable location. Look for a spot with sufficient space around the tree to accommodate the treehouse and allow for healthy tree growth. Additionally, consider the tree's proximity to other trees, structures, and power lines to avoid potential hazards.
-
Trunk Diameter and Branch Structure: Measure the diameter of the tree trunk to determine if it can support the intended size and weight of the treehouse. Inspect the branch structure to identify sturdy, evenly spaced limbs that can serve as anchor points for the treehouse's support system.
-
Health and Stability: Examine the overall health and stability of the tree, checking for signs of disease, infestation, or structural weaknesses. A healthy tree with a strong root system is essential for ensuring the long-term safety and integrity of the treehouse.
-
Future Growth: Anticipate the tree's future growth and consider how it may impact the treehouse. Account for potential changes in the tree's size and shape, ensuring that the treehouse design allows for natural expansion without causing damage to the structure or the tree.
By carefully evaluating these factors and selecting a suitable tree, you can lay a solid foundation for your treehouse project, setting the stage for a safe, sustainable, and harmonious integration with nature.
Step 2: Designing Your Treehouse
Designing your treehouse is a pivotal stage that allows you to unleash your creativity and transform your vision into a tangible blueprint. The design process encompasses not only the aesthetic aspects but also the structural considerations that will ensure the safety and functionality of the treehouse. Here's a detailed exploration of the key elements involved in designing your treehouse:
Conceptualization and Planning
Begin by conceptualizing the purpose and theme of your treehouse. Whether it's a whimsical play space for children, a tranquil reading nook, or a multifunctional retreat, clarifying the intended use will guide the design direction. Consider the size, layout, and desired features, such as windows, doors, and additional platforms, to create a comprehensive plan.
Structural Integrity and Safety
Prioritize the structural integrity and safety of the treehouse design. Consult building codes and regulations to ensure compliance with safety standards. Engage in thorough research or seek professional advice to determine the appropriate support system, fastening methods, and load-bearing capacity to safeguard the stability of the structure.
Read more: How To Build A Sauna
Material Selection and Sustainability
Choose materials that align with your design vision while prioritizing sustainability and durability. Opt for weather-resistant wood, such as cedar or redwood, to withstand outdoor elements. Consider eco-friendly options and repurposed materials to minimize environmental impact and imbue the treehouse with a unique character.
Integration with Natural Surroundings
Harmonize the design with the natural surroundings to create a seamless integration with the environment. Incorporate the tree's natural features into the design, such as positioning the treehouse around existing branches or allowing space for tree growth. Utilize natural light and ventilation to enhance the connection with the outdoors.
Customization and Personalization
Infuse the design with personalized touches that reflect your individual style and preferences. Whether it's adding decorative elements, customizing the interior layout, or incorporating a themed aesthetic, the design should encapsulate your personality and create a captivating space that resonates with its users.
Visualization and Adaptability
Utilize visualization tools, such as sketches, 3D models, or architectural software, to bring your design to life and make necessary adjustments. Embrace adaptability in the design process, allowing room for modifications based on practical considerations and creative inspirations.
By meticulously addressing these aspects in the design phase, you can lay a solid foundation for the construction phase, ensuring that your treehouse embodies both structural integrity and captivating charm.
Read more: How To Build A Dock
Step 3: Gathering Materials and Tools
Gathering the necessary materials and tools is a crucial preparatory step that sets the stage for the actual construction of your treehouse. By ensuring that you have the right resources at your disposal, you can streamline the building process and minimize potential delays. Here's a comprehensive guide to help you navigate the process of gathering materials and tools for your treehouse project.
Materials
Structural Components
Begin by procuring high-quality lumber for the structural components of the treehouse, such as the support posts, beams, joists, and decking. Opt for pressure-treated or rot-resistant wood to withstand outdoor exposure and ensure long-term durability. Additionally, consider the specific wood species that align with your design preferences and sustainability goals.
Fasteners and Hardware
Select a range of appropriate fasteners and hardware, including galvanized screws, bolts, nuts, washers, and brackets. These components are essential for securely fastening the structural elements of the treehouse and ensuring structural stability. Prioritize corrosion-resistant materials to withstand weather conditions and prolong the lifespan of the treehouse.
Exterior Cladding and Finishes
Choose exterior cladding materials, such as siding or shingles, to protect the treehouse from the elements while enhancing its visual appeal. Additionally, consider finishes, sealants, and paints that provide weatherproofing and aesthetic customization. Opt for products designed for outdoor use to maintain the integrity and aesthetics of the treehouse over time.
Safety Features and Accessories
Prioritize safety features and accessories, including handrails, ladders, and safety barriers, to ensure a secure and user-friendly treehouse environment. Select materials that meet safety standards and align with the overall design aesthetic, enhancing both the functionality and visual appeal of the treehouse.
Tools
Cutting and Shaping Tools
Acquire a comprehensive set of cutting and shaping tools, including a circular saw, jigsaw, handsaw, and chisels. These tools are essential for accurately cutting lumber to size, shaping components, and executing precise joinery for the treehouse construction.
Fastening and Assembly Tools
Invest in a range of fastening and assembly tools, such as a cordless drill, impact driver, hammer, and screwdrivers. These tools facilitate efficient installation of fasteners, hardware, and structural components, streamlining the assembly process and ensuring secure connections.
Safety Gear and Equipment
Prioritize safety gear and equipment, including protective eyewear, gloves, and headgear, to safeguard yourself during the construction process. Additionally, consider the need for ladders, scaffolding, and other equipment to access elevated areas and work safely at height.
Specialized Tools for Custom Features
If your treehouse design includes specialized features, such as custom windows, doors, or decorative elements, ensure that you have the necessary specialized tools and equipment to execute these elements with precision and attention to detail.
By methodically gathering the required materials and tools, you can lay a solid foundation for the construction phase, ensuring that you have everything you need to bring your treehouse vision to fruition.
Step 4: Building the Foundation
The foundation of a treehouse serves as the anchor that supports the entire structure, providing stability and ensuring its long-term resilience. Building a robust and well-designed foundation is paramount to the structural integrity and safety of the treehouse. Here's a detailed exploration of the essential steps involved in constructing the foundation for your treehouse:
Read more: How To Build A Hearth
Site Preparation and Assessment
Begin by thoroughly assessing the chosen tree and its surroundings to determine the optimal placement for the treehouse foundation. Clear the area around the tree, removing any debris, rocks, or vegetation that may impede the construction process. Level the ground as much as possible to create a stable and even foundation site.
Support System Installation
Install the support system that will bear the weight of the treehouse. Depending on the design and treehouse height, this may involve setting sturdy support posts into the ground or attaching load-bearing brackets directly to the tree trunk. Ensure that the support system is securely anchored and aligned to support the planned layout and dimensions of the treehouse.
Floor Framing and Decking
Construct the floor framing using pressure-treated lumber, ensuring that it is level and securely attached to the support system. Once the framing is in place, install the decking material to create the floor surface of the treehouse. Opt for durable and weather-resistant decking material to withstand outdoor exposure and provide a stable platform for the treehouse structure.
Connection to the Tree
If the treehouse is designed to directly integrate with the tree, implement measures to allow for the natural movement and growth of the tree. Utilize specialized treehouse attachment hardware, such as treehouse attachment bolts (TABs), to connect the structure to the tree without causing harm. These specialized attachments accommodate the tree's natural sway and growth while maintaining a secure connection.
Read more: How To Build An Ark
Structural Reinforcement and Bracing
Reinforce the foundation and support system with additional bracing and cross beams to enhance stability and distribute the weight of the treehouse evenly. Consider the anticipated load and usage of the treehouse to determine the appropriate level of reinforcement, ensuring that the foundation can withstand the intended activities and occupants.
By meticulously executing these foundational steps, you can establish a solid and reliable base for your treehouse, setting the stage for the subsequent phases of construction. The foundation serves as the cornerstone of the treehouse, laying the groundwork for a safe, enduring, and enchanting elevated retreat.
Step 5: Constructing the Walls and Roof
With the foundation in place, the construction of the walls and roof marks a significant phase in bringing your treehouse to life. This stage involves translating your design plans into tangible structures that provide shelter, security, and aesthetic appeal. Here's a detailed exploration of the essential steps involved in constructing the walls and roof of your treehouse.
Wall Framing and Assembly
Begin by framing the walls of the treehouse using the selected lumber, ensuring precise measurements and sturdy construction. Depending on the design, you may incorporate window and door openings into the framing. Secure the framed walls to the foundation and each other, creating a stable framework for the treehouse structure.
Exterior Cladding and Weatherproofing
Apply exterior cladding materials, such as siding or shingles, to enclose the framed walls and protect the interior from the elements. Choose weather-resistant cladding that complements the overall design aesthetic while providing durability and insulation. Implement proper weatherproofing measures, including sealants and flashing, to safeguard the walls against moisture and environmental exposure.
Read more: How To Build A Raft
Roof Truss Installation
Construct and install the roof trusses, ensuring that they are accurately positioned and securely anchored to the walls. The trusses form the framework for the roof structure, providing support for the roof covering and distributing the weight evenly. Pay careful attention to the angles and connections of the trusses to ensure structural integrity and load-bearing capacity.
Roofing Material Application
Select roofing materials, such as shingles, metal panels, or thatch, based on your design preferences and climate considerations. Install the chosen roofing material with precision, ensuring proper coverage and weatherproofing. The roof covering not only shields the treehouse from rain and sun but also contributes to its visual character, enhancing the overall charm of the structure.
Interior Finishing and Customization
Once the walls and roof are in place, focus on interior finishing and customization to create a welcoming and functional space. Install insulation, interior paneling, and any desired interior features, such as built-in seating or storage. Customize the interior to reflect the intended use of the treehouse, whether it's a cozy retreat, a play area, or a versatile multi-purpose space.
By meticulously executing these steps, you can transform the conceptual design of your treehouse into a tangible and enchanting structure. The walls and roof not only provide shelter and protection but also serve as the canvas for expressing your creativity and vision, culminating in a captivating elevated sanctuary nestled among the branches.
Step 6: Adding Finishing Touches
As the construction of the treehouse nears completion, the addition of finishing touches elevates the space from a mere structure to a captivating and inviting retreat. This phase allows for the infusion of personality, comfort, and functionality, transforming the treehouse into a space that beckons for enjoyment and relaxation. Here's a detailed exploration of the essential steps involved in adding finishing touches to your treehouse:
Read more: How To Build A Pantry
Exterior Enhancements
Embellish the exterior of the treehouse with decorative elements that enhance its visual appeal and blend harmoniously with the natural surroundings. Consider adding window boxes filled with vibrant flowers, hanging lanterns, or whimsical signage that infuses character and charm. Incorporate exterior lighting to extend the usability of the treehouse into the evening hours, creating a magical ambiance among the treetops.
Customized Features
Integrate customized features that cater to the specific needs and preferences of the treehouse occupants. This may include built-in seating, storage solutions, or a small fold-down table for activities. Personalize the exterior and interior with handcrafted details, such as carved wooden accents, painted murals, or personalized signage, adding a touch of individuality to the space.
Comfort and Coziness
Enhance the comfort and coziness of the treehouse by incorporating soft furnishings, such as cushions, throws, and rugs. Create a welcoming atmosphere with carefully selected textiles and accessories that invite relaxation and leisure. Consider installing a small wood-burning stove or portable heater to extend the usability of the treehouse during cooler seasons, ensuring year-round enjoyment.
Functional Additions
Incorporate functional additions that cater to the intended use of the treehouse. This may involve installing a simple kitchenette area with a compact sink and countertop, a designated play area for children, or a reading nook with built-in bookshelves. By aligning the finishing touches with the intended purpose of the treehouse, you can maximize its utility and appeal.
Read more: How To Build Rafters
Landscaping and Surroundings
Integrate landscaping elements around the treehouse to create a cohesive and inviting environment. Consider adding potted plants, a small garden, or a pathway leading to the treehouse entrance. Embrace the natural beauty of the surroundings and leverage landscaping to seamlessly blend the treehouse into its setting, fostering a sense of tranquility and connection with nature.
By meticulously attending to these finishing touches, you can elevate the treehouse into a captivating and functional space that reflects your creativity, style, and thoughtful consideration of its purpose. The culmination of these details transforms the treehouse into a cherished sanctuary, beckoning for moments of joy, relaxation, and cherished memories among the branches.
Conclusion
As you reach the culmination of your treehouse construction journey, it's essential to reflect on the remarkable transformation that has taken place. What began as a vision and a pile of materials has now evolved into a tangible and enchanting retreat nestled among the branches. The process of building a treehouse has not only been a testament to your craftsmanship and dedication but has also fostered a deeper connection with nature and the joy of creating a space that transcends mere functionality.
The completion of your treehouse signifies more than just the assembly of walls and a roof; it represents the realization of a dream, the embodiment of creativity, and the cultivation of a space where cherished moments will unfold. It stands as a testament to the harmonious coexistence of human ingenuity and the natural world, where the sturdy support beams intertwine with the resilient branches, and the laughter within its walls mingles with the rustling leaves.
Beyond its physical presence, your treehouse embodies the spirit of adventure, imagination, and boundless possibilities. It beckons for moments of play, storytelling, and quiet contemplation, offering a sanctuary where the ordinary gives way to the extraordinary. It serves as a reminder of the joy of simple pleasures, the wonder of childhood fantasies, and the enduring allure of a space that transcends the constraints of the ground.
As you stand back and admire the culmination of your efforts, take pride in the enduring legacy that your treehouse embodies. It is a testament to the transformative power of DIY craftsmanship, the resilience of nature, and the timeless allure of a space that invites connection and creativity. Whether it becomes a haven for family gatherings, a secret hideaway for children, or a personal retreat for moments of solitude, your treehouse stands as a testament to the enduring spirit of human imagination and the beauty of coexisting with the natural world.
So, as you open the door to your completed treehouse and step across the threshold into its inviting embrace, may it serve as a reminder of the journey you've undertaken, the memories yet to be made, and the enduring magic of a space that exists among the branches, where dreams take flight and the ordinary becomes extraordinary.

