
Home>Create & Decorate>DIY & Crafts>10×16 Shed Plans: DIY Guide To Building Your Own Outdoor Storage Space
DIY & Crafts
10×16 Shed Plans: DIY Guide To Building Your Own Outdoor Storage Space
Published: February 24, 2024

Content Creator specializing in woodworking and interior transformations. Caegan's guides motivate readers to undertake their own projects, while his custom furniture adds a personal touch.
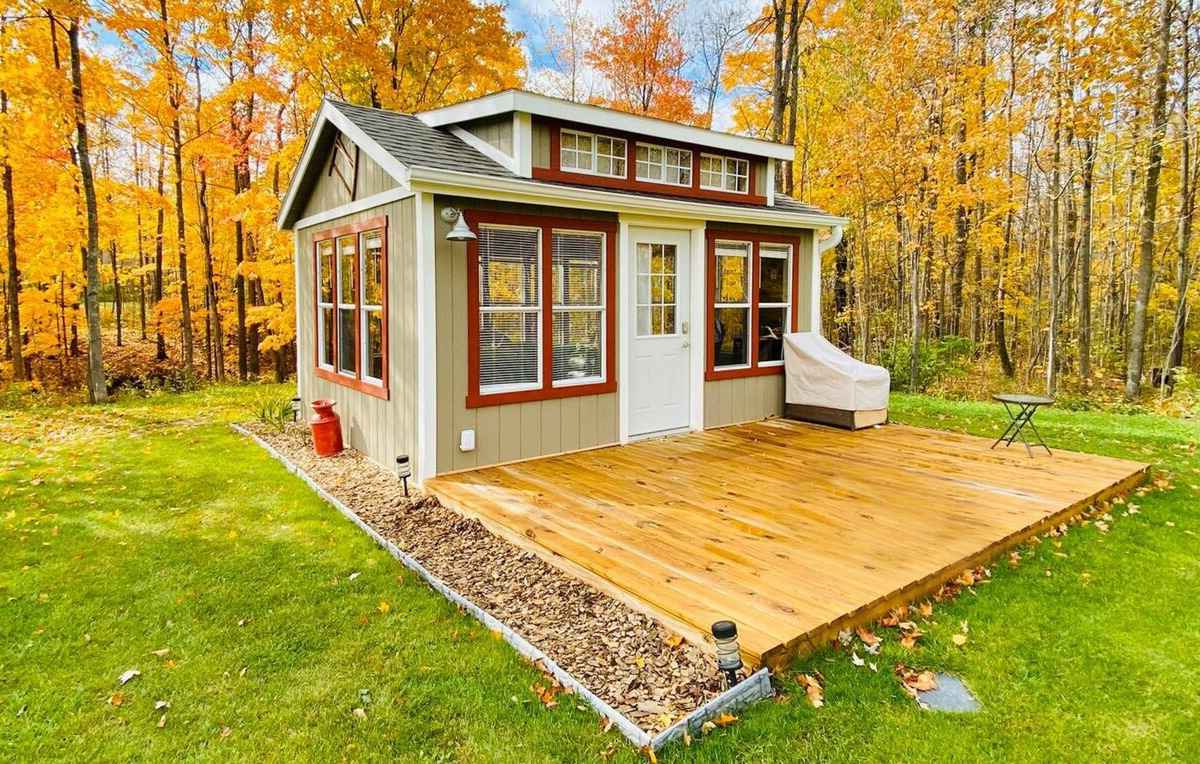
Discover step-by-step 10x16 shed plans for creating your own outdoor storage space with this comprehensive DIY guide. Perfect for DIY & Crafts enthusiasts!
(Many of the links in this article redirect to a specific reviewed product. Your purchase of these products through affiliate links helps to generate commission for Twigandthistle.com, at no extra cost. Learn more)
Introduction
Building a 10×16 shed can be a rewarding and practical DIY project that provides valuable outdoor storage space for your tools, equipment, and seasonal items. Whether you're a seasoned DIY enthusiast or a novice looking to embark on your first major construction endeavor, this comprehensive guide will walk you through the step-by-step process of creating your own outdoor storage solution.
A well-constructed shed not only adds functionality to your property but also enhances its aesthetic appeal. With careful planning and attention to detail, you can customize your shed to complement the style of your home and landscape. From selecting the ideal location to putting the finishing touches, this guide will equip you with the knowledge and confidence to tackle this project with ease.
Throughout this guide, you'll discover essential tips on choosing the right location for your shed, gathering the necessary materials and tools, building a sturdy foundation, constructing the frame, adding the roof and siding, installing doors and windows, and applying finishing touches. Additionally, you'll find valuable maintenance tips to ensure the longevity and durability of your newly constructed outdoor storage space.
By following this DIY guide, you'll not only save on the cost of hiring professionals but also gain a sense of accomplishment as you witness your vision take shape. So, roll up your sleeves, gather your tools, and let's embark on this exciting journey of building your very own 10×16 shed!
Choosing the Right Location for Your Shed
Selecting the optimal location for your shed is a crucial first step in the construction process. The chosen spot should not only accommodate the size of the shed but also align with your practical needs and aesthetic preferences. Here's a detailed breakdown of the key considerations when choosing the right location for your shed:
-
Accessibility: Ensure that the shed is easily accessible from your home and other relevant areas of your property. This will facilitate the convenient storage and retrieval of items, saving you time and effort in the long run.
-
Sunlight and Shade: Assess the sunlight and shade patterns in your yard throughout the day. Ideally, the shed should be situated in an area that receives a balanced amount of sunlight and shade, especially if you plan to use it for activities that require a moderate climate, such as woodworking or gardening.
-
Ground Level and Drainage: Opt for a location with a relatively level ground to simplify the foundation construction process. Additionally, consider the natural drainage patterns in your yard to prevent water accumulation around the shed, which could lead to potential damage over time.
-
Landscaping and Aesthetics: Take into account the overall landscaping and aesthetics of your property. A well-placed shed can complement the existing features of your yard and enhance its visual appeal. Consider factors such as proximity to trees, flower beds, and other landscape elements to create a harmonious outdoor environment.
-
Local Building Codes: Familiarize yourself with local building codes and regulations regarding shed placement. Some areas have specific requirements regarding setbacks from property lines, easements, and other structures. Adhering to these regulations will prevent potential legal issues and ensure a smooth construction process.
-
Future Use: Anticipate any future expansions or modifications to your property. Choosing a location that allows for potential growth or landscaping changes will provide flexibility for your long-term plans.
By carefully evaluating these factors, you can identify the most suitable location for your shed, setting the stage for a successful and functional addition to your property. Once you've determined the ideal spot, you can proceed to the next steps of gathering materials and tools to bring your shed construction project to life.
Gathering Materials and Tools
Before diving into the construction of your 10×16 shed, it's essential to gather all the necessary materials and tools to ensure a smooth and efficient building process. Here's a comprehensive list of the items you'll need to acquire before embarking on this DIY project:
Materials:
- Lumber: Purchase high-quality lumber for framing, flooring, and trusses. Opt for pressure-treated wood to protect against decay and insect damage, especially for the foundation and base components.
- Plywood and Sheathing: Invest in sturdy plywood for the walls, roof, and flooring. Additionally, acquire sheathing to provide structural support and stability to the shed's exterior.
- Roofing Materials: Select durable roofing materials such as asphalt shingles, metal roofing panels, or corrugated fiberglass to protect the shed from the elements.
- Siding: Choose siding materials that suit your aesthetic preferences and climate conditions. Options include wood, vinyl, metal, or composite siding for added durability.
- Fasteners and Hardware: Stock up on nails, screws, bolts, and other fasteners required for securing the various components of the shed. Additionally, gather hinges, latches, and handles for doors and windows.
- Insulation and Vapor Barrier: If you plan to use the shed for storage or as a workspace, consider adding insulation and a vapor barrier to regulate temperature and moisture levels.
- Paint and Sealant: Select high-quality exterior paint and sealant to protect the shed from weathering and enhance its visual appeal.
Tools:
- Measuring and Marking Tools: Ensure you have a tape measure, carpenter's square, and marking tools to accurately measure and lay out the dimensions of the shed components.
- Cutting Tools: Acquire a circular saw, jigsaw, and handsaw for cutting lumber, plywood, and other materials to the required sizes and angles.
- Fastening Tools: Invest in a reliable hammer, nail gun, and screwdriver set for fastening the various components of the shed securely.
- Level and Plumb Line: A level and plumb line are essential for ensuring that the shed's foundation, walls, and roof are perfectly aligned and vertical.
- Safety Gear: Prioritize safety by obtaining protective gear such as gloves, safety glasses, and a dust mask to safeguard yourself during the construction process.
By procuring these materials and tools, you'll be well-equipped to commence the construction of your 10×16 shed with confidence and efficiency. With the groundwork laid and the necessary resources at your disposal, you're ready to embark on the next phase of this exciting DIY endeavor.
Building the Foundation
The foundation serves as the anchor of your shed, providing stability and structural integrity. Before commencing the construction of the foundation, it's crucial to carefully assess the ground conditions and select the most suitable foundation type for your shed. Here's a detailed breakdown of the steps involved in building a solid foundation for your 10×16 shed:
Site Preparation
Begin by clearing the chosen area of any debris, vegetation, or obstacles that may impede the foundation construction process. Use a shovel and rake to level the ground, ensuring that the site is uniformly graded and free from any irregularities.
Selecting the Foundation Type
Depending on your specific needs and the local climate, you can opt for various foundation types, including concrete slab, concrete piers, or skids. A concrete slab foundation offers a durable and low-maintenance option, while concrete piers provide elevated support for the shed. Skids, on the other hand, are ideal for sheds that may need to be relocated in the future.
Excavation and Formwork
If you choose a concrete foundation, proceed with excavating the area to the required depth, ensuring proper drainage and stability. Construct formwork using wooden boards to contain the concrete and shape the foundation according to the shed's dimensions.
Pouring and Curing Concrete
Once the formwork is in place, pour the concrete mixture into the designated area, ensuring even distribution and a smooth finish. Use a screed board to level the concrete and eliminate any air pockets. Allow the concrete to cure according to the manufacturer's recommendations, ensuring optimal strength and durability.
Installing Skids or Piers
For skid or pier foundations, position and secure the treated lumber skids or concrete piers at strategic intervals to support the shed's base. Use a level to ensure that the skids or piers are perfectly aligned and provide a stable platform for the shed's construction.
Anchoring and Securing
Regardless of the foundation type, it's essential to anchor and secure the shed to the foundation to withstand external forces such as wind and seismic activity. Utilize anchor bolts, straps, or brackets to firmly attach the shed's base to the foundation, ensuring a robust and resilient structure.
By meticulously following these steps, you'll establish a solid foundation that forms the groundwork for the rest of the shed construction process. With the foundation in place, you're ready to progress to the next phase of constructing the frame, bringing you one step closer to realizing your custom-built outdoor storage space.
Constructing the Frame
With the foundation set, the next crucial phase in building your 10×16 shed is constructing the frame. The frame serves as the skeletal structure of the shed, providing support for the walls, roof, and overall stability. Here's a detailed breakdown of the steps involved in constructing the frame:
Laying Out the Bottom Plates
Begin by laying out the pressure-treated bottom plates on the foundation, ensuring they are precisely aligned with the shed's dimensions. Use a tape measure and carpenter's square to verify the accuracy of the layout, as this will serve as the base for the wall framing.
Assembling the Wall Framing
Once the bottom plates are in place, proceed to assemble the wall framing using the specified lumber dimensions. Cut the studs, headers, and cripple studs to the required lengths, and then position and secure them to the bottom plates. Ensure that the walls are plumb and aligned, using a level to maintain accuracy throughout the framing process.
Adding Door and Window Openings
If your shed design includes doors and windows, carefully measure and cut openings within the wall framing to accommodate these features. Install additional framing members around the openings to provide structural support and ensure proper integration with the overall wall framework.
Erecting the Wall Sections
With the individual wall sections framed and prepared, enlist the assistance of others to help lift and erect the walls into position. Secure the walls to each other at the corners, ensuring they are aligned and plumb. Temporary bracing may be necessary to maintain stability during this phase of construction.
Installing the Top Plates
Once the walls are in place, install the top plates to secure the wall framing and provide a stable connection between the individual wall sections. Use appropriate fasteners to ensure a secure and rigid connection, reinforcing the overall structural integrity of the frame.
Bracing and Reinforcement
To further strengthen the frame, add diagonal bracing within the wall sections to prevent lateral movement and enhance stability. Additionally, consider reinforcing the corners and junctions with metal brackets or additional framing members for added durability.
By meticulously following these steps, you'll successfully construct the frame of your 10×16 shed, laying the groundwork for the subsequent phases of adding the roof, siding, doors, and windows. With the frame in place, your vision of a custom-built outdoor storage space is taking shape, bringing you one step closer to completing this rewarding DIY project.
Adding the Roof and Siding
Once the frame of your 10×16 shed is securely in place, the next critical phase involves adding the roof and siding to enclose the structure and provide protection from the elements. This phase marks a significant step towards completing your outdoor storage space, and attention to detail during the roof and siding installation is paramount.
Roof Installation
Truss Assembly
Begin by assembling the roof trusses according to the specified design and dimensions. Ensure that each truss is securely constructed, with precise angles and measurements to guarantee structural integrity. Trusses play a pivotal role in supporting the roof and distributing its weight evenly, making their accurate assembly crucial to the shed's overall stability.
Roof Sheathing
Once the trusses are in place, proceed to install the roof sheathing, typically using plywood or oriented strand board (OSB). Secure the sheathing to the trusses, ensuring a uniform and sturdy base for the roofing materials. Properly fastening the sheathing is essential to create a solid foundation for the roof and enhance its resilience against external forces.
Roofing Material Selection
Select roofing materials that align with your aesthetic preferences and climate considerations. Options include asphalt shingles, metal roofing panels, or corrugated fiberglass, each offering distinct advantages in terms of durability, weather resistance, and visual appeal. Choose materials that complement the overall design of your property while providing long-lasting protection for your shed.
Roofing Installation
Carefully install the chosen roofing materials according to the manufacturer's guidelines, paying close attention to proper overlap, fastening, and sealing techniques. Ensure that the roofing is securely affixed to the sheathing, with adequate provisions for water runoff and weatherproofing. A well-installed roof not only enhances the shed's structural integrity but also safeguards its interior from moisture and environmental elements.
Siding Installation
Siding Selection
Selecting the appropriate siding for your shed involves considering factors such as durability, maintenance requirements, and visual appeal. Common siding options include wood, vinyl, metal, or composite materials, each offering unique characteristics that cater to different preferences and environmental conditions. Choose siding that complements the overall aesthetic of your property while providing long-term protection for your shed's exterior.
Siding Application
Install the chosen siding material meticulously, ensuring proper alignment, secure fastening, and weatherproofing. Pay attention to detail when cutting and fitting the siding to achieve a seamless and visually appealing exterior. Properly installed siding not only enhances the shed's appearance but also serves as a protective barrier against moisture, wind, and other external elements.
By diligently following these steps, you'll successfully add the roof and siding to your 10×16 shed, bringing it closer to completion. With the roof providing shelter and the siding enhancing both protection and visual appeal, your custom-built outdoor storage space is well on its way to becoming a functional and aesthetically pleasing addition to your property.
Installing Doors and Windows
The installation of doors and windows is a pivotal phase in completing your 10×16 shed, as it not only enhances functionality but also contributes to the overall aesthetics and comfort of the space. Properly installed doors and windows provide natural light, ventilation, and easy access, transforming your shed into a versatile and inviting environment.
Door Installation
When selecting doors for your shed, consider factors such as durability, security, and ease of operation. Whether opting for a pre-hung door or constructing a custom door, precise measurements and careful installation are essential for a seamless fit and optimal functionality.
-
Preparation: Begin by framing the door opening according to the dimensions of the selected door. Ensure that the framing is square and level to facilitate a smooth installation process.
-
Hanging the Door: If using a pre-hung door, carefully position it within the door opening, ensuring that it is plumb and level. Secure the door in place using shims and screws, adjusting as needed to achieve a perfect fit. For custom-built doors, attach the hinges securely to the door frame, ensuring smooth operation and proper alignment.
-
Hardware and Sealing: Install the necessary hardware, including handles, locks, and hinges, to complete the door assembly. Additionally, apply weather-stripping and sealant around the door frame to prevent drafts and enhance weather resistance.
Window Installation
Windows play a crucial role in providing natural light and ventilation within the shed, creating a comfortable and well-lit interior space. When installing windows, attention to detail and proper sealing are essential to ensure energy efficiency and protection against the elements.
-
Frame Preparation: Prepare the window openings by framing them to accommodate the dimensions of the selected windows. Ensure that the framing is square and level to facilitate a seamless installation process.
-
Installing the Windows: Carefully position the windows within the framed openings, ensuring they are plumb and level. Secure the windows in place using appropriate fasteners, ensuring a snug fit and proper alignment. Consider using shims to adjust the positioning as needed for optimal operation.
-
Sealing and Finishing: Apply caulking or weather-stripping around the window frames to create a tight seal and prevent air and water infiltration. Additionally, install window trim to enhance the visual appeal and provide a finished look to the interior and exterior of the shed.
By meticulously following these steps, you'll successfully install doors and windows, elevating the functionality and visual appeal of your 10×16 shed. With the addition of well-fitted doors and windows, your custom-built outdoor storage space is poised to provide a welcoming and versatile environment for various activities and storage needs.
Finishing Touches and Maintenance Tips
With the structural elements of your 10×16 shed in place, attention to finishing touches and ongoing maintenance is essential to ensure its longevity, functionality, and visual appeal. This phase involves adding final details, addressing protective measures, and implementing maintenance practices to preserve the shed's integrity over time.
Exterior Finishing Touches
- Trim and Molding: Install trim and molding to provide a polished look to the shed's exterior. Properly fitted and painted trim enhances the overall aesthetic and creates a cohesive appearance.
- Gutters and Downspouts: Consider adding gutters and downspouts to manage water runoff and prevent soil erosion around the shed. Proper drainage maintenance can protect the foundation and siding from water-related damage.
- Exterior Lighting: Install exterior lighting to enhance visibility and security around the shed. Motion-activated lights or strategically placed fixtures can improve accessibility and safety during evening hours.
Interior Finishing Touches
- Organization and Storage Solutions: Incorporate shelving, hooks, and storage systems to optimize the interior space for efficient organization. Customized storage solutions can maximize the utility of the shed for various tools and equipment.
- Interior Finishing: Apply a protective finish to the interior surfaces, such as paint or sealant, to safeguard the walls and flooring from moisture and wear. A well-finished interior contributes to a clean and inviting workspace.
Maintenance Tips
- Regular Inspections: Schedule routine inspections to assess the shed's condition, including the foundation, roof, and siding. Identifying and addressing any signs of wear or damage promptly can prevent extensive repairs in the future.
- Weatherproofing: Periodically inspect and maintain the weatherproofing elements, such as caulking, seals, and roofing materials, to ensure they remain intact and effective in protecting the shed from the elements.
- Pest Control: Implement pest control measures to safeguard the shed from potential infestations. Seal any entry points, use pest-resistant materials, and consider periodic treatments to deter pests.
- Seasonal Maintenance: Adjust maintenance activities based on seasonal changes. This may include clearing debris, snow removal, and adjusting ventilation to accommodate varying weather conditions.
- Exterior Upkeep: Regularly clean the exterior surfaces, including siding, windows, and doors, to preserve their appearance and structural integrity. Additionally, touch up any paint or sealant as needed to prevent deterioration.
By attending to these finishing touches and implementing proactive maintenance practices, you can ensure that your 10×16 shed remains a functional, durable, and visually appealing asset on your property for years to come.
Conclusion
Congratulations on successfully completing the construction of your 10×16 shed! This DIY project has not only provided you with valuable outdoor storage space but has also showcased your skills and determination in creating a functional and visually appealing addition to your property. As you stand back and admire the fruits of your labor, it's essential to reflect on the journey and the significance of this accomplishment.
Building a shed from the ground up is a testament to your creativity, resourcefulness, and ability to transform a vision into a tangible structure. The careful planning, meticulous execution, and attention to detail throughout the construction process have culminated in a versatile space that can serve a multitude of purposes, from storing tools and equipment to providing a workshop or hobby area.
Beyond the practical benefits, the completion of this DIY project represents a sense of empowerment and self-sufficiency. By taking on the challenge of building your own shed, you've demonstrated a willingness to learn new skills, overcome obstacles, and embrace the satisfaction of hands-on craftsmanship. This experience not only enriches your knowledge but also instills a sense of pride in your ability to tackle significant construction projects.
As you integrate the shed into your property, consider the numerous possibilities it offers. Whether it becomes a sanctuary for pursuing hobbies, a functional storage space for seasonal items, or a workshop for DIY projects, the shed stands as a testament to your ingenuity and dedication. Its presence enhances the overall functionality and aesthetic appeal of your outdoor environment, contributing to a well-rounded and personalized property.
Looking ahead, the completion of your shed marks the beginning of a new chapter in which you can fully utilize and enjoy the space you've created. Embrace the opportunities it presents, whether it's organizing your tools, pursuing creative endeavors, or simply finding a peaceful retreat within its walls. As you make the shed your own, remember the effort and craftsmanship that have gone into its construction, and take pride in the lasting impact of your DIY achievement.
In closing, the successful construction of your 10×16 shed is a testament to your dedication, creativity, and ability to bring a vision to life. As you embark on future projects and endeavors, carry forward the lessons learned and the sense of accomplishment gained from this experience. Your shed stands as a symbol of your determination and capability, enriching your property and your life in meaningful ways.