
Home>Create & Decorate>DIY & Crafts>16×20 Shed Plans: DIY Guide To Building Your Own Spacious Outdoor Storage
DIY & Crafts
16×20 Shed Plans: DIY Guide To Building Your Own Spacious Outdoor Storage
Published: February 24, 2024

Content Creator specializing in woodworking and interior transformations. Caegan's guides motivate readers to undertake their own projects, while his custom furniture adds a personal touch.
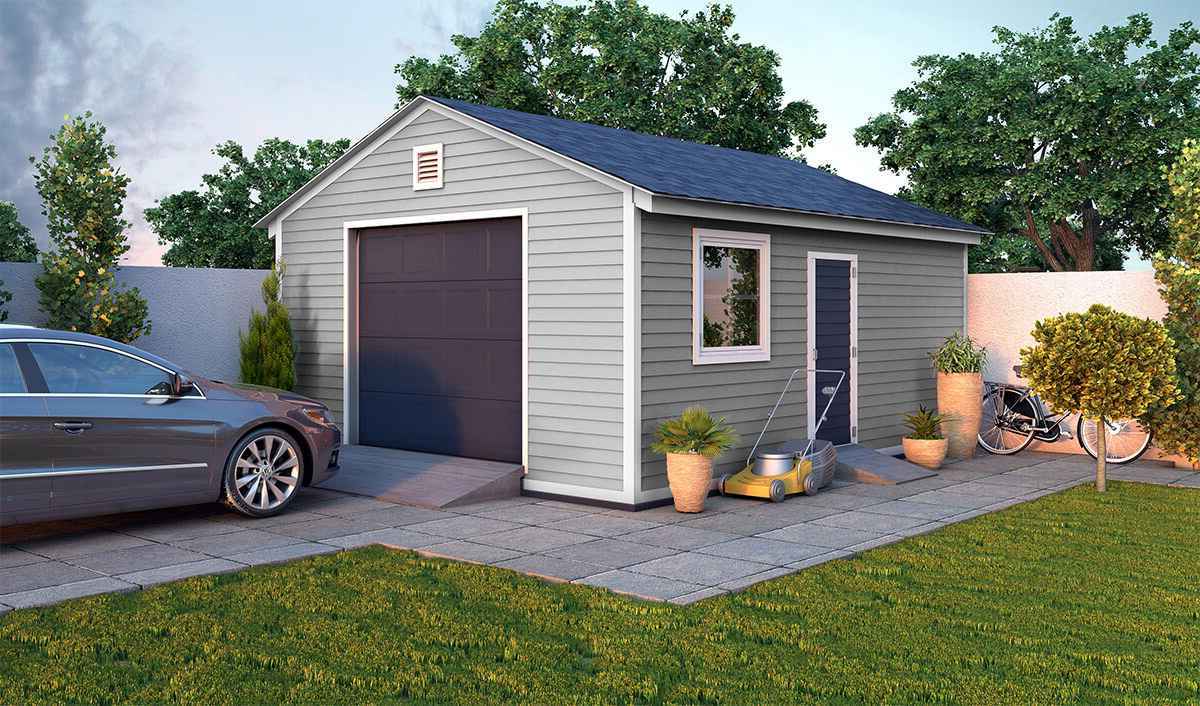
Discover step-by-step 16x20 shed plans for your DIY & Crafts project. Build a spacious outdoor storage with our comprehensive guide.
(Many of the links in this article redirect to a specific reviewed product. Your purchase of these products through affiliate links helps to generate commission for Twigandthistle.com, at no extra cost. Learn more)
Introduction
Welcome to the ultimate DIY guide for building your very own 16×20 shed! Whether you're a seasoned DIY enthusiast or a newcomer to the world of woodworking, this comprehensive guide will equip you with the knowledge and confidence to embark on this fulfilling project. A 16×20 shed offers ample space for storage, workshop activities, or even a cozy retreat within your outdoor space. By following this guide, you'll not only save on the cost of purchasing a pre-built shed but also have the satisfaction of creating a customized and durable structure that meets your specific needs.
In the upcoming sections, we'll delve into the step-by-step process of constructing a 16×20 shed, from selecting the ideal location to adding the finishing touches. You'll discover the essential tools and materials required for the project, along with valuable tips for preparing the foundation, constructing the frame, installing the roof, and adding siding and trim. Additionally, we'll explore the intricacies of building doors and windows, ensuring that your shed is not only functional but also aesthetically pleasing.
Whether you envision your shed as a storage haven for gardening tools and outdoor equipment or as a versatile workspace for your DIY projects, this guide will empower you to bring your vision to life. So, roll up your sleeves, gather your tools, and let's embark on this rewarding journey of creating a spacious and functional outdoor storage solution. Let's get started on building your very own 16×20 shed!
Benefits of Building a 16×20 Shed
Building a 16×20 shed offers a myriad of benefits that cater to both practical and lifestyle needs. Here are some compelling reasons why embarking on this DIY project can significantly enhance your outdoor space and overall living experience:
-
Ample Storage Space: A 16×20 shed provides generous storage capacity, accommodating a wide array of items such as gardening tools, lawnmowers, bicycles, outdoor furniture, and seasonal decorations. This spacious storage solution helps declutter your home and garage, creating a more organized and functional living environment.
-
Customization: By constructing your own 16×20 shed, you have the freedom to customize the interior layout and storage features according to your specific needs. Whether you require built-in shelving, workbenches, or designated areas for different types of equipment, the customization options are virtually limitless, allowing you to tailor the shed to suit your preferences.
-
Versatile Workspace: Beyond storage, a 16×20 shed can serve as a versatile workspace for various hobbies and DIY projects. Whether you're a woodworking enthusiast, a craftsperson, or simply in need of a quiet retreat for reading and relaxation, this spacious structure can be transformed into a personalized haven that complements your interests and activities.
-
Property Value: Adding a well-built 16×20 shed to your property can enhance its overall value. A thoughtfully designed and skillfully constructed shed contributes to the aesthetic appeal and functionality of your outdoor space, making it an attractive feature for potential buyers should you decide to sell your home in the future.
-
Outdoor Organization: With a 16×20 shed, you can efficiently organize and store outdoor equipment, preventing clutter and ensuring that your yard and garden remain tidy and visually appealing. This contributes to a more inviting and well-maintained outdoor environment, allowing you to fully enjoy your outdoor space without the distraction of scattered tools and equipment.
-
Cost-Effective Solution: Building your own 16×20 shed can be a cost-effective alternative to purchasing a pre-built structure. By investing your time and effort into the construction process, you can save on labor costs and have greater control over the quality of materials used, ultimately resulting in a durable and budget-friendly outdoor storage solution.
In summary, the benefits of building a 16×20 shed extend far beyond mere storage. This DIY project offers the opportunity to enhance organization, functionality, and personalization within your outdoor space, ultimately enriching your lifestyle and property value. Whether you're seeking practical storage solutions or a creative outlet for your hobbies, a 16×20 shed is a versatile and valuable addition to any home.
Tools and Materials Needed
Embarking on the construction of a 16×20 shed requires a comprehensive array of tools and materials to ensure a smooth and successful building process. Here's a detailed list of essential items that will be indispensable throughout the various stages of the project:
Tools:
- Measuring Tools: A reliable tape measure, framing square, and level are essential for accurate measurements and ensuring precise angles during the construction process.
- Cutting Tools: A circular saw or a miter saw for cutting lumber, plywood, and other materials with precision. Additionally, a handsaw or reciprocating saw can be useful for detailed or smaller cuts.
- Fastening Tools: A cordless drill with a set of drill bits and screwdriver attachments for driving screws and drilling pilot holes. A nail gun can also expedite the fastening process for framing and siding.
- Safety Gear: Personal protective equipment including safety glasses, work gloves, and hearing protection to ensure safety while working with power tools and construction materials.
- Lifting and Support Equipment: A sturdy ladder for accessing elevated areas during construction, along with sawhorses or workbenches for supporting and assembling materials.
Materials:
- Lumber: Pressure-treated lumber for the foundation, framing, and trusses, as well as standard dimensional lumber for interior framing and trim.
- Plywood: Exterior-grade plywood for sheathing the walls and roof, as well as interior-grade plywood for constructing shelves and interior finishes.
- Roofing Materials: Asphalt shingles or metal roofing panels, along with roofing underlayment and flashing to ensure weatherproofing and durability.
- Fasteners: Galvanized nails and exterior-grade screws in various lengths to secure framing, sheathing, and trim components.
- Siding and Trim: Exterior siding panels such as T1-11 or vinyl siding, along with trim boards for finishing edges and corners.
- Doors and Windows: Pre-hung exterior door(s), window units, and associated hardware for installation.
- Foundation Materials: Concrete blocks or sonotubes for supporting the shed foundation, along with gravel and pressure-treated lumber for framing the foundation.
By ensuring that you have the necessary tools and materials at your disposal, you'll be well-prepared to tackle each phase of the construction process with confidence and efficiency. Additionally, having a well-organized workspace and a clear understanding of how to use each tool and material will contribute to a seamless and rewarding DIY experience.
Choosing the Right Location
Selecting the optimal location for your 16×20 shed is a crucial decision that significantly influences its functionality, longevity, and overall visual impact within your outdoor space. Here are essential considerations to guide you in choosing the right location for your shed:
1. Zoning and Regulations:
Before determining the shed's placement, familiarize yourself with local zoning regulations and building codes. These guidelines often dictate setback requirements, property line distances, and other restrictions that may affect where you can place the shed on your property.
2. Accessibility:
Consider the accessibility of the shed from your home and other relevant areas. Placing the shed within a convenient distance from your house ensures easy access to stored items and facilitates seamless transportation of equipment and materials during construction.
3. Sunlight and Ventilation:
Opt for a location that receives ample natural light and ventilation. Adequate sunlight helps prevent moisture buildup and promotes a healthier environment within the shed. Additionally, proper ventilation aids in regulating temperature and humidity, safeguarding the contents stored inside.
4. Ground Stability:
Ensure that the chosen location offers stable ground conditions to support the shed's foundation. Avoid areas prone to excessive moisture accumulation or potential flooding, as these conditions can compromise the structural integrity of the shed over time.
5. Landscaping and Aesthetics:
Integrate the shed harmoniously into your landscape design. Consider how the shed's placement complements the overall aesthetics of your outdoor space. Strategic positioning can enhance visual appeal and create a cohesive integration with existing landscaping features.
6. Utility Connections:
If you plan to incorporate electrical or plumbing utilities into the shed, proximity to existing utility connections should be a key factor in determining the location. This consideration ensures practicality and cost-effectiveness when extending essential services to the shed.
7. Future Expansion:
Anticipate potential future expansions or modifications to your outdoor space. Selecting a location that allows for future expansion or the addition of complementary structures can provide flexibility for evolving needs and preferences.
By carefully evaluating these factors, you can make an informed decision regarding the placement of your 16×20 shed. Ultimately, choosing the right location sets the foundation for a functional, visually appealing, and enduring addition to your outdoor environment.
Preparing the Foundation
The foundation serves as the fundamental support system for your 16×20 shed, ensuring stability, durability, and resistance to ground moisture. Properly preparing the foundation is essential for the long-term structural integrity of the shed. Here's a detailed guide on the crucial steps involved in preparing the foundation for your shed:
1. Site Preparation:
Begin by clearing and leveling the designated area where the shed will be situated. Remove any vegetation, rocks, or debris, and use a shovel and rake to create a uniformly level surface. It's imperative to ensure that the ground is compact and free from any obstructions that could hinder the foundation's stability.
2. Foundation Type Selection:
Select the most suitable foundation type based on your specific needs and local building codes. Common options include concrete slab, concrete piers, or pressure-treated wood skids. Each foundation type offers distinct advantages in terms of cost, durability, and ease of installation.
3. Marking and Layout:
Using stakes and string, mark the perimeter of the shed's foundation according to the precise dimensions of the 16×20 structure. This layout serves as a visual guide for accurately positioning the foundation components and ensures that the shed will be aligned with the intended location.
4. Excavation and Grading:
If you opt for a concrete slab foundation, excavation is necessary to create a level trench for pouring the concrete. For other foundation types, such as concrete piers or skids, excavation may be required to accommodate the support elements. Ensure that the ground is graded to promote proper drainage away from the shed site, preventing water accumulation around the foundation.
5. Adding Drainage and Gravel:
Incorporate a layer of gravel within the excavated area to enhance drainage and provide a stable base for the foundation. This gravel layer facilitates water runoff and minimizes the risk of moisture-related issues, such as soil erosion and water seepage into the shed.
6. Installing Footings or Skids:
For concrete slab foundations, construct and install formwork to contain the concrete, ensuring that it conforms to the shed's dimensions. Alternatively, position pressure-treated wood skids or lay out concrete piers according to the shed's layout. Secure these foundation components firmly to the ground to establish a robust base for the shed.
7. Inspection and Compliance:
Before proceeding with further construction, it's advisable to have the foundation inspected to ensure compliance with local building regulations and structural integrity standards. This step helps verify that the foundation meets safety requirements and is ready to support the subsequent phases of shed construction.
By meticulously preparing the foundation in accordance with these steps, you establish a solid groundwork for the construction of your 16×20 shed. A well-executed foundation not only ensures the structural stability of the shed but also contributes to its longevity and resilience against environmental factors. With the foundation in place, you're ready to progress to the next stages of constructing your customized outdoor storage solution.
Constructing the Frame
Constructing the frame of a 16×20 shed is a pivotal phase that lays the groundwork for the structural integrity and stability of the entire building. This process involves assembling the framework that will support the walls, roof, and overall structure of the shed. Here's a comprehensive guide to the essential steps involved in constructing the frame:
-
Lumber Selection: Begin by selecting high-quality lumber for the frame, ensuring that it is straight, free from defects, and suitable for load-bearing purposes. Pressure-treated lumber is recommended for the bottom plates and any components in direct contact with the ground to prevent moisture-related deterioration.
-
Cutting and Assembly: Accurately measure and cut the lumber according to the shed's blueprint or design plan. The frame assembly typically consists of constructing the bottom plates, wall studs, top plates, and roof trusses. Use a framing square to ensure precise angles and dimensions during the assembly process.
-
Bottom Plate Installation: Position the pressure-treated bottom plates along the perimeter of the foundation, securing them in place with anchor bolts or concrete screws. This establishes the base for attaching the wall studs and provides a secure connection between the frame and the foundation.
-
Wall Framing: Assemble the wall framing by attaching vertical studs between the bottom and top plates, ensuring consistent spacing and alignment. Incorporate openings for doors, windows, and any desired access points within the wall framing, following the shed's design specifications.
-
Corner Bracing and Sheathing: Install diagonal bracing at the corners of the frame to reinforce structural stability and prevent lateral movement. Subsequently, sheath the exterior walls with plywood or oriented strand board (OSB) to enclose the frame and provide rigidity and support for the siding material.
-
Roof Truss Construction: If the shed design incorporates a truss roof system, construct the trusses according to the specified dimensions and angles. Trusses are typically assembled using individual components such as rafters, gussets, and bracing, ensuring that they are structurally sound and capable of supporting the roof load.
-
Frame Alignment and Leveling: Throughout the frame construction process, consistently verify the alignment, plumbness, and leveling of the components. This meticulous attention to detail ensures that the frame is accurately positioned and ready to support the subsequent installation of the roof and siding materials.
By meticulously following these steps, you'll successfully construct a robust and precisely engineered frame for your 16×20 shed. The frame serves as the structural backbone of the shed, providing the framework for subsequent phases of construction. With the frame in place, you're poised to advance to the next stages of the building process, bringing you closer to the realization of your customized outdoor storage solution.
Installing the Roof
The installation of the roof is a critical phase in the construction of a 16×20 shed, as it not only provides protection from the elements but also contributes to the overall structural integrity and aesthetic appeal of the building. Here's a detailed guide to the essential steps involved in installing the roof of your shed:
-
Roof Sheathing: Begin by applying the roof sheathing, typically made of exterior-grade plywood or oriented strand board (OSB), over the trusses or rafters. Ensure that the sheathing panels are securely fastened to the framing members, providing a solid and uniform base for the roofing material.
-
Weatherproofing: Prior to installing the roofing material, it's essential to incorporate weatherproofing elements such as roofing underlayment and flashing. The underlayment acts as a protective barrier against moisture infiltration, while flashing is utilized to seal joints and transitions, preventing water penetration at vulnerable areas of the roof.
-
Roofing Material Selection: Select the roofing material that best suits your preferences and the environmental conditions in your area. Common options include asphalt shingles, metal roofing panels, or cedar shakes, each offering distinct advantages in terms of durability, aesthetics, and weather resistance.
-
Shingle Installation: If you opt for asphalt shingles, begin the installation process at the eaves, overlapping each successive row to ensure proper water shedding. Secure the shingles with roofing nails, following the manufacturer's guidelines for the correct placement and fastening techniques. Pay meticulous attention to the alignment and uniformity of the shingle courses to achieve a professional and watertight finish.
-
Metal Roofing Installation: For metal roofing panels, align and secure the panels according to the manufacturer's instructions, utilizing appropriate fasteners and sealants to ensure a secure and weathertight installation. Properly overlapping and sealing the joints between panels is crucial for preventing water infiltration and maintaining the roof's integrity.
-
Flashing and Trim: Install flashing around roof penetrations such as vents, chimneys, and skylights to create watertight seals and prevent potential leakage points. Additionally, apply trim components along the roof edges and gables to provide a finished appearance and further enhance weather resistance.
-
Ridge Cap Installation: Complete the roof installation by affixing the ridge cap, which covers the peak of the roof and seals the uppermost edges of the roofing material. The ridge cap not only enhances the visual appeal of the roof but also serves as a protective barrier against wind-driven rain and debris.
By meticulously following these steps, you'll successfully install a durable and weather-resistant roof for your 16×20 shed. The completed roof not only safeguards the shed's interior from the elements but also contributes to its overall visual appeal and longevity. With the roof in place, you're one step closer to realizing your customized outdoor storage solution.
Adding Siding and Trim
The addition of siding and trim marks a significant phase in the construction of a 16×20 shed, as it not only enhances the aesthetic appeal of the structure but also provides essential protection against the elements. Here's a detailed guide to the essential steps involved in adding siding and trim to your shed:
-
Siding Selection: Begin by selecting the siding material that aligns with your preferences, budget, and the architectural style of your shed. Common options include T1-11 plywood siding, vinyl siding, cedar clapboard, or composite panels. Consider factors such as durability, maintenance requirements, and visual appeal when choosing the most suitable siding for your project.
-
Siding Installation: Prior to installing the siding, ensure that the exterior sheathing is properly prepared and weatherproofed. Begin the installation at the bottom of the shed, working your way upwards to facilitate water shedding. Secure the siding panels according to the manufacturer's guidelines, utilizing appropriate fasteners and ensuring proper alignment and spacing between panels. Pay meticulous attention to detail to achieve a seamless and visually pleasing exterior finish.
-
Trim Components: Incorporate trim elements to accentuate the architectural features of the shed and provide a polished appearance. Common trim components include corner boards, fascia boards, window and door casings, and soffits. Select trim materials that complement the siding and contribute to the overall cohesiveness of the shed's exterior design.
-
Trim Installation: Install the trim components at the corners, edges, and openings of the shed, ensuring precise cuts and seamless joints. Secure the trim elements using appropriate fasteners and adhesives, taking care to maintain consistent spacing and alignment. Properly installed trim not only enhances the visual appeal of the shed but also serves as a protective barrier against moisture infiltration and structural damage.
-
Priming and Painting: If you opt for wood siding and trim, consider priming and painting these components to enhance their durability and weather resistance. Apply high-quality exterior primer and paint according to the manufacturer's recommendations, ensuring thorough coverage and proper drying between coats. This step not only adds a personalized touch to the shed's exterior but also contributes to its long-term maintenance and protection.
By meticulously following these steps, you'll successfully add durable siding and trim to your 16×20 shed, elevating its visual appeal and fortifying its resilience against environmental factors. The completed siding and trim not only contribute to the shed's overall aesthetic charm but also ensure its long-lasting durability and protection. With the siding and trim in place, your customized outdoor storage solution is one step closer to realization.
Building the Doors and Windows
The construction of doors and windows for your 16×20 shed is a pivotal phase that not only enhances the functionality and accessibility of the structure but also contributes to its overall aesthetic appeal. Here's a comprehensive guide to the essential steps involved in building and installing doors and windows for your shed:
1. Door Construction:
Begin by selecting the appropriate door style and dimensions based on the shed's design and your specific requirements. Common options include single or double doors, sliding doors, or overhead garage-style doors, each offering distinct advantages in terms of accessibility and space utilization. Once the door style is determined, proceed with the following steps:
-
Frame Preparation: Construct the door frame using dimensional lumber, ensuring precise measurements and square angles. The frame should align with the shed's wall framing and accommodate the selected door size.
-
Panel Assembly: Assemble the door panels using exterior-grade plywood or individual boards, ensuring a sturdy and warp-resistant construction. Incorporate cross-bracing or diagonal supports to reinforce the door panels and prevent warping over time.
-
Hinge and Hardware Installation: Install heavy-duty hinges and appropriate door hardware, ensuring smooth operation and secure attachment to the door frame. Consider incorporating a locking mechanism for added security and peace of mind.
2. Window Installation:
Windows play a crucial role in providing natural light, ventilation, and visual appeal to the shed's interior. Select the window style and size based on the shed's design, ensuring that it complements the overall aesthetic and functional requirements. Here's a detailed overview of the window installation process:
-
Frame Preparation: Prepare the window openings within the shed's wall framing, ensuring precise dimensions and proper support for the windows. Incorporate headers and sills to provide structural integrity and weather resistance.
-
Window Placement: Install the windows within the prepared openings, ensuring a snug fit and proper alignment. Secure the windows using appropriate fasteners and weatherproofing elements to prevent air and moisture infiltration.
-
Weatherproofing and Trim: Apply weatherproofing sealants and flashing around the window perimeters to create a watertight seal and prevent potential leakage. Install trim components such as casing and sills to enhance the visual appeal and weather resistance of the windows.
By meticulously following these steps, you'll successfully construct and install doors and windows that not only enhance the functionality and accessibility of your 16×20 shed but also contribute to its overall visual appeal and weather resistance. With the doors and windows in place, your customized outdoor storage solution is one step closer to realization.
Finishing Touches
With the structural elements of the 16×20 shed in place, attention turns to the finishing touches that elevate its functionality, aesthetics, and long-term durability. This phase encompasses a range of essential tasks and enhancements that contribute to the overall appeal and usability of the shed.
1. Interior Finishes:
Applying interior finishes such as paint or stain to the walls and ceiling enhances the visual appeal of the shed's interior while providing protection against moisture and wear. Consider using light colors to create a bright and inviting space, or opt for a natural wood finish to impart a warm and rustic ambiance.
2. Shelving and Storage Solutions:
Incorporating shelving, storage racks, and organizational systems within the shed maximizes its utility and helps keep the space tidy and efficient. Custom-built shelves and storage units can be tailored to accommodate specific tools, equipment, and supplies, optimizing the functionality of the shed for various storage needs.
3. Lighting and Electrical:
Installing adequate lighting fixtures and electrical outlets within the shed enhances its usability, particularly for evening tasks or projects that require consistent illumination. Consider energy-efficient LED lighting and strategically positioned outlets to support power tools and electronic devices.
4. Ventilation and Insulation:
Ensuring proper ventilation through vents or windows promotes air circulation, minimizes humidity, and prevents the buildup of stale air within the shed. Additionally, incorporating insulation in the walls and roof helps regulate temperature, making the interior space more comfortable and energy-efficient.
5. Exterior Enhancements:
Adding exterior elements such as gutters, downspouts, and exterior lighting not only enhances the shed's functionality but also contributes to its overall curb appeal and weather resistance. Proper drainage systems and exterior lighting improve the shed's usability and safety, especially during inclement weather or nighttime use.
6. Personalized Details:
Incorporating personalized details such as decorative trim, signage, or landscaping around the shed further customizes the space to align with your preferences and outdoor aesthetic. These thoughtful touches add character and charm to the shed, making it a distinctive and integral part of your outdoor environment.
By attending to these finishing touches, the 16×20 shed is transformed into a fully functional, visually appealing, and personalized space that seamlessly integrates into your outdoor landscape. Each detail contributes to the shed's overall usability, durability, and aesthetic charm, ensuring that it serves as a valuable and versatile asset within your property.
Conclusion
In conclusion, the journey of building your own 16×20 shed is not merely a construction project; it's a transformative endeavor that enriches your outdoor space and lifestyle. By embarking on this DIY venture, you've not only created a spacious and functional storage solution but also infused your outdoor environment with personalized craftsmanship and practical elegance.
Throughout the process, you've navigated the essential steps of selecting the ideal location, preparing a sturdy foundation, constructing a robust frame, installing a durable roof, adding resilient siding and trim, and incorporating functional doors and windows. Each phase has been a testament to your dedication, creativity, and attention to detail, resulting in a customized shed that aligns with your specific needs and preferences.
The benefits of building a 16×20 shed extend far beyond its utilitarian purpose. This versatile structure offers a sanctuary for your hobbies, a haven for your tools and equipment, and a canvas for your creative expression. It enhances the organization and visual appeal of your outdoor space while contributing to the overall value and functionality of your property.
As you put the finishing touches on your shed, from interior finishes and storage solutions to lighting and exterior enhancements, you've imbued the space with your unique vision and personality. The shed stands as a reflection of your craftsmanship and ingenuity, serving as a testament to your ability to transform raw materials into a functional and aesthetically pleasing structure.
With the completion of your 16×20 shed, you've not only gained a valuable asset for storage and workspace but also a source of pride and accomplishment. The journey of building your own shed has empowered you to embrace the art of DIY construction, fostering a deeper connection to your outdoor environment and a sense of fulfillment in creating a tangible and enduring addition to your property.
As you step back and admire the finished shed, take pride in the knowledge that you've not only built a structure but also cultivated a space that embodies your passion, creativity, and practicality. Your 16×20 shed stands as a testament to the power of DIY craftsmanship and the transformative impact of personalized construction projects. It's a space where functionality meets creativity, and where your vision has materialized into a tangible and cherished asset within your outdoor landscape.