
Home>Create & Decorate>DIY & Crafts>DIY Lego House: Build Your Own Miniature Dream Home
DIY & Crafts
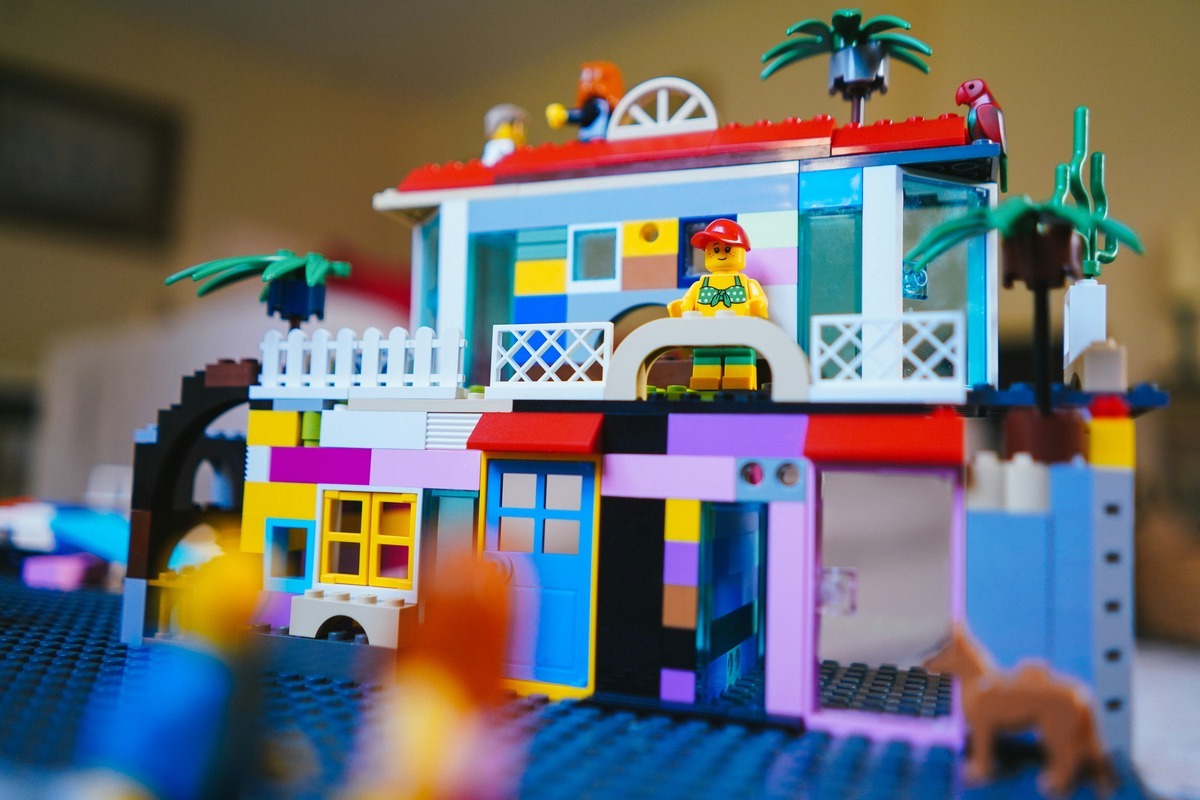
DIY Lego House: Build Your Own Miniature Dream Home
Published: February 28, 2024

Content Creator specializing in woodworking and interior transformations. Caegan's guides motivate readers to undertake their own projects, while his custom furniture adds a personal touch.
Discover how to create your own miniature dream home with our DIY Lego House guide. Get inspired to build and craft with our DIY & Crafts tips. Start your project today!
(Many of the links in this article redirect to a specific reviewed product. Your purchase of these products through affiliate links helps to generate commission for Twigandthistle.com, at no extra cost. Learn more)
Introduction
Welcome to the wonderful world of DIY Lego house building! If you've ever dreamed of creating your own miniature dream home using the iconic plastic bricks, then you're in for an exciting and rewarding adventure. Building a Lego house is not only a fun and creative project, but it also allows you to unleash your imagination and showcase your craftsmanship.
Whether you're a seasoned Lego enthusiast or a beginner looking for a new challenge, constructing a Lego house offers a unique opportunity to bring your architectural visions to life in a tangible and interactive way. From designing the floor plan to adding intricate details, every step of the process is a chance to express your creativity and attention to detail.
In this comprehensive guide, we'll walk you through the step-by-step process of building your very own Lego house. You'll learn about the essential materials needed, the importance of careful planning, and the techniques for constructing a sturdy foundation, walls, and roof. Additionally, we'll explore the exciting realm of interior design, where you can personalize your Lego house with furniture, decor, and other delightful touches.
Whether you're aiming to replicate a real-life architectural marvel or create a whimsical fantasy abode, the possibilities are endless when it comes to building a Lego house. So, gather your bricks, unleash your imagination, and get ready to embark on an unforgettable journey of creativity and construction. Let's dive in and discover the joy of bringing your miniature dream home to life, one brick at a time.
Materials Needed
To embark on your DIY Lego house building adventure, you'll need a variety of materials to bring your miniature dream home to life. Here's a comprehensive list of essential items to gather before you begin:
-
Lego Bricks: The foundation of your Lego house project, these colorful and versatile bricks will serve as the building blocks for your creation. Ensure you have a diverse assortment of bricks in different sizes, shapes, and colors to accommodate various design elements.
-
Baseplate: A sturdy baseplate provides a stable foundation for your Lego house. Choose a size that suits the scale of your project, whether you're building a cozy cottage or a sprawling mansion.
-
Roofing Elements: Depending on the architectural style of your Lego house, you'll need roof pieces such as slopes, tiles, and shingles to construct a visually appealing and structurally sound roof.
-
Windows and Doors: Incorporate transparent bricks for windows and specialized door pieces to add realistic features to your Lego house. These elements will infuse charm and character into your miniature abode.
-
Specialty Pieces: Explore specialty Lego pieces such as arches, columns, and decorative elements to add unique architectural details and embellishments to your creation.
-
Mini Figures and Accessories: To bring life to your Lego house, consider including mini figures, furniture, plants, and other accessories to populate the interior and exterior spaces.
-
Adhesive Putty or Glue: While not essential, adhesive putty or glue can be useful for securing delicate or intricate components of your Lego house, ensuring stability and longevity.
-
Reference Materials: If you're drawing inspiration from real-life architecture or specific design styles, gather reference materials such as photographs, blueprints, or sketches to guide your creative process.
-
Workspace and Storage: Set up a dedicated workspace with ample room to assemble your Lego house. Additionally, consider storage solutions to organize and store your Lego bricks and components between building sessions.
By assembling these materials, you'll be well-equipped to commence your Lego house construction journey with confidence and creativity. With a thoughtful selection of bricks, accessories, and reference materials, you'll have the foundation for bringing your miniature dream home to life in captivating detail.
Planning Your Lego House
Before diving into the physical construction of your Lego house, it's crucial to devote ample time to the planning phase. This preparatory stage sets the foundation for a successful and enjoyable building experience, allowing you to envision the architectural style, layout, and unique features of your miniature dream home.
Visualizing Your Design
Begin by visualizing the overall design and aesthetic of your Lego house. Consider the architectural style you wish to emulate, whether it's a quaint cottage, a modernist masterpiece, or a fantastical structure inspired by your imagination. Browse through architectural magazines, online resources, or even take a stroll through your neighborhood to gather inspiration for your design.
Creating a Floor Plan
Once you have a clear vision of your Lego house, sketch out a basic floor plan to outline the layout of the interior spaces. Determine the placement of rooms, entryways, and any special features you intend to incorporate. This initial blueprint will serve as a guide as you translate your design onto the baseplate.
Selecting Color Schemes
Delve into the realm of color theory and select a cohesive color scheme for your Lego house. Whether you opt for a vibrant and eclectic palette or a more subdued and elegant combination, choosing the right colors will infuse personality and charm into your creation. Experiment with different combinations of bricks to find the perfect hues for your miniature dream home.
Considering Structural Integrity
As you conceptualize your Lego house, keep structural integrity in mind. Consider the stability of the walls, the pitch of the roof, and the overall balance of the design. By planning for a sturdy and well-supported structure from the outset, you'll ensure that your Lego house stands the test of time and handling.
Incorporating Personal Touches
Lastly, infuse your design with personal touches and unique elements that reflect your individual style and interests. Whether it's a whimsical garden, a cozy fireplace, or a charming bay window, these details will elevate your Lego house from a mere construction project to a personalized work of art.
By dedicating time to thoughtful planning, you'll lay the groundwork for a rewarding and fulfilling Lego house building experience. With a clear vision, a well-defined floor plan, and a touch of creativity, you'll be ready to bring your miniature dream home to life with confidence and enthusiasm.
Building the Foundation
The foundation of a Lego house serves as the fundamental support structure upon which the entire edifice rests. Building a sturdy and level foundation is essential for ensuring the stability and durability of your miniature dream home. To commence this crucial phase of construction, begin by selecting a suitable baseplate that provides ample space for your desired floor plan. The size and shape of the baseplate should align with the scale and design of your Lego house, offering a stable platform for the subsequent building stages.
Once you have chosen the appropriate baseplate, carefully lay it out on your workspace, ensuring that it sits level and secure. This foundational step sets the stage for the meticulous placement of the initial bricks, which will form the groundwork for your Lego house. Begin by outlining the perimeter of the house on the baseplate, using standard bricks or specialized foundation elements to create a solid boundary.
As you lay down the foundational bricks, pay close attention to alignment and symmetry, ensuring that the corners are square and the edges are straight. This precision is crucial for establishing a stable and well-balanced foundation that will support the walls and roof of your Lego house. Additionally, consider incorporating reinforcing elements such as support columns or internal bracing to enhance the structural integrity of the foundation.
While constructing the foundation, take the opportunity to integrate any unique features or landscaping elements that will enhance the overall aesthetic of your Lego house. Whether it's a charming front porch, a decorative pathway, or a garden terrace, these details can be seamlessly integrated into the foundation, adding character and visual interest to your creation.
Throughout the process of building the foundation, maintain a keen eye for detail and a commitment to precision. By investing time and care into this foundational stage, you'll establish a solid base for the subsequent phases of construction, ensuring that your Lego house stands strong and proud as it takes shape. With the foundation in place, you're ready to embark on the next exciting stage of building your miniature dream home.
Constructing the Walls
With the foundation securely in place, the next phase of building your Lego house involves the construction of the walls, which define the perimeter and structure of the interior spaces. This stage presents an opportunity to infuse character and personality into your miniature dream home while ensuring the stability and coherence of the overall design.
To commence the construction of the walls, begin by selecting an appropriate combination of bricks that align with your envisioned architectural style and color scheme. Consider the height, texture, and decorative elements that will contribute to the visual appeal of your Lego house. Whether you opt for a traditional brick pattern, a sleek modern facade, or a whimsical design, the possibilities for creativity are endless.
As you assemble the walls, prioritize the use of sturdy and interlocking techniques to ensure the structural integrity of the construction. Incorporate corner reinforcements, internal bracing, and strategic placement of support elements to bolster the stability of the walls. Additionally, consider integrating windows, doors, and architectural details as you progress, adding depth and dimension to the facade of your Lego house.
While constructing the walls, pay attention to symmetry and alignment, ensuring that the vertical elements are straight and securely connected. This precision will contribute to the overall cohesion and professional finish of your miniature dream home. Moreover, take the opportunity to incorporate unique design features such as decorative patterns, textured surfaces, or ornamental elements that reflect your creative vision.
As the walls begin to take shape, step back periodically to assess the visual impact and structural soundness of the construction. This reflective approach allows you to make adjustments and refinements as needed, ensuring that the walls of your Lego house embody the desired aesthetic and functionality.
By dedicating care and attention to the construction of the walls, you'll lay the groundwork for a visually stunning and robust framework that forms the essence of your miniature dream home. With each brick meticulously placed, your Lego house will evolve into a captivating architectural marvel, ready to embrace the next phase of its construction journey.
Adding the Roof
As the walls of your Lego house stand proudly, the time has come to crown your creation with a meticulously crafted roof. The roofing stage is a pivotal moment in the construction process, as it not only provides essential protection for the interior spaces but also contributes significantly to the overall aesthetic and character of your miniature dream home.
To commence the addition of the roof, carefully consider the architectural style and structural requirements of your Lego house. Select roof pieces such as slopes, tiles, and shingles that align with the envisioned design, ensuring that they complement the walls and contribute to the visual harmony of the structure. Whether you opt for a classic gabled roof, a contemporary flat roof, or a whimsical asymmetrical design, the roof elements you choose will define the character and charm of your Lego house.
As you assemble the roof, prioritize precision and attention to detail to ensure a seamless and secure fit. Begin by laying the foundational roof elements, aligning them with the top of the walls and ensuring a snug connection. Pay close attention to the pitch and angle of the roof, ensuring that it not only enhances the visual appeal of your Lego house but also provides adequate drainage and protection from the elements.
Incorporate specialized roofing pieces to add texture, depth, and visual interest to the roof. Experiment with different patterns and techniques to create a captivating and dynamic roofscape that elevates the overall design of your miniature dream home. Additionally, consider integrating skylights, dormer windows, or other architectural features to infuse the roof with personality and charm.
Throughout the process of adding the roof, maintain a keen eye for balance and symmetry, ensuring that the roofing elements align harmoniously with the walls and foundation. Periodically step back to assess the visual impact and structural integrity of the roof, making adjustments and refinements as needed to achieve a cohesive and polished finish.
As the final pieces of the roof come together, revel in the satisfaction of witnessing your Lego house evolve into a captivating architectural masterpiece. With the roof in place, your miniature dream home is one step closer to realization, poised to embrace the next phase of its construction journey with grace and allure.
Designing the Interior
With the exterior structure of your Lego house taking shape, it's time to shift your focus inward and embark on the exciting phase of designing the interior spaces. This pivotal stage allows you to infuse personality, functionality, and charm into your miniature dream home, creating inviting and captivating living areas that reflect your creative vision.
Begin by envisioning the layout and function of the interior spaces, considering the placement of rooms, furniture, and decorative elements. Whether you're crafting a cozy living room, a stylish kitchen, or a tranquil bedroom, thoughtful planning is essential to optimize the use of space and create a harmonious flow throughout the interior.
As you delve into the interior design process, explore a diverse array of Lego elements to emulate furniture, fixtures, and decor. Experiment with creating seating arrangements, dining areas, and storage solutions using a combination of bricks, plates, and specialized pieces. Consider the scale and proportion of the furniture in relation to the rooms, ensuring a realistic and visually appealing representation of interior spaces.
Incorporate decorative details and accessories to add character and warmth to the interior of your Lego house. From potted plants and artwork to rugs and lighting fixtures, these elements infuse personality and charm into each room, creating a welcoming and lived-in ambiance.
Furthermore, consider integrating functional features such as staircases, fireplaces, and built-in shelving to enhance the practicality and visual interest of the interior spaces. These architectural details not only contribute to the authenticity of your miniature dream home but also showcase your attention to detail and craftsmanship.
Throughout the interior design process, maintain a keen eye for cohesion and balance, ensuring that each room harmonizes with the overall aesthetic and theme of your Lego house. Periodically step back to assess the layout and visual impact of the interior spaces, making adjustments and refinements as needed to achieve a cohesive and inviting environment.
As you immerse yourself in the art of designing the interior, relish the opportunity to infuse your miniature dream home with character, functionality, and personal flair. With each room meticulously crafted, your Lego house will exude warmth and charm, inviting admiration and sparking the imagination of all who behold its captivating interior.
Adding Final Touches
With the exterior and interior of your Lego house taking shape, it's time to elevate the overall aesthetic and inject a sense of life and vibrancy through the addition of final touches. This phase of the construction journey allows you to infuse character, charm, and intricate details that will transform your miniature dream home into a captivating and immersive creation.
Begin by exploring the realm of landscaping and outdoor features to enhance the exterior of your Lego house. Consider incorporating a garden with vibrant flowers, a quaint pathway leading to the front door, or a charming patio area complete with seating and a barbecue grill. These outdoor elements not only add visual appeal but also create a sense of warmth and liveliness, inviting the imagination to wander through the miniature outdoor spaces.
Furthermore, pay attention to the small details that bring authenticity and personality to your Lego house. Add window boxes filled with colorful blooms, outdoor lighting fixtures, and decorative elements such as mailboxes, bird feeders, or even a playful pet figurine. These subtle touches contribute to the narrative of your miniature dream home, infusing it with a sense of realism and charm.
As you shift your focus to the interior, consider embellishing the living spaces with thoughtful accents and accessories. Explore the creation of miniature books, artwork, and decorative objects to adorn the walls and shelves, adding a sense of coziness and individuality to each room. Additionally, experiment with creating custom rugs, curtains, and other soft furnishings using a combination of small bricks and plates, infusing the interior with warmth and texture.
Moreover, consider the incorporation of lighting features to bring a sense of ambiance and realism to your Lego house. Whether it's crafting a chandelier for the dining room, bedside lamps for the bedrooms, or a cozy fireplace with a flickering flame effect, these lighting elements add a touch of magic and sophistication to the interior spaces.
Throughout the process of adding final touches, embrace the opportunity to infuse your miniature dream home with personal touches and intricate details that reflect your creativity and attention to detail. With each carefully placed element, your Lego house will evolve into a captivating and immersive creation, ready to inspire and delight all who behold its enchanting presence.
Conclusion
As you reach the culmination of your DIY Lego house building journey, take a moment to revel in the remarkable achievement of bringing your miniature dream home to life. Through meticulous planning, creative ingenuity, and unwavering dedication, you have transformed a collection of plastic bricks into a captivating architectural marvel that embodies your vision and craftsmanship.
The process of constructing a Lego house transcends the realm of mere building; it is a testament to the boundless potential of creativity and the joy of hands-on craftsmanship. From the foundational stages, where the baseplate became the canvas for your architectural aspirations, to the intricate details that adorn the interior and exterior spaces, each step of the journey has been a testament to your passion for creativity and design.
As you reflect on the completion of your Lego house, take pride in the unique narrative that unfolds within its walls. Every carefully placed brick, every thoughtfully designed room, and every charming detail contributes to a story that is uniquely yours. Whether you've crafted a cozy cottage nestled in a tranquil landscape, a modernist masterpiece that defies convention, or a whimsical abode that sparks the imagination, your Lego house stands as a testament to your creativity and individuality.
Beyond the tangible creation that now stands before you, the journey of building a Lego house has been a source of inspiration, learning, and personal growth. It has nurtured your ability to visualize and manifest ideas, honed your attention to detail, and fostered a deep appreciation for the art of design and construction. Moreover, it has provided moments of joy, satisfaction, and wonder as you witnessed your miniature dream home take shape, brick by brick.
As you admire your completed Lego house, take a moment to celebrate the spirit of creativity and exploration that has guided you through this endeavor. Whether you choose to display your creation as a cherished centerpiece, share it with friends and family, or embark on new building adventures, the experience of constructing a Lego house will continue to inspire and resonate with the imaginative spirit within you.
In the end, your DIY Lego house stands not only as a physical manifestation of your creativity but as a testament to the limitless possibilities that unfold when passion and imagination converge. As you bid farewell to this enchanting project, carry forward the lessons learned, the memories created, and the enduring joy of bringing dreams to life, one brick at a time.