
Home>Create & Decorate>DIY & Crafts>Hinged Barn Door Plans: Step-by-Step Guide For DIY Enthusiasts
DIY & Crafts
Hinged Barn Door Plans: Step-by-Step Guide For DIY Enthusiasts
Published: April 20, 2024

Senior Editor in Create & Decorate, Kathryn combines traditional craftsmanship with contemporary trends. Her background in textile design and commitment to sustainable crafts inspire both content and community.
Discover step-by-step hinged barn door plans for DIY enthusiasts. Create your own stylish barn door with our easy-to-follow guide. Perfect for DIY & Crafts enthusiasts.
(Many of the links in this article redirect to a specific reviewed product. Your purchase of these products through affiliate links helps to generate commission for Twigandthistle.com, at no extra cost. Learn more)
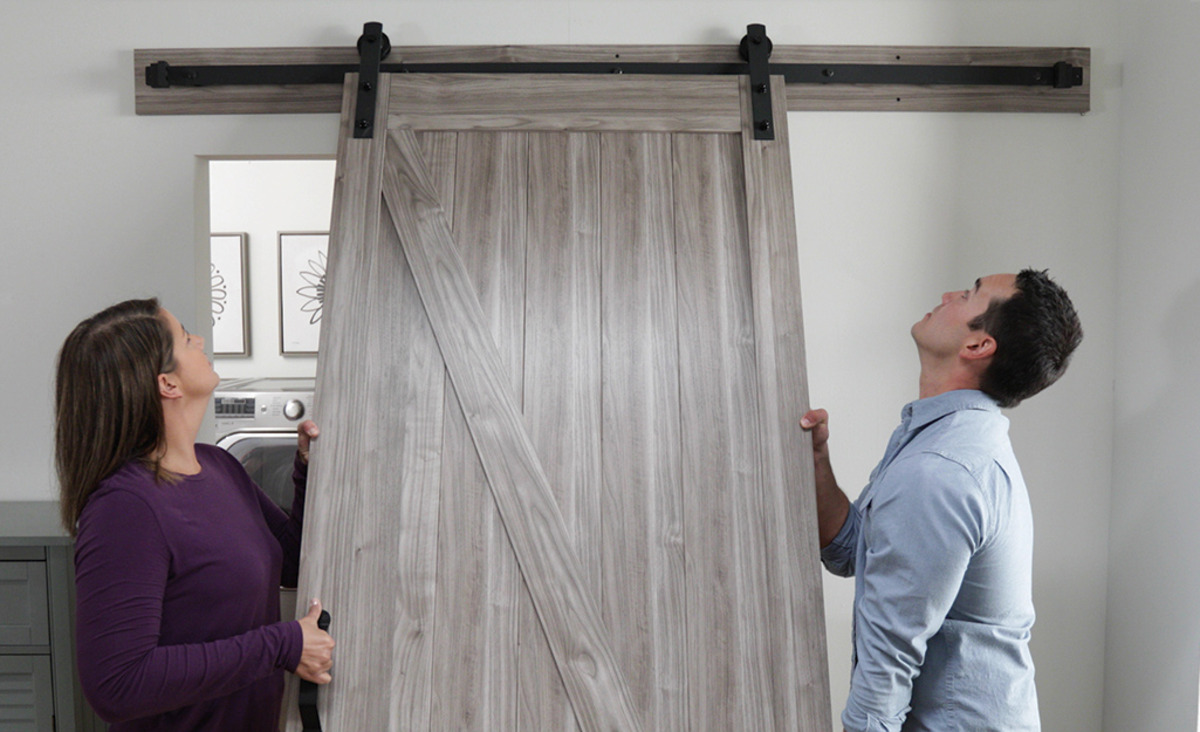
Introduction
Are you looking to add a touch of rustic charm to your home? Building a hinged barn door can be a rewarding and practical DIY project. Whether you're aiming to create a stylish room divider or a space-saving entryway, a hinged barn door can add character and functionality to any space. In this step-by-step guide, we'll walk you through the process of building your own hinged barn door, from selecting the right materials to installing the finishing touches. Let's roll up our sleeves and get started on this exciting DIY adventure!
Materials and Tools Needed
Before diving into the construction of your hinged barn door, it's essential to gather all the necessary materials and tools. Here's a comprehensive list to ensure you have everything at your fingertips:
Materials:
- Wooden Planks: Choose high-quality, sturdy wooden planks that are suitable for the size of your door.
- Hinges: Opt for heavy-duty hinges that can support the weight of the door and allow smooth movement.
- Door Handle: Select a door handle that complements the aesthetic of your barn door and is easy to grip.
- Wood Screws: Ensure you have an assortment of wood screws in various sizes to secure the planks together.
- Wood Glue: A reliable wood glue will reinforce the joints and add extra strength to the door.
- Sandpaper: Invest in different grits of sandpaper for smoothing the wood and achieving a polished finish.
- Wood Stain or Paint: Decide whether you want to stain the wood for a natural look or paint it to match your decor.
Tools:
- Measuring Tape: Accurate measurements are crucial for a well-fitted barn door, so a measuring tape is a must.
- Circular Saw or Hand Saw: Depending on your preference, a circular saw or hand saw will be essential for cutting the wooden planks to size.
- Drill and Bits: A drill with various drill bits will be necessary for creating pilot holes and attaching the hinges and handle.
- Screwdriver: Have both a manual and electric screwdriver on hand for driving in the wood screws.
- Clamps: Clamps will help hold the wooden planks in place during assembly and glue drying.
- Safety Gear: Don't forget safety goggles, gloves, and a dust mask to protect yourself during cutting and sanding.
By ensuring you have all the required materials and tools, you'll be well-prepared to embark on the construction of your hinged barn door.
Preparing the Barn Door Frame
To begin constructing your hinged barn door, the first step is to prepare the door frame. Follow these detailed steps to ensure a sturdy and well-constructed frame:
-
Measure and Cut the Wooden Planks: Using a measuring tape and a circular saw or hand saw, carefully measure and cut the wooden planks to the desired dimensions for the door frame. It's crucial to ensure that the planks are cut precisely to achieve a seamless fit when assembled.
-
Assemble the Frame: Lay the cut planks on a flat surface and arrange them to form the door frame. Use clamps to hold the planks in place, ensuring that the corners are square and the frame is perfectly aligned. This step is essential for creating a solid foundation for the barn door.
-
Secure the Joints: Once the planks are aligned, use wood glue to reinforce the joints between the planks. Apply a generous amount of wood glue along the edges before pressing the planks together. Wipe off any excess glue and use clamps to hold the joints tightly while the glue sets.
-
Add Support Crossbars (Optional): Depending on the size of your barn door, you may want to add support crossbars to enhance the stability of the frame. Measure and cut additional wooden planks to fit horizontally across the back of the frame, then secure them in place using wood screws and wood glue.
-
Allow for Drying Time: After assembling the frame and reinforcing the joints, allow sufficient time for the wood glue to dry completely. This step is crucial for ensuring that the frame is solid and durable before proceeding to the next stage of the construction process.
By meticulously preparing the barn door frame, you'll lay the groundwork for a robust and well-constructed hinged barn door. Once the frame is ready, you can move on to the exciting phase of installing the hinges and bringing your barn door to life.
Installing the Hinges
Installing the hinges is a critical step in the construction of your hinged barn door. Proper installation ensures smooth functionality and stability. Follow these steps to securely attach the hinges to the door frame and the door itself:
-
Positioning the Hinges: Begin by determining the placement of the hinges on the door frame and the door. For optimal support, it's recommended to use at least three hinges evenly spaced along the height of the door. Mark the positions for the hinges using a pencil and ensure they align accurately on both the frame and the door.
-
Pre-Drilling Pilot Holes: Using a drill with a suitable drill bit, pre-drill pilot holes at the marked positions for the hinges. This step is crucial for preventing the wood from splitting when driving in the screws and ensures precise alignment of the hinges.
-
Attaching the Hinges to the Frame: With the pilot holes in place, position the hinges on the door frame and secure them using wood screws. Ensure the hinges are flush against the frame and tightly fastened to provide sturdy support for the door.
-
Mounting the Hinges on the Door: Once the hinges are securely attached to the frame, it's time to mount the corresponding halves of the hinges onto the door. Align the hinges with the pre-marked positions on the door and fasten them using wood screws. Double-check the alignment and ensure the hinges are firmly attached to the door.
-
Testing the Movement: After installing the hinges, carefully test the movement of the door to ensure it opens and closes smoothly without any obstructions. Make any necessary adjustments to the hinge screws to achieve the desired movement and ensure the door is properly aligned within the frame.
By following these steps, you'll successfully install the hinges, allowing your hinged barn door to function seamlessly. Once the hinges are in place, you can proceed to the next stage of attaching the door handle, bringing your DIY barn door closer to completion.
Attaching the Door Handle
Attaching the door handle is a crucial step that adds both functionality and aesthetic appeal to your hinged barn door. Follow these detailed steps to securely attach the door handle:
-
Selecting the Door Handle: Before attaching the handle, choose a door handle that complements the style of your barn door and fits comfortably in your hand. Whether you opt for a sleek modern handle or a traditional rustic design, ensure it aligns with the overall look you want to achieve.
-
Determining Handle Placement: Decide on the placement of the door handle, considering both the height and the side of the door where it will be installed. Typically, the handle is positioned at a comfortable height for easy access and smooth operation. Use a pencil to mark the precise placement of the handle on the door.
-
Drilling Holes for the Handle: Using a drill with the appropriate drill bit, carefully drill holes at the marked positions for the handle. Take precise measurements to ensure the holes are aligned and accommodate the handle's mounting screws.
-
Securing the Handle in Place: With the holes drilled, place the handle against the door and align it with the drilled holes. Insert the mounting screws through the handle and into the pre-drilled holes. Use a screwdriver to tighten the screws securely, ensuring the handle is firmly attached to the door.
-
Checking the Handle Alignment: After securing the handle, double-check its alignment and ensure it sits flush against the surface of the door. Test the handle to confirm that it operates smoothly and securely.
-
Adding a Latch or Lock (Optional): Depending on the intended use of the barn door, you may choose to add a latch or lock for privacy and security. If desired, follow the manufacturer's instructions to install the latch or lock mechanism, ensuring it complements the door handle and functions effectively.
By following these steps, you'll successfully attach the door handle, enhancing the functionality and visual appeal of your hinged barn door. With the handle securely in place, your DIY barn door is one step closer to becoming a standout feature in your home.
Sanding and Finishing
Once the construction and assembly of your hinged barn door are complete, the next crucial step is sanding and finishing the door to achieve a polished and professional look. Follow these detailed steps to ensure your barn door is smooth, visually appealing, and ready to make a statement in your home:
-
Sanding the Surface: Begin by using medium-grit sandpaper to sand the entire surface of the barn door. Work systematically, moving in the direction of the wood grain to ensure an even finish. Sanding helps to remove any rough spots, imperfections, or splinters, resulting in a smooth and touchable surface.
-
Smoothing the Edges: Pay special attention to the edges of the door, as they may require additional sanding to achieve a seamless and rounded finish. Use finer grit sandpaper to carefully smooth the edges, creating a soft and polished look that enhances the overall appeal of the door.
-
Applying Wood Stain or Paint: Depending on your design preference, you can choose to apply wood stain or paint to the barn door. Wood stain enhances the natural beauty of the wood, bringing out its grain and texture, while paint allows you to customize the door to match your decor. Use a brush or roller to apply the chosen finish evenly, following the manufacturer's instructions for drying and recoating.
-
Adding a Protective Finish: To protect the surface of the door and enhance its durability, consider applying a clear protective finish such as polyurethane. This final coat not only adds a subtle sheen to the door but also shields it from wear and tear, making it suitable for long-term use.
-
Allowing for Drying Time: After applying the wood stain, paint, or protective finish, allow the door to dry completely according to the product's recommended drying time. This step is essential for achieving a flawless and long-lasting finish.
By meticulously sanding and finishing your hinged barn door, you'll elevate its appearance and ensure it complements your home's aesthetic. With the door's surface smooth and the finish applied, your DIY barn door is ready to take center stage in your living space, adding a touch of rustic charm and functionality.
Conclusion
In conclusion, building a hinged barn door is a rewarding and practical DIY project that can add character and functionality to any space. By following the step-by-step guide outlined in this article, you can create a standout feature in your home while showcasing your DIY skills. From preparing the barn door frame to installing the hinges, attaching the door handle, and sanding and finishing, each stage contributes to the overall quality and visual appeal of the barn door. With the right materials, tools, and attention to detail, you can achieve a professional-looking hinged barn door that enhances the ambiance of your living space. Embrace the rustic charm and versatility of a hinged barn door, and enjoy the satisfaction of completing a project that combines craftsmanship and creativity.