
Home>Home & Furniture>Doors & Windows>How To Build An Exterior Door
Doors & Windows
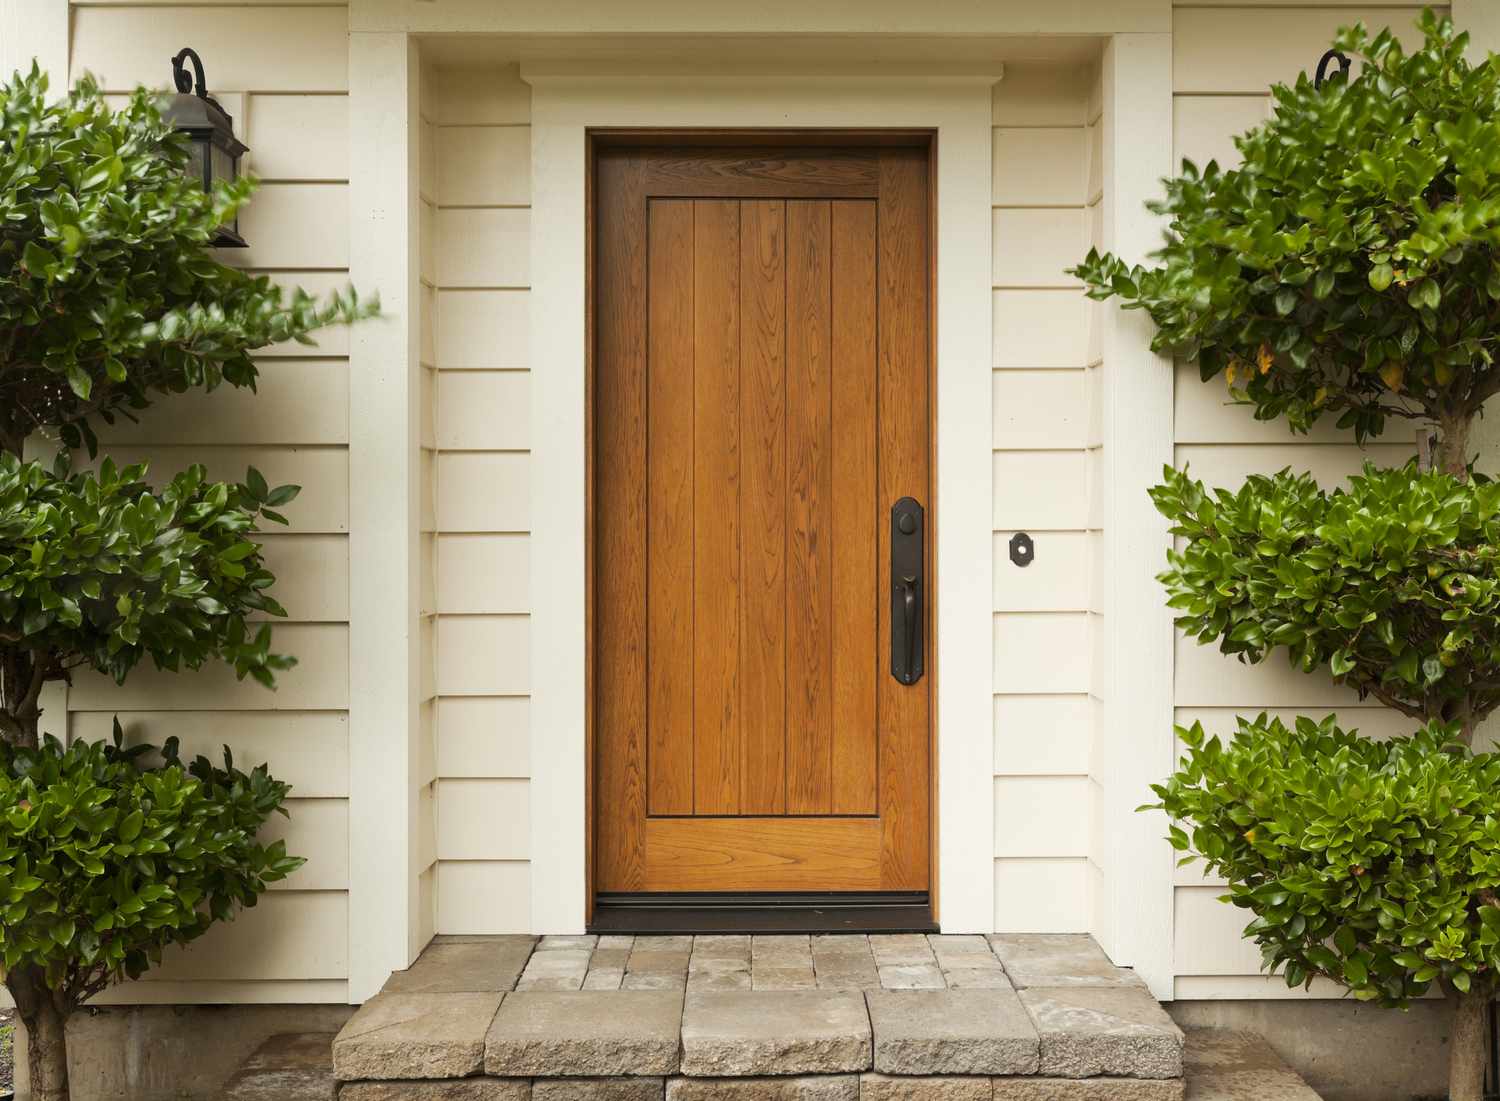
How To Build An Exterior Door
Published: February 20, 2024
Editor-in-Chief with a decade in home renovation and a passion for vintage furniture. Diane is known for her weekend treasure hunts at flea markets, enriching our content with unique style insights.
Learn how to build an exterior door for your home with our comprehensive guide. Get expert tips and advice on doors and windows.
(Many of the links in this article redirect to a specific reviewed product. Your purchase of these products through affiliate links helps to generate commission for Twigandthistle.com, at no extra cost. Learn more)
Introduction
Building an exterior door can be a rewarding and practical project for homeowners looking to enhance the aesthetics and functionality of their homes. Whether you're aiming to replace an old, worn-out door or create a custom entryway, constructing an exterior door allows for personalization and the satisfaction of completing a hands-on woodworking endeavor.
Crafting an exterior door from scratch provides the opportunity to tailor the design to fit the specific architectural style of your home, ensuring a seamless integration with the overall aesthetic. Additionally, by using high-quality materials and precise construction techniques, you can create a durable and secure entryway that enhances both the curb appeal and the security of your home.
In this comprehensive guide, we will walk you through the step-by-step process of building an exterior door, from gathering the necessary materials and tools to hanging the finished product. By following these instructions, you can embark on a fulfilling DIY project that not only adds value to your home but also showcases your craftsmanship and attention to detail.
Embarking on the journey of building an exterior door allows for creative expression and the satisfaction of creating a functional and visually appealing entryway. Whether you're a seasoned woodworking enthusiast or a novice DIYer, this guide will equip you with the knowledge and confidence to tackle this project and achieve a stunning result that complements your home's exterior while providing security and insulation.
Now, let's dive into the exciting process of crafting your own exterior door, where precision, creativity, and practicality converge to bring your vision to life.
Step 1: Gather Materials and Tools
Before embarking on the construction of an exterior door, it is essential to gather all the necessary materials and tools to ensure a smooth and efficient building process. Here's a comprehensive list of items you'll need to get started:
Materials:
- Wood: Select high-quality lumber, such as cedar, mahogany, or oak, to ensure durability and resistance to the elements. The wood should be thick enough to provide security and insulation while remaining manageable for construction.
- Wood Glue: Choose a weather-resistant wood glue to ensure strong and long-lasting adhesion between the door panels and frames.
- Wood Screws: Opt for corrosion-resistant wood screws to secure the door panels and frames effectively.
- Wood Stain or Paint: Depending on your preference, acquire a suitable wood stain or paint to protect the door from moisture and UV damage while enhancing its visual appeal.
- Varnish or Sealant: To provide an additional layer of protection, consider using a varnish or sealant to safeguard the exterior door from the elements.
Tools:
- Measuring Tape: Accurate measurements are crucial for ensuring a precise fit and alignment of the door components.
- Circular Saw or Table Saw: A reliable saw will be essential for cutting the wood to the required dimensions with precision.
- Chisel and Hammer: These tools will aid in fine-tuning the edges and joints of the door panels for a seamless fit.
- Drill and Bits: A drill, along with suitable drill bits, will be necessary for creating holes for screws and hardware installation.
- Clamps: Utilize clamps to hold the door components securely in place during assembly and glue application.
- Sanding Tools: Sandpaper or a power sander will be indispensable for smoothing the wood surfaces and achieving a professional finish.
- Hinges and Hardware: Depending on the design of your exterior door, acquire suitable hinges, doorknobs, and any additional hardware required for installation.
By ensuring that you have all the essential materials and tools at your disposal, you can streamline the construction process and minimize interruptions. Additionally, investing in high-quality materials and reliable tools will contribute to the overall durability and visual appeal of the finished exterior door. With these items in hand, you're ready to move on to the next step of measuring and cutting the door frame, bringing you one step closer to completing your custom-built exterior door.
Step 2: Measure and Cut the Door Frame
Accurate measurements and precise cuts are pivotal in the construction of an exterior door, as they directly influence the door's fit, functionality, and overall aesthetic appeal. The process of measuring and cutting the door frame requires meticulous attention to detail and a methodical approach to ensure a seamless assembly. Here's a detailed breakdown of the essential steps involved in this critical phase of the door-building process:
1. Measure the Door Opening
Begin by measuring the dimensions of the door opening to determine the exact size of the door frame needed. Use a reliable measuring tape to record the width and height of the opening, taking into account any variations in the dimensions due to irregularities in the wall or floor. It's crucial to measure both the width and height at multiple points to accommodate any discrepancies and ensure a precise fit.
2. Select and Prepare the Wood
Choose high-quality lumber for the door frame, ensuring that it is sturdy enough to provide structural integrity and withstand external elements. Once the wood is selected, mark the measurements obtained from the door opening onto the lumber, taking care to account for the necessary allowances for the frame's thickness and clearance.
3. Cut the Frame Components
Using a reliable circular saw or table saw, carefully cut the marked lumber to create the individual components of the door frame, including the top, bottom, and side pieces. It's essential to execute the cuts with precision, maintaining straight and square edges to facilitate seamless assembly and installation.
4. Fine-Tune the Joints
After cutting the frame components, use a chisel and hammer to fine-tune the edges and ensure that the joints fit together snugly. This step is crucial for achieving a seamless and stable frame structure, as any gaps or misalignments can compromise the door's functionality and visual appeal.
5. Test Fit the Frame
Once the frame components are prepared, perform a test fit within the door opening to verify the accuracy of the measurements and the suitability of the frame. This step allows for any necessary adjustments to be made before proceeding to the next phase of assembling the door panels.
By meticulously measuring and cutting the door frame with precision and attention to detail, you can lay a solid foundation for the construction of a custom-built exterior door that seamlessly integrates with your home's architecture and provides lasting functionality and visual appeal.
Step 3: Assemble the Door Panels
Assembling the door panels is a crucial phase in the construction of an exterior door, as it involves creating the core structure that will provide security, insulation, and visual appeal. This process requires precision, attention to detail, and the use of reliable adhesives and fasteners to ensure a sturdy and durable assembly. Here's a comprehensive guide to the essential steps involved in assembling the door panels:
- Select and Prepare the Wood Panels
Begin by selecting high-quality wood panels that are suitable for exterior use, such as solid wood or engineered wood products designed to withstand the elements. Ensure that the panels are of the appropriate thickness to provide structural integrity and insulation while remaining manageable for assembly.
Once the wood panels are selected, carefully measure and mark the dimensions for the individual components of the door panels, including the stiles, rails, and any additional decorative elements. Use a measuring tape and a straight edge to achieve precise and uniform dimensions, taking into account any allowances for joinery and hardware.
- Cut and Mill the Panel Components
Using a reliable circular saw or table saw, proceed to cut the marked wood panels into the required components, such as stiles and rails, with precise and straight cuts. Additionally, if the door design incorporates decorative elements, such as raised panels or intricate patterns, utilize appropriate milling techniques to achieve the desired aesthetic details.
- Assemble the Panel Components
With the individual components prepared, it's time to assemble the door panels using a suitable wood glue and clamps to ensure a strong and secure bond. Apply a generous amount of wood glue to the joining surfaces of the stiles and rails, then carefully align the components and use clamps to hold them in place while the adhesive sets.
During the assembly process, it's essential to verify the squareness and alignment of the door panels to prevent any warping or misalignment that could affect the functionality and visual appeal of the finished door. Once the glue has fully cured, remove the clamps and proceed to the next phase of installing the door hardware and hinges.
By meticulously assembling the door panels with precision and attention to detail, you can create a sturdy and visually appealing core structure that forms the foundation of a custom-built exterior door. This phase of the construction process sets the stage for the final steps of installing hinges, hardware, and hanging the finished door, bringing you closer to the realization of your personalized and functional entryway.
Step 4: Install Hinges and Hardware
The installation of hinges and hardware is a pivotal phase in the construction of an exterior door, as it directly influences the door's functionality, security, and overall aesthetic appeal. This step requires precision, attention to detail, and the use of reliable tools and fasteners to ensure a seamless integration of the essential components. Here's a detailed breakdown of the crucial steps involved in installing hinges and hardware:
-
Select Suitable Hinges and Hardware
Before commencing the installation process, carefully select hinges, doorknobs, locksets, and any additional hardware required for the exterior door. Opt for high-quality, weather-resistant hardware that complements the design of the door while providing durability and security. -
Mark and Prepare the Door and Frame
Begin by marking the locations for the hinges and hardware on both the door and the frame. Use a measuring tape and a pencil to ensure accurate placement, taking into account the dimensions and design of the door panels. Additionally, prepare the necessary recesses or mortises for the hinges to be flush-mounted within the door and frame. -
Install the Hinges
With the markings in place, proceed to install the hinges on the door and frame using a reliable drill and suitable screws. Ensure that the hinges are aligned correctly and securely fastened to provide smooth operation and stability. Depending on the door design, consider using three or more hinges to distribute the weight evenly and enhance the door's structural integrity. -
Mount the Hardware
Once the hinges are installed, proceed to mount the doorknobs, locksets, and any additional hardware according to the manufacturer's instructions. Ensure that the hardware is positioned accurately and functions smoothly, allowing for effortless operation and secure locking of the exterior door. -
Test the Operation
After installing the hinges and hardware, test the operation of the door to verify that it opens and closes smoothly, aligns correctly with the frame, and securely latches when closed. Make any necessary adjustments to the hinges and hardware to ensure optimal functionality and a snug fit within the door frame.
By meticulously installing hinges and hardware with precision and attention to detail, you can elevate the functionality and security of the custom-built exterior door while adding the finishing touches that enhance its visual appeal. This phase of the construction process brings you one step closer to the final installation of the finished door, culminating in the realization of a personalized and secure entryway that reflects your craftsmanship and attention to detail.
Step 5: Hang the Door
Hanging the door is the culminating step in the construction of an exterior door, marking the transition from the assembly phase to the installation and integration of the finished product into your home's entryway. This pivotal phase requires precision, patience, and attention to detail to ensure a seamless fit, smooth operation, and secure positioning of the door within the frame. Here's a comprehensive guide to the essential steps involved in hanging the door:
-
Prepare the Door and Frame: Before proceeding with the installation, ensure that the door and frame are clean, free of debris, and properly aligned. Verify that the hinges and hardware are securely fastened, and make any necessary adjustments to ensure that the door is ready for installation.
-
Position the Door: With the assistance of a helper, carefully position the door within the frame, ensuring that it aligns evenly and smoothly with the surrounding structure. Use shims to support the door and maintain an even gap between the door and the frame, allowing for smooth operation and insulation.
-
Secure the Hinges: Once the door is positioned correctly, secure the hinges to the frame using reliable screws, ensuring that they are aligned and fastened securely to provide stability and smooth operation. Verify that the door swings open and closed smoothly without any obstructions or misalignments.
-
Test the Operation: After securing the hinges, test the operation of the door to ensure that it opens and closes smoothly, aligns correctly with the frame, and securely latches when closed. Make any necessary adjustments to the hinges and shims to achieve a snug fit and optimal functionality.
-
Install the Weather Stripping: To enhance the door's insulation and weather resistance, install weather stripping along the door frame to create a tight seal when the door is closed. This step is crucial for preventing drafts, moisture infiltration, and energy loss, contributing to the overall efficiency and comfort of your home.
By meticulously hanging the door with precision and attention to detail, you can complete the construction process and integrate the custom-built exterior door into your home's entryway. This final phase marks the realization of a personalized and secure entryway that reflects your craftsmanship and dedication to creating a functional and visually appealing exterior door.
Conclusion
In conclusion, the process of building an exterior door is a rewarding journey that combines craftsmanship, practicality, and creativity. By following the step-by-step guide outlined in this comprehensive resource, homeowners and DIY enthusiasts can embark on a fulfilling project that results in a custom-built entryway tailored to their specific preferences and architectural requirements.
Throughout the construction process, attention to detail and precision play pivotal roles in ensuring the functionality, security, and visual appeal of the finished exterior door. From gathering the necessary materials and tools to hanging the completed door, each step contributes to the creation of a durable, weather-resistant, and aesthetically pleasing entryway that enhances the overall curb appeal and value of the home.
Crafting an exterior door from scratch offers the opportunity for personalization, allowing homeowners to select high-quality materials, incorporate unique design elements, and tailor the dimensions to fit seamlessly within their home's architectural framework. This level of customization ensures that the finished door not only serves as a functional entry point but also makes a statement, reflecting the homeowner's style and attention to detail.
Moreover, the construction of an exterior door provides a sense of accomplishment and pride, as the finished product stands as a testament to the homeowner's dedication to quality craftsmanship and hands-on involvement in home improvement projects. Whether it's the satisfaction of achieving a precise fit during the measurement and cutting phase or the pride of seeing the door seamlessly integrated into the entryway, the process of building an exterior door is a testament to the homeowner's dedication to enhancing their living space.
By embracing the challenge of building an exterior door, individuals can gain valuable woodworking skills, deepen their understanding of home construction, and experience the fulfillment of creating a functional and visually appealing element that contributes to the overall charm and security of their home.
In essence, the construction of an exterior door is not merely a practical endeavor but a creative expression of homeowners' dedication to enhancing their living environment. From the initial gathering of materials to the final hanging of the door, this process embodies the fusion of precision, creativity, and practicality, resulting in a personalized and secure entryway that reflects the homeowner's vision and craftsmanship.