
Home>Create & Decorate>DIY & Crafts>DIY Coffer Ceiling: Step-by-Step Guide To Creating A Stunning Coffered Ceiling
DIY & Crafts
DIY Coffer Ceiling: Step-by-Step Guide To Creating A Stunning Coffered Ceiling
Published: April 20, 2024

Senior Editor in Create & Decorate, Kathryn combines traditional craftsmanship with contemporary trends. Her background in textile design and commitment to sustainable crafts inspire both content and community.
Learn how to create a stunning coffered ceiling with our step-by-step DIY guide. Perfect for DIY & Crafts enthusiasts.
(Many of the links in this article redirect to a specific reviewed product. Your purchase of these products through affiliate links helps to generate commission for Twigandthistle.com, at no extra cost. Learn more)
Introduction
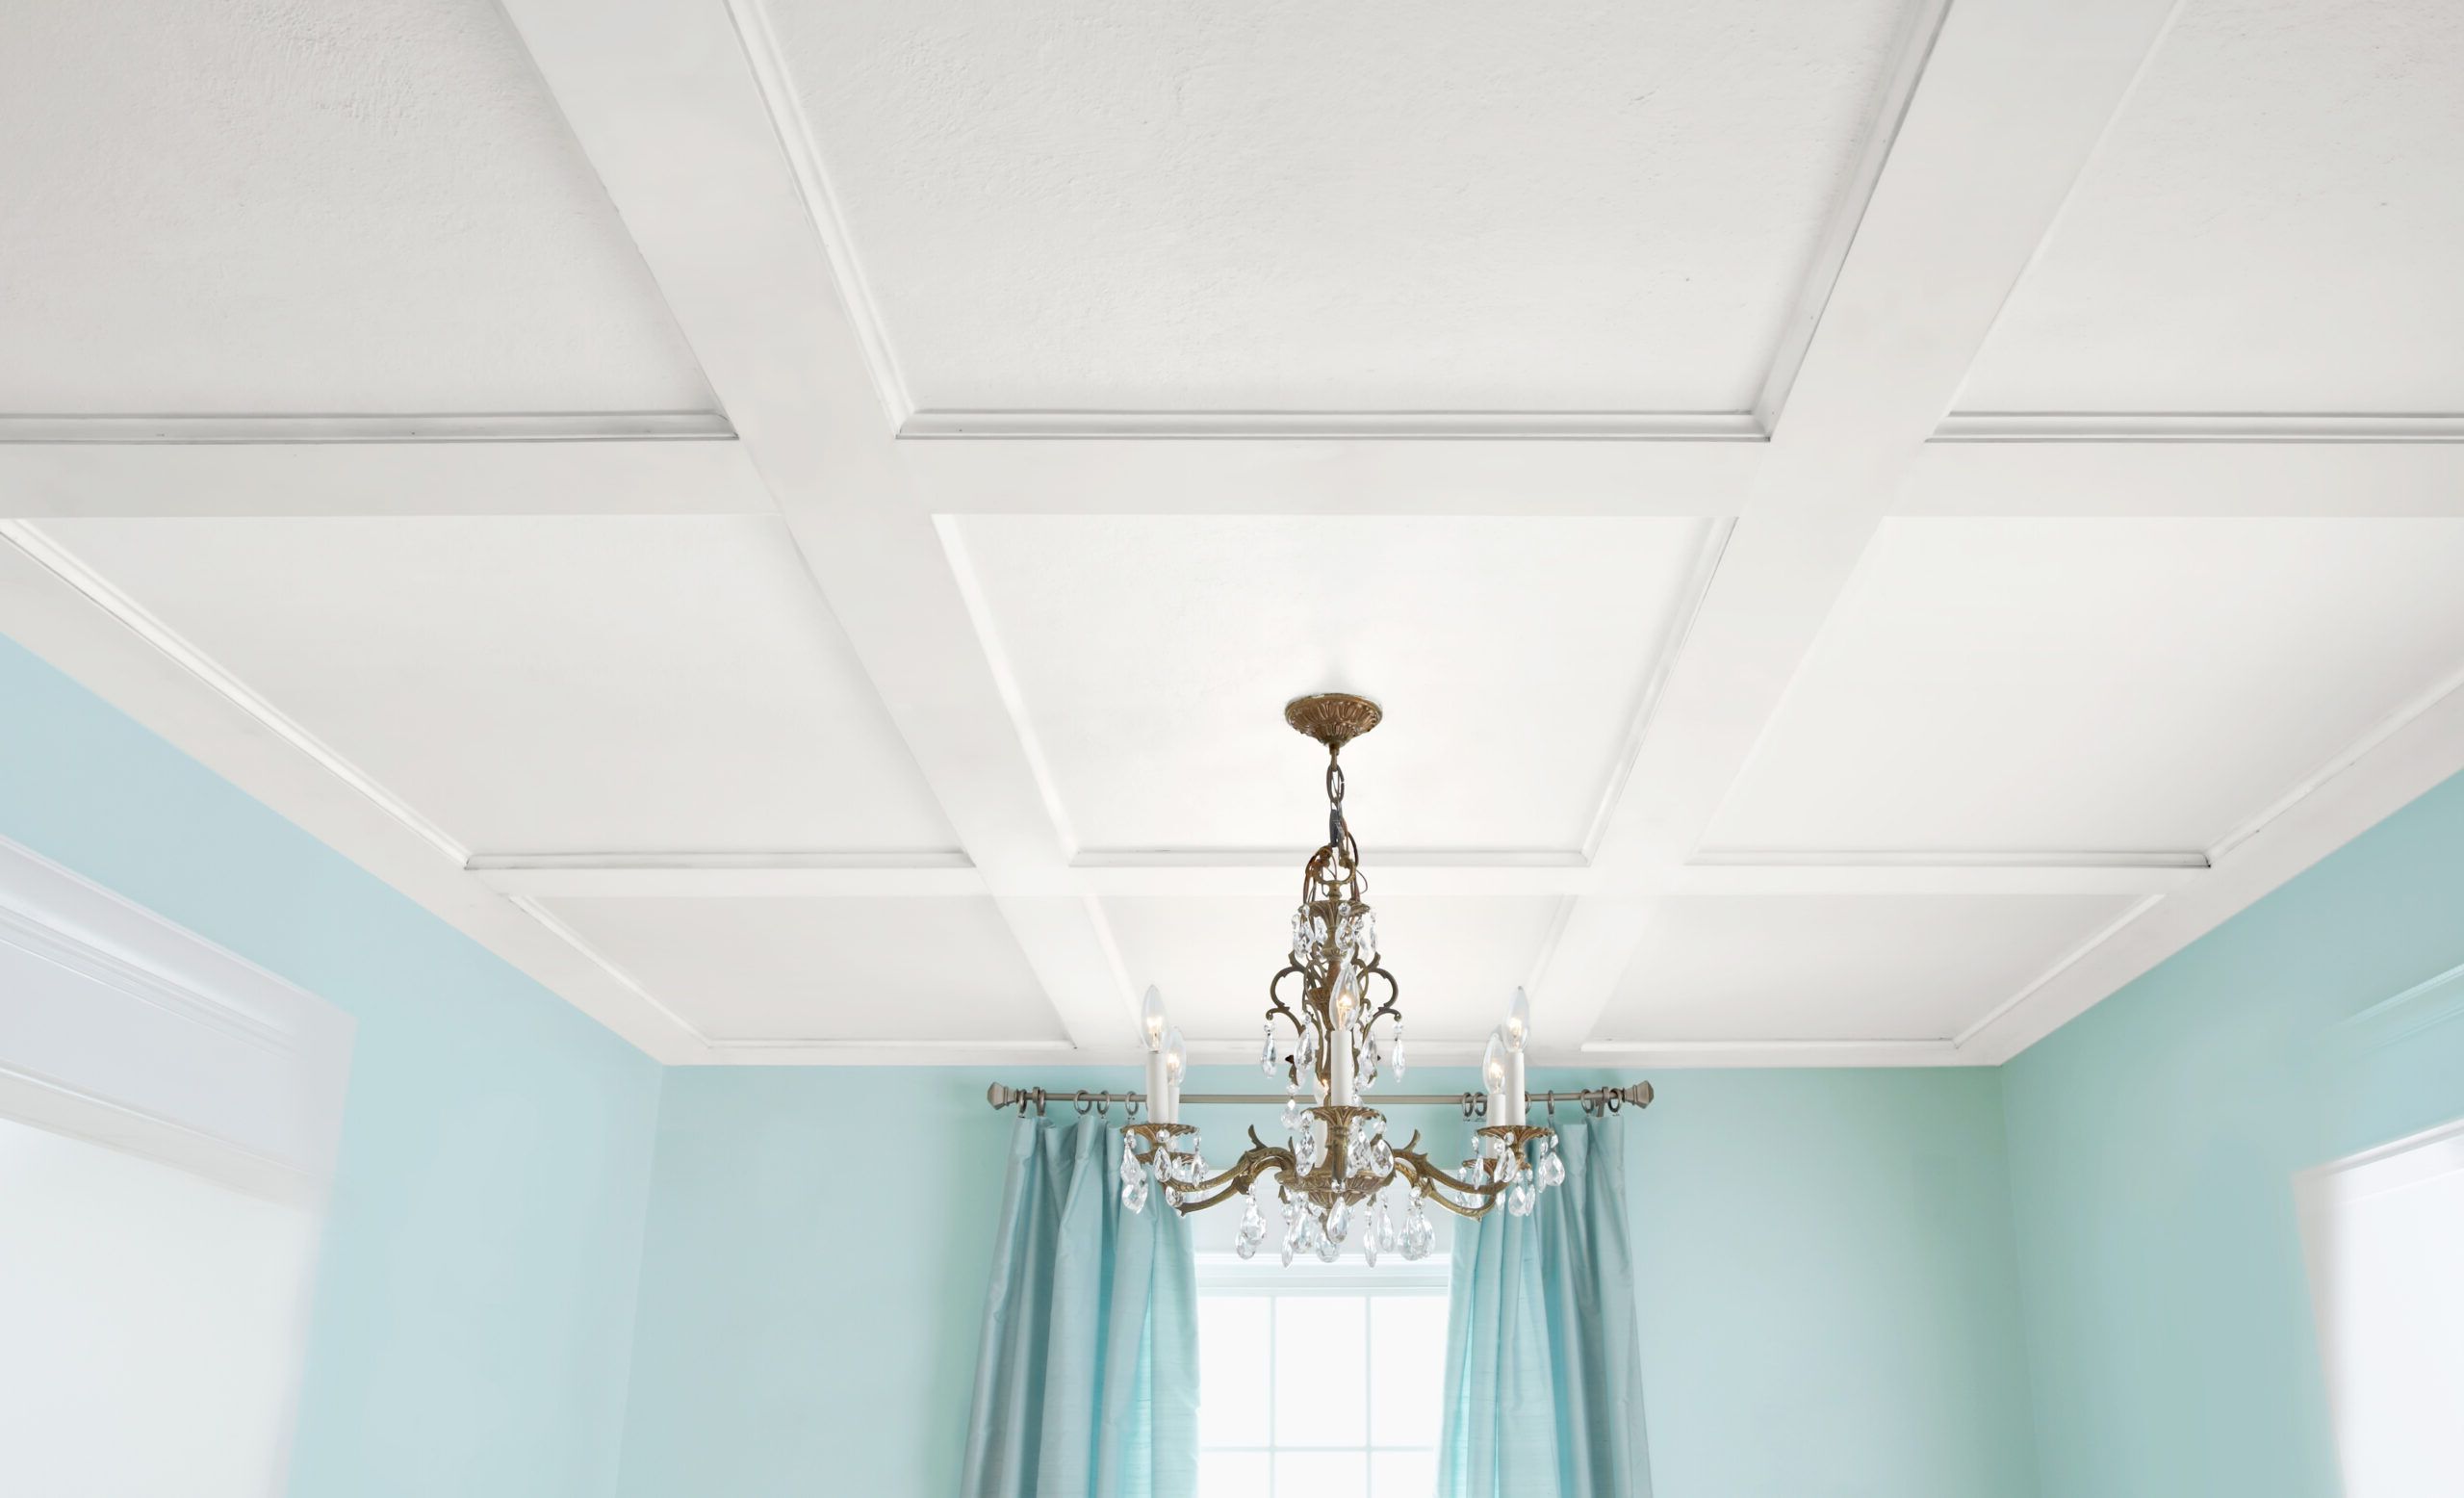
Are you looking to add a touch of elegance and sophistication to your home? A DIY coffered ceiling could be just the project for you. This classic architectural feature can transform any room into a stunning space with its intricate grid pattern and depth. In this step-by-step guide, we will walk you through the process of creating your own coffered ceiling, from planning and designing to installation and finishing. Whether you're a seasoned DIY enthusiast or a beginner looking for a rewarding project, this guide will help you achieve a beautiful coffered ceiling that will elevate the look of your home.
Materials and Tools Needed
Creating a stunning coffered ceiling requires the right materials and tools to ensure a successful DIY project. Here's a comprehensive list of what you'll need:
Materials:
- Lumber: 1×4 and 1×6 boards for constructing the frame.
- MDF or Plywood: Sheets for the coffered panels.
- Construction Adhesive: To secure the frame and panels.
- Wood Screws: For assembling the frame and attaching the panels.
- Sandpaper: For smoothing any rough edges.
- Wood Filler: To fill any gaps and holes in the wood.
- Primer and Paint: Choose colors that complement your room's decor.
Tools:
- Measuring Tape: For taking accurate measurements.
- Miter Saw: To cut the boards at precise angles.
- Nail Gun or Hammer: For securing the frame and panels.
- Level: To ensure the frame and panels are installed straight.
- Caulk Gun: For applying construction adhesive.
- Paintbrushes and Rollers: For priming and painting.
- Safety Gear: Including goggles, gloves, and a dust mask for protection.
Gathering these materials and tools will set you up for a smooth and efficient coffered ceiling project.
Planning and Designing Your Coffered Ceiling
Before diving into the construction phase, careful planning and designing are crucial for a successful coffered ceiling project. Here's how to get started:
-
Measure Your Ceiling: Begin by measuring the dimensions of your ceiling to determine the layout of the coffered panels. Accurate measurements will ensure a precise fit for the coffered design.
-
Choose a Design Pattern: There are various coffered ceiling patterns to consider, such as square, rectangular, or octagonal. Select a pattern that complements the architectural style of your home and the room where the ceiling will be installed.
-
Consider Lighting and Ventilation: Take into account any lighting fixtures or ventilation systems in the ceiling. Plan the coffered layout to accommodate these elements seamlessly.
-
Create a Detailed Layout: Using graph paper or design software, create a detailed layout of the coffered ceiling, including the dimensions of each panel and the spacing between them. This will serve as a visual guide during the installation process.
-
Select Materials and Finishes: Choose the type of wood or MDF for the panels and decide on the finish, whether it's a natural wood stain or a painted surface. Consider how the materials and finishes will complement the overall aesthetic of the room.
-
Seek Inspiration: Look for inspiration in home improvement magazines, online resources, or architectural design books to gather ideas for your coffered ceiling. This can help you refine your vision and make informed design choices.
By carefully planning and designing your coffered ceiling, you'll lay the foundation for a visually striking and structurally sound addition to your home.
Preparing the Ceiling for Installation
Before you can begin constructing your coffered ceiling, it's essential to prepare the existing ceiling for the installation process. Here's a detailed breakdown of the steps involved in preparing the ceiling:
-
Clear the Room: Start by removing any furniture, light fixtures, or ceiling fans from the room. Clearing the space will provide you with ample room to work and minimize the risk of damage to your belongings during the installation.
-
Locate Ceiling Joists: Use a stud finder to locate the ceiling joists. Marking the position of the joists is crucial as they will serve as anchor points for securing the coffered frame. This step is essential for ensuring the stability and structural integrity of the coffered ceiling.
-
Remove Existing Finishes: If there are any existing finishes on the ceiling, such as paint or texture, consider removing them to create a smooth and even surface for the coffered installation. This can be done using a scraper or sander, depending on the type of finish.
-
Address Ceiling Imperfections: Inspect the ceiling for any imperfections, such as cracks or uneven surfaces. Use a suitable filler or joint compound to repair these imperfections and create a level base for the coffered ceiling installation.
-
Prime the Ceiling: Applying a coat of primer to the ceiling surface can help improve adhesion and create a uniform base for the coffered panels. Choose a primer that is compatible with the material of your ceiling and allow it to dry completely before proceeding.
-
Establish Reference Lines: Using a chalk line or laser level, establish reference lines on the ceiling to guide the placement of the coffered frame. These lines will ensure that the frame is installed evenly and in alignment with the room's dimensions.
By meticulously preparing the ceiling for the installation of your coffered ceiling, you'll set the stage for a seamless and professional-looking end result. This preparatory phase is crucial for ensuring that the subsequent construction and installation steps proceed smoothly and yield a visually stunning coffered ceiling.
Building the Coffered Ceiling Frame
Building the coffered ceiling frame is a critical step in the construction process, as it provides the structural support for the coffered panels and establishes the grid pattern that defines the ceiling's visual appeal. Here's a detailed guide on how to build the coffered ceiling frame:
-
Cutting the Lumber: Begin by cutting the 1×4 and 1×6 lumber to the required lengths based on your ceiling dimensions and coffered layout. Use a miter saw to make precise angled cuts, ensuring that the frame components fit together seamlessly.
-
Assembling the Frame Components: With the lumber cut to size, assemble the frame components on the ground before installation. Use wood screws and construction adhesive to secure the joints, ensuring that the frame is sturdy and well-constructed.
-
Installing the Main Beams: Start by installing the main beams of the coffered frame, which will run perpendicular to the ceiling joists. Secure the main beams to the ceiling joists using wood screws, ensuring that they are level and evenly spaced according to your coffered layout.
-
Adding Cross Beams: Once the main beams are in place, add the cross beams to create the grid pattern of the coffered ceiling. Use precise measurements and a level to ensure that the cross beams intersect the main beams at perfect right angles, forming uniform coffered sections.
-
Securing the Frame: As you add each component of the frame, use a combination of wood screws and construction adhesive to secure the frame to the ceiling. This dual method of attachment will ensure the stability and longevity of the coffered ceiling frame.
-
Reinforcing the Corners: Pay special attention to reinforcing the corners of the frame, as these areas will bear the weight of the coffered panels. Adding additional support at the corners will enhance the overall strength and durability of the frame.
By following these steps, you'll be able to construct a robust and precisely aligned coffered ceiling frame that forms the foundation for the next phase of the installation process. The careful construction of the frame is essential for ensuring that the coffered ceiling is not only visually striking but also structurally sound.
Installing the Coffered Ceiling Panels
Once the coffered ceiling frame is in place, the next crucial step is to install the coffered panels, which will complete the intricate grid pattern and add depth and visual interest to the ceiling. Here's a detailed guide on how to install the coffered ceiling panels:
-
Cutting the Panels: Begin by measuring the dimensions of the coffered sections within the frame. Use these measurements to cut the MDF or plywood panels to fit each section precisely. A miter saw or table saw can be used to make accurate cuts, ensuring that the panels align seamlessly within the frame.
-
Applying Construction Adhesive: Apply construction adhesive to the back of each panel before placing it within the coffered frame. The adhesive will help secure the panels in position and create a strong bond between the panels and the frame.
-
Securing the Panels: Carefully position each panel within its designated coffered section, pressing firmly to ensure that it adheres to the adhesive. Use a nail gun or hammer and nails to further secure the panels to the frame, focusing on the edges and corners to prevent any potential movement.
-
Filling the Gaps: If there are any small gaps between the panels and the frame, use wood filler to fill them in. This will create a seamless and uniform surface for the coffered ceiling, ensuring a polished and professional finish.
-
Sanding the Panels: Once the panels are installed and the gaps are filled, use sandpaper to smooth any rough edges and ensure that the surface of the coffered ceiling is even and free of imperfections.
-
Priming and Painting: Before applying the final coat of paint, prime the coffered panels to enhance adhesion and create a uniform base for the paint. Once the primer is dry, apply the desired paint color to the panels, ensuring that the paint complements the overall aesthetic of the room.
By following these steps, you'll be able to install the coffered ceiling panels with precision and attention to detail, resulting in a visually stunning and professionally finished coffered ceiling. The installation of the panels is the final touch that brings the coffered ceiling to life, transforming the room with its timeless elegance and architectural charm.
Finishing and Painting Your Coffered Ceiling
Once the coffered ceiling panels are installed, the finishing and painting phase is essential for bringing out the full beauty of your DIY project. Here's a detailed guide on how to finish and paint your coffered ceiling:
-
Inspecting the Surface: Before proceeding with the finishing and painting, carefully inspect the entire coffered ceiling to ensure that the panels are securely in place and any gaps or imperfections have been addressed.
-
Applying Wood Filler: If there are any remaining gaps or small imperfections on the surface of the coffered panels, use wood filler to fill them in. Smooth out the filler with sandpaper once it has dried to create a seamless surface.
-
Sanding the Surface: Use fine-grit sandpaper to lightly sand the entire surface of the coffered ceiling. This step is crucial for creating a smooth and even surface for the paint to adhere to, as well as for removing any rough edges or blemishes.
-
Priming the Panels: Apply a coat of primer to the coffered panels to enhance the adhesion of the paint and create a uniform base for the final paint color. Choose a primer that is suitable for the material of your panels and allow it to dry completely.
-
Choosing the Paint Color: Select a paint color that complements the overall aesthetic of the room and enhances the visual impact of the coffered ceiling. Consider the existing color scheme and décor elements in the room when making your choice.
-
Applying the Paint: Using a high-quality paintbrush or roller, apply the chosen paint color to the coffered panels. Work in even strokes, ensuring full coverage and a consistent finish across the entire ceiling. Multiple coats may be necessary to achieve the desired depth of color.
-
Adding Finishing Touches: Once the paint has dried, inspect the coffered ceiling for any touch-ups or additional detailing. Address any areas that may require additional paint or touch-ups to ensure a flawless and professional finish.
By following these steps, you'll be able to complete the finishing and painting of your coffered ceiling with precision and attention to detail, resulting in a visually stunning and professionally finished addition to your home. The finishing and painting phase is the final step in the process, bringing your DIY coffered ceiling project to its full potential and transforming the room with its timeless elegance and architectural charm.
Conclusion
Creating a stunning coffered ceiling through a DIY project is a rewarding endeavor that can elevate the aesthetic appeal of any room. From meticulous planning and designing to the precise installation of the coffered panels, each step contributes to the transformation of a plain ceiling into a visually striking architectural feature. By following this step-by-step guide and utilizing the right materials and tools, you can achieve a coffered ceiling that exudes elegance and sophistication. Whether you're aiming to add a touch of traditional charm or a modern twist to your home, a coffered ceiling serves as a timeless and captivating focal point. Embrace the creativity and craftsmanship involved in this project, and enjoy the lasting impact of a beautifully crafted coffered ceiling in your living space.