
Home>Home & Furniture>Roof>How To Build A Roof Under A Deck
Roof
How To Build A Roof Under A Deck
Published: February 21, 2024
Editor-in-Chief with a decade in home renovation and a passion for vintage furniture. Diane is known for her weekend treasure hunts at flea markets, enriching our content with unique style insights.
Learn how to build a durable and functional roof under your deck with our expert tips and step-by-step guide. Protect your outdoor space from the elements.
(Many of the links in this article redirect to a specific reviewed product. Your purchase of these products through affiliate links helps to generate commission for Twigandthistle.com, at no extra cost. Learn more)
Introduction
Building a roof under a deck can transform the space into a cozy outdoor retreat, providing protection from the elements and extending its functionality throughout the year. Whether you envision a sheltered entertainment area or a peaceful sanctuary for relaxation, constructing a roof under your deck opens up a world of possibilities for enjoying the outdoors in comfort and style.
By following a systematic approach and utilizing the right materials and techniques, you can create a durable and visually appealing roof that seamlessly integrates with the existing structure. This endeavor requires careful planning, precise execution, and a keen eye for detail to ensure that the end result not only enhances the aesthetic appeal of your outdoor space but also provides reliable protection from rain, snow, and harsh sunlight.
In the following steps, we will delve into the key considerations and essential tasks involved in building a roof under a deck. From assessing the space and selecting suitable materials to constructing the support structure and installing the roofing material, each phase of the process plays a crucial role in achieving a successful outcome. Additionally, we will explore the finishing touches that add both functionality and visual appeal to the newly covered area.
Embarking on this project offers an opportunity to unleash your creativity and craftsmanship while enhancing the overall value and utility of your outdoor living space. Whether you are a seasoned DIY enthusiast or enlisting the expertise of professionals, the journey of building a roof under a deck promises to be a rewarding endeavor that elevates the charm and functionality of your home.
Step 1: Assessing the Space
Before embarking on the construction of a roof under your deck, a thorough assessment of the space is essential to ensure a well-informed and successful project. This initial step involves evaluating the structural integrity of the existing deck, understanding the dimensions and layout of the area, and considering any potential obstacles or challenges that may impact the roof installation process.
Evaluating the Existing Deck Structure
The first aspect of assessing the space involves closely examining the current deck structure. It is crucial to verify that the deck is structurally sound and capable of supporting the additional weight of a roof. This assessment may require the expertise of a professional contractor or structural engineer to determine if any reinforcements or modifications are necessary to ensure the safety and stability of the deck.
Understanding the Dimensions and Layout
Accurately measuring the dimensions of the deck and the available space underneath is fundamental in planning the roof construction. This includes determining the height from the ground to the underside of the deck, as well as the length and width of the area to be covered. Additionally, taking note of any existing features such as support posts, stairs, or obstructions will aid in designing a roof that seamlessly integrates with the overall layout of the outdoor space.
Considering Potential Obstacles
Identifying potential obstacles such as trees, utility lines, or neighboring structures that may impact the roof installation process is crucial. Assessing the surrounding environment will help anticipate any challenges and enable strategic planning to mitigate or work around these obstacles effectively.
Environmental Factors
Assessing the prevailing environmental factors, such as the direction of sunlight, prevailing wind patterns, and potential exposure to rain or snow, is vital in designing a roof that provides optimal protection and comfort. Understanding these elements will guide decisions regarding the orientation and slope of the roof, as well as the selection of suitable roofing materials to withstand the local climate conditions.
By meticulously assessing the space under the deck, including the existing structure, dimensions, potential obstacles, and environmental factors, you can lay a solid foundation for the subsequent phases of building a roof that not only complements the aesthetics of your outdoor space but also delivers functionality and durability.
Step 2: Choosing the Right Materials
Selecting the appropriate materials is a pivotal aspect of building a roof under a deck, as it directly influences the structural integrity, durability, and visual appeal of the finished structure. From the framework and roofing material to the fasteners and finishing touches, each component plays a crucial role in creating a robust and aesthetically pleasing roof that harmonizes with the existing deck and the surrounding environment.
Framework Materials
The framework forms the backbone of the roof structure, providing support and stability. When choosing materials for the framework, it is essential to prioritize strength, resistance to moisture, and longevity. Pressure-treated lumber, particularly rot-resistant species such as cedar or redwood, is a popular choice for constructing the framework due to its durability and ability to withstand outdoor conditions. Alternatively, steel or aluminum framing systems offer exceptional strength and are impervious to rot and insect damage, making them ideal for long-lasting roof structures.
Roofing Material
The selection of roofing material significantly impacts the aesthetic appeal and functionality of the roof. Common options include asphalt shingles, metal panels, polycarbonate sheets, and traditional wood shakes or shingles. Each material possesses distinct characteristics, such as durability, weather resistance, and visual appeal. Asphalt shingles are renowned for their cost-effectiveness and ease of installation, while metal roofing offers exceptional longevity and low maintenance. Polycarbonate sheets provide translucency and are lightweight, making them suitable for creating a bright and airy space. Wood shakes or shingles exude a timeless charm and natural warmth, adding a rustic touch to the outdoor environment. The choice of roofing material should align with the desired aesthetic, climate considerations, and maintenance preferences.
Fasteners and Hardware
Utilizing high-quality fasteners and hardware is imperative to ensure the structural integrity and longevity of the roof. Stainless steel or galvanized fasteners are recommended for their corrosion resistance, especially in outdoor applications where exposure to moisture is inevitable. Additionally, selecting appropriate connectors, brackets, and hangers designed for outdoor use will contribute to the overall stability and safety of the roof structure.
Finishing Touches
Incorporating finishing touches such as fascia boards, soffits, and gutters not only enhances the visual appeal of the roof but also serves practical purposes. Fascia boards provide a polished edge to the roof, while soffits contribute to ventilation and aesthetics. Gutters and downspouts effectively manage rainwater runoff, preventing water accumulation and potential damage to the deck and surrounding landscape. Choosing durable and visually complementary finishing materials ensures a cohesive and well-protected roof under the deck.
By thoughtfully selecting the right materials for the framework, roofing, fasteners, and finishing touches, you can lay the groundwork for a robust, visually appealing, and enduring roof structure that seamlessly integrates with the existing deck and elevates the overall outdoor living experience.
Step 3: Building the Support Structure
The support structure forms the backbone of the roof under the deck, providing stability, load-bearing capacity, and structural integrity. Constructing a robust support system is essential to ensure the safety and longevity of the roof, as well as to accommodate the chosen roofing material and withstand environmental elements.
Designing the Framework
The first crucial step in building the support structure involves designing the framework that will bear the weight of the roof and withstand external forces. This includes determining the spacing and size of the support posts, beams, and joists based on the dimensions of the deck and the intended roof design. The framework design should adhere to local building codes and regulations to ensure compliance with safety standards.
Selecting Support Materials
Choosing the appropriate materials for the support structure is paramount to its strength and durability. Pressure-treated lumber, such as treated pine or cedar, is a popular choice for constructing the framework due to its resistance to rot, decay, and insect damage. Alternatively, steel or aluminum framing systems offer exceptional strength and longevity, making them suitable for supporting the roof under the deck.
Installing Support Posts and Beams
The installation of support posts and beams forms the foundation of the support structure. Careful attention should be given to securely anchoring the support posts to the ground or existing deck structure, ensuring they are plumb and capable of bearing the anticipated load. Beams are then installed to span the distance between the support posts, providing the primary framework for the roof.
Adding Joists and Cross Bracing
Incorporating joists and cross bracing further reinforces the support structure, distributing the weight of the roof evenly and enhancing its stability. Joists are installed perpendicular to the beams, creating a grid-like pattern that forms the base for attaching the roofing material. Cross bracing, typically installed diagonally between support posts and beams, strengthens the framework and minimizes lateral movement.
Ensuring Proper Drainage and Ventilation
Integrating proper drainage and ventilation elements into the support structure is essential for preserving the integrity of the roof and the underlying deck. Ensuring adequate slope for water runoff and incorporating ventilation openings or channels prevents water accumulation and minimizes the risk of moisture-related issues, such as rot and mold.
By meticulously designing, selecting materials, and constructing the support structure, you establish a solid foundation for the roof under the deck, ensuring its resilience against external forces and environmental factors while providing a safe and functional outdoor space.
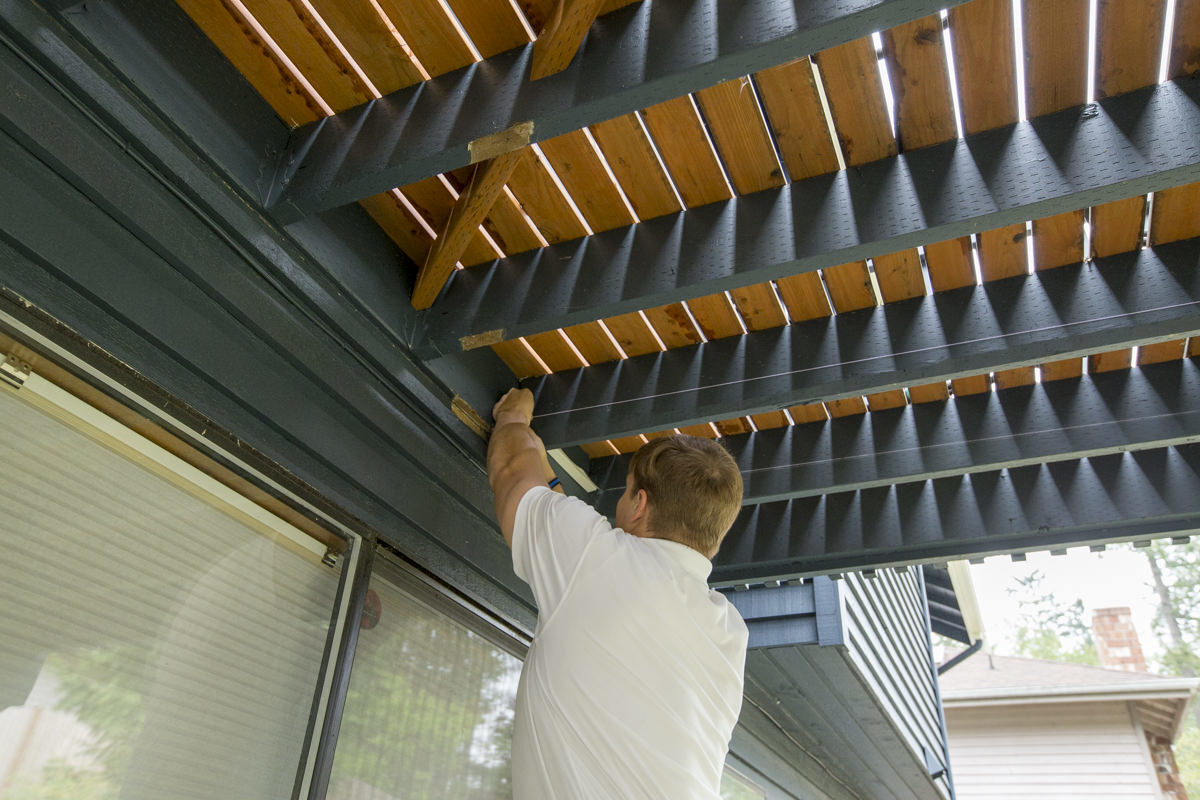
Step 4: Installing the Roofing Material
The installation of the roofing material is a pivotal phase in the construction of a roof under a deck, as it not only provides protection from the elements but also contributes significantly to the overall aesthetic appeal of the outdoor space. The choice of roofing material, whether it be traditional asphalt shingles, durable metal panels, translucent polycarbonate sheets, or classic wood shakes, plays a defining role in shaping the visual character and functionality of the roof.
Preparing the Surface
Before commencing the installation of the roofing material, it is essential to ensure that the underlying support structure is meticulously prepared to receive the chosen roofing elements. This involves inspecting the framework for any protruding nails, uneven surfaces, or imperfections that could hinder the proper placement of the roofing material. Addressing any irregularities and ensuring a smooth, clean surface sets the stage for a seamless and secure installation.
Laying the Underlayment
The underlayment serves as a crucial protective barrier between the roofing material and the underlying support structure, safeguarding against moisture infiltration and providing an additional layer of defense against the elements. Depending on the chosen roofing material, the appropriate underlayment, such as asphalt-saturated felt, synthetic membranes, or specialized underlayment designed for metal roofing, is carefully laid out and secured to the framework, ensuring comprehensive coverage and weatherproofing.
Installing the Roofing Material
The installation process varies depending on the type of roofing material selected. For asphalt shingles, each shingle is meticulously placed and secured using roofing nails, with overlapping layers to create a watertight barrier. Metal panels are affixed to the framework using specialized fasteners, ensuring a secure and weather-resistant attachment. Polycarbonate sheets are installed with precision, allowing for proper sealing and alignment to maximize natural light transmission while providing protection from the elements. Wood shakes or shingles are skillfully arranged and fastened, creating a timeless and rustic appeal.
Sealing and Finishing
Upon the completion of the roofing material installation, attention is directed towards sealing the edges, seams, and penetrations to fortify the roof's integrity against water intrusion. Utilizing appropriate sealants and flashing materials, such as caulk, roofing cement, and metal flashing, ensures a watertight and durable finish. Additionally, incorporating ridge caps, hip caps, and other finishing elements not only enhances the visual appeal but also contributes to the overall weatherproofing and longevity of the roof.
Quality Assurance
Thoroughly inspecting the installed roofing material for proper alignment, secure fastening, and weatherproofing is essential to guarantee a high-quality and long-lasting roof under the deck. Addressing any potential issues or discrepancies promptly ensures that the roof not only meets aesthetic expectations but also delivers reliable protection and performance.
By meticulously executing the installation of the roofing material, you bring the vision of a sheltered and inviting outdoor space to fruition, creating a durable, visually captivating, and weather-resilient roof under your deck.
Step 5: Adding Finishing Touches
The final phase of building a roof under a deck involves adding finishing touches that elevate the functionality, aesthetics, and overall appeal of the newly covered outdoor space. These details not only contribute to the visual cohesiveness of the structure but also enhance its practicality and comfort, creating an inviting environment for relaxation, entertainment, and outdoor gatherings.
Ceiling Treatments
Incorporating ceiling treatments, such as beadboard panels, tongue-and-groove planks, or decorative metal tiles, adds a touch of elegance and warmth to the underside of the roof. These treatments not only conceal the structural elements but also create a polished and inviting ambiance, transforming the space into a cozy extension of the home.
Lighting Solutions
Strategically integrating lighting solutions enhances the usability of the covered area, extending its functionality into the evening hours. Options such as recessed lighting, pendant fixtures, or string lights not only provide illumination but also contribute to the overall atmosphere, whether it be a soft and intimate glow for relaxation or vibrant lighting for social gatherings.
Integrated Fans or Heaters
For added comfort and climate control, integrating ceiling fans or heaters into the roof structure ensures a pleasant environment regardless of the weather. Ceiling fans promote air circulation and cooling during warm days, while heaters extend the usability of the space into cooler seasons, allowing for year-round enjoyment of the outdoor retreat.
Decorative Accents
Incorporating decorative accents, such as moldings, corbels, or trim details, imparts a sense of refinement and character to the roof structure. These ornamental elements not only add visual interest but also create a seamless transition between the roof and the surrounding architecture, enhancing the overall aesthetic appeal of the outdoor space.
Integrated Sound Systems
For those seeking to create an immersive entertainment experience, integrating sound systems into the roof structure provides an audio backdrop for gatherings and relaxation. Weather-resistant speakers discreetly installed within the ceiling or framework offer a harmonious blend of technology and nature, enhancing the ambiance of the outdoor environment.
Customized Finishes
Personalized finishes, such as paint or stain colors that complement the existing exterior palette, allow for a cohesive integration of the roof structure with the overall design of the home. Thoughtfully selected finishes harmonize the covered outdoor space with the architectural style and color scheme, creating a unified and visually appealing extension of the residence.
By attending to these finishing touches, you can transform the roof under your deck into a captivating and functional outdoor retreat, where every detail contributes to a harmonious and inviting environment for relaxation, entertainment, and enjoyment of the natural surroundings.
Conclusion
In conclusion, the process of building a roof under a deck encompasses a journey of creativity, precision, and thoughtful consideration of both functional and aesthetic elements. From the initial assessment of the space to the selection of materials, construction of the support structure, installation of the roofing material, and addition of finishing touches, each phase contributes to the transformation of the outdoor area into a versatile and inviting extension of the home.
The decision to build a roof under a deck represents a commitment to enhancing the usability and visual appeal of the outdoor space, creating a sheltered environment that can be enjoyed throughout the seasons. By carefully evaluating the existing deck structure, understanding the dimensions and layout of the space, and considering potential obstacles and environmental factors, the foundation is laid for a successful and well-planned project.
Selecting the right materials, including the framework, roofing material, fasteners, and finishing elements, is pivotal in ensuring the durability, weather resistance, and cohesive integration of the roof with the existing deck and surrounding environment. The choice of materials not only influences the structural integrity and longevity of the roof but also contributes to its visual character and overall charm.
The construction of the support structure forms the backbone of the roof, providing stability, load-bearing capacity, and structural resilience. By meticulously designing the framework, selecting suitable support materials, and incorporating proper drainage and ventilation, a solid foundation is established for the roof, ensuring its ability to withstand external forces and environmental elements.
The installation of the roofing material represents a transformative phase, where the vision of a sheltered and inviting outdoor space comes to fruition. From preparing the surface and laying the underlayment to meticulously installing the chosen roofing material and adding sealing and finishing elements, this phase culminates in the creation of a durable, visually captivating, and weather-resilient roof under the deck.
Finally, the addition of finishing touches elevates the functionality, aesthetics, and overall appeal of the covered outdoor space, creating an inviting environment for relaxation, entertainment, and outdoor gatherings. By incorporating ceiling treatments, lighting solutions, integrated fans or heaters, decorative accents, sound systems, and customized finishes, the roof under the deck is transformed into a captivating and functional outdoor retreat.
In essence, the process of building a roof under a deck is a testament to the potential for creativity, craftsmanship, and thoughtful design in enhancing the outdoor living experience. It represents an opportunity to create a seamless integration of indoor comfort and outdoor allure, providing a space where nature and architecture converge to offer a harmonious and inviting environment for leisure and enjoyment.