
Home>Home & Furniture>Roof>How To Build A Roof Over A Deck
Roof
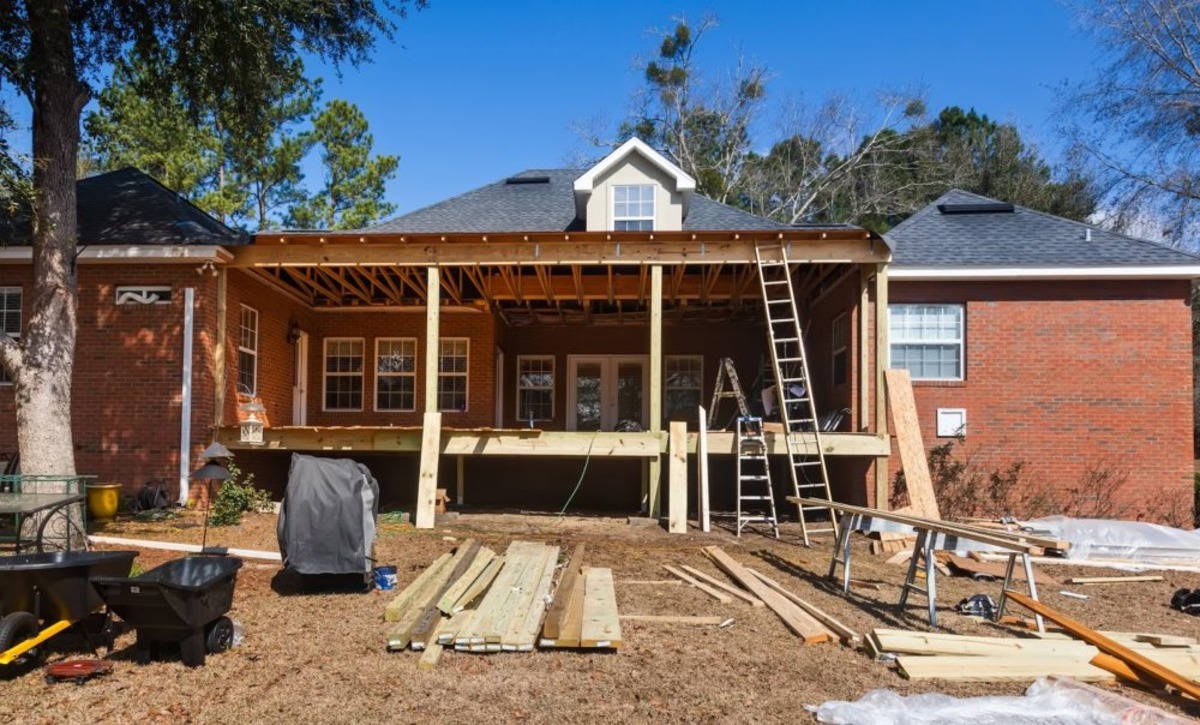
How To Build A Roof Over A Deck
Published: February 21, 2024
Editor-in-Chief with a decade in home renovation and a passion for vintage furniture. Diane is known for her weekend treasure hunts at flea markets, enriching our content with unique style insights.
Learn how to build a sturdy and stylish roof over your deck with our comprehensive guide. Enhance your outdoor space and protect it from the elements.
(Many of the links in this article redirect to a specific reviewed product. Your purchase of these products through affiliate links helps to generate commission for Twigandthistle.com, at no extra cost. Learn more)
Introduction
Building a roof over a deck can transform it into a cozy outdoor living space, providing shade and protection from the elements. Whether you envision hosting gatherings, enjoying quiet mornings with a cup of coffee, or simply expanding your living area, a well-designed and skillfully constructed deck roof can make your outdoor space more inviting and functional.
The process of building a roof over a deck involves several crucial steps, from assessing the deck's structure to obtaining permits and selecting the right materials. Each step requires careful planning and execution to ensure the safety, durability, and aesthetic appeal of the finished structure.
In this comprehensive guide, we will walk you through the essential steps of building a roof over a deck, offering practical insights and expert tips to help you navigate the process with confidence. From assessing the deck's suitability for a roof to adding the finishing touches, we will cover everything you need to know to embark on this rewarding home improvement project.
By the end of this guide, you will have a clear understanding of the key considerations involved in building a deck roof, empowering you to make informed decisions and embark on the project with a solid foundation of knowledge. So, let's dive into the first step: assessing the deck to determine its readiness for a roof addition.
Step 1: Assessing the Deck
Before embarking on the construction of a roof over your deck, it is crucial to assess the existing structure to ensure that it can support the additional weight and complexity of a roof. Here are the key aspects to consider during the assessment:
-
Structural Integrity: Begin by evaluating the structural integrity of the deck. Check for any signs of deterioration, such as rotting wood, rusted fasteners, or weakened support posts. It's essential to address any structural issues before proceeding with the roof construction to ensure the safety and stability of the entire structure.
-
Load-Bearing Capacity: Determine the load-bearing capacity of the deck to ascertain whether it can support the weight of a roof. Consider consulting a structural engineer to assess the deck's capacity and recommend any necessary reinforcements. Factors such as the type of roof, materials used, and local building codes will influence the load-bearing requirements.
-
Attachment Points: Identify suitable attachment points for the roof structure. The deck's existing posts and beams should be evaluated to determine if they can serve as secure anchor points for the roof supports. If modifications or additional support structures are needed, this should be addressed during the assessment phase.
-
Water Drainage: Evaluate the deck's ability to manage water drainage effectively. Proper drainage is essential to prevent water accumulation on the roof surface, which can lead to structural damage and leaks. Consider the slope and design of the deck to ensure that water can flow away from the roof and the underlying structure.
-
Aesthetic Integration: Assess how the proposed roof will integrate with the overall design and aesthetics of the deck and the surrounding architecture. Consider the visual impact of the roof on the existing outdoor space and how it aligns with your design preferences.
By thoroughly assessing these key aspects, you can gain a comprehensive understanding of the deck's readiness for a roof addition. Addressing any structural, load-bearing, or drainage concerns at this stage will set the foundation for a successful and durable roof construction project. Once the assessment is complete and any necessary preparations are made, you can proceed to the next step: designing the roof to complement your deck and enhance your outdoor living experience.
Step 2: Designing the Roof
Designing the roof for your deck is a pivotal phase that demands careful consideration of both functional and aesthetic elements. A well-thought-out design not only enhances the visual appeal of your outdoor space but also ensures that the roof provides adequate protection and complements the existing deck structure. Here's a detailed overview of the key considerations involved in designing the roof for your deck:
Roof Style and Materials
The first decision to make when designing your deck roof is selecting the appropriate roof style and materials. The choice of roof style, such as gable, hip, or shed, will influence the overall look of the structure and its compatibility with the architectural style of your home. Additionally, consider the roofing materials, such as asphalt shingles, metal panels, or polycarbonate sheets, based on factors like durability, weather resistance, and aesthetic appeal.
Integration with Deck Layout
The roof design should seamlessly integrate with the layout and dimensions of your deck. Consider how the roof will extend from the existing structure and how it will affect the flow of the outdoor space. Pay attention to the positioning of support posts and beams to ensure that they align with the deck's layout while providing adequate coverage and support for the roof structure.
Ventilation and Natural Light
Incorporating ventilation and natural light into the roof design is essential for creating a comfortable and inviting outdoor environment. Consider including features such as ridge vents, skylights, or translucent panels to promote air circulation and introduce natural light while maintaining a sheltered outdoor space.
Structural Considerations
Ensure that the roof design accounts for structural stability and load-bearing requirements. The placement of support beams, rafters, and trusses should be carefully planned to distribute the weight of the roof evenly and align with the load-bearing capacity of the deck. Consulting a structural engineer or experienced contractor can provide valuable insights into optimizing the structural integrity of the roof design.
Aesthetic Enhancements
Explore opportunities to enhance the visual appeal of the roof through decorative elements and finishes. From trim details and fascia boards to decorative brackets and lighting fixtures, incorporating aesthetic enhancements can elevate the overall look of the roof while complementing the design of the deck and the surrounding outdoor space.
By meticulously addressing these design considerations, you can develop a comprehensive plan for the roof that aligns with your functional needs and aesthetic preferences. Once the design phase is complete, you can move forward with obtaining the necessary permits and approvals to bring your envisioned deck roof to life.
Step 3: Obtaining Permits
Obtaining the required permits is a critical step in the process of building a roof over a deck. Before commencing any construction work, it is essential to adhere to local building codes and regulations by securing the necessary permits and approvals. The specific permit requirements may vary based on your location and the scope of the project, but the following general guidelines can help you navigate the permit acquisition process effectively.
-
Research Local Regulations: Begin by researching the building codes and permit requirements specific to your area. Contact your local building department or visit their website to obtain information on the permits needed for constructing a deck roof. Familiarize yourself with any zoning restrictions, setback requirements, and design guidelines that may impact your project.
-
Consult with Authorities: Engage in discussions with the relevant authorities, such as building inspectors or permit officers, to gain clarity on the specific permit application process. Seek guidance on the documentation, drawings, and project details required for permit approval. Building a clear understanding of the regulatory expectations will streamline the permit acquisition process.
-
Prepare Comprehensive Documentation: Compile a comprehensive set of documentation to support your permit application. This may include detailed construction plans, structural drawings, material specifications, and engineering reports, depending on the complexity of the roof structure. Ensure that the documentation aligns with the local building codes and clearly illustrates the proposed roof construction.
-
Submit Permit Application: Complete the permit application forms accurately and submit them to the relevant building department or permitting authority. Along with the application, provide the required documentation and any additional information requested by the authorities. Timely and thorough submission of the permit application package is crucial for initiating the review process.
-
Facilitate Review Process: Upon submission, the permit application will undergo a review process to assess its compliance with building codes and safety standards. Be prepared to address any inquiries or requests for modifications from the reviewing authorities. Cooperate with the officials to facilitate a smooth and efficient review process.
-
Obtain Permit Approval: Once the permit application successfully meets the regulatory requirements and passes the review process, you will receive permit approval. Ensure that the approved permit documents are readily accessible at the construction site for inspection purposes. Adhering to the approved plans and permit conditions is imperative throughout the construction phase.
By diligently navigating the permit acquisition process and adhering to the regulatory guidelines, you can lay a solid foundation for the construction of a compliant and safe deck roof. Securing the necessary permits demonstrates your commitment to upholding building standards and ensures that the project progresses in accordance with legal requirements. With the permits in place, you can proceed to the next phase of gathering materials and preparing for the construction of the roof over your deck.
Step 4: Gathering Materials
Gathering the right materials is a crucial step in the process of building a roof over a deck. The selection of high-quality materials not only contributes to the structural integrity and longevity of the roof but also influences its visual appeal and overall performance. Here's a detailed overview of the essential materials required for constructing a durable and aesthetically pleasing deck roof:
Structural Components
- Lumber: Select pressure-treated or rot-resistant lumber for the construction of support posts, beams, rafters, and trusses. The choice of lumber dimensions should align with the structural design and load-bearing requirements specified in the approved plans.
- Fasteners: Utilize corrosion-resistant screws, bolts, and connectors to secure the structural components. Stainless steel or galvanized fasteners are recommended to withstand outdoor exposure and ensure secure connections.
Roofing Materials
- Roofing Panels: Choose roofing panels based on your preferred style and performance characteristics. Options include asphalt shingles, metal panels, polycarbonate sheets, or traditional roofing tiles. Consider factors such as weather resistance, durability, and aesthetic compatibility with the existing home architecture.
- Underlayment: Install a high-quality underlayment to provide an additional layer of protection against water infiltration and enhance the weatherproofing of the roof.
Waterproofing and Sealants
- Flashing: Acquire flashing materials to seal roof penetrations, edges, and junctions, preventing water intrusion and ensuring a watertight roof assembly.
- Sealants: Invest in premium-grade sealants and caulks designed for outdoor applications to seal gaps, joints, and seams, enhancing the waterproofing and weatherproofing of the roof.
Decorative and Finishing Elements
- Trim and Fascia: Select decorative trim and fascia boards to add a polished finish to the roof edges and eaves. These elements contribute to the aesthetic cohesion of the roof structure with the overall deck design.
- Decorative Hardware: Consider incorporating decorative hardware such as ornamental brackets, finials, or decorative screws to enhance the visual appeal of the roof while complementing the deck's style.
Safety Equipment and Tools
- Safety Gear: Prioritize safety by obtaining personal protective equipment, including gloves, safety glasses, and head protection, to ensure a safe working environment during the construction process.
- Construction Tools: Gather essential construction tools such as a circular saw, power drill, level, and measuring tools to facilitate accurate and efficient assembly of the roof components.
By meticulously sourcing these materials and ensuring their compatibility with the design and structural requirements, you can lay the groundwork for a successful and well-executed roof construction project. With the materials in hand, you can proceed to the next step: building the support structure to bring your envisioned deck roof to fruition.
Step 5: Building the Support Structure
The construction of a sturdy and reliable support structure forms the backbone of a well-built deck roof. Building the support structure involves precise execution and adherence to the approved design plans to ensure the structural integrity and load-bearing capacity of the roof. Here's a detailed exploration of the essential steps involved in constructing the support structure for your deck roof:
1. Setting the Support Posts
Begin by positioning and securing the support posts in accordance with the approved design layout. Use post hole diggers to create stable foundations for the posts, ensuring that they are set at the specified intervals and aligned with the overall dimensions of the deck. Verify the vertical alignment and plumbness of the posts before proceeding to the next phase.
2. Installing Beams and Headers
Once the support posts are in place, proceed to install the beams and headers that will form the primary framework of the roof structure. Secure the beams to the support posts using appropriate fasteners, ensuring a strong and level connection. Pay close attention to the alignment and spacing of the beams to accommodate the planned roof design and load distribution.
3. Adding Rafters and Trusses
Integrate the rafters and trusses into the support structure, following the specified spacing and alignment guidelines. Carefully position and secure the rafters to the beams, ensuring uniform weight distribution and structural stability. Incorporate truss elements where applicable to reinforce the roof framework and enhance its load-bearing capacity.
4. Verifying Structural Alignment
Thoroughly inspect the assembled support structure to verify its alignment, levelness, and overall structural integrity. Utilize a level and measuring tools to confirm the precise positioning of the support components, making any necessary adjustments to achieve optimal alignment and stability.
5. Reinforcing Connections and Bracing
Reinforce the connections between the support posts, beams, and rafters using appropriate bracing and fastening methods. Implement diagonal bracing where required to enhance the lateral stability of the support structure and mitigate structural movement under varying loads and environmental conditions.
6. Consulting Structural Experts
Consider engaging the expertise of structural engineers or experienced contractors to review the assembled support structure and provide valuable insights into optimizing its strength and stability. Professional guidance can help identify potential enhancements and ensure compliance with structural standards.
By meticulously executing the construction of the support structure, you can lay a solid foundation for the successful installation of the roofing materials and the realization of your envisioned deck roof. With the support structure in place, you can proceed to the next phase of installing the roofing materials to complete the construction of your functional and aesthetically pleasing deck roof.
Step 6: Installing the Roofing Materials
The installation of roofing materials marks a pivotal phase in the construction of a roof over a deck, where careful attention to detail and precision is essential to ensure the durability, weatherproofing, and aesthetic appeal of the completed structure. Here's a comprehensive overview of the key steps involved in installing the roofing materials for your deck roof:
1. Underlayment Installation
Begin the roofing process by laying the underlayment over the prepared support structure. The underlayment serves as a protective barrier against moisture infiltration and enhances the weatherproofing of the roof. Ensure that the underlayment is securely fastened and overlaps according to the manufacturer's specifications to create a seamless and watertight layer.
2. Roofing Panel Assembly
Select the appropriate roofing panels based on your design preferences and performance requirements. Whether opting for asphalt shingles, metal panels, or other roofing materials, carefully follow the manufacturer's guidelines for installation. Start from the bottom edge of the roof and work your way upwards, overlapping the panels to facilitate efficient water shedding and prevent leaks.
3. Flashing and Sealant Application
Integrate flashing materials at critical junctures, such as roof penetrations, valleys, and transitions, to create watertight seals and prevent water intrusion. Apply high-quality sealants and caulks to seal gaps, joints, and seams, enhancing the overall waterproofing and weatherproofing of the roof. Pay close attention to detail to ensure thorough coverage and effective sealing.
4. Ventilation and Skylight Installation
If incorporating ventilation features or skylights into the roof design, proceed with their installation at this stage. Ridge vents, soffit vents, and skylights contribute to proper air circulation and introduce natural light, enhancing the comfort and functionality of the covered outdoor space. Follow the manufacturer's instructions for precise installation of these elements.
5. Trim and Finishing Touches
Complete the roofing installation by adding trim elements, fascia boards, and decorative finishes to refine the visual appeal of the roof. Attention to detail in the installation of trim components contributes to a polished and cohesive aesthetic, complementing the overall design of the deck and the surrounding outdoor environment.
By meticulously executing the installation of roofing materials and associated components, you can bring your envisioned deck roof to fruition, creating a sheltered and inviting outdoor living space. With the roofing materials in place, the final phase involves adding finishing touches to enhance the functionality and visual appeal of the completed deck roof.
Step 7: Adding Finishing Touches
The process of adding finishing touches to your newly constructed deck roof represents the culmination of meticulous planning and skilled craftsmanship, elevating the functionality, aesthetics, and overall appeal of the outdoor living space. This phase involves integrating thoughtful details and enhancements that contribute to the comfort, visual harmony, and personalization of the deck roof. Here's a detailed exploration of the essential elements to consider when adding finishing touches to your deck roof:
1. Lighting Fixtures and Ambiance
Incorporating lighting fixtures tailored to the specific ambiance you envision for your outdoor space can significantly enhance its usability and visual allure. From elegant pendant lights and sconces to energy-efficient LED fixtures, the strategic placement of lighting elements can create a warm and inviting atmosphere for evening gatherings or quiet relaxation.
2. Ceiling and Wall Finishes
Consider the application of ceiling finishes, such as tongue-and-groove wood paneling or beadboard, to add a touch of sophistication and texture to the underside of the roof. Additionally, explore the possibility of integrating wall finishes, such as decorative lattice panels or climbing vines, to infuse the space with charm and privacy while harmonizing with the surrounding landscape.
3. Functional Furnishings
Selecting appropriate outdoor furnishings, such as weather-resistant seating, tables, and storage solutions, allows you to optimize the usability of the covered deck area. Thoughtfully arranged and stylishly designed furniture pieces can transform the space into a comfortable retreat for relaxation, dining, or socializing, reflecting your personal style and preferences.
4. Greenery and Landscaping
Integrating greenery and landscaping elements around the perimeter of the deck roof can soften the architectural lines and introduce natural beauty to the outdoor setting. Consider incorporating potted plants, hanging baskets, or vertical gardens to infuse the space with lush foliage, creating a tranquil and refreshing environment that seamlessly blends with the surrounding landscape.
5. Personalized Accents
Adding personalized accents, such as outdoor rugs, throw pillows, and decorative accessories, allows you to infuse the space with your individual flair and create a welcoming ambiance. Whether incorporating vibrant patterns, soothing hues, or thematic elements, these accents contribute to the overall character and comfort of the deck roof, reflecting your unique taste and personality.
By thoughtfully integrating these finishing touches, you can transform your newly constructed deck roof into a captivating and functional outdoor retreat that aligns with your lifestyle and design vision. Each carefully considered detail contributes to the overall cohesiveness and allure of the space, inviting you and your guests to savor the delights of al fresco living in a setting that reflects your distinct style and preferences.
Conclusion
In conclusion, the process of building a roof over a deck encompasses a series of essential steps, each contributing to the creation of a functional, aesthetically pleasing, and enduring outdoor living space. From the initial assessment of the deck's structural readiness to the meticulous installation of roofing materials and the addition of personalized finishing touches, every phase of the construction journey plays a crucial role in shaping the final outcome.
Embarking on the endeavor of building a deck roof represents a commitment to enhancing the usability and visual appeal of your outdoor environment. It is a testament to the desire to create a versatile space that accommodates a myriad of activities, from leisurely relaxation to vibrant social gatherings, while providing shelter from the elements.
Throughout the process, attention to detail, adherence to regulatory requirements, and thoughtful design considerations are paramount. The careful selection of materials, the precision in constructing the support structure, and the seamless integration of roofing components collectively contribute to the creation of a robust and enduring roof that harmonizes with the existing deck and the architectural character of the home.
Moreover, the addition of finishing touches, such as lighting fixtures, furnishings, and greenery, infuses the completed deck roof with a sense of warmth, comfort, and personalization. These elements transform the space into a captivating retreat that reflects the unique style and preferences of the homeowner, inviting moments of relaxation, connection, and enjoyment in an outdoor setting tailored to individual tastes.
Ultimately, the construction of a roof over a deck represents a transformative journey, culminating in the realization of an outdoor sanctuary that extends the boundaries of the home into the embrace of nature. It is a testament to the fusion of practicality and aesthetics, where form meets function to create a space that enriches daily living and fosters memorable experiences.
As you embark on the endeavor of building a roof over your deck, may this guide serve as a source of inspiration, guidance, and empowerment, equipping you with the knowledge and insights needed to embark on this rewarding home improvement project with confidence and vision. Embrace the journey, infuse your creativity, and savor the process of crafting an outdoor oasis that reflects your unique lifestyle and aspirations.