
Home>Create & Decorate>DIY & Crafts>How To Build A Deck Railing
DIY & Crafts
How To Build A Deck Railing
Published: February 27, 2024

Content Creator specializing in woodworking and interior transformations. Caegan's guides motivate readers to undertake their own projects, while his custom furniture adds a personal touch.
Learn how to build a deck railing with our easy DIY & Crafts guide. Create a stylish and sturdy railing for your outdoor space.
(Many of the links in this article redirect to a specific reviewed product. Your purchase of these products through affiliate links helps to generate commission for Twigandthistle.com, at no extra cost. Learn more)
Introduction
Building a deck railing is a rewarding DIY project that can enhance the safety and aesthetics of your outdoor living space. Whether you're constructing a new deck or upgrading an existing one, a well-designed and sturdy railing not only adds to the visual appeal but also provides essential protection for you and your loved ones. This comprehensive guide will walk you through the step-by-step process of building a deck railing, from initial planning to the finishing touches.
When it comes to creating a deck railing, there are various design options to consider, ranging from classic wood railings to modern metal or composite materials. The style you choose should complement the overall architecture of your home and reflect your personal taste. Additionally, it's crucial to adhere to local building codes and regulations to ensure that your railing meets safety standards.
Before diving into the construction phase, it's essential to gather the necessary tools and materials. From measuring and cutting to fastening and finishing, having the right equipment at your disposal will streamline the building process and contribute to a professional-looking end result.
Throughout this guide, you'll learn about the different types of materials commonly used for deck railings, including wood, metal, and composite options. Each material has its unique characteristics, such as durability, maintenance requirements, and aesthetic appeal. By understanding the attributes of each material, you can make an informed decision based on your specific needs and preferences.
As you embark on this DIY endeavor, keep in mind that attention to detail and precision are key elements in achieving a well-constructed and visually appealing deck railing. While the process may seem daunting at first, the satisfaction of completing this project and the enjoyment it brings to your outdoor space make it well worth the effort.
With careful planning, the right materials, and a clear understanding of the construction process, you'll be well-equipped to tackle the task of building a deck railing with confidence and skill. So, let's roll up our sleeves and embark on this exciting journey to create a safe, stylish, and functional deck railing that will elevate your outdoor living experience.
Planning and Design
The planning and design phase is the foundation of a successful deck railing project. It sets the stage for the entire construction process and allows you to envision the final outcome. Before diving into the technical aspects, take a moment to consider the overall style and functionality you want to achieve with your deck railing.
Start by assessing the layout of your deck and identifying any specific areas that require railing, such as elevated platforms or staircases. Consider the primary purpose of the railing, whether it's for safety, aesthetics, or both. This initial assessment will help you determine the scope of the project and guide your design decisions.
Next, explore various railing styles and materials to find the best fit for your deck. Traditional wood railings offer a timeless look and can be customized to match the architectural style of your home. Alternatively, metal railings provide a sleek and modern aesthetic, while composite materials offer durability and low maintenance. Consider the visual impact, durability, and maintenance requirements of each material as you weigh your options.
Once you've chosen a railing style and material, it's time to sketch out the design. Consider the overall height and width of the railing, as well as the spacing between balusters or pickets. These dimensions are crucial for ensuring compliance with local building codes and safety standards. Additionally, think about decorative elements such as post caps and lighting options to enhance the visual appeal of your railing.
As you finalize the design, take into account any special features or accessories you may want to incorporate, such as built-in benches or planter boxes. These elements can add functionality and character to your deck railing, elevating it from a simple barrier to a multifunctional outdoor space.
Lastly, consult local building codes and regulations to ensure that your design meets safety requirements. This step is essential for obtaining any necessary permits and ensuring that your deck railing complies with legal standards. By thoroughly planning and designing your deck railing, you'll lay the groundwork for a successful and visually appealing construction process.
Choosing Materials
Selecting the right materials for your deck railing is a critical decision that significantly impacts the overall appearance, durability, and maintenance requirements of the structure. When choosing materials, it's essential to consider factors such as aesthetics, longevity, and upkeep to ensure that your railing meets both your functional and visual expectations.
Wood
Wood is a classic and versatile option for deck railings, offering a timeless appeal that complements various architectural styles. Common wood species used for railing construction include cedar, redwood, and pressure-treated pine. Each type of wood has its unique characteristics, such as natural resistance to decay and insect infestation. However, wood railings require regular maintenance, including staining or painting, to preserve their appearance and protect them from the elements.
Metal
Metal railings, such as aluminum or steel, provide a modern and sleek aesthetic while offering exceptional durability. Aluminum railings are lightweight, corrosion-resistant, and require minimal maintenance, making them an attractive option for homeowners seeking a low-maintenance railing solution. On the other hand, steel railings are known for their strength and can be customized to achieve various design styles, from minimalist to ornate.
Composite
Composite materials, composed of a blend of wood fibers and recycled plastic, offer the appeal of wood without the intensive maintenance requirements. Composite railings are resistant to rot, decay, and insect damage, making them an ideal choice for homeowners seeking a low-maintenance and long-lasting railing solution. Additionally, composite railings are available in a wide range of colors and styles, allowing for customization to suit your design preferences.
Glass
For a contemporary and unobtrusive railing option, glass panels provide an elegant and unobstructed view of the surrounding landscape. Glass railings are often paired with metal or composite frames, creating a seamless and modern look. While glass railings require regular cleaning to maintain their transparency, they offer a sophisticated and open feel to outdoor spaces.
By carefully considering the attributes of each material, you can make an informed decision based on your preferences, budget, and long-term maintenance considerations. Whether you opt for the natural warmth of wood, the durability of metal, the low maintenance of composite, or the modern elegance of glass, selecting the right materials is a crucial step in creating a deck railing that meets your functional and aesthetic needs.
Tools and Equipment
To embark on the construction of a deck railing, it's essential to gather the necessary tools and equipment to ensure a smooth and efficient building process. From precise measurements to secure fastening, having the right tools at your disposal is crucial for achieving professional results. Here's a comprehensive list of the tools and equipment you'll need to complete this project:
Measuring and Layout Tools
- Tape Measure: A reliable tape measure is essential for accurately determining the dimensions of the railing components, ensuring a precise fit and alignment.
- Level: A level is indispensable for ensuring that the railing posts and balusters are installed perfectly vertical and horizontal, maintaining the structural integrity and visual appeal of the railing.
Cutting Tools
- Circular Saw: A high-quality circular saw equipped with a fine-toothed blade is necessary for cutting railing components to the required lengths with precision and efficiency.
- Miter Saw: A miter saw is ideal for making precise angled cuts, particularly for railing components that require beveled or mitered edges.
Fastening Tools
- Drill/Driver: A power drill or driver, along with appropriate drill bits and screwdriver attachments, is essential for fastening railing components securely to the deck structure.
- Impact Driver: An impact driver provides additional torque for driving screws into tough materials, ensuring a strong and reliable connection.
Assembly and Installation Tools
- Clamps: Clamps are invaluable for holding railing components in place during assembly and installation, ensuring accurate alignment and secure attachment.
- Hammer: A hammer is useful for tasks such as tapping balusters into position and securing hardware.
Safety Gear
- Safety Glasses: Protecting your eyes from debris and potential hazards is crucial during cutting and drilling operations.
- Work Gloves: Durable work gloves provide hand protection and improve grip when handling rough or heavy materials.
Additional Equipment
- Post Hole Digger: If your railing design includes posts that require digging and setting in concrete footings, a post hole digger is essential for this task.
- Screw Assortment: A variety of screws in different lengths and types will accommodate the diverse fastening needs of the railing components.
By ensuring that you have these essential tools and equipment at your disposal, you'll be well-prepared to tackle the construction of a deck railing with confidence and precision. Having the right tools not only streamlines the building process but also contributes to the safety and structural integrity of the finished railing.
Building the Frame
The construction of the frame forms the structural backbone of the deck railing, providing stability and support for the entire system. The frame consists of the posts, rails, and any additional structural elements that form the framework of the railing. Here's a detailed overview of the essential steps involved in building the frame for your deck railing:
1. Post Placement and Installation
Begin by determining the placement of the posts along the perimeter of the deck. Posts are typically spaced evenly to ensure the stability and uniformity of the railing. Once the post locations are marked, use a post hole digger to create holes at the designated spots. The depth of the holes should comply with local building codes and ensure proper anchoring of the posts.
2. Setting the Posts
After the holes are prepared, place the posts in the holes and fill them with concrete to secure the posts in position. It's crucial to ensure that the posts are perfectly plumb and aligned with each other. A level can be used to verify the vertical alignment of the posts, and temporary bracing may be employed to hold the posts in place while the concrete sets.
3. Attaching the Bottom Rail
Once the posts are securely set, the bottom rail is attached to the posts, forming the lower horizontal component of the frame. The bottom rail provides structural support and serves as the base for attaching the balusters or pickets. Secure the bottom rail to the posts using appropriate fasteners, ensuring a strong and stable connection.
4. Installing Intermediate Rails (if applicable)
Depending on the design of the railing, intermediate rails may be installed between the bottom rail and the top rail to provide additional support and enhance the visual appeal of the railing. These intermediate rails are attached to the posts and the bottom rail, creating a sturdy framework for the balusters or pickets.
5. Verifying Alignment and Stability
Throughout the frame construction process, it's essential to verify the alignment and stability of the components. Using a level to ensure that the rails are horizontal and the posts are plumb is crucial for the structural integrity and visual appeal of the railing. Additionally, checking for any wobbling or instability in the frame is essential to address any issues before proceeding.
By meticulously following these steps, you'll establish a solid and well-constructed frame for your deck railing. The frame serves as the foundation for the subsequent installation of balusters, top rails, and any additional decorative elements, culminating in the completion of a visually appealing and structurally sound deck railing.
Installing Balusters
Once the frame of the deck railing is in place, the next crucial step is the installation of balusters. Balusters, also known as spindles or pickets, are vertical supports that fill the space between the bottom rail and the top rail, providing safety and visual appeal to the railing. The process of installing balusters requires precision and attention to detail to ensure a secure and aesthetically pleasing result.
1. Measuring and Marking
Before installing the balusters, it's essential to determine the spacing between each spindle to comply with local building codes and safety standards. Typically, the spacing should be such that a 4-inch sphere cannot pass through any opening in the railing, ensuring the safety of children and pets. Once the spacing is determined, mark the positions on the bottom and top rails where the balusters will be installed.
2. Cutting and Fitting
Using the predetermined spacing measurements, cut the balusters to the required length using a saw. It's crucial to ensure that each baluster is cut precisely to achieve a uniform and visually appealing appearance. Once cut, test-fit the balusters into the marked positions on the bottom rail, ensuring a snug and secure fit.
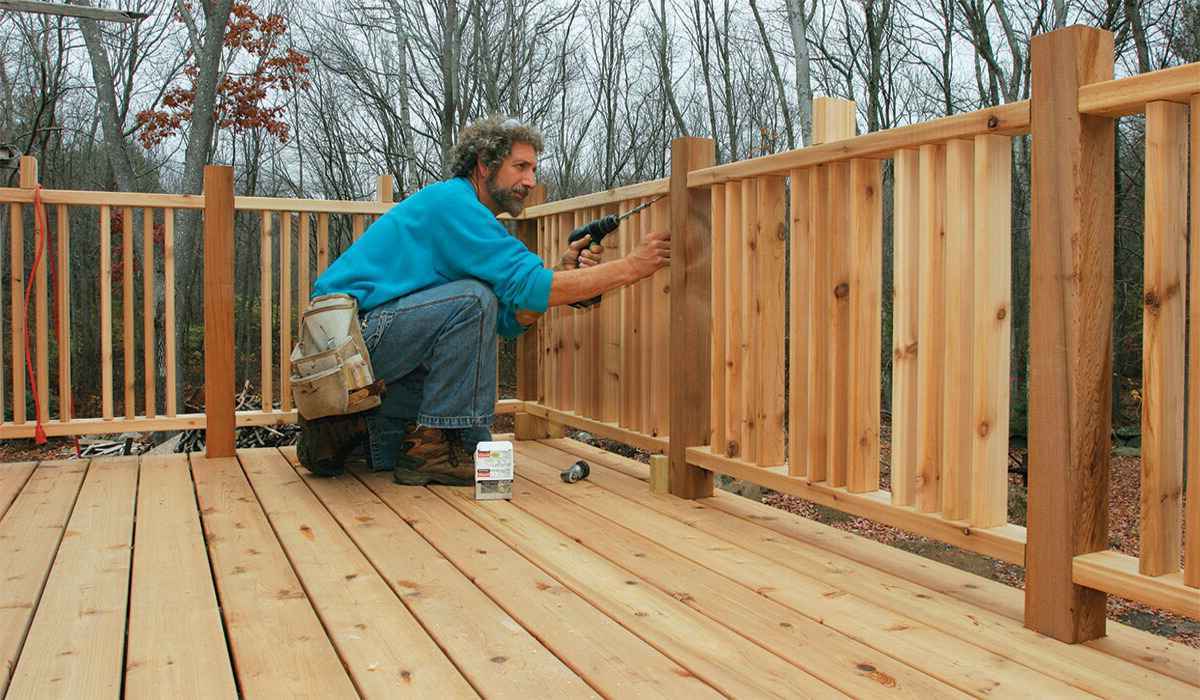
3. Securing the Balusters
With the balusters fitted into the bottom rail, secure them in place using appropriate fasteners. Depending on the railing design, balusters may be attached using screws or nails. It's essential to ensure that each baluster is securely fastened to the bottom rail to prevent any wobbling or instability.
4. Attaching the Top Rail
After the balusters are securely installed in the bottom rail, position the top rail over the balusters. Carefully align the top rail with the balusters and secure it in place, creating a cohesive and stable railing structure. The top rail serves as the final horizontal component, enclosing the balusters and providing a finished look to the railing.
5. Verifying Alignment and Stability
Once the balusters and top rail are in place, it's crucial to verify the alignment and stability of the entire railing structure. Using a level, ensure that the top rail is horizontal and the balusters are vertically aligned. Additionally, check for any wobbling or instability in the balusters to address any issues before completing the installation.
By meticulously following these steps, you'll successfully install the balusters, creating a secure, visually appealing, and code-compliant deck railing. The installation of balusters not only enhances the safety of the railing but also contributes to the overall aesthetic appeal of your outdoor living space.
Attaching the Top Rail
Attaching the top rail is a pivotal step in the construction of a deck railing, as it not only provides the finishing touch to the structure but also plays a crucial role in ensuring the stability and integrity of the entire railing system. The top rail serves as the final horizontal component that encloses the balusters or pickets, creating a cohesive and visually appealing barrier for your deck.
To begin the process of attaching the top rail, carefully position the rail over the installed balusters, ensuring that it aligns evenly with the tops of the balusters. This alignment is essential for achieving a uniform and professional appearance for the railing. Using a level, verify that the top rail is perfectly horizontal, making any necessary adjustments to ensure its level placement.
Once the top rail is positioned correctly, secure it in place using appropriate fasteners. Depending on the railing design and material, screws, nails, or specialized railing hardware may be used to attach the top rail to the balusters and posts. It's crucial to ensure that the fasteners are driven securely, creating a strong and stable connection between the top rail and the underlying components.
As you fasten the top rail, pay close attention to the spacing and alignment of the balusters to maintain a consistent and aesthetically pleasing appearance. Additionally, verify that the top rail is securely attached to each baluster, minimizing any potential movement or wobbling. This attention to detail contributes to the overall structural integrity and visual appeal of the railing.
After the top rail is securely attached, perform a final inspection to ensure that the entire railing structure is stable and level. Using a level, verify that the top rail maintains a consistent horizontal orientation across its length, providing a polished and professional finish to the railing.
By meticulously following these steps and paying attention to the details of attaching the top rail, you'll complete the construction of a visually appealing, stable, and code-compliant deck railing. The top rail not only adds the final touch to the railing but also contributes to the safety and aesthetic enhancement of your outdoor living space.
Finishing Touches
With the main structural components of the deck railing in place, attention turns to the finishing touches that elevate the overall appearance and functionality of the railing. These final details not only add aesthetic appeal but also contribute to the safety and longevity of the structure. Here's a detailed overview of the essential finishing touches to consider when completing your deck railing project.
1. Post Caps
Post caps serve as decorative and protective elements that add a polished look to the railing. Available in various materials such as wood, metal, or composite, post caps are installed on top of the railing posts, providing a finished and cohesive appearance. Additionally, post caps help protect the vulnerable end grain of the posts from moisture, extending their lifespan.
2. Lighting
Incorporating lighting into the deck railing not only enhances the ambiance of the outdoor space but also improves safety and functionality, especially during evening hours. LED post cap lights, under-rail lighting, or integrated rail strip lights can illuminate the railing, creating a welcoming and inviting atmosphere while ensuring visibility and security.
3. Decorative Accessories
Consider adding decorative accessories such as planters, flower boxes, or custom metalwork to personalize the railing and integrate it seamlessly with the surrounding landscape. These elements not only add visual interest but also contribute to the functionality of the railing, allowing for the incorporation of greenery and decorative accents.
4. Stain or Sealant
For wood railings, applying a high-quality stain or sealant is essential to protect the wood from the elements and preserve its natural beauty. The right stain or sealant not only enhances the appearance of the wood but also provides crucial protection against moisture, UV rays, and general wear and tear.
5. Maintenance Considerations
Finally, it's important to consider the long-term maintenance of the deck railing. Regular inspections, cleaning, and upkeep are essential to ensure the structural integrity and visual appeal of the railing over time. Establishing a maintenance routine that includes inspections for loose fasteners, cleaning of surfaces, and addressing any signs of wear will prolong the lifespan of the railing.
By attending to these finishing touches, you'll complete the deck railing project with a refined and functional structure that enhances the beauty and safety of your outdoor living space. These final details not only add character and charm to the railing but also contribute to its durability and long-term enjoyment.