Home>Create & Decorate>DIY & Crafts>DIY Floating Shelves: Step-by-Step Guide To Creating Stylish Storage Solutions

DIY & Crafts
DIY Floating Shelves: Step-by-Step Guide To Creating Stylish Storage Solutions
Published: February 28, 2024

Content Creator specializing in woodworking and interior transformations. Caegan's guides motivate readers to undertake their own projects, while his custom furniture adds a personal touch.
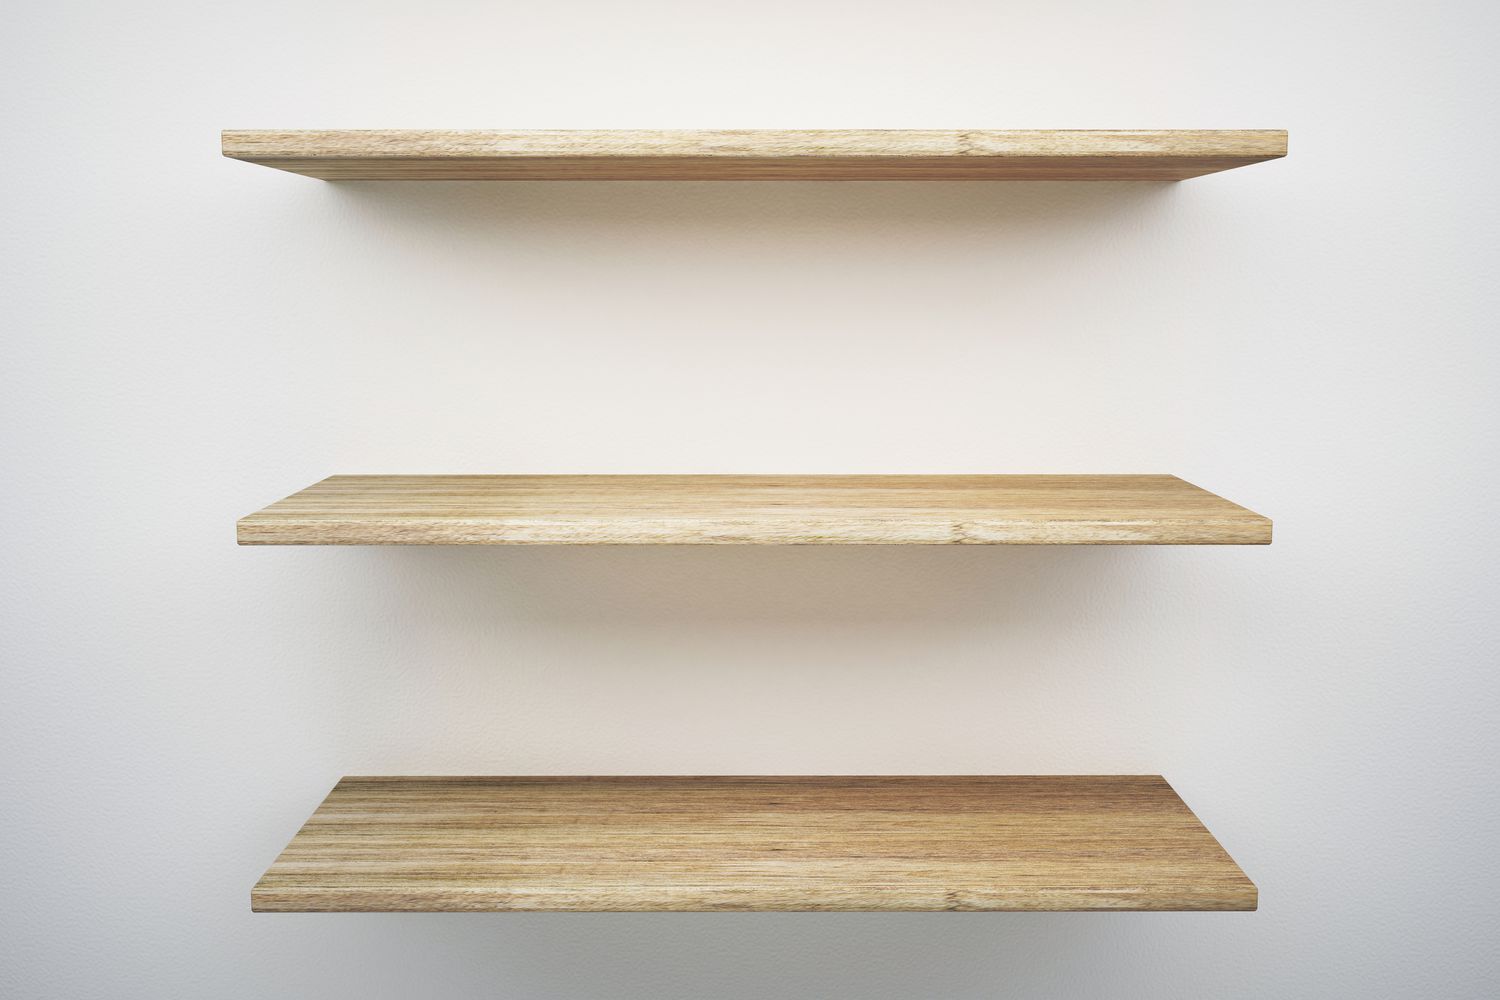
Learn how to create stylish storage solutions with our step-by-step guide to DIY floating shelves. Perfect for your next DIY & Crafts project!
(Many of the links in this article redirect to a specific reviewed product. Your purchase of these products through affiliate links helps to generate commission for Twigandthistle.com, at no extra cost. Learn more)
Introduction
Are you looking to add a touch of elegance and functionality to your living space? DIY floating shelves are the perfect solution for creating stylish storage options while showcasing your decorative items. Whether you're a seasoned DIY enthusiast or a beginner looking for a rewarding project, crafting your own floating shelves can be a fulfilling and budget-friendly endeavor.
In this comprehensive guide, we will walk you through the step-by-step process of creating and installing your own floating shelves. From measuring and planning to staining and mounting, you'll gain valuable insights and practical tips to bring your vision to life. With a few essential materials and tools, along with a dash of creativity, you can transform any bare wall into a stunning display area that reflects your personal style.
By embarking on this DIY journey, you'll not only customize your living space but also experience the satisfaction of crafting something with your own hands. Whether you're aiming to declutter a room, showcase cherished mementos, or simply add a touch of sophistication to your home, DIY floating shelves offer a versatile and visually appealing solution.
So, roll up your sleeves, gather your supplies, and let's dive into the exciting world of DIY floating shelves. Get ready to unleash your creativity and elevate the aesthetics of your living space with this engaging and rewarding project.
Read more: DIY Floating Shelves for Bedroom
Materials and Tools Needed
Creating your own DIY floating shelves requires a selection of essential materials and tools to ensure a successful and visually appealing outcome. Before diving into the project, it's crucial to gather the following items:
Materials:
- Wooden Boards: Opt for high-quality, sturdy wooden boards that align with your desired shelf dimensions. Common options include pine, oak, or plywood, depending on your preference and budget.
- Floating Shelf Brackets: These specialized brackets provide the hidden support necessary for the shelves to appear as if they are "floating" on the wall. Ensure that the brackets are durable and capable of supporting the weight of the shelves and their contents.
- Wood Stain or Paint: Depending on your design preferences, you'll need wood stain or paint to add a decorative finish to the shelves. Choose a color that complements your existing decor or opt for a bold hue to make a statement.
- Wood Sealant (Optional): To protect the shelves from moisture, dust, and wear, consider applying a wood sealant for added durability and longevity.
- Screws and Wall Anchors: These hardware essentials are crucial for securely attaching the floating shelf brackets to the wall. Be sure to select the appropriate size and type of screws and anchors based on your wall material.
- Sandpaper: Smooth out rough edges and surfaces of the wooden boards with sandpaper to achieve a polished and professional look.
- Wood Glue: This adhesive will reinforce the joints and connections between the various components of the shelves, ensuring their stability and strength.
Tools:
- Measuring Tape: Accurate measurements are essential for customizing the shelf dimensions and ensuring a precise fit within your chosen space.
- Saw: A reliable saw, such as a circular saw or a handsaw, is necessary for cutting the wooden boards to your desired lengths.
- Paintbrushes or Stain Applicators: Depending on your chosen finish, you'll need paintbrushes or stain applicators to apply the wood stain or paint evenly.
- Screwdriver or Power Drill: To secure the brackets and attach the shelves to the wall, a screwdriver or power drill is essential for driving screws into place.
- Level: Maintaining a straight and even alignment is crucial for the aesthetic appeal and functionality of the floating shelves. A level will help ensure that the shelves are mounted accurately.
- Safety Gear: Prioritize safety by wearing protective gear such as goggles and gloves when handling tools and materials.
By assembling these materials and tools, you'll be well-equipped to embark on the exciting journey of creating your own stunning DIY floating shelves. With careful planning and attention to detail, you can transform these basic components into eye-catching and functional additions to your living space.
Step 1: Measuring and Planning
Before diving into the physical construction of your DIY floating shelves, it's crucial to start with meticulous measuring and thoughtful planning. This initial step sets the foundation for a successful and visually appealing outcome, ensuring that your shelves seamlessly integrate with your existing space while accommodating your specific storage needs.
Read more: DIY Floating Bathroom Shelves
Measuring the Space
Begin by identifying the location where you intend to install the floating shelves. Use a measuring tape to determine the precise dimensions of the wall area, taking into account any potential obstructions such as light switches, electrical outlets, or furniture. By understanding the available space, you can tailor the shelf dimensions to fit seamlessly within the designated area, avoiding any visual overcrowding or awkward gaps.
Determining Shelf Dimensions
With the measurements in hand, consider the intended purpose of the shelves and the items they will hold. Whether you're showcasing decorative accents, storing books, or displaying collectibles, the shelf dimensions should align with the scale and weight of the items. Additionally, factor in the desired spacing between each shelf to create a harmonious and balanced arrangement.
Sketching the Design
Visualize the layout of the floating shelves by sketching a simple diagram or using digital design tools. This step allows you to experiment with different configurations and proportions, ensuring that the shelves harmonize with the overall aesthetic of the room. Consider factors such as the number of shelves, their heights, and the distance from the ceiling or floor to achieve a visually pleasing composition.
Selecting Wood and Finish
Based on your measurements and design preferences, choose the type of wood that best suits your vision. Consider the grain pattern, color, and durability of the wood species, keeping in mind the existing decor and furniture in the room. Additionally, decide whether you prefer a natural wood finish, a stained look, or a painted surface, as this will influence the overall ambiance of the space.
Read more: DIY Floating Garage Shelves Guide
Finalizing the Plan
Once you've determined the precise measurements, shelf dimensions, wood type, and finish, finalize your plan before proceeding to the construction phase. Double-check all measurements and design elements to ensure accuracy, and make any necessary adjustments to guarantee a seamless integration of the floating shelves within your living space.
By dedicating time to meticulous measuring and thoughtful planning, you'll lay the groundwork for a successful and visually striking DIY project. This preparatory phase sets the stage for the subsequent steps, ensuring that your floating shelves not only serve a practical purpose but also enhance the aesthetic appeal of your home.
Step 2: Cutting and Sanding the Wood
With the meticulous planning and measurements in place, it's time to bring your vision to life by transforming raw wooden boards into sleek and polished floating shelves. This crucial step involves precision cutting and meticulous sanding to ensure that the shelves not only fit seamlessly within your designated space but also exude a professional and refined appearance.
Cutting the Wooden Boards
Begin by laying out the selected wooden boards on a stable work surface, ensuring ample space for maneuvering and cutting. Using the measurements determined during the planning phase, mark the precise lengths for each shelf on the boards using a pencil and a straight edge. Whether you opt for a handsaw or a circular saw, prioritize accuracy and caution when making the cuts, aiming for clean and straight edges.
As you proceed with the cutting process, adhere to the designated measurements with precision, double-checking each mark before initiating the cuts. This attention to detail will guarantee that the shelves align flawlessly within the allocated space, creating a cohesive and visually appealing display area.
Sanding for a Smooth Finish
Once the wooden boards have been cut to the desired dimensions, it's time to refine their surfaces through thorough sanding. Begin with coarse-grit sandpaper to eliminate any rough edges, uneven surfaces, or splinters, gradually progressing to finer-grit sandpaper for a smooth and polished finish.
Pay close attention to the edges and corners of the shelves, ensuring that they are rounded and softened to prevent any sharp protrusions. Additionally, sand the entire surface of the shelves to achieve a uniform texture and prepare the wood for the application of the chosen finish, whether it be stain or paint.
By dedicating care and precision to the cutting and sanding process, you'll transform basic wooden boards into refined and custom-fit floating shelves. This meticulous attention to detail ensures that the shelves not only integrate seamlessly within your living space but also exude a professional and polished aesthetic, setting the stage for the subsequent steps in the construction and installation process.
Step 3: Staining or Painting the Shelves
With the wooden shelves meticulously cut and sanded to perfection, the next pivotal step involves adding a touch of personality and style through the application of wood stain or paint. This transformative process not only enhances the visual appeal of the shelves but also protects the wood from wear and tear while harmonizing with the existing decor of your living space.
Choosing the Right Finish
Before delving into the staining or painting process, consider the overall ambiance of the room and the desired aesthetic impact. If you prefer to highlight the natural beauty of the wood grain, opt for a wood stain that complements the existing color palette. Alternatively, if you envision a bold statement or a cohesive color scheme, selecting a high-quality paint in a hue that resonates with your decor can infuse the shelves with character and charm.
Preparing the Work Area
Create a well-ventilated and adequately lit workspace for the staining or painting process. Lay down protective coverings to shield the surrounding surfaces from potential drips or spills. Ensure that the wooden shelves are positioned on a stable and level surface, allowing for easy access and maneuverability during the application of the finish.
Applying the Finish
If you've chosen to stain the shelves, use a clean cloth or brush to apply the wood stain evenly, following the grain of the wood for a consistent and natural appearance. Allow the stain to penetrate the wood for the recommended duration before wiping off any excess, resulting in a rich and lustrous finish that accentuates the unique characteristics of the wood.
On the other hand, if you've opted for paint, use smooth and deliberate brush strokes or a paint sprayer to achieve a flawless and uniform coating. Apply multiple thin layers of paint, allowing each coat to dry completely before adding the next, ensuring a smooth and professional finish that complements the overall design of the room.
Read more: DIY Bathroom Storage Solutions
Sealing the Finish (Optional)
To safeguard the shelves from daily wear and tear, consider applying a clear wood sealant after the stain or paint has fully dried. This additional layer of protection enhances the durability of the finish, making the shelves more resistant to scratches, moisture, and fading over time.
Embracing Creativity
Whether you choose a warm walnut stain to evoke a cozy ambiance or a crisp white paint to impart a modern flair, the staining or painting process presents an opportunity to infuse the shelves with your unique style and vision. Embrace this creative endeavor as a means of personalizing your living space and elevating the visual allure of the floating shelves.
By meticulously staining or painting the shelves, you'll not only enhance their aesthetic appeal but also imbue them with a touch of individuality that harmonizes with your home decor. This transformative step sets the stage for the final phases of the DIY floating shelf project, bringing you one step closer to showcasing your personalized storage solutions with pride.
Step 4: Attaching the Brackets
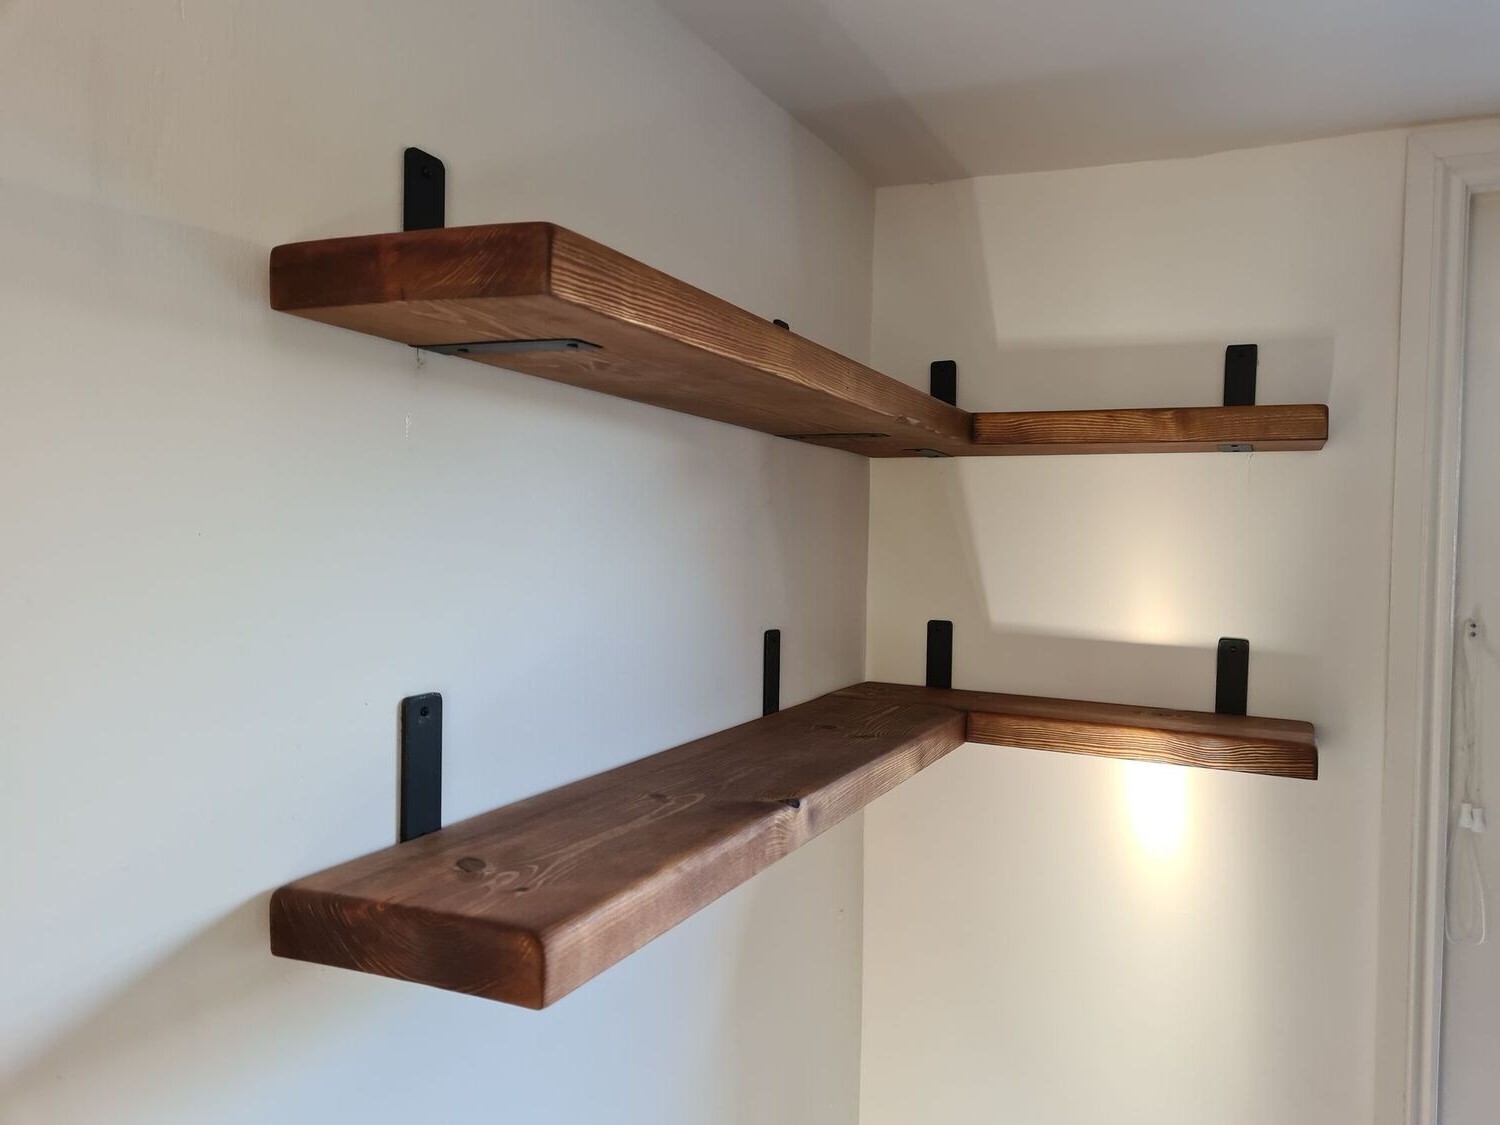
Attaching the brackets is a crucial step in the construction of DIY floating shelves, as it provides the hidden support necessary for the shelves to appear as if they are "floating" on the wall. This process requires precision, careful measurement, and attention to detail to ensure that the shelves are securely anchored and levelled, ready to showcase your decorative items.
Positioning the Brackets
Begin by determining the placement of the brackets on the wall, aligning them with the intended position of the shelves. Use a measuring tape and a pencil to mark the precise locations where the brackets will be installed, ensuring that they are evenly spaced and level. Take into account the weight-bearing capacity of the brackets and the anticipated load on the shelves to determine the optimal placement for stability and visual appeal.
Read more: How to Build a French Cleat Closet System
Securing the Brackets
Once the positions are marked, use a power drill and appropriate screws to secure the brackets to the wall, ensuring that they are firmly anchored into wall studs or using wall anchors for added support. It's essential to follow the manufacturer's guidelines for the specific type of brackets being used, ensuring that they are installed according to recommended weight-bearing capacities and installation methods.
Verifying Level Alignment
After attaching the brackets, use a level to verify that they are perfectly aligned and parallel to the ground. This step is critical for ensuring that the shelves will sit level once installed, preventing any slant or unevenness that could compromise their stability and visual appeal. Make any necessary adjustments to the bracket positions to achieve a flawless and balanced alignment.
Testing Stability
Before proceeding to mount the shelves, perform a stability test by applying gentle pressure to the brackets to ensure that they are securely anchored and capable of supporting the weight of the shelves and their contents. This precautionary measure helps identify any potential issues before the shelves are installed, allowing for prompt adjustments if needed.
Preparing for Shelf Installation
With the brackets securely attached and verified for stability, the stage is set for the final phase of the installation process. The brackets serve as the reliable foundation upon which the floating shelves will rest, ready to transform the designated wall space into a functional and visually captivating display area.
By meticulously attaching the brackets with precision and care, you'll establish a sturdy and reliable support system for the floating shelves, ensuring that they are poised to fulfill their dual role of practical storage and aesthetic enhancement within your living space.
Read more: Simple Pallet Garage Shelving Guide
Step 5: Mounting the Shelves
With the brackets securely attached to the wall, the final step in the construction of DIY floating shelves involves mounting the shelves onto the installed brackets. This pivotal phase brings the project to fruition, transforming the carefully crafted wooden boards into functional and visually striking storage solutions that seamlessly integrate with your living space.
Placing the Shelves
Begin by carefully positioning the wooden shelves onto the installed brackets, ensuring a snug and secure fit. Align the shelves with the brackets, taking care to maintain a level orientation as they are gently lowered into place. The precision and attention to detail at this stage are crucial for achieving a seamless and professional appearance once the shelves are mounted.
Securing the Shelves
Once the shelves are positioned on the brackets, secure them in place by fastening screws through the bottom of the shelves into the brackets. This additional anchoring provides stability and prevents the shelves from shifting or dislodging over time. It's essential to use the appropriate length and type of screws to ensure a secure and durable connection between the shelves and the brackets.
Verifying Stability
After securing the shelves onto the brackets, perform a thorough stability check to ensure that they are firmly anchored and capable of supporting the intended load. Gently apply pressure to the shelves and assess their stability, making any necessary adjustments to the fastenings or bracket positions to guarantee a solid and reliable installation.
Read more: DIY Wall Mounted Garage Shelving Ideas
Adding Decorative Touches
With the shelves securely mounted, take a moment to add decorative touches and personal flair by arranging your chosen items or ornaments on the newly installed shelves. Whether it's displaying cherished mementos, arranging potted plants, or showcasing a collection of books, the shelves now serve as a captivating platform for your decorative creativity.
Admiring the Results
Step back and admire the transformation as the DIY floating shelves take center stage, elevating the visual appeal of your living space while providing practical storage solutions. Revel in the satisfaction of bringing your vision to life, and take pride in the personalized and stylish addition that enhances the ambiance of your home.
By meticulously mounting the shelves onto the installed brackets, you complete the journey of creating and installing your own DIY floating shelves. This final step marks the culmination of your efforts, resulting in a functional and aesthetically pleasing enhancement to your living space that reflects your creativity and craftsmanship.
Conclusion
In conclusion, the journey of creating DIY floating shelves is a rewarding and fulfilling endeavor that combines practical functionality with artistic expression. From the initial stages of measuring and planning to the final moments of mounting the shelves, this comprehensive guide has provided valuable insights and step-by-step instructions to empower DIY enthusiasts and beginners alike.
By embarking on the process of crafting your own floating shelves, you have not only personalized your living space but also experienced the satisfaction of transforming basic materials into visually striking and functional storage solutions. The careful selection of materials, precision cutting and sanding, and the thoughtful application of wood stain or paint have culminated in the creation of custom-fit shelves that seamlessly integrate with your home decor.
The installation of floating shelf brackets and the subsequent mounting of the shelves represent the culmination of your efforts, resulting in a visually captivating display area that showcases your decorative items and reflects your unique style. Whether you've chosen to display family photos, favorite books, or cherished collectibles, the floating shelves now serve as a platform for your creativity and personal expression.
As you admire the completed project, take pride in the craftsmanship and attention to detail that have brought your vision to life. The DIY floating shelves not only offer practical storage solutions but also elevate the aesthetic appeal of your living space, adding a touch of sophistication and individuality to the room.
Furthermore, the skills and knowledge gained from this DIY endeavor can be applied to future projects, empowering you to continue enhancing your living space with custom creations and personalized touches. Whether it's a small apartment or a spacious home, the addition of DIY floating shelves has the potential to transform any wall into a captivating focal point that reflects your personality and design sensibilities.
In essence, the creation and installation of DIY floating shelves exemplify the fusion of creativity, craftsmanship, and practicality, resulting in a tangible and visually appealing enhancement to your living environment. Embrace the sense of accomplishment that comes with completing this project, and let the stylish storage solutions serve as a testament to your ingenuity and dedication to creating a home that is both functional and aesthetically pleasing.

