
Home>Create & Decorate>DIY & Crafts>DIY Bench: How To Build Your Own Stylish And Functional Seating Solution
DIY & Crafts
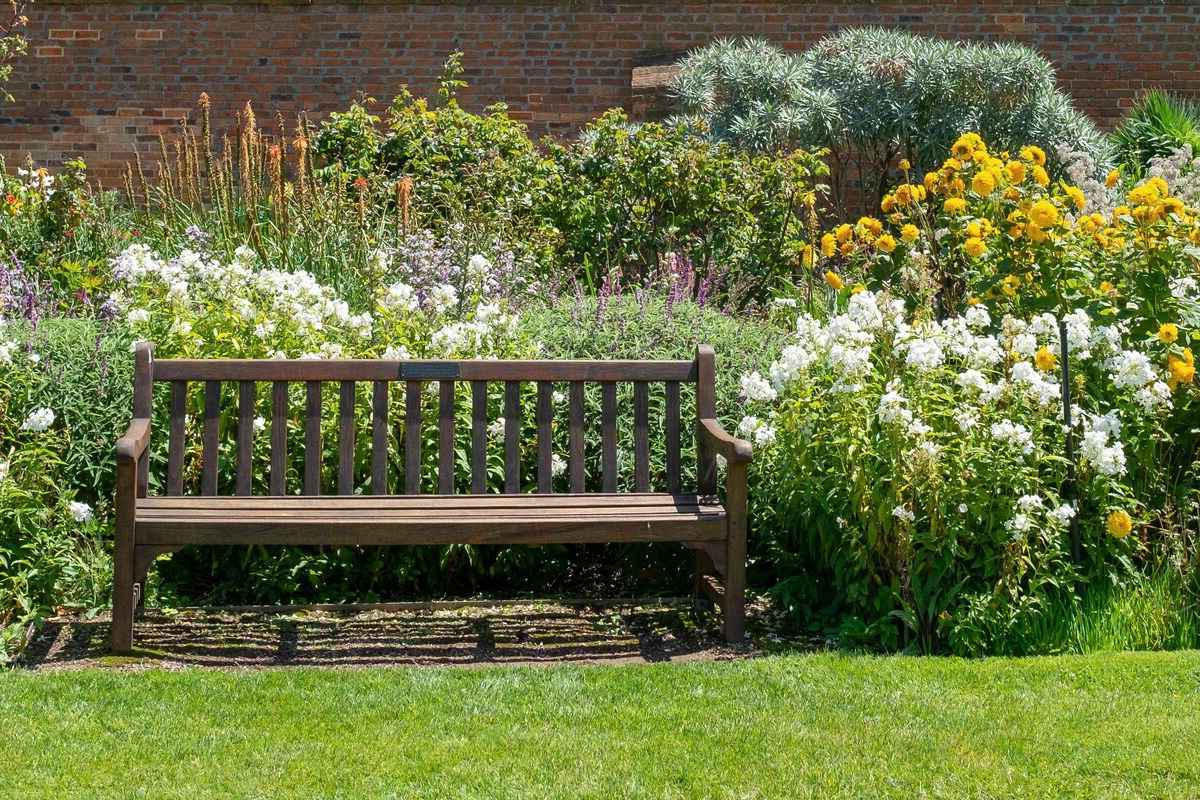
DIY Bench: How To Build Your Own Stylish And Functional Seating Solution
Published: February 28, 2024

Senior Editor in Create & Decorate, Kathryn combines traditional craftsmanship with contemporary trends. Her background in textile design and commitment to sustainable crafts inspire both content and community.
Learn how to create your own stylish and functional seating solution with our DIY bench guide. Perfect for DIY & Crafts enthusiasts.
(Many of the links in this article redirect to a specific reviewed product. Your purchase of these products through affiliate links helps to generate commission for Twigandthistle.com, at no extra cost. Learn more)
Introduction
Are you looking to add a touch of charm and functionality to your living space? Building your own DIY bench can be a rewarding and practical project that allows you to showcase your craftsmanship while creating a stylish seating solution. Whether you're a seasoned DIY enthusiast or a novice looking to embark on a new project, constructing a bench offers a perfect opportunity to unleash your creativity and enhance your home decor.
A DIY bench serves as a versatile piece of furniture that can be customized to suit your specific needs and aesthetic preferences. From providing extra seating for guests to offering a cozy spot for relaxation, a well-crafted bench can become a focal point in any room. Additionally, the sense of accomplishment that comes with completing a DIY project is truly unparalleled, making the process of building a bench both enjoyable and fulfilling.
By following this comprehensive guide, you'll learn how to construct a sturdy and visually appealing bench using simple tools and readily available materials. Whether you're aiming for a rustic, farmhouse-inspired look or a sleek, modern design, the step-by-step instructions provided here will empower you to bring your vision to life. From measuring and cutting the wood to assembling the frame and adding the finishing touches, each stage of the process will be outlined in detail, ensuring that you have all the information you need to create a stunning bench that complements your home decor.
So, roll up your sleeves, gather your tools, and let's embark on this DIY journey together. Whether you're a woodworking enthusiast or a complete beginner, building your own bench is an achievable and gratifying endeavor that promises to elevate the ambiance of your living space. Let's dive into the exciting world of DIY bench construction and unleash your creativity to craft a stylish and functional seating solution that reflects your unique style and personality.
Step 1: Gather Materials and Tools
Before diving into the construction process, it's essential to gather all the necessary materials and tools to ensure a smooth and efficient DIY bench-building experience. Here's a comprehensive list of items you'll need to get started:
Materials:
- Wood: Select high-quality lumber for the bench frame, seat, and backrest. Opt for a durable wood species such as pine, cedar, or oak, depending on your desired aesthetic and budget.
- Wood Screws: Choose corrosion-resistant screws in various lengths to secure the components of the bench frame and provide structural stability.
- Wood Glue: A reliable wood adhesive will reinforce joints and enhance the overall strength of the bench.
- Finishing Nails: These will be used for attaching the seat and backrest slats securely.
- Wood Finish: Select a suitable wood stain, paint, or sealant to protect the bench from environmental elements and enhance its visual appeal.
Tools:
- Measuring Tape: Accurate measurements are crucial for ensuring precise cuts and proper assembly.
- Circular Saw or Miter Saw: A saw will be essential for cutting the wood to the required dimensions with precision.
- Drill and Bits: A power drill equipped with drill bits and screwdriver attachments will facilitate the assembly process.
- Sanding Block or Orbital Sander: Smooth out rough edges and surfaces for a polished finish.
- Clamps: These will come in handy for securing wood pieces during assembly and glue application.
- Paintbrushes or Stain Applicators: Depending on your chosen finish, you'll need suitable tools for applying paint, stain, or sealant.
- Safety Gear: Don't forget to prioritize safety by wearing protective eyewear, gloves, and a dust mask during the woodworking process.
By ensuring that you have all the required materials and tools at your disposal, you'll be well-prepared to embark on the next steps of the bench-building journey. With everything in place, you can proceed confidently to the measurement and cutting phase, where the raw materials will begin to take shape and form the foundation of your stylish and functional DIY bench.
Step 2: Measure and Cut Wood
Accurate measurements and precise cuts are fundamental to the success of your DIY bench project. Before wielding your saw, take the time to measure the wood components meticulously, ensuring that each piece aligns with the designated dimensions outlined in your bench design plan.
Begin by measuring and marking the wood according to the required lengths for the bench frame, seat, and backrest. Utilize a reliable measuring tape to achieve precision, and mark the cut lines using a pencil or a marking tool. When measuring, remember the age-old adage: "measure twice, cut once." This simple yet invaluable practice helps minimize errors and ensures that your wood pieces fit together seamlessly during assembly.
Once the measurements are marked, it's time to bring out your trusty circular saw or miter saw. Ensure that the saw blade is appropriate for the type and thickness of the wood you're cutting. With a steady hand and a focus on safety, carefully guide the saw along the marked cut lines to produce clean and accurate cuts. If you're new to woodworking, consider practicing your cutting technique on scrap wood to familiarize yourself with the saw's operation and achieve greater confidence and precision.
As you progress through the cutting process, pay close attention to the angles and dimensions specified in your bench design. Whether you're creating straight cuts for the frame or angled cuts for the backrest, maintaining consistency and accuracy is key to achieving a professional-looking end result.
Remember, woodworking is a craft that rewards patience and attention to detail. Take your time with each cut, and don't rush the process. By prioritizing precision and methodical cutting, you'll set the stage for a seamless assembly phase and a visually striking DIY bench that reflects your dedication to quality craftsmanship.
With the wood pieces now cut to size and ready for assembly, you've successfully completed the crucial step of measuring and cutting. Your attention to detail and commitment to precision will undoubtedly shine through in the finished product, as each component fits together harmoniously to form a sturdy and visually appealing bench frame. As you proceed to the next phase of the construction process, the assembly of the bench frame, you'll build upon this foundation of carefully measured and cut wood, bringing your DIY bench one step closer to completion.
Step 3: Assemble the Bench Frame
With the wood pieces meticulously measured and cut to size, it's time to transition to the pivotal stage of assembling the bench frame. This phase marks a significant stride in bringing your DIY bench to life, as the individual components begin to merge into a cohesive structure that forms the foundation of the seating solution.
Begin by laying out the cut wood pieces in an organized manner, ensuring that all components are easily accessible for assembly. Take a moment to review the bench design plan and familiarize yourself with the layout of the frame, including the placement of support beams, legs, and any additional structural elements.
Using a power drill and suitable wood screws, carefully attach the support beams to the legs, following the predetermined measurements and layout. It's crucial to maintain alignment and ensure that the frame remains square and stable as you secure the components together. Consider enlisting the assistance of clamps to hold the pieces in place during the assembly process, facilitating a seamless and secure connection.
As the frame begins to take shape, periodically check for any discrepancies in alignment or structural integrity, making adjustments as necessary to guarantee a sturdy and level foundation for the bench. Attention to detail during this phase is paramount, as it sets the stage for the successful integration of the seat and backrest components in the subsequent steps.
Once the primary frame structure is assembled and securely fastened, take a moment to admire your progress and visualize the transformation of raw materials into a functional and aesthetically pleasing bench frame. The sense of accomplishment at this stage serves as a testament to your dedication and craftsmanship, propelling you forward with confidence as you approach the final stages of the DIY bench construction process.
With the bench frame now expertly assembled, you've reached a significant milestone in your DIY journey. The solid foundation you've created sets the stage for the addition of the seat and backrest, bringing your vision of a stylish and functional bench closer to fruition. As you prepare to move forward with the next steps, the assembly of the seat and backrest will seamlessly integrate with the meticulously crafted frame, culminating in a captivating and personalized seating solution that reflects your ingenuity and woodworking prowess.
Step 4: Attach the Seat and Backrest
With the bench frame expertly assembled, the focus now shifts to the pivotal task of attaching the seat and backrest, transforming the sturdy frame into a fully functional and inviting seating solution. This phase marks a significant stride in the DIY bench construction process, as the integration of the seat and backrest components adds both comfort and aesthetic appeal to the project.
Begin by positioning the pre-cut seat slats evenly across the assembled frame, ensuring a uniform overhang on all sides for a balanced and visually appealing look. Secure the slats in place using wood screws, taking care to maintain consistent spacing between each slat for both comfort and structural integrity. The attachment of the seat slats serves as a defining moment, as the bench begins to take on its characteristic form and purpose.
As the seat slats are securely fastened, turn your attention to the backrest assembly. Position the backrest slats vertically against the rear of the bench frame, aligning them evenly to achieve a symmetrical and polished appearance. Secure the backrest slats in place using wood screws or finishing nails, ensuring that they are firmly anchored to the frame to provide ample support and stability.
Throughout the attachment process, prioritize attention to detail, ensuring that the seat and backrest components align seamlessly with the frame to create a cohesive and visually striking bench. Periodically step back to assess the progress, confirming that the seat and backrest are securely attached and harmoniously integrated with the frame.
As the final screws are tightened and the last nail is driven home, take a moment to appreciate the transformation of raw materials into a functional and aesthetically pleasing DIY bench. The successful attachment of the seat and backrest components represents the culmination of your woodworking prowess and attention to detail, resulting in a captivating and personalized seating solution that reflects your dedication to craftsmanship.
With the seat and backrest now securely attached, the DIY bench stands as a testament to your creativity and skill, ready to enhance your living space with its stylish and functional presence. As you prepare to move forward with the finishing touches, including sanding and applying a protective finish, the completed bench serves as a tangible embodiment of your passion for DIY projects and your ability to craft a stunning and practical piece of furniture.
Step 5: Sand and Finish
After the successful attachment of the seat and backrest, the DIY bench is poised to undergo the transformative process of sanding and finishing, culminating in a polished and visually appealing final product. This crucial step not only enhances the overall aesthetic of the bench but also serves to protect the wood from environmental elements, ensuring its longevity and durability.
Begin the sanding process by using a sanding block or an orbital sander to smooth out any rough edges, uneven surfaces, and imperfections present on the wood. Pay particular attention to the areas where the wood components join, as well as the edges of the seat and backrest slats, to achieve a seamless and tactile finish. By meticulously sanding the entire bench, you'll create a touchable smoothness that enhances the comfort and visual allure of the seating solution.
As you progress through the sanding phase, consider starting with a coarse-grit sandpaper to address any prominent irregularities or rough patches. Gradually transition to finer-grit sandpaper to refine the surface further, resulting in a velvety-smooth texture that beckons to be touched. The meticulous approach to sanding ensures that the wood's natural beauty is accentuated, setting the stage for the application of a protective finish.
With the wood now impeccably sanded, it's time to apply a suitable finish to safeguard the bench and enrich its appearance. Whether you opt for a wood stain to accentuate the natural grain, a vibrant paint to infuse personality, or a protective sealant to preserve the wood's integrity, the finishing stage allows you to impart a personalized touch to your DIY creation.
Using a paintbrush, stain applicator, or suitable tool for your chosen finish, carefully apply the product in even strokes, ensuring comprehensive coverage and a uniform appearance. Take the time to follow the manufacturer's instructions for the specific finish you've selected, allowing for adequate drying time between coats to achieve a professional and enduring result.
As the finishing touches are applied, the DIY bench undergoes a remarkable transformation, evolving from a collection of raw materials into a refined and functional piece of furniture. The protective finish not only enhances the visual allure of the bench but also shields it from wear and tear, ensuring that it remains a cherished element of your living space for years to come.
With the sanding and finishing process complete, the DIY bench stands as a testament to your dedication and craftsmanship, ready to enrich your home with its stylish and functional presence. As you admire the fruits of your labor, take pride in the creation of a captivating and personalized seating solution that reflects your ingenuity and woodworking prowess.
Conclusion
In conclusion, the journey of building your own DIY bench has been a fulfilling and rewarding experience, showcasing the power of creativity and craftsmanship. From the initial gathering of materials and tools to the meticulous process of measuring, cutting, and assembling the wood, each step has contributed to the transformation of raw materials into a stylish and functional seating solution.
As you reflect on the completion of the DIY bench, it's evident that the dedication to precision and attention to detail have culminated in a tangible manifestation of your woodworking prowess. The seamless integration of the seat and backrest with the expertly crafted frame has resulted in a captivating and personalized piece of furniture that not only enhances your living space but also reflects your unique style and personality.
The sanding and finishing phase served as the crowning touch, elevating the bench to a new level of visual allure and tactile comfort. The application of a protective finish ensures that the bench is not only aesthetically pleasing but also resilient against the rigors of daily use, promising longevity and durability.
As you admire the completed DIY bench, take pride in the fact that you've not only created a functional piece of furniture but also imbued it with a sense of individuality and character. Whether it's a rustic farmhouse-inspired bench or a sleek modern design, your creation stands as a testament to your ability to bring visions to life through the art of woodworking.
The DIY bench you've crafted is more than just a piece of furniture; it's a tangible representation of your passion for hands-on projects and your capacity to transform simple materials into something extraordinary. As it finds its place in your home, it will serve as a constant reminder of the satisfaction that comes from creating something with your own hands.
So, as you embark on future DIY endeavors, may the experience of building your own bench continue to inspire you, fueling your creativity and igniting your passion for crafting practical and visually stunning pieces that enrich your living space and bring joy to your everyday life.