
Home>Create & Decorate>DIY & Crafts>How To Make A Fort
DIY & Crafts
How To Make A Fort
Published: February 24, 2024

Senior Editor in Create & Decorate, Kathryn combines traditional craftsmanship with contemporary trends. Her background in textile design and commitment to sustainable crafts inspire both content and community.
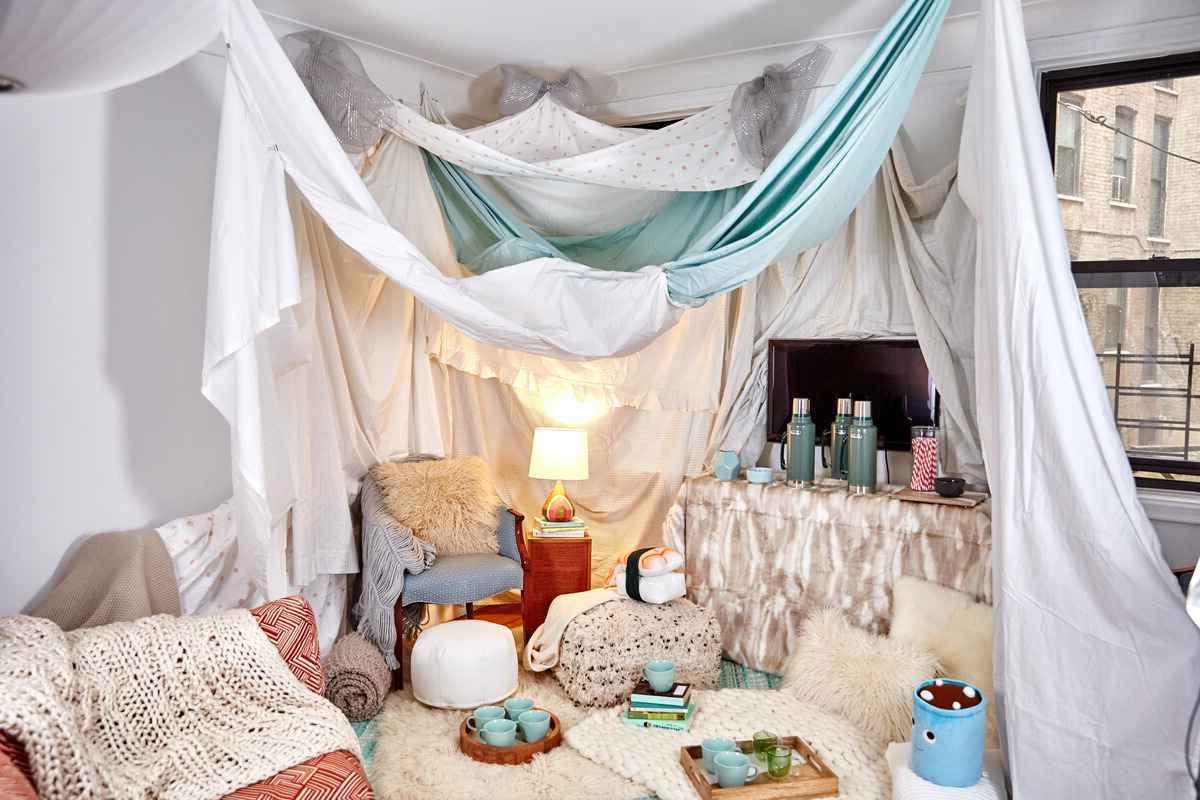
Learn how to make a fort with these DIY & Crafts tips and ideas. Create a fun and cozy space for kids with simple materials and easy steps. Start building your own fort today!
(Many of the links in this article redirect to a specific reviewed product. Your purchase of these products through affiliate links helps to generate commission for Twigandthistle.com, at no extra cost. Learn more)
Introduction
Building a fort is a timeless and cherished activity that sparks creativity and imagination. Whether you're a kid or a kid at heart, constructing a fort provides a sense of adventure and accomplishment. It's a project that brings people together, fostering teamwork and bonding. The process of creating a fort is not just about the end result; it's about the journey, the laughter, and the memories made along the way.
The beauty of making a fort lies in its versatility. It can be a cozy hideaway on a rainy day, a magical castle in a child's imagination, or a peaceful retreat for relaxation. The possibilities are as endless as your creativity. With a few simple materials and a touch of ingenuity, you can transform an ordinary space into a remarkable haven.
As you embark on this DIY adventure, remember that there are no strict rules or limitations. Your fort can be as elaborate or as simple as you desire. It's an opportunity to unleash your inner architect and designer, allowing your vision to come to life in a tangible and enchanting form.
In the following sections, we will explore the step-by-step process of creating a fort, from selecting the ideal location to adding personalized touches. By the end of this guide, you'll be equipped with the knowledge and inspiration to embark on your fort-building journey. So, gather your materials, unleash your creativity, and let's dive into the exciting world of fort construction!
Materials Needed
Building a fort is an exciting endeavor that requires a few essential materials to bring your vision to life. Before diving into the construction process, it's important to gather the necessary items to ensure a smooth and enjoyable building experience. Here's a comprehensive list of materials you'll need to get started:
1. Blankets and Sheets
Gather an assortment of blankets and sheets to serve as the primary building materials for your fort. Choose a variety of textures and sizes to add depth and character to your creation. Soft, cozy blankets can provide comfort, while sturdy sheets can form the structure of the fort.
2. Pillows and Cushions
Incorporate an array of pillows and cushions to create a comfortable and inviting interior for your fort. These items not only enhance the coziness of the space but also offer a plush seating area for relaxation and enjoyment.
3. Chairs or Furniture
Depending on the size and design of your fort, you may need chairs or lightweight furniture to support the structure. Chairs can serve as anchor points for securing blankets and creating a framework for the fort. Additionally, small tables or ottomans can add functionality to the space.
4. Clothespins or Clips
To secure the blankets and sheets in place, gather a supply of clothespins or clips. These handy tools will help fasten the materials together, ensuring that your fort remains sturdy and intact during playtime.
5. String Lights or Flashlights
Illuminate your fort with a touch of magic by incorporating string lights or flashlights. These lighting elements not only create a whimsical ambiance but also add a sense of enchantment to the space, making it a captivating hideaway.
6. Decorative Items
Personalize your fort with decorative items such as stuffed animals, artwork, or themed decorations. These embellishments infuse personality and charm into the fort, transforming it into a unique and inviting retreat.
7. Snacks and Refreshments
For extended fort adventures, consider stocking up on snacks and refreshments to enjoy within the cozy confines of your creation. Having a supply of treats on hand adds an extra layer of enjoyment to the fort-building experience.
By gathering these materials, you'll be well-prepared to embark on the fort-building journey, ensuring that you have everything you need to construct a captivating and comfortable haven. With the materials in hand, it's time to move on to the next step: choosing the perfect location for your fort.
Choosing a Location
Selecting the ideal location for your fort is a crucial step in the building process. The right setting can elevate the fort-building experience, providing a sense of seclusion, comfort, and inspiration. When choosing a location, consider the following factors to ensure that your fort becomes a captivating retreat:
-
Space and Accessibility: Look for a spacious area that allows ample room for constructing the fort. Whether it's a living room, bedroom, or outdoor space, ensure that there is enough space to accommodate the fort's dimensions. Additionally, consider accessibility for easy entry and exit, especially if the fort will be used by multiple individuals.
-
Privacy and Tranquility: Seek out a location that offers a degree of privacy and tranquility. A quiet corner or secluded spot can enhance the sense of escape and relaxation within the fort. Minimizing external distractions and noise can create a peaceful environment for imaginative play and leisure.
-
Lighting and Ambiance: Take into account the lighting conditions in the chosen location. Natural light can infuse the fort with a warm and inviting glow, while artificial lighting sources, such as string lights or lanterns, can create a magical atmosphere. Consider how the lighting will contribute to the ambiance and overall appeal of the fort.
-
Versatility and Adaptability: Choose a location that allows for versatility and adaptability. Whether indoors or outdoors, the selected space should accommodate the construction of the fort and provide opportunities for creative embellishments. Consider how the location can be transformed to suit different fort designs and themes.
-
Safety and Stability: Prioritize safety and stability when selecting a location. Ensure that the chosen space is free from potential hazards and provides a stable foundation for building the fort. Consider factors such as furniture placement, flooring surfaces, and any obstacles that may impact the fort's structural integrity.
-
Inspiration and Imagination: Look for a location that sparks inspiration and fuels the imagination. Consider the surroundings and how they can contribute to the fort-building experience. Whether it's a cozy nook by a window, a shaded area in the backyard, or a spacious playroom, the chosen location should inspire creativity and imaginative play.
By carefully considering these factors, you can identify the perfect location for your fort, setting the stage for an enchanting and memorable building experience. Once the location is chosen, it's time to embark on the next phase of fort construction: building the frame.
Building the Frame
The process of building the frame forms the structural foundation of your fort, providing the framework upon which the rest of the construction will unfold. This phase is crucial in ensuring that your fort is stable, secure, and capable of supporting the additional elements that will be added later. Here's a detailed guide on how to build the frame for your fort:
1. Select Anchor Points
Identify sturdy anchor points within the chosen location where you can secure the blankets and sheets to form the frame. These anchor points can include furniture, such as chairs, tables, or bed frames, as well as fixtures like door frames or curtain rods. The key is to choose locations that can support the weight of the blankets and sheets without causing damage.
2. Drape and Secure Blankets
Drape the blankets and sheets over the selected anchor points to create the basic structure of the fort. Ensure that the materials are arranged in a way that provides ample interior space while maintaining stability. Use clothespins or clips to secure the blankets in place, ensuring that they are taut and free from sagging.
3. Create Openings
Depending on the design of your fort, consider leaving openings for entry and ventilation. These openings can be formed by leaving gaps between draped blankets or by folding back sections of the materials to create doorways and windows. The openings not only serve practical purposes but also add an element of whimsy to the fort's design.
4. Reinforce the Frame
Once the blankets are in place, assess the overall stability of the frame. Make any necessary adjustments to reinforce the structure, ensuring that it can withstand gentle movements and interactions. Pay attention to the tension of the blankets and the security of the anchor points to prevent any unexpected collapses.
5. Test the Stability
Before proceeding to the next phase of fort construction, conduct a stability test by gently shaking the frame and applying light pressure to various points. This test will help identify any weak spots or areas that require additional reinforcement. Address any stability concerns before moving on to the next steps.
By following these steps, you can establish a sturdy and reliable frame for your fort, laying the groundwork for the subsequent stages of construction. With the frame in place, you're ready to move on to the exciting process of adding walls and a roof to your fort, bringing it one step closer to completion.
Adding Walls and Roof
With the frame of your fort securely in place, the next phase involves adding walls and a roof to enclose the space and create a cozy sanctuary. This step is where the fort truly takes shape, transforming from a draped structure into a defined and inviting retreat. Here's a detailed guide on how to add walls and a roof to your fort:
1. Layering Blankets and Sheets
Begin by layering additional blankets and sheets over the existing frame to form the walls of the fort. Consider using thicker blankets or comforters for added insulation and privacy. The walls can be draped from the top of the frame and secured along the sides using clothespins or clips. Ensure that the materials overlap to minimize gaps and create a sense of enclosure.
2. Creating Partitioned Spaces
If desired, you can create partitioned spaces within the fort by strategically positioning blankets to section off different areas. For example, a reading nook or a sleeping area can be designated within the fort, adding versatility to the space. The partitioned spaces can be defined by arranging the blankets in a way that delineates distinct areas while maintaining an open and airy feel.
3. Incorporating a Roof or Canopy
To complete the enclosure of the fort, consider adding a roof or canopy using additional blankets or a large sheet. This overhead covering not only enhances the sense of privacy and seclusion but also contributes to the fort's aesthetic appeal. Secure the roof in place, ensuring that it drapes evenly and creates a smooth, uninterrupted surface overhead.
4. Enhancing Stability and Comfort
As you add the walls and roof, pay attention to the stability and comfort of the fort's interior. Ensure that the materials are securely fastened and free from sagging, providing a snug and secure environment. Additionally, consider layering soft cushions or pillows along the interior surfaces to enhance comfort and create inviting seating or lounging areas.
5. Personalizing the Walls
Take the opportunity to personalize the walls of the fort by incorporating decorative elements such as artwork, string lights, or hanging ornaments. These embellishments add character and charm to the interior, infusing the space with your unique style and creativity. Personalizing the walls creates a captivating and personalized environment within the fort.
By following these steps, you can effectively add walls and a roof to your fort, transforming it into a captivating and inviting space. With the enclosure complete, the fort becomes a secluded haven where imagination and relaxation intertwine. The addition of walls and a roof marks a significant milestone in the fort-building process, bringing you one step closer to enjoying the enchanting retreat you've created.
Decorating and Personalizing
With the structural elements of your fort in place, it's time to infuse it with personality and charm through decorating and personalization. This phase allows you to unleash your creativity and transform the fort into a captivating and personalized haven. Here's a detailed guide on how to decorate and personalize your fort, elevating it from a simple structure to a magical retreat:
1. Theme and Inspiration
Consider a theme or concept that resonates with your interests and imagination. Whether it's a whimsical fairy-tale castle, a rustic wilderness hideout, or a futuristic space station, choosing a theme sets the stage for cohesive and imaginative decorations. Draw inspiration from favorite books, movies, or hobbies to guide the overall aesthetic of the fort.
2. Embellishments and Accents
Incorporate embellishments and accents that align with the chosen theme. This can include decorative elements such as themed pillows, plush toys, wall art, and fabric banners. Select items that add visual interest and contribute to the immersive atmosphere of the fort. For example, if the fort is themed around outer space, consider hanging glow-in-the-dark stars or planetary mobiles.
3. Creative Lighting
Enhance the ambiance of the fort with creative lighting solutions. String lights, lanterns, or battery-operated LED candles can add a magical glow to the interior, creating a captivating and enchanting atmosphere. Experiment with different lighting placements to achieve a warm and inviting glow that complements the overall theme of the fort.
4. Cozy Furnishings
Introduce cozy furnishings to elevate the comfort and functionality of the fort. Soft rugs, floor cushions, and throw blankets can create inviting seating areas and lounging spots within the fort. Consider incorporating a small table or shelf to hold books, games, or snacks, adding practicality to the space while enhancing its coziness.
5. Personal Touches
Infuse the fort with personal touches that reflect your individuality and interests. Display handmade crafts, artwork, or personal mementos that hold sentimental value. These personal touches not only add a unique flair to the fort but also create a sense of ownership and pride in the space.
6. Imaginative Play Elements
Incorporate elements that encourage imaginative play and creativity. For example, a dress-up corner with costumes and props, a storytelling nook with books and puppets, or a designated art area with drawing supplies can inspire imaginative adventures within the fort. These play elements enhance the fort's versatility and provide opportunities for immersive and interactive experiences.
By following these steps, you can transform your fort into a captivating and personalized retreat that reflects your creativity and individuality. Decorating and personalizing the fort adds depth, character, and a touch of magic to the space, creating an enchanting haven where imagination knows no bounds. With the fort adorned with personalized touches and thematic embellishments, it becomes a place of wonder and delight, ready to host memorable adventures and moments of pure joy.
Conclusion
As you reach the conclusion of your fort-building journey, take a moment to revel in the accomplishment of creating a captivating and personalized retreat. The process of constructing a fort transcends the mere act of assembling blankets and sheets; it embodies the spirit of creativity, imagination, and shared experiences. Your fort is more than a physical structure; it's a manifestation of cherished memories, laughter, and the boundless joy of imaginative play.
With the fort standing as a testament to your ingenuity and vision, it becomes a sanctuary where moments of relaxation, storytelling, and playful adventures await. The cozy interior, adorned with thematic embellishments and personal touches, invites you to embark on journeys of the mind and heart, transcending the ordinary and embracing the extraordinary.
As you bask in the enchanting ambiance of your fort, remember that its allure extends beyond its physical form. It serves as a reminder of the power of creativity, the joy of shared experiences, and the endless possibilities that unfold when imagination takes flight. Whether it's a quiet refuge for solitary contemplation or a lively hub for collaborative play, your fort stands as a testament to the enduring magic of creativity and the simple pleasures of life.
As you bid farewell to this fort-building adventure, carry with you the spirit of creativity and the joy of crafting enchanting spaces. Let the memories made within the fort linger as cherished treasures, and may the lessons learned during its construction inspire future endeavors. Whether you embark on another fort-building escapade or channel your creativity into new pursuits, may the spirit of imagination and the joy of creation accompany you on your journey.
So, as you step out of the fort, adorned with the warmth of shared moments and the magic of creativity, remember that the spirit of fort-building resides within you, ready to be reignited whenever the call of adventure beckons. Until then, may your days be filled with wonder, laughter, and the enduring enchantment of your very own fort.