
Home>Create & Decorate>DIY & Crafts>How To Make A Table
DIY & Crafts
How To Make A Table
Published: February 23, 2024

Content Creator specializing in woodworking and interior transformations. Caegan's guides motivate readers to undertake their own projects, while his custom furniture adds a personal touch.
Learn how to make a table with our easy DIY & Crafts guide. Get step-by-step instructions and create your own custom table today!
(Many of the links in this article redirect to a specific reviewed product. Your purchase of these products through affiliate links helps to generate commission for Twigandthistle.com, at no extra cost. Learn more)
Introduction
Welcome to the world of do-it-yourself (DIY) woodworking! In this comprehensive guide, we will walk you through the rewarding process of creating your own table from scratch. Whether you're a seasoned woodworker or a novice looking to embark on your first project, crafting a table is a fulfilling endeavor that allows you to unleash your creativity and practical skills.
The beauty of making your own table lies in the ability to customize it to your exact specifications. From choosing the type of wood to determining the dimensions and style, every aspect of the table is a reflection of your personal taste and craftsmanship. Not to mention, the sense of accomplishment that comes with using a table you've built with your own hands is truly unparalleled.
Throughout this guide, we will provide you with detailed instructions, tips, and tricks to ensure that your table-making journey is both enjoyable and successful. You'll learn how to select the right materials, make precise cuts, assemble the tabletop, attach sturdy legs, and add the perfect finishing touches to bring your creation to life.
So, roll up your sleeves, gather your tools, and let's dive into the wonderful world of woodworking as we guide you through the step-by-step process of making a beautiful and functional table that you can proudly display in your home. Whether you're aiming for a rustic farmhouse style, a sleek modern design, or anything in between, this guide will equip you with the knowledge and confidence to bring your vision to fruition. Let's get started!
Materials Needed
Before diving into the woodworking process, it's essential to gather all the necessary materials and tools to ensure a smooth and efficient construction of your table. Here's a comprehensive list of the items you'll need:
Wood:
- Tabletop: Select a high-quality wood material that suits your aesthetic preferences and functional requirements. Common options include oak, pine, maple, or walnut. Ensure that the wood is appropriately sized based on the dimensions of the table you intend to build.
- Legs: Depending on the style and stability you desire, choose either pre-made table legs or opt to craft your own using the same type of wood as the tabletop.
Tools:
- Measuring Tape: An essential tool for accurately determining the dimensions of the tabletop and legs.
- Circular Saw or Table Saw: For precise and controlled wood cutting.
- Electric Sander: To smoothen the surfaces of the wood and remove any rough edges.
- Drill and Screws: Necessary for attaching the tabletop and legs securely.
- Wood Glue: Provides additional strength when joining wood pieces together.
- Clamps: Useful for holding wood pieces in place during assembly.
- Wood Stain or Paint: Optional for adding a personalized finish to the table.
Safety Equipment:
- Safety Goggles: Protect your eyes from wood dust and debris.
- Work Gloves: Ensure a secure grip and shield your hands from splinters.
- Respirator Mask: Essential for filtering out wood particles and dust to maintain clean air while working.
Additional Items:
- Sandpaper: Various grits for hand sanding and refining the wood surfaces.
- Wood Filler: Ideal for filling in any gaps or imperfections in the wood.
- Tack Cloth: Used to wipe away dust and particles before applying the finish.
- Paintbrushes or Stain Applicators: If you choose to paint or stain the table.
By having these materials and tools at your disposal, you'll be well-prepared to embark on the woodworking journey and create a stunning table that perfectly complements your living space. With everything in place, you can proceed to the next step of cutting the wood and bringing your vision to life.
Step 1: Cutting the Wood
The first crucial step in creating your own table is cutting the wood to the precise dimensions required for the tabletop and legs. This process demands accuracy and attention to detail to ensure that the components fit together seamlessly, resulting in a sturdy and visually appealing final product.
Begin by measuring and marking the wood according to your desired tabletop size. Use a measuring tape to outline the length and width, ensuring that the measurements are consistent and symmetrical. Once marked, carefully use a circular saw or table saw to make the cuts, following the designated lines with precision. It's essential to maintain a steady hand and a controlled cutting pace to achieve clean and straight edges.
Similarly, if you are crafting your own table legs, measure and mark the wood to the specified length, taking into account the desired height of the table. Whether you opt for traditional four-legged design or a more intricate style, such as tapered or turned legs, accurate measurements are paramount to achieving a balanced and stable table structure.
As you make the cuts, prioritize safety by wearing protective goggles and using a stable work surface to secure the wood. Additionally, ensure that the saw blade is suitable for the type of wood you are cutting, as different wood species may require specific blade configurations for optimal results.
Once the cuts are complete, use an electric sander to refine the edges and surfaces of the wood, smoothing out any rough areas and creating a uniform finish. This step is crucial for achieving a professional look and ensuring that the tabletop and legs fit together seamlessly during assembly.
By meticulously cutting the wood to the precise dimensions and refining the surfaces, you set the foundation for a well-crafted table that embodies both functionality and aesthetic appeal. With the wood pieces prepared, you are now ready to proceed to the next step of sanding the wood to further enhance its quality and prepare it for assembly.
Step 2: Sanding the Wood
Sanding the wood is a crucial step in the table-making process, as it not only enhances the visual appeal of the wood but also ensures a smooth and refined surface that is pleasant to the touch. This meticulous task involves the use of an electric sander and various grits of sandpaper to achieve a flawless finish on the tabletop and legs.
Begin by selecting the appropriate grit of sandpaper based on the condition of the wood and the level of smoothness you aim to achieve. Coarse-grit sandpaper, such as 80 or 100 grit, is ideal for removing any rough spots, imperfections, or uneven surfaces from the wood. As you progress, transition to finer grits, such as 150 or 220, to gradually refine the wood and eliminate any remaining blemishes.
When sanding the tabletop, work in the direction of the wood grain to prevent cross-grain scratches and ensure a uniform appearance. Pay close attention to the edges and corners, as these areas may require extra care to achieve a seamless transition between surfaces. Additionally, be mindful of maintaining consistent pressure and movement to avoid creating uneven patches on the wood.
For the table legs, focus on sanding both the exterior and interior surfaces to guarantee a polished and professional look from every angle. Take your time to address any rough edges or irregularities, as the legs play a significant role in the overall stability and aesthetics of the table.
As you progress through the sanding process, periodically inspect the wood to assess the smoothness and identify any remaining imperfections that require attention. This meticulous approach ensures that the tabletop and legs are impeccably prepared for the subsequent stages of assembly and finishing.
Once the sanding is complete, use a tack cloth to remove any residual dust and particles from the wood surfaces. This preparatory step is essential for achieving a pristine foundation before applying the chosen finish, whether it be a natural wood stain to accentuate the wood's grain or a vibrant paint color to infuse personality into the table.
By dedicating time and care to the sanding process, you elevate the quality and visual allure of the wood, setting the stage for the next phase of assembling the tabletop and attaching the legs. With the wood now impeccably sanded and prepared, you are one step closer to witnessing your vision of a stunning handmade table come to fruition.
Step 3: Assembling the Tabletop
With the wood meticulously cut and sanded to perfection, the next pivotal phase in crafting your own table involves assembling the tabletop. This process demands precision and attention to detail to ensure that the individual wood pieces come together seamlessly, forming a robust and visually appealing surface that serves as the focal point of the table.
Begin by arranging the wood pieces for the tabletop in the desired configuration, ensuring that the edges align perfectly. If you've opted for a traditional plank-style tabletop, carefully position the wood boards side by side, ensuring that the grain patterns complement each other for a cohesive look. For those creating a more intricate design, such as a herringbone or chevron pattern, take the time to arrange the pieces in the designated layout, paying close attention to symmetry and alignment.
Once the wood pieces are arranged to your satisfaction, apply a thin, even layer of wood glue along the edges that will be joined together. This adhesive not only enhances the structural integrity of the tabletop but also creates a strong bond between the wood pieces, ensuring long-lasting durability. As you apply the glue, use a brush or spreader to achieve uniform coverage, preventing excess glue from seeping out during the clamping process.
After applying the wood glue, carefully press the wood pieces together, ensuring that they are aligned according to the predetermined configuration. Use clamps to secure the pieces firmly in place, exerting even pressure along the entire length of the tabletop to promote a solid bond. It's essential to verify that the wood pieces are level and flush with each other, as any misalignment at this stage can impact the overall appearance and stability of the tabletop.
With the wood pieces securely clamped together, allow the wood glue to cure according to the manufacturer's instructions, ensuring that the bond achieves maximum strength. During this curing period, it's advisable to periodically inspect the tabletop to confirm that the wood pieces remain aligned and that the glue is setting evenly across the entire surface.
Once the wood glue has fully cured, remove the clamps and inspect the assembled tabletop. Run your hand along the surface to ensure that the joints are smooth and seamless, indicating a successful bonding process. Any excess glue that has seeped out can be carefully removed using a chisel or scraper, resulting in a clean and professional finish.
By meticulously assembling the tabletop with precision and care, you've taken a significant stride towards bringing your vision of a handcrafted table to life. The tabletop now stands as a testament to your craftsmanship and attention to detail, setting the stage for the next phase of attaching the legs and adding the finishing touches that will complete your masterpiece.
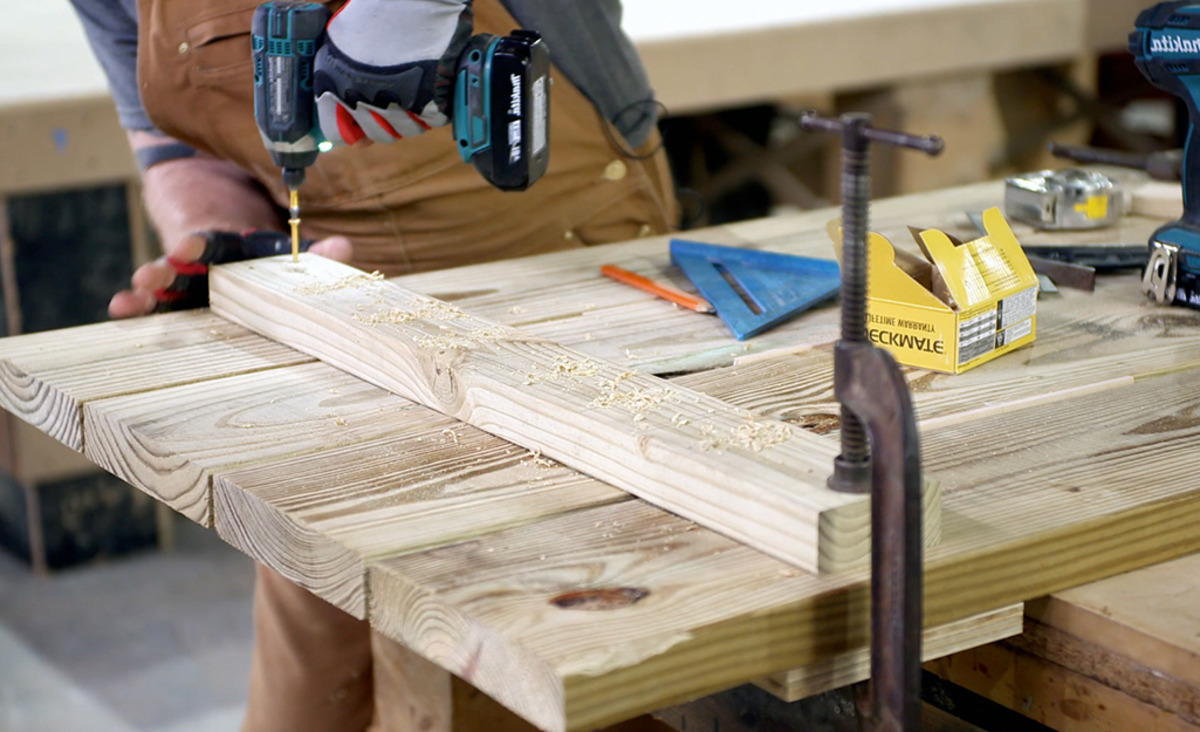
Step 4: Attaching the Legs
With the tabletop expertly assembled, the focus now shifts to the pivotal task of attaching the legs, a step that significantly contributes to the stability, functionality, and overall aesthetic of the table. Whether you've opted for pre-made legs or crafted your own, the process of securely affixing them to the tabletop demands precision and attention to detail to ensure a balanced and durable final product.
Begin by positioning the tabletop upside down on a stable work surface, providing easy access to the underside for attaching the legs. Carefully measure and mark the locations where the legs will be attached, ensuring uniform spacing and alignment to guarantee a symmetrical and well-balanced table structure. Whether you're aiming for a classic four-legged design or a more unconventional configuration, such as tapered or hairpin legs, precise measurements are essential to achieving a visually appealing and stable foundation.
Once the positions are marked, use a drill to create pilot holes at the designated locations on the underside of the tabletop. The diameter and depth of the pilot holes should correspond to the size of the screws or bolts that will be used to secure the legs, ensuring a snug and reliable attachment. It's crucial to exercise caution and maintain a perpendicular drilling angle to prevent any misalignment or damage to the tabletop surface.
With the pilot holes in place, proceed to attach the legs to the tabletop using screws or bolts, depending on the design and material of the legs. Ensure that the legs are positioned securely and level with the underside of the tabletop, exerting even pressure as you fasten them in place. It's advisable to use a screwdriver or wrench to tighten the screws or bolts, confirming that the legs are firmly anchored and free from wobbling or instability.
As the legs are affixed, periodically inspect the tabletop to verify that the attachment is uniform and that the legs are aligned according to the predetermined positions. This meticulous approach ensures that the table maintains a level and balanced stance, essential for its functionality and visual appeal.
Once the legs are securely attached, carefully turn the table upright to admire your handiwork. Run your hand along the underside to confirm that the legs are firmly anchored and that the tabletop rests evenly on a flat surface, signifying a successful attachment process. With the legs in place, the table now stands as a testament to your craftsmanship and attention to detail, ready to serve as a functional and visually striking addition to your living space.
By methodically attaching the legs with precision and care, you've brought your vision of a handcrafted table one step closer to reality. The table now embodies both structural integrity and aesthetic allure, setting the stage for the final phase of adding the finishing touches that will complete your masterpiece.
Step 5: Finishing Touches
With the table taking shape, the final phase of the woodworking journey involves adding the finishing touches that will elevate its visual appeal and protect the wood for years to come. This critical step encompasses the application of a wood finish, whether it be a natural wood stain to enhance the grain or a protective sealant to safeguard the surface. Additionally, it presents an opportunity to address any remaining imperfections and imbue the table with a personalized touch that reflects your unique style.
Begin by assessing the condition of the tabletop and legs, identifying any minor blemishes or imperfections that may require attention. Utilize wood filler to address small gaps or cracks, ensuring that the wood surfaces are smooth and flawless. Once the filler has dried, lightly sand the areas to achieve a seamless integration with the surrounding wood, creating a pristine canvas for the finishing application.
When selecting a wood finish, consider the desired aesthetic and level of protection for the table. Natural wood stains offer a timeless appeal, enriching the wood's natural beauty and accentuating its unique grain patterns. Alternatively, clear polyurethane or lacquer sealants provide a durable protective layer, shielding the wood from moisture, stains, and daily wear and tear. Whether you opt for a matte, satin, or glossy finish, ensure that it complements the overall style of the table and aligns with your vision for the finished piece.
Apply the chosen wood finish methodically, using a brush, cloth, or applicator to achieve even coverage across the entire tabletop and legs. Work in the direction of the wood grain, ensuring that the finish penetrates the surface and enhances the wood's inherent character. Multiple thin coats are often preferable to a single heavy application, allowing each layer to dry thoroughly before applying the next. This approach results in a smooth and lustrous finish that showcases the wood's natural allure.
As the wood finish dries, periodically inspect the table to ensure that the application is uniform and free from drips or streaks. Once the finish has cured according to the manufacturer's instructions, gently buff the surface with fine-grit sandpaper or steel wool to achieve a silky smooth texture. This final step enhances the tactile appeal of the table, inviting touch and admiration.
With the finishing touches complete, stand back and admire the transformation of raw wood into a stunning handcrafted table. The wood finish not only enhances the table's visual allure but also provides long-lasting protection, ensuring that your creation remains a cherished centerpiece in your home for years to come.
Conclusion
Congratulations on successfully completing the exhilarating journey of crafting your own table! From meticulously selecting the wood and making precise cuts to assembling the tabletop, attaching the legs, and adding the finishing touches, you've demonstrated a remarkable blend of creativity, precision, and craftsmanship. As you stand back and admire the tangible result of your dedication and hard work, it's evident that your handmade table is more than just a piece of furniture – it's a reflection of your ingenuity and passion for woodworking.
The process of making a table from scratch is not merely a practical endeavor; it's a deeply rewarding and fulfilling experience that allows you to unleash your creativity and bring your vision to life. Every step along the way, from the initial planning to the final application of the wood finish, has been a testament to your commitment to excellence and your ability to transform raw materials into a functional work of art.
As you integrate your handcrafted table into your living space, whether it's serving as a gathering place for family meals, a platform for creative projects, or a showcase for cherished decor, take pride in the fact that it is a unique and personalized creation that embodies your individual style and skill. The table stands as a symbol of your ability to turn a vision into reality, enriching your home with a piece that is both practical and visually captivating.
Furthermore, the knowledge and expertise gained throughout this woodworking endeavor serve as a solid foundation for future projects and a testament to your growth as a skilled artisan. The confidence and satisfaction derived from creating a table with your own hands are invaluable, inspiring you to explore new woodworking ventures and continue honing your craft.
As you embark on future woodworking endeavors, may the experience of making your own table serve as a constant reminder of the joy and fulfillment found in bringing ideas to fruition through hands-on craftsmanship. Whether you choose to tackle larger furniture pieces, delve into intricate woodworking techniques, or share your knowledge with others, your journey as a DIY woodworker is filled with endless possibilities and opportunities for self-expression.
In closing, your handcrafted table is not just a functional piece of furniture; it's a testament to your creativity, perseverance, and dedication to the art of woodworking. Embrace the pride and satisfaction that come with creating something truly unique, and let your handmade table stand as a lasting symbol of your passion for craftsmanship and the boundless potential of DIY woodworking.