
Home>Create & Decorate>DIY & Crafts>DIY Deck Frame Building: Step-by-Step Guide For A Sturdy And Stylish Outdoor Space
DIY & Crafts
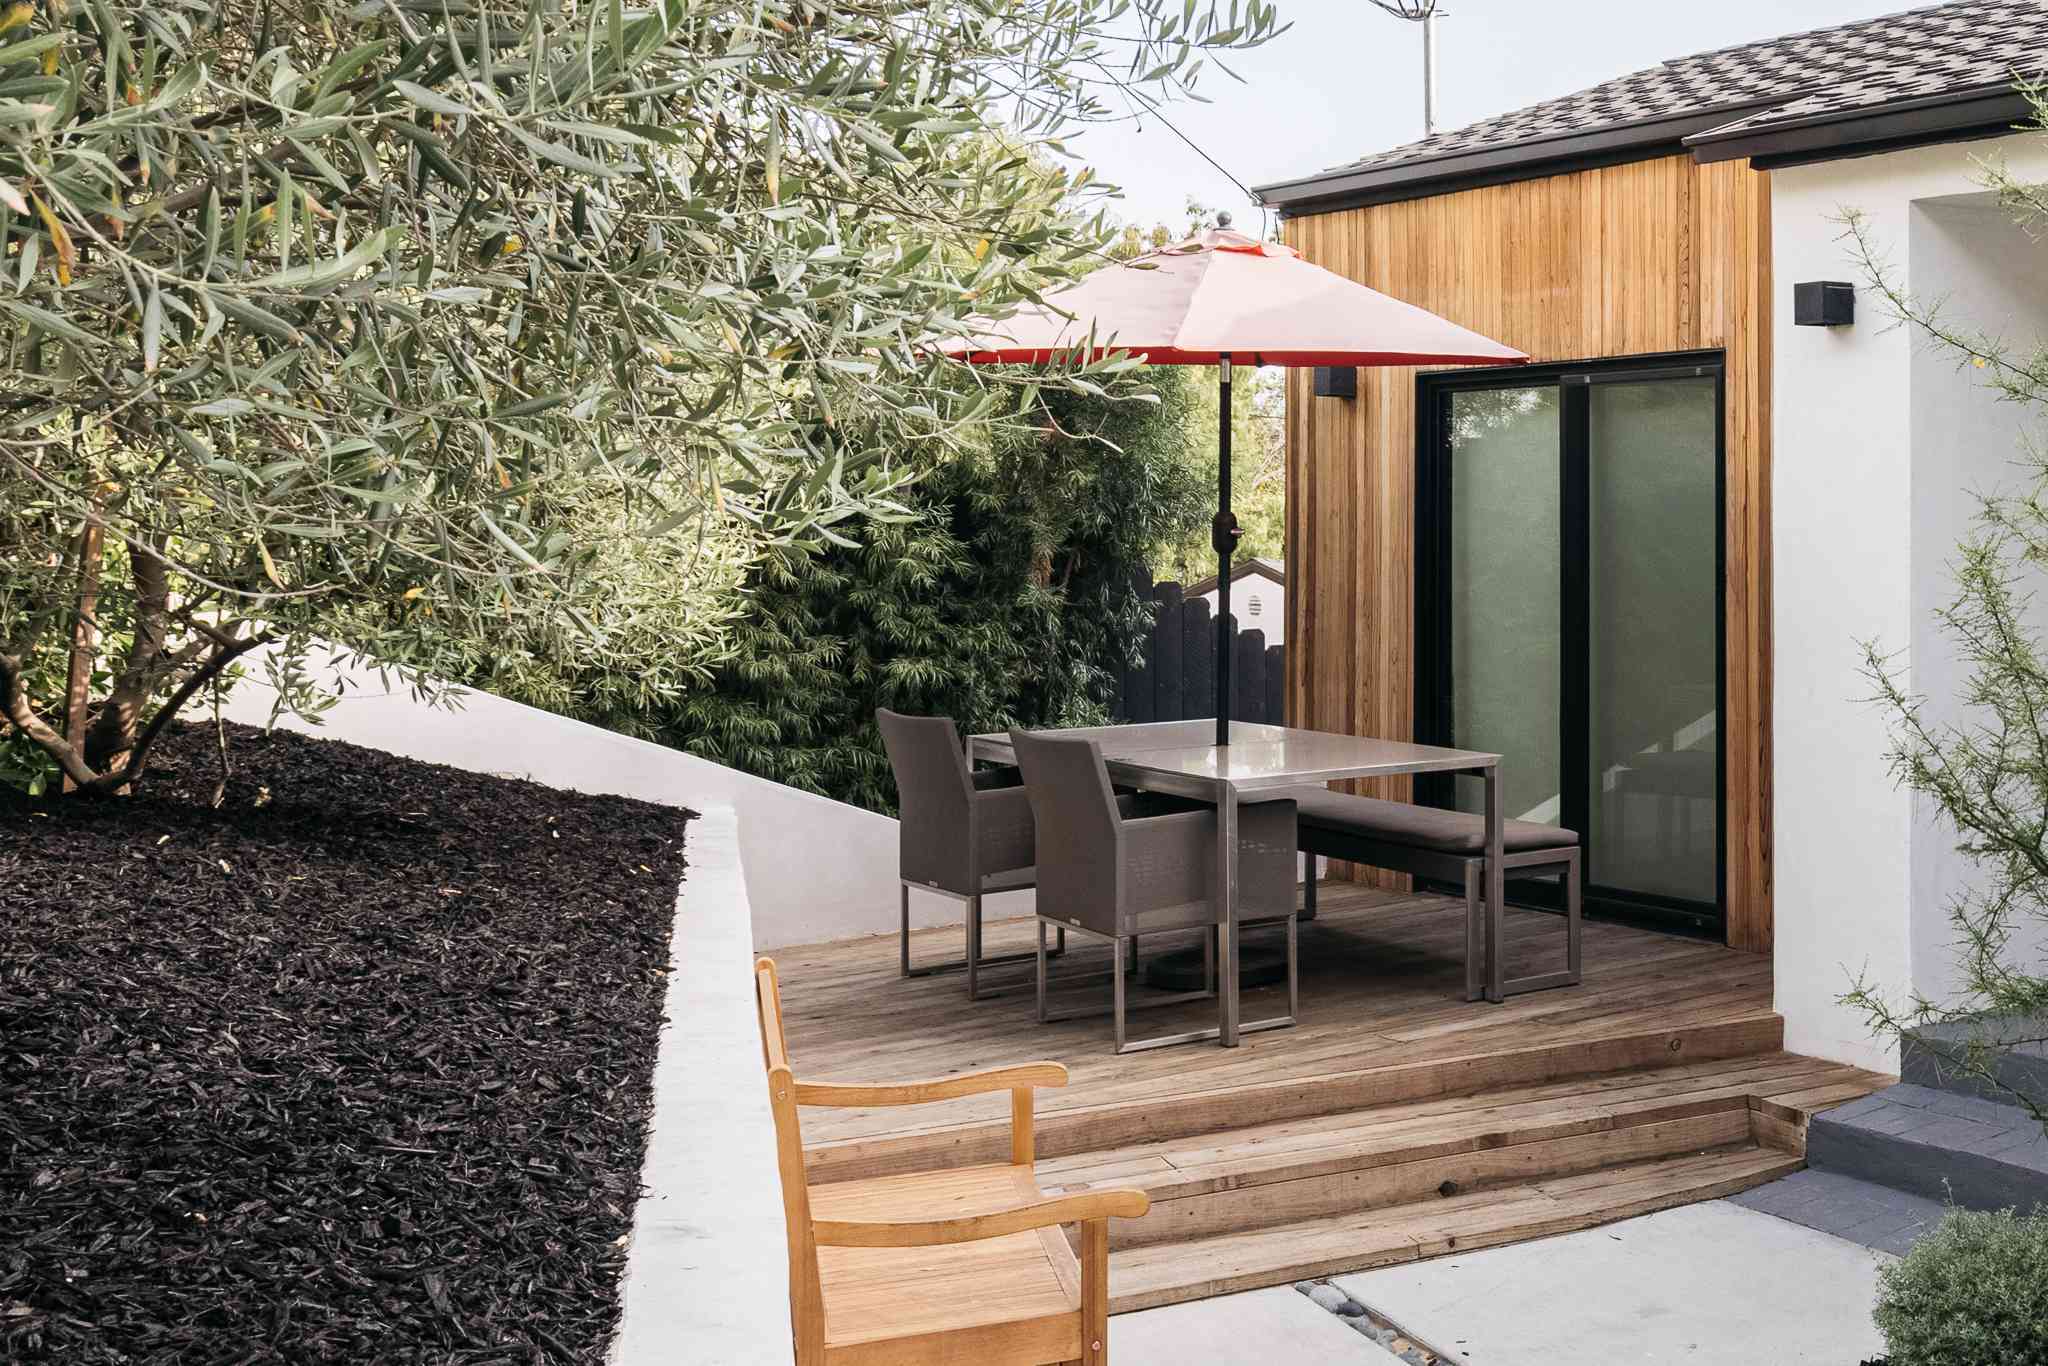
DIY Deck Frame Building: Step-by-Step Guide For A Sturdy And Stylish Outdoor Space
Published: February 22, 2024

Senior Editor in Create & Decorate, Kathryn combines traditional craftsmanship with contemporary trends. Her background in textile design and commitment to sustainable crafts inspire both content and community.
Learn how to build a sturdy and stylish outdoor deck frame with our step-by-step DIY guide. Create the perfect outdoor space with our expert tips and techniques. Ideal for DIY & Crafts enthusiasts.
(Many of the links in this article redirect to a specific reviewed product. Your purchase of these products through affiliate links helps to generate commission for Twigandthistle.com, at no extra cost. Learn more)
Introduction
Building a deck frame is a rewarding and practical DIY project that can transform your outdoor space into a functional and inviting area for relaxation and entertainment. Whether you envision hosting lively gatherings or simply unwinding in the open air, constructing a sturdy and stylish deck frame lays the foundation for creating your ideal outdoor oasis.
A well-designed deck frame not only enhances the aesthetic appeal of your home but also adds value to your property. By embarking on this DIY endeavor, you have the opportunity to customize the size, shape, and features of your deck to perfectly suit your lifestyle and preferences. From hosting barbecues to enjoying peaceful mornings with a cup of coffee, a thoughtfully crafted deck frame can elevate your outdoor living experience.
In this comprehensive guide, we will walk you through each step of the deck frame building process, providing valuable insights and practical tips to ensure a successful and satisfying project. From planning and designing to the finishing touches, you will gain the knowledge and confidence to tackle this endeavor with enthusiasm and precision.
So, roll up your sleeves and get ready to embark on a journey of creativity and craftsmanship as we delve into the art of building a durable and visually appealing deck frame. Whether you are a seasoned DIY enthusiast or a newcomer to the world of construction, this guide is designed to equip you with the essential know-how and inspiration to bring your vision of the perfect outdoor space to life. Let's dive in and discover the steps to creating a deck frame that will be the envy of the neighborhood!
Step 1: Planning and Designing Your Deck Frame
Before diving into the physical construction of your deck frame, it's crucial to lay a solid foundation in the form of meticulous planning and thoughtful design. This initial step sets the stage for a successful and satisfying project, ensuring that your deck not only meets your functional needs but also complements the aesthetic appeal of your outdoor space.
Assessing Your Needs and Preferences
Begin by envisioning how you intend to use your deck. Will it serve as a space for outdoor dining, entertaining guests, or simply unwinding in the fresh air? Consider the furniture, fixtures, and amenities you plan to incorporate, as well as the traffic flow and seating arrangements. Understanding your specific requirements will guide the design process and help you create a deck that seamlessly integrates with your lifestyle.
Determining the Deck Size and Layout
Next, take measurements of the available space and consider the ideal dimensions for your deck. Factor in the existing landscaping, architectural features, and natural elements such as trees and water features. Visualize the layout of your deck, keeping in mind the desired access points, sightlines, and potential expansion areas. By carefully planning the size and layout, you can optimize the functionality and visual harmony of your outdoor living area.
Selecting Materials and Finishes
Explore the diverse range of decking materials, railing options, and finishes available in the market. Consider the durability, maintenance requirements, and visual appeal of each material, keeping in mind your climate and local building codes. Whether you prefer the timeless charm of natural wood or the low-maintenance convenience of composite decking, choosing the right materials is essential for achieving a deck that aligns with your style and stands the test of time.
Incorporating Design Elements
From integrated seating and built-in planters to decorative railings and lighting fixtures, the design possibilities for your deck are virtually limitless. Explore creative design elements that reflect your personality and enhance the functionality of your outdoor space. Whether you aspire to create a cozy retreat or a vibrant entertainment area, integrating thoughtful design elements will elevate the visual impact and usability of your deck.
Seeking Inspiration and Professional Guidance
Gather inspiration from home improvement magazines, online platforms, and local deck installations to spark your creativity and refine your design vision. Additionally, consulting with experienced professionals or seeking guidance from reputable resources can provide valuable insights and practical advice for optimizing your deck design. By leveraging inspiration and expertise, you can refine your plans and ensure that your deck reflects your unique style and preferences.
By dedicating ample time and attention to the planning and design phase, you lay a solid groundwork for a successful deck building project. With a clear vision, well-defined objectives, and a thoughtful approach, you can embark on the subsequent steps of materializing your dream deck with confidence and precision.
Step 2: Gathering Materials and Tools
The successful execution of any DIY project hinges on the availability of the right materials and tools. When it comes to building a sturdy and stylish deck frame, the selection of high-quality materials and the use of appropriate tools are paramount to achieving a professional finish and long-lasting durability.
Choosing the Right Materials
-
Decking Materials: Selecting the decking material is a pivotal decision that directly impacts the aesthetics and longevity of your deck. Whether you opt for traditional wood, composite decking, or PVC boards, prioritize materials known for their durability, resistance to weathering, and low maintenance requirements. Consider the color, texture, and overall appearance of the decking material to ensure it harmonizes with your outdoor setting.
-
Support Structures: The choice of support structures, such as pressure-treated lumber or steel framing, plays a crucial role in the structural integrity of your deck. Evaluate the load-bearing capacity, resistance to rot and decay, and compatibility with your chosen decking material when selecting support structures.
-
Fasteners and Hardware: From corrosion-resistant screws and nails to joist hangers and post anchors, investing in high-quality fasteners and hardware is essential for securing the various components of your deck frame. Ensure that the fasteners are designed for outdoor use and compatible with the chosen materials to prevent premature deterioration and structural issues.
-
Railings and Balusters: If your deck design incorporates railings and balusters, explore the diverse options available, including wood, metal, and composite railing systems. Prioritize safety, visual appeal, and ease of installation when selecting these components.
Essential Tools for the Project
-
Power Tools: Equip yourself with essential power tools such as a circular saw, drill/driver, impact driver, and a power miter saw to facilitate precise cutting, drilling, and fastening of materials. These tools streamline the construction process and ensure accuracy in creating the necessary components of your deck frame.
-
Hand Tools: A comprehensive set of hand tools, including a hammer, tape measure, level, framing square, and adjustable wrench, is indispensable for tasks that require manual precision and adjustment. These tools enable you to fine-tune the alignment, measurements, and assembly of various elements during the construction process.
-
Safety Gear: Prioritize safety by wearing protective gear such as safety glasses, work gloves, and hearing protection. Additionally, consider using a dust mask when cutting or sanding materials to minimize exposure to airborne particles.
-
Lifting and Support Equipment: Depending on the scale of your project, consider utilizing lifting equipment such as a hand truck or a dolly to transport heavy materials. Additionally, temporary support structures such as adjustable post jacks can aid in stabilizing components during installation.
By meticulously gathering the requisite materials and tools, you set the stage for a smooth and efficient deck building process. Prioritizing quality, compatibility, and safety in your selection of materials and tools ensures that your project unfolds seamlessly, allowing you to focus on bringing your vision of a stunning and resilient deck frame to fruition.
Step 3: Preparing the Site
Preparing the site for deck construction is a critical phase that sets the groundwork for a stable and enduring outdoor structure. This step involves a series of essential tasks aimed at ensuring the site is properly leveled, cleared of obstructions, and adequately prepared to accommodate the deck frame.
Clearing and Marking the Area
The first task in site preparation involves clearing the designated area of any vegetation, debris, or obstacles that may impede the construction process. This includes removing rocks, roots, and any existing structures that could interfere with the installation of the deck frame. Additionally, it is crucial to mark the perimeter of the deck layout using stakes and string to delineate the precise boundaries and facilitate accurate measurements.
Assessing Soil and Drainage
An important consideration during site preparation is evaluating the soil composition and assessing the drainage characteristics of the area. Soil that retains excessive moisture or exhibits poor compaction may compromise the stability of the deck over time. By addressing drainage issues and ensuring proper soil compaction, you can mitigate the risk of structural damage and prolong the lifespan of your deck.
Leveling the Ground
Achieving a level surface is fundamental to the structural integrity and aesthetic appeal of the deck. Using a transit level or a laser level, carefully assess the slope and elevation of the site to identify any uneven areas. Depending on the extent of the unevenness, you may need to excavate soil, build up low-lying areas, or install retaining walls to create a uniformly level base for the deck frame.
Installing Ground Fabric and Gravel
To prevent weed growth and enhance drainage, consider laying a layer of ground fabric over the prepared site. This permeable fabric acts as a barrier against weed penetration while allowing water to permeate through. Following this, spreading a layer of gravel over the ground fabric promotes effective drainage and provides a stable foundation for the deck frame.
Securing Perimeter Footings
If your deck design necessitates the use of footings, this is the stage to install them along the perimeter of the deck layout. Whether utilizing concrete footings or engineered helical piers, ensure that the footings are strategically positioned and securely anchored to support the weight of the deck and resist lateral movement.
By meticulously executing the site preparation phase, you establish a solid and level foundation for the subsequent stages of deck construction. This proactive approach not only ensures the structural stability of the deck but also contributes to its long-term resilience and performance in the outdoor environment.
Step 4: Building the Foundation
With the site meticulously prepared, the next pivotal step in constructing a sturdy and enduring deck frame is building the foundation. The foundation serves as the backbone of the deck, providing essential support and stability to ensure its structural integrity and longevity.
Installing Support Posts or Piers
The foundation construction typically begins with the installation of support posts or piers, depending on the design and structural requirements of the deck. If utilizing traditional support posts, ensure they are positioned at consistent intervals along the perimeter of the deck layout. These posts should be securely anchored into the ground and aligned to the desired height using a level to maintain uniformity.
For decks requiring a more versatile and adjustable foundation, engineered helical piers offer a practical solution. These piers are mechanically screwed into the ground, providing reliable support while accommodating variations in soil conditions and terrain. Carefully follow the manufacturer's guidelines for proper installation and alignment to establish a robust foundation for the deck.
Attaching Beams and Ledger Boards
Once the support posts or piers are in place, the next step involves attaching beams and ledger boards to create the framework for the deck. Beams, typically constructed from pressure-treated lumber or engineered wood products, are secured horizontally to the support posts, forming the primary load-bearing structure of the deck. Ledger boards, if applicable, are affixed to the exterior wall of the house to provide additional support and stability.
When attaching beams and ledger boards, precision is paramount to ensure the components are level, plumb, and securely fastened. Utilize appropriate fasteners and hardware, such as lag screws and structural connectors, to reinforce the connections and enhance the overall strength of the foundation.
Incorporating Cross Bracing and Diagonal Supports
To further fortify the foundation and minimize lateral movement, consider incorporating cross bracing and diagonal supports between the beams and support posts. These elements enhance the rigidity of the foundation, particularly in regions prone to high winds or seismic activity. By strategically positioning cross bracing and diagonal supports, you can effectively distribute the load and bolster the structural resilience of the deck foundation.
Ensuring Compliance with Building Codes
Throughout the foundation construction process, it is imperative to adhere to local building codes and regulations governing deck construction. Verify the specific requirements related to foundation design, materials, and anchoring methods to ensure full compliance and structural safety. By aligning the foundation construction with established building codes, you uphold the integrity of the deck structure and prioritize the well-being of its occupants.
By methodically executing the foundation construction phase, you establish a robust and reliable base for the subsequent stages of deck assembly. The meticulous attention to detail and adherence to best practices during this pivotal step lay the groundwork for a resilient and enduring deck frame that will stand the test of time.
Step 5: Installing the Joists
With the foundation in place, the next crucial phase in the construction of a sturdy and reliable deck frame involves the installation of the joists. Joists form the framework upon which the decking boards are laid, providing essential support and ensuring the structural integrity of the deck. This step demands precision and attention to detail to create a level and resilient substructure for the deck.
Selecting and Preparing Joist Materials
Begin by selecting high-quality joist materials that align with the design specifications and load-bearing requirements of your deck. Pressure-treated lumber, commonly used for joist construction, offers durability and resistance to decay, making it an ideal choice for outdoor applications. Carefully inspect the lumber for any defects or warping, and ensure that the dimensions meet the prescribed design standards.
Prior to installation, it is essential to acclimate the joist materials to the outdoor environment to minimize the risk of warping or dimensional changes. Store the lumber in the vicinity of the construction site for a period recommended by the manufacturer to allow it to adjust to the ambient moisture levels and temperature.
Establishing Joist Layout and Spacing
Carefully plan the layout and spacing of the joists to optimize the structural integrity and load distribution across the deck surface. Adhere to the prescribed joist span and spacing guidelines, considering the anticipated load, decking material, and local building codes. Utilize a chalk line and framing square to mark the precise locations for the joists, ensuring uniformity and alignment throughout the deck framework.
Installing and Leveling the Joists
With the layout established, proceed to install the joists, securing them to the support beams using appropriate fasteners and hardware. Utilize joist hangers or hurricane ties to reinforce the connections and maintain the prescribed elevation and alignment. Employ a level to ensure that the joists are uniformly horizontal and free from any sagging or unevenness, making necessary adjustments as required to achieve a level substructure.
Incorporating Blocking and Bridging
To enhance the stability and rigidity of the deck framework, consider incorporating blocking between the joists at regular intervals. Blocking reinforces the joists, minimizing deflection and lateral movement while promoting a uniform weight distribution across the deck surface. Additionally, installing bridging between the joists further fortifies the substructure, particularly in larger deck designs, contributing to the overall resilience and longevity of the deck frame.
By meticulously executing the installation of the joists, you establish a robust and level substructure that forms the backbone of the deck frame. The precision and attention to detail invested in this phase lay the groundwork for the seamless integration of the decking boards and the realization of a structurally sound and visually appealing outdoor living space.
Step 6: Adding Support Beams
The addition of support beams marks a pivotal phase in the construction of a resilient and structurally sound deck frame. These beams play a fundamental role in distributing the load from the decking surface to the underlying foundation, ensuring uniform support and stability across the entire structure. The meticulous installation of support beams is essential to the long-term performance and durability of the deck, making it a critical step in the overall construction process.
Selecting and Preparing Support Beam Materials
The selection of high-quality support beam materials is paramount to the structural integrity and load-bearing capacity of the deck frame. Pressure-treated lumber, engineered wood products, or steel beams are commonly employed for this purpose, offering durability and resistance to environmental factors. Prior to installation, it is imperative to inspect the beams for any defects, warping, or damage, ensuring that the dimensions align with the prescribed design specifications.
Determining Beam Placement and Alignment
Carefully plan the placement and alignment of the support beams to optimize load distribution and structural stability. Adhere to the prescribed spacing and span guidelines, considering the anticipated load, joist layout, and local building codes. Utilize a level and measuring tools to ensure that the beams are uniformly positioned and aligned, maintaining consistent elevation and parallel orientation to the joists.
Securing Beams to Support Posts
Once the placement and alignment are established, proceed to secure the support beams to the support posts using appropriate fasteners and hardware. Utilize structural connectors, lag screws, or through-bolts to reinforce the connections and ensure a robust attachment between the beams and support posts. The secure fastening of the support beams is essential to withstand the vertical and lateral forces exerted on the deck frame.
Incorporating Lateral Bracing and Diagonal Supports
To enhance the rigidity and resistance to lateral movement, consider incorporating lateral bracing and diagonal supports between the support beams and posts. These elements effectively distribute the load and minimize sway, particularly in regions prone to high winds or seismic activity. By strategically positioning lateral bracing and diagonal supports, you can fortify the structural resilience of the deck frame, contributing to its long-term stability.
Ensuring Compliance with Building Codes
Throughout the installation of support beams, it is imperative to adhere to local building codes and regulations governing deck construction. Verify the specific requirements related to beam placement, materials, and anchoring methods to ensure full compliance and structural safety. By aligning the installation with established building codes, you uphold the integrity of the deck structure and prioritize the well-being of its occupants.
By meticulously adding support beams, you establish a robust and resilient framework that forms the backbone of the deck structure. The precision and attention to detail invested in this phase lay the groundwork for the seamless integration of the decking boards and the realization of a structurally sound and visually appealing outdoor living space.
Step 7: Attaching Decking Boards
The installation of decking boards marks a significant milestone in the construction of a functional and visually captivating deck frame. This phase not only contributes to the structural integrity of the deck but also serves as a defining element in shaping the overall aesthetic appeal of the outdoor living space. The meticulous attachment of decking boards demands precision, attention to detail, and a keen eye for achieving a seamless and visually pleasing surface.
Selecting High-Quality Decking Materials
Begin by selecting high-quality decking materials that align with your design preferences, durability requirements, and maintenance considerations. Whether opting for natural wood, composite decking, or PVC boards, prioritize materials known for their resistance to weathering, warping, and decay. Carefully inspect the decking boards for any defects, ensuring that the dimensions and surface quality meet the prescribed standards.
Planning the Layout and Orientation
Carefully plan the layout and orientation of the decking boards to optimize visual appeal and structural integrity. Adhere to the prescribed installation guidelines, considering factors such as board orientation, spacing, and potential expansion and contraction due to temperature variations. Utilize chalk lines and framing squares to mark the precise locations for the decking boards, ensuring uniformity and alignment throughout the deck surface.
Securing and Fastening the Decking Boards
Proceed to secure the decking boards to the underlying framework using appropriate fasteners and hardware. Whether utilizing screws, hidden fastening systems, or specialized clips, ensure that the fastening method aligns with the chosen decking material and promotes a secure and visually unobtrusive attachment. Pay close attention to the spacing between boards, allowing for adequate drainage and expansion while maintaining a uniform and aesthetically pleasing surface.
Incorporating Design Elements and Finishes
Explore opportunities to incorporate design elements and finishes that enhance the visual appeal and functionality of the deck surface. Consider integrating decorative patterns, contrasting board orientations, or inlay designs to infuse character and personality into the decking layout. Additionally, explore the diverse range of finishes and treatments available to protect and enhance the appearance of the decking boards, ensuring long-term resilience and visual allure.
Ensuring Compliance with Installation Guidelines
Throughout the attachment of decking boards, it is imperative to adhere to the manufacturer's installation guidelines and best practices. Verify the specific requirements related to fastening methods, spacing, and finishing recommendations to ensure optimal performance and longevity of the decking material. By aligning the installation with established guidelines, you uphold the integrity of the deck surface and prioritize its enduring visual appeal.
By meticulously attaching the decking boards, you bring the vision of a stunning and functional outdoor living space to fruition. The precision and attention to detail invested in this phase lay the groundwork for a resilient and visually captivating deck that invites relaxation, entertainment, and cherished moments in the open air.
Step 8: Finishing Touches and Maintenance Tips
As the construction of the deck frame nears completion, attention turns to the crucial phase of adding finishing touches and implementing maintenance strategies to ensure the longevity and visual appeal of the outdoor space. This step encompasses a range of essential tasks aimed at enhancing the aesthetics, functionality, and durability of the deck, as well as establishing a proactive approach to its ongoing care and upkeep.
Applying Protective Finishes
To safeguard the decking boards and structural components from the effects of weathering, UV exposure, and moisture, consider applying protective finishes such as sealers, stains, or specialized deck oils. These finishes not only enhance the natural beauty of the wood or composite material but also provide a crucial barrier against rot, decay, and discoloration. Prior to application, thoroughly clean the deck surface and ensure it is free from debris and moisture to achieve optimal adhesion and effectiveness of the protective finish.
Installing Railing Systems and Accessories
If your deck design incorporates railing systems, this phase presents an opportunity to install these safety features and aesthetic enhancements. Explore the diverse range of railing options, including wood, metal, or composite materials, and select a design that harmonizes with the overall style of the deck. Additionally, consider integrating accessories such as post caps, lighting fixtures, or decorative elements to elevate the visual impact and functionality of the railing system.
Implementing Landscaping and Décor
To create a cohesive and inviting outdoor environment, consider integrating landscaping elements and décor that complement the deck space. Whether incorporating potted plants, outdoor furniture, or decorative accents, thoughtful landscaping and décor choices can enhance the ambiance and usability of the deck. Pay attention to the scale, color palette, and maintenance requirements of the selected elements to ensure a harmonious and inviting outdoor living area.
Establishing a Maintenance Routine
Proactive maintenance is essential for preserving the beauty and structural integrity of the deck over time. Develop a maintenance routine that includes regular cleaning, inspection of fasteners and structural components, and addressing any signs of wear or damage promptly. Additionally, consider scheduling periodic reapplication of protective finishes and conducting thorough inspections to identify and mitigate potential issues before they escalate.
Incorporating Drainage and Ventilation Solutions
Effective drainage and ventilation are crucial for preserving the structural integrity of the deck and preventing moisture-related issues. Ensure that the deck design incorporates proper drainage systems, such as downspouts and gutters, to divert water away from the deck structure. Additionally, assess the ventilation beneath the deck to promote airflow and prevent moisture buildup, particularly in regions with high humidity or precipitation.
By meticulously attending to finishing touches and implementing proactive maintenance strategies, you not only enhance the visual appeal and functionality of the deck but also prioritize its long-term resilience and performance. This proactive approach sets the stage for enjoying a captivating and enduring outdoor living space that enriches your lifestyle and fosters cherished moments in the open air.
Conclusion
As we conclude this comprehensive guide to building a sturdy and stylish deck frame, it's evident that the journey from planning and design to the finishing touches is a testament to the artistry and craftsmanship involved in creating an inviting outdoor space. The process of constructing a deck frame is not merely a series of steps; it's a transformative endeavor that empowers homeowners to shape their ideal outdoor environment with creativity and precision.
Throughout this guide, we have delved into the essential considerations, from meticulous planning and material selection to the intricacies of site preparation, foundation construction, and the installation of decking components. Each phase of the construction process represents a crucial building block in the realization of a resilient and visually captivating deck frame.
By embracing the principles of thoughtful design, structural integrity, and proactive maintenance, DIY enthusiasts and homeowners alike can embark on this journey with confidence, knowing that they possess the knowledge and insights to create a space that reflects their unique vision and lifestyle. The fusion of practicality and aesthetics in deck construction underscores the transformative power of a well-crafted outdoor living area.
As you embark on your own deck building journey, remember that the process is not solely about the tangible outcome but also about the experiences and memories that will unfold within the space you create. Whether it's the laughter of loved ones gathered for a barbecue, the tranquility of a quiet morning spent sipping coffee, or the joy of witnessing the natural beauty that surrounds your home, your deck frame will serve as the backdrop for countless cherished moments.
In the realm of DIY and crafts, the construction of a deck frame stands as a testament to the fusion of practical skills, creative vision, and a deep appreciation for the art of transforming raw materials into functional and aesthetically pleasing structures. It is a journey that celebrates the spirit of ingenuity and the joy of creating a space that enriches the lives of those who inhabit it.
So, as you set out to build your own deck frame, may this guide serve as a source of inspiration, guidance, and empowerment. Embrace the process with enthusiasm, and let your creativity and craftsmanship shape an outdoor space that becomes a cherished extension of your home and a canvas for countless moments of joy, relaxation, and connection with the natural world.