
Home>Create & Decorate>DIY & Crafts>DIY Planter Box: Create Your Own Stylish Garden Feature
DIY & Crafts
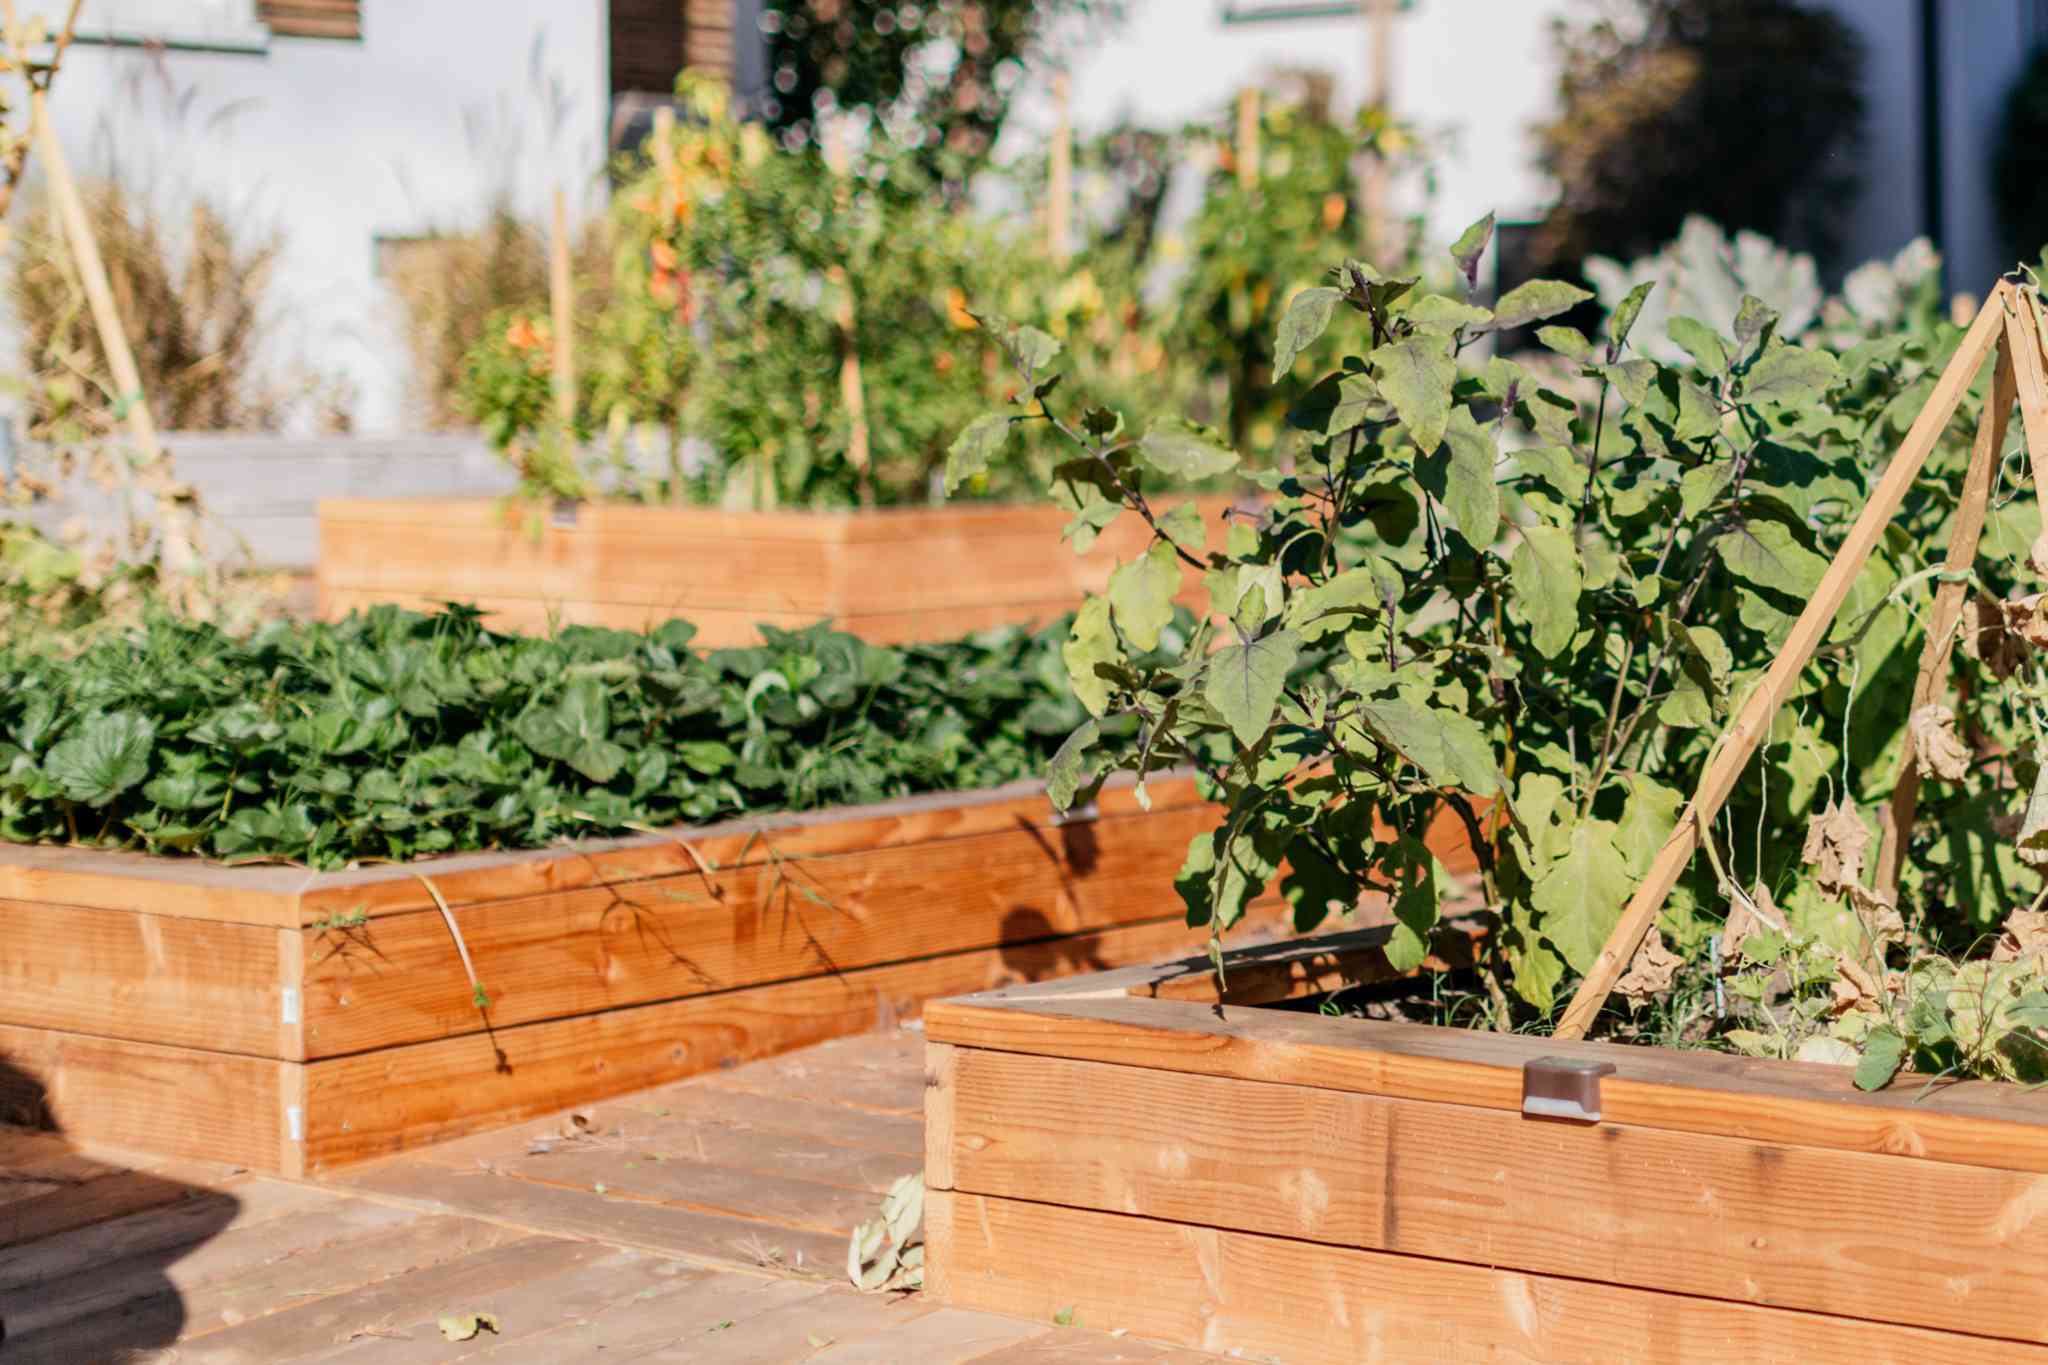
DIY Planter Box: Create Your Own Stylish Garden Feature
Published: February 22, 2024

Senior Editor in Create & Decorate, Kathryn combines traditional craftsmanship with contemporary trends. Her background in textile design and commitment to sustainable crafts inspire both content and community.
Create a stylish garden feature with our DIY planter box ideas. Get inspired to craft your own with our easy DIY & Crafts tutorials.
(Many of the links in this article redirect to a specific reviewed product. Your purchase of these products through affiliate links helps to generate commission for Twigandthistle.com, at no extra cost. Learn more)
Introduction
Are you looking to add a touch of greenery to your living space? A DIY planter box is an excellent way to bring the beauty of nature into your home while showcasing your creativity. Whether you have a spacious backyard, a cozy balcony, or a sunny windowsill, a custom planter box can be tailored to fit any space and style.
Creating your own planter box is not only a rewarding and enjoyable project, but it also allows you to personalize your outdoor or indoor decor. With a few basic materials and tools, you can design a stylish and functional planter box that complements your home's aesthetic and provides a perfect home for your favorite plants and flowers.
In this comprehensive guide, we will walk you through the step-by-step process of building a DIY planter box. From selecting the right materials to assembling and finishing your project, you'll gain the knowledge and confidence to embark on this fulfilling DIY endeavor. Whether you're a seasoned woodworking enthusiast or a novice DIYer, this guide is designed to inspire and empower you to create a stunning garden feature that will be the envy of your friends and neighbors.
So, roll up your sleeves, gather your tools, and let's dive into the world of DIY planter boxes. Get ready to unleash your creativity and elevate your gardening game with a personalized and stylish planter box that will breathe new life into your living space.
Materials and Tools Needed
Before diving into the construction of your DIY planter box, it's essential to gather all the necessary materials and tools. Having everything at hand will streamline the building process and ensure a smooth and enjoyable experience. Here's a comprehensive list of the items you'll need to bring your planter box to life:
Materials:
- Wood: Select high-quality lumber such as cedar, redwood, or pressure-treated pine. These woods are durable and weather-resistant, making them ideal for outdoor use. Ensure that the wood is at least ¾ inch thick to provide stability and longevity for your planter box.
- Screws: Opt for corrosion-resistant screws to assemble the box securely. Stainless steel or coated screws are excellent choices for outdoor projects, as they can withstand exposure to moisture and soil.
- Wood Glue: A reliable wood glue will reinforce the joints of the planter box, adding extra strength and stability to the structure.
- Landscape Fabric: This will line the interior of the planter box, preventing soil from escaping while allowing excess water to drain freely.
- Drainage Material: Gravel or small stones will facilitate proper drainage within the planter box, preventing waterlogging and promoting healthy plant growth.
- Potting Mix: Choose a high-quality potting mix suitable for the specific plants you intend to grow. The right mix will provide essential nutrients and optimal moisture retention for your plants.
- Plants: Select your favorite flowers, herbs, or vegetables to populate your planter box and bring vibrant color and life to your space.
Tools:
- Measuring Tape: Accurate measurements are crucial for ensuring the proper dimensions of your planter box.
- Saw: A handsaw or power saw will be necessary for cutting the wood to the desired lengths.
- Drill: A power drill equipped with the appropriate drill bits will facilitate the assembly of the planter box and the addition of drainage holes.
- Sandpaper: Smooth any rough edges and surfaces of the wood to create a polished and professional finish.
- Paintbrush or Stain Applicator: If you choose to paint or stain your planter box, a brush or applicator will be essential for achieving a flawless and personalized look.
- Work Gloves and Safety Glasses: Protect your hands and eyes during the construction process for a safe and comfortable experience.
By gathering these materials and tools, you'll be well-prepared to embark on your DIY planter box project. With everything in place, you can proceed to the next step of measuring and cutting the wood to begin constructing your stylish and functional garden feature.
Step 1: Measure and Cut the Wood
The first step in creating your DIY planter box is to measure and cut the wood to the desired dimensions. Accurate measurements are crucial for ensuring that the planter box is sturdy, well-proportioned, and visually appealing. Here's a detailed guide to help you navigate through this essential phase of the construction process.
Gather Your Materials and Tools
Before diving into the measurement and cutting process, ensure that you have all the necessary materials and tools at hand. Double-check that you have high-quality wood, a measuring tape, a saw, and safety equipment such as gloves and safety glasses. Having everything ready will streamline the process and minimize interruptions.
Take Precise Measurements
Begin by measuring and marking the wood according to the dimensions of the planter box you envision. Use a measuring tape to determine the lengths of the sides, bottom, and any additional components of the planter box. Ensure that the measurements are precise and consistent to maintain uniformity and symmetry in the final product.
Mark the Cutting Lines
Once the measurements are determined, use a pencil and a straight edge to mark the cutting lines on the wood. Double-check the markings to avoid errors before proceeding to the cutting phase. Clear and accurate markings will guide the saw and help you achieve clean and precise cuts.
Use the Appropriate Saw
Select the appropriate saw based on the thickness and type of wood you are working with. A handsaw or a power saw equipped with a fine-toothed blade is ideal for achieving smooth and accurate cuts. Take your time and exercise caution while cutting the wood to ensure safety and precision.
Double-Check the Cuts
After cutting each piece of wood, double-check the dimensions and angles to ensure that they align with the intended design. Accuracy at this stage will contribute to the seamless assembly of the planter box in the subsequent steps.
By meticulously measuring and cutting the wood, you are laying the foundation for a well-crafted and visually appealing DIY planter box. With precision and attention to detail, you'll soon have the components ready for the next phase of assembling the box.
Step 2: Assemble the Box
With the wood components cut to precision, it's time to bring your DIY planter box to life by assembling the box. This phase marks the transition from individual pieces to a cohesive structure, and attention to detail is paramount to ensure a sturdy and visually appealing outcome.
Lay Out the Pieces
Begin by laying out the cut wood pieces in an organized manner, ensuring that all components are easily accessible. This preparation will streamline the assembly process and allow for a systematic approach to constructing the planter box.
Align and Secure the Sides
Position the side panels of the planter box, ensuring that they are aligned at perfect right angles to the bottom piece. Utilize clamps to hold the pieces in place, providing stability and precision during the assembly. Once aligned, use corrosion-resistant screws and wood glue to securely fasten the sides to the bottom, creating a strong foundation for the planter box.
Add the End Panels
With the sides and bottom securely connected, proceed to attach the end panels to complete the box's structure. Align the end panels with the sides, ensuring uniformity and symmetry in the assembly. Similar to the previous step, utilize clamps, screws, and wood glue to affix the end panels firmly in place, reinforcing the structural integrity of the planter box.
Reinforce the Joints
To further strengthen the box, consider adding additional screws and applying wood glue along the interior joints. This reinforcement will enhance the durability of the planter box, ensuring that it can withstand the weight of the soil and plants while maintaining its shape over time.
Check for Stability
Once the assembly is complete, carefully inspect the planter box for stability and structural soundness. Gently test the box for any wobbling or misalignments, making any necessary adjustments to ensure that the box is level and secure.
Celebrate Your Progress
As you complete the assembly of the planter box, take a moment to celebrate your progress. The transformation of individual wood pieces into a functional and aesthetically pleasing structure is a significant achievement, marking the culmination of meticulous planning and skilled craftsmanship.
By methodically assembling the box, you have laid the groundwork for the next steps of adding drainage holes, sanding, finishing, and ultimately planting your garden. With the box taking shape, the anticipation of seeing it filled with vibrant greenery and blossoming flowers adds to the excitement of the DIY journey.
Step 3: Add Drainage Holes
Proper drainage is essential for the health and vitality of the plants in your DIY planter box. Without adequate drainage, excess water can accumulate in the soil, leading to root rot and other detrimental conditions. Adding drainage holes to your planter box is a critical step that ensures the well-being of your plants and the longevity of your creation.
Determine the Placement
Before drilling the drainage holes, carefully consider the placement to optimize the drainage process. The bottom of the planter box is the ideal location for the holes, as it allows excess water to escape while preventing the soil from becoming waterlogged. Ensure that the holes are evenly spaced to promote uniform drainage throughout the box.
Select the Right Tools
Equipped with a power drill and the appropriate drill bit size, you are ready to create the drainage holes. A drill bit with a diameter of ¼ inch to ½ inch is suitable for most planter boxes, allowing for efficient water drainage without compromising the structural integrity of the box.
Drill with Precision
With the placement determined and the drill ready, carefully and evenly space the holes along the bottom of the planter box. Exercise caution to maintain a consistent distance between the holes, ensuring that the drainage is uniform and effective. As you drill, apply gentle and steady pressure to create clean and precise holes without splintering the wood.
Line the Bottom with Landscape Fabric
To prevent soil from escaping through the drainage holes while still allowing water to flow freely, line the bottom of the planter box with landscape fabric. This barrier will maintain the integrity of the soil while facilitating proper drainage, creating an optimal environment for plant growth.
Test the Drainage
After adding the drainage holes and lining the bottom with landscape fabric, conduct a simple test to ensure that water flows freely through the holes. Pour a small amount of water into the planter box and observe the drainage process. Confirm that the water exits the box smoothly, indicating that the drainage holes are functioning as intended.
By adding drainage holes to your DIY planter box, you have taken a crucial step toward creating a healthy and sustainable environment for your plants. With proper drainage in place, your planter box is now primed to support the growth and flourishing of your chosen greenery, setting the stage for the next phase of sanding and finishing the box.
Step 4: Sand and Finish
With the structural assembly and essential drainage elements in place, the next pivotal step in the creation of your DIY planter box is the sanding and finishing process. This phase not only enhances the visual appeal of the planter box but also contributes to its longevity and resilience in outdoor environments.
Sanding for Smoothness
Begin by meticulously sanding the exterior and interior surfaces of the planter box. Utilize medium-grit sandpaper to smooth any rough edges, uneven surfaces, or imperfections in the wood. Pay particular attention to the corners and edges, ensuring that they are rounded and free of splinters. As you progress, transition to fine-grit sandpaper to achieve a velvety-smooth finish that is pleasing to the touch and visually appealing.
Embracing the Natural Beauty
The choice of whether to leave the wood natural or apply a finish is a personal one. If you opt to retain the natural beauty of the wood, consider using a clear sealant or outdoor wood oil to protect the planter box from the elements while allowing the wood's natural grain and color to shine through. This approach celebrates the organic allure of the wood and creates a timeless and rustic aesthetic that complements a variety of outdoor settings.
Adding a Splash of Color
Alternatively, if you prefer to infuse your planter box with a pop of color or a personalized touch, consider applying an exterior wood stain or paint. Select a high-quality, outdoor-rated product in a hue that resonates with your personal style and complements the surrounding environment. Whether you opt for a classic earthy tone, a vibrant splash of color, or a subtle pastel shade, the application of a stain or paint can transform the planter box into a striking focal point that reflects your unique taste and creativity.
Protecting for Longevity
Whichever finishing option you choose, ensure that it provides protection against moisture, UV rays, and other environmental factors. Apply multiple coats of the chosen finish, following the manufacturer's instructions for proper drying and curing times. This protective layer not only enhances the visual appeal of the planter box but also shields the wood from weather-related damage, extending its lifespan and preserving its beauty for years to come.
By meticulously sanding and thoughtfully finishing your DIY planter box, you are elevating it from a functional structure to a visually captivating and enduring garden feature. The attention to detail and the personalized finish you apply will imbue the planter box with character and charm, setting the stage for the final and most rewarding step: planting your garden and witnessing the fruits of your labor flourish within this custom-crafted masterpiece.
Step 5: Plant Your Garden
With your DIY planter box fully assembled, meticulously sanded, and thoughtfully finished, the time has come to breathe life into this custom-crafted masterpiece by planting your garden. This step marks the culmination of your creative journey, as you transform the once-empty vessel into a vibrant and flourishing oasis of greenery and color.
Selecting the Perfect Plants
Before delving into the planting process, take a moment to consider the types of plants that will thrive in your planter box. Whether you envision a cascading display of colorful flowers, a bountiful herb garden, or a collection of verdant foliage, selecting the right plants is essential for creating a visually stunning and harmonious composition. Consider the sunlight exposure, watering needs, and mature size of the plants to ensure they are well-suited for the environment in which the planter box will reside.
Preparing the Soil
Fill the planter box with a high-quality potting mix that is tailored to the specific needs of your chosen plants. The potting mix should provide essential nutrients, optimal moisture retention, and excellent drainage to support healthy root development and robust growth. As you fill the planter box with the potting mix, distribute it evenly and gently pat it down to create a level surface for planting.
Arranging and Planting
With the soil in place, arrange your selected plants within the planter box, considering their mature size and growth habits. Visualize the composition and balance of colors and textures as you position the plants, creating an arrangement that is visually appealing and complements the overall design of the planter box. Once satisfied with the layout, carefully remove the plants from their containers, loosen the roots, and plant them at the appropriate depth in the potting mix.
Watering and Nurturing
After planting, water the newly introduced greenery thoroughly to ensure that the roots are adequately hydrated. Monitor the moisture levels in the soil and adjust your watering routine based on the specific needs of the plants. As your garden takes root and begins to flourish, provide ongoing care and attention, nurturing the plants with regular watering, occasional fertilization, and diligent maintenance to promote their health and vitality.
Embracing the Beauty
As your garden takes shape within the planter box, step back and admire the beauty that you have cultivated. The vibrant colors, fragrant blooms, and lush foliage breathe new life into your living space, creating a captivating focal point that captivates the senses and uplifts the ambiance. Revel in the joy of witnessing your DIY planter box transform into a living work of art, a testament to your creativity and dedication.
By planting your garden within the DIY planter box, you have not only completed the final step of this fulfilling project but also ushered in a new chapter of natural beauty and tranquility. The personalized touch and care you have invested in this endeavor will continue to yield a bountiful harvest of visual delight and botanical splendor, enriching your surroundings and infusing your living space with the timeless allure of nature's abundance.
Conclusion
In conclusion, the journey of creating your own DIY planter box has been a fulfilling and rewarding experience, culminating in the transformation of raw materials into a stunning garden feature that breathes new life into your living space. From the initial selection of high-quality wood to the meticulous assembly, thoughtful finishing, and the joyous act of planting, every step has been a testament to your creativity, dedication, and craftsmanship.
As you stand back and admire the vibrant garden thriving within the planter box, you witness the harmonious fusion of nature and artistry. The planter box serves as a testament to your ability to craft a functional and visually captivating structure that not only enhances your surroundings but also provides a nurturing home for your chosen greenery.
The DIY planter box stands as a symbol of your commitment to infusing your living space with natural beauty and tranquility. Its presence adds a touch of elegance and charm, creating a focal point that captivates the senses and uplifts the ambiance. The personalized touch and care you have invested in this project continue to yield a bountiful harvest of visual delight and botanical splendor, enriching your surroundings and infusing your living space with the timeless allure of nature's abundance.
Moreover, the process of creating a DIY planter box extends beyond the tangible outcome. It represents a journey of self-expression, creativity, and connection with nature. The act of building and nurturing a garden within the planter box fosters a sense of accomplishment and pride, as you witness the fruits of your labor flourish and thrive.
As you continue to care for your garden and witness its ever-changing beauty, the DIY planter box serves as a constant reminder of your ability to create, nurture, and cultivate. It stands as a testament to the transformative power of hands-on craftsmanship and the enduring allure of nature's wonders.
In the end, the DIY planter box is more than just a garden feature; it is a reflection of your passion for creating a living, breathing masterpiece that enriches your life and brings joy to those who behold it. It is a testament to the timeless art of crafting beauty from simplicity and infusing your surroundings with the vibrant energy of the natural world.