
Home>Create & Decorate>DIY & Crafts>DIY Fire Pit: How To Create Your Own Backyard Oasis
DIY & Crafts
DIY Fire Pit: How To Create Your Own Backyard Oasis
Published: February 28, 2024

Senior Editor in Create & Decorate, Kathryn combines traditional craftsmanship with contemporary trends. Her background in textile design and commitment to sustainable crafts inspire both content and community.
Learn how to build your own DIY fire pit and transform your backyard into a relaxing oasis with our step-by-step guide. Perfect for DIY & Crafts enthusiasts!
(Many of the links in this article redirect to a specific reviewed product. Your purchase of these products through affiliate links helps to generate commission for Twigandthistle.com, at no extra cost. Learn more)
Introduction
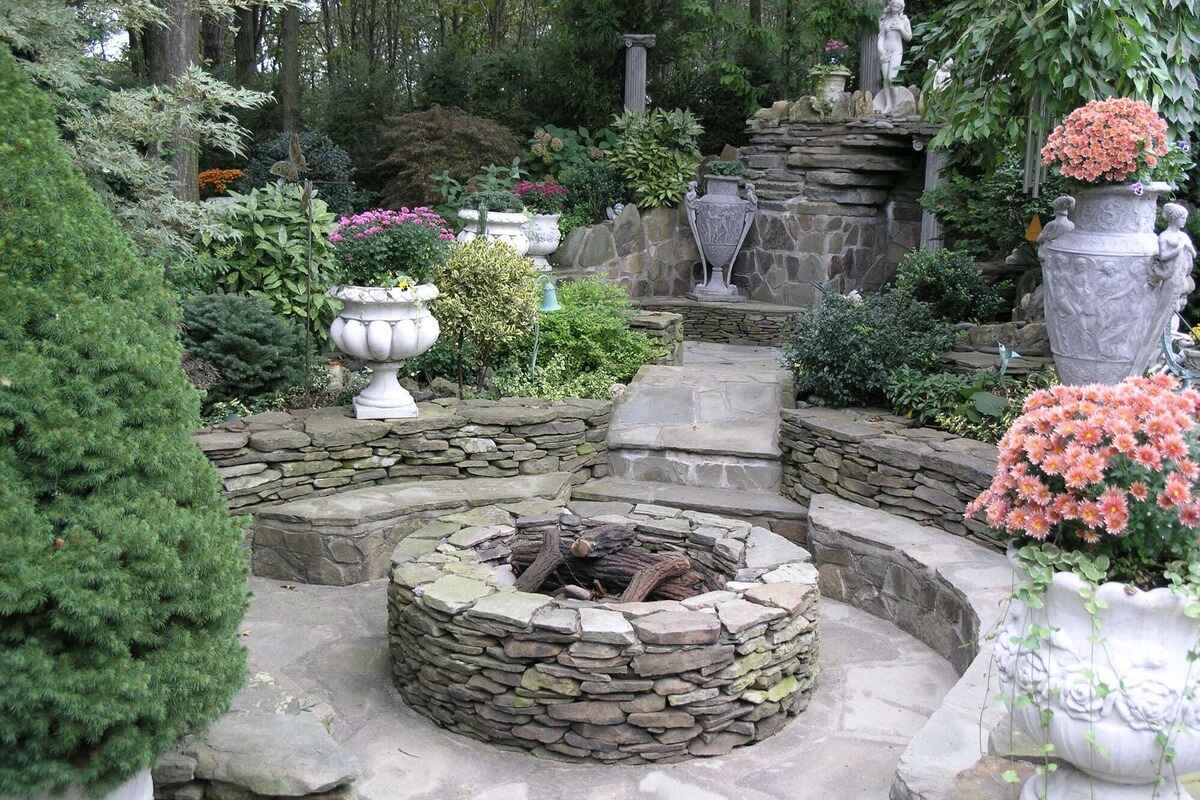
Creating a DIY fire pit in your backyard can transform your outdoor space into a cozy and inviting oasis. Whether you're looking to gather with friends and family for a relaxing evening or simply enjoy the warmth and ambiance of a crackling fire, a fire pit can be the perfect addition to your outdoor living area. Not only does it provide a focal point for gatherings, but it also adds a touch of rustic charm to your backyard.
Building your own fire pit allows you to customize it to fit your specific style and needs. From choosing the perfect location to selecting the materials and design, every step of the process offers an opportunity for creativity and personalization. Additionally, constructing a fire pit can be a rewarding and enjoyable DIY project that brings a sense of accomplishment and pride.
In this comprehensive guide, we will walk you through the step-by-step process of creating your own backyard fire pit. From selecting the ideal location to adding safety features, you'll learn everything you need to know to embark on this exciting DIY endeavor. So, roll up your sleeves, gather your materials, and get ready to embark on a journey to transform your outdoor space into a warm and inviting retreat. Let's dive into the details and bring your vision of a backyard oasis to life!
Step 1: Choosing the Right Location
Selecting the perfect location for your DIY fire pit is crucial to ensure both safety and enjoyment. Here are some key factors to consider when choosing the right spot:
1. Safety First
Safety should always be the top priority when determining the location of your fire pit. Ensure that it is positioned away from any flammable structures, overhanging trees, or low-hanging branches. A safe distance of at least 10 to 20 feet from any buildings or combustible materials is recommended to prevent the risk of accidental fires.
2. Local Regulations
Before breaking ground, it's essential to check local regulations and obtain any necessary permits for building a fire pit. Some areas have specific guidelines regarding the size, location, and fuel type allowed for outdoor fire features. By familiarizing yourself with local regulations, you can avoid potential legal issues and ensure that your fire pit complies with all relevant codes.
3. Wind Direction
Consider the prevailing wind direction in your backyard when choosing the location for your fire pit. Placing it in an area where the wind is less likely to blow smoke toward your home or seating area can significantly enhance the comfort of your outdoor gatherings.
4. Accessibility and Visibility
The location of your fire pit should be easily accessible from your outdoor living space, such as a patio or deck, to encourage frequent use. Additionally, consider the visibility of the fire pit from various vantage points in your backyard to ensure that it becomes a focal point and adds to the overall aesthetic appeal of the outdoor area.
5. Ground Surface
Select a level ground surface for the fire pit to ensure stability and safety. Avoid placing it on uneven or sloping terrain, as this could pose a risk of the fire pit tipping over. Additionally, consider the proximity of the fire pit to any grass or landscaping, as radiant heat from the fire could potentially damage nearby vegetation.
By carefully considering these factors, you can choose the ideal location for your DIY fire pit, setting the stage for a safe, enjoyable, and visually appealing addition to your outdoor space.
Step 2: Gathering Materials and Tools
Gathering the right materials and tools is a crucial step in the process of building a DIY fire pit. By ensuring that you have all the necessary items at the outset, you can streamline the construction process and avoid unnecessary delays. Here's a comprehensive list of materials and tools you'll need to bring your backyard fire pit to life:
Materials:
-
Fire Pit Kit or Individual Components: Depending on your preference, you can either opt for a fire pit kit, which typically includes a metal ring and necessary hardware, or gather individual components such as retaining wall blocks, concrete, or bricks to construct the fire pit from scratch.
-
Gravel or Sand: This will serve as the base for your fire pit, providing stability and aiding in drainage.
-
High-Heat Resistant Paint or Sealant: If your fire pit components are made of metal, a high-heat resistant paint or sealant will help protect them from rust and corrosion.
-
Fire Bricks or Pavers: These will be used to line the interior of the fire pit, providing an additional layer of protection and insulation.
-
Leveling Sand or Concrete: This will be essential for creating a stable and level base for your fire pit.
-
Safety Screen or Spark Guard: To enhance safety and prevent embers from escaping, a safety screen or spark guard is recommended.
-
Firewood or Gas Burner Kit: Depending on your preference, gather firewood for a traditional wood-burning fire pit or a gas burner kit for a convenient and clean-burning alternative.
Tools:
-
Shovel: Essential for digging and leveling the ground where the fire pit will be placed.
-
Tape Measure: To ensure accurate dimensions and spacing during the construction process.
-
Level: This tool will help you ensure that the fire pit components are installed evenly and securely.
-
Rubber Mallet: Useful for adjusting the position of bricks or pavers during assembly.
-
Work Gloves: To protect your hands during the construction process.
-
Safety Glasses: Important for eye protection, especially when cutting or chiseling materials.
-
Wheelbarrow or Bucket: For transporting gravel, sand, or concrete to the construction site.
By gathering these materials and tools, you'll be well-equipped to proceed with the construction of your DIY fire pit. With everything in place, you can move on to the exciting phase of building and customizing your backyard oasis.
Step 3: Building the Fire Pit
With the location selected and all the necessary materials and tools at hand, it's time to roll up your sleeves and start building your DIY fire pit. Follow these step-by-step instructions to bring your vision of a cozy backyard oasis to life:
-
Prepare the Base: Begin by clearing the selected area of any debris or vegetation. Use a shovel to dig a shallow, level trench for the base of the fire pit. Fill the trench with a layer of gravel or sand, ensuring it is evenly distributed and compacted to create a stable foundation.
-
Assemble the First Layer: If you're using a fire pit kit, follow the manufacturer's instructions to assemble the first layer of the pit. If you've opted for individual components, arrange the retaining wall blocks, bricks, or stones in a circle to form the base of the fire pit. Use a level to ensure that the first layer is even and well-aligned.
-
Build Upward: Continue stacking the blocks or bricks to create additional layers, ensuring that each layer is securely positioned and level. If using individual components, consider using a high-heat resistant adhesive to bond the materials together and enhance stability.
-
Line the Interior: Once the desired height of the fire pit is reached, line the interior with fire bricks or heat-resistant pavers. This additional layer provides insulation and protection for the base materials.
-
Add the Fire Ring or Burner: If you're constructing a wood-burning fire pit, place the fire ring in the center of the pit, ensuring it is securely positioned. For a gas fire pit, follow the manufacturer's instructions to install the burner kit, connecting it to the gas supply as per safety guidelines.
-
Finishing Touches: Apply a high-heat resistant paint or sealant to any metal components of the fire pit to protect them from the heat and elements. Additionally, consider adding a safety screen or spark guard to prevent embers from escaping.
-
Test the Fire Pit: Before adding the final touches, test the fire pit to ensure that it functions safely and effectively. If using a wood-burning fire pit, ignite a small fire to check for proper ventilation and smoke direction. For gas fire pits, ensure that the burner ignites and functions as intended.
By following these steps, you can successfully build your own fire pit, adding a warm and inviting focal point to your outdoor space. With the construction phase complete, it's time to move on to the final step of adding safety features to ensure that your backyard oasis is both enjoyable and secure.
Step 4: Adding Safety Features
Safety is paramount when it comes to enjoying a fire pit in your backyard oasis. By incorporating essential safety features, you can ensure that your DIY fire pit provides a secure and worry-free environment for gatherings and relaxation. Here's a detailed look at the key safety features to consider adding to your fire pit:
1. Safety Screen or Spark Guard
Installing a safety screen or spark guard over the opening of your fire pit can prevent embers and sparks from escaping, reducing the risk of accidental fires and protecting nearby flammable materials. These protective barriers come in various designs and materials, providing both functionality and aesthetic appeal. When selecting a safety screen, ensure that it is compatible with the size and shape of your fire pit, and that it is made from durable, heat-resistant materials.
2. Clear Signage and Safety Guidelines
Incorporating clear signage and safety guidelines near the fire pit can help educate guests and family members about proper usage and safety protocols. This can include instructions on how to safely start and extinguish a fire, guidelines for keeping a safe distance from the fire pit, and reminders to never leave the fire unattended. By promoting awareness and responsible fire pit etiquette, you can create a safer environment for everyone enjoying the outdoor space.
3. Fire Extinguishing Equipment
Having fire extinguishing equipment readily available near the fire pit is a crucial safety measure. A portable fire extinguisher rated for Class A, B, and C fires should be easily accessible in case of emergencies. Additionally, keeping a bucket of sand or a garden hose nearby can provide an alternative method for quickly extinguishing any unexpected flare-ups or sparks.
4. Proper Ventilation and Airflow
Ensuring proper ventilation and airflow around the fire pit is essential for minimizing smoke accumulation and maintaining a comfortable outdoor environment. If your fire pit is located in a covered or enclosed area, consider incorporating a vent or chimney to direct smoke upward and away from seating areas. Adequate airflow not only enhances safety but also contributes to a more enjoyable and breathable outdoor space.
5. Childproofing Measures
If children frequent your outdoor space, implementing childproofing measures around the fire pit is crucial. This can include installing a sturdy barrier or low fence around the perimeter of the fire pit to prevent accidental contact with the flames or hot surfaces. Educating children about fire safety and establishing clear boundaries around the fire pit area can further enhance the overall safety of your backyard oasis.
By integrating these safety features into your DIY fire pit design, you can create a secure and welcoming environment for outdoor gatherings and relaxation. Prioritizing safety not only provides peace of mind but also ensures that your backyard oasis remains a source of enjoyment for years to come.
Step 5: Enjoying Your Backyard Oasis
With your DIY fire pit successfully built and safety features in place, it's time to bask in the warmth and ambiance of your backyard oasis. Here's how you can make the most of your newly created outdoor haven:
1. Cozy Gatherings
Gather friends and family for memorable evenings around the fire pit. Whether it's roasting marshmallows, sharing stories, or simply enjoying the crackling flames, the fire pit provides the perfect focal point for cozy and intimate gatherings. Arrange comfortable seating around the fire pit to encourage relaxed conversations and bonding moments.
2. Outdoor Dining
Elevate your outdoor dining experience by incorporating the fire pit into your al fresco meals. Whether it's a casual weekend brunch or a festive dinner party, the warm glow of the fire pit adds a touch of enchantment to your dining area. Consider placing a tabletop fire pit nearby for a captivating centerpiece during meals.
3. Relaxation and Reflection
Embrace moments of solitude and relaxation by the fire pit. Whether it's unwinding with a good book, meditating, or simply enjoying the tranquil ambiance, the fire pit offers a serene retreat within your own backyard. Create a dedicated relaxation space near the fire pit with cozy seating and soft lighting for peaceful evenings under the stars.
4. Seasonal Celebrations
Celebrate seasonal festivities and holidays with themed gatherings around the fire pit. From Halloween ghost stories to cozy Christmas gatherings, the fire pit sets the stage for memorable and festive occasions. Consider decorating the surrounding area with seasonal accents to enhance the ambiance and create a magical atmosphere.
5. Stargazing and Night Sky Appreciation
Extend your outdoor enjoyment into the night by stargazing from the comfort of your backyard oasis. The warmth of the fire pit provides the perfect backdrop for admiring the night sky, identifying constellations, and appreciating the beauty of the cosmos. Consider adding comfortable reclining chairs or outdoor loungers for an optimal stargazing experience.
6. Creative Activities
Explore creative activities that can be enhanced by the presence of the fire pit. From outdoor art sessions to acoustic music performances, the fire pit can serve as a captivating backdrop for various artistic and creative pursuits. Encourage guests to share their talents or engage in collaborative projects around the fire pit.
7. Year-Round Enjoyment
Maximize the use of your fire pit throughout the year by adapting to seasonal changes. Cozy up by the fire during chilly autumn evenings, embrace the warmth on crisp winter nights, and savor the gentle breezes of spring and summer. With the right outdoor accessories and heating elements, your backyard oasis can be enjoyed in every season.
By embracing these ideas, you can fully immerse yourself in the pleasures of your DIY fire pit and create lasting memories in your personalized backyard oasis. Whether it's fostering connections with loved ones, finding moments of tranquility, or celebrating life's special occasions, the fire pit becomes the heart of your outdoor sanctuary, enriching your lifestyle and bringing joy to your everyday experiences.