
Home>Create & Decorate>DIY & Crafts>How To Build Shelves Into A Wall
DIY & Crafts
How To Build Shelves Into A Wall
Modified: November 28, 2024

Content Creator specializing in woodworking and interior transformations. Caegan's guides motivate readers to undertake their own projects, while his custom furniture adds a personal touch.
Learn how to easily build shelves into a wall with this DIY & Crafts guide. Transform your space with these simple and stylish shelving ideas.
(Many of the links in this article redirect to a specific reviewed product. Your purchase of these products through affiliate links helps to generate commission for Twigandthistle.com, at no extra cost. Learn more)
Introduction
So, you've been looking at that empty wall in your living room and thinking, "I could really use some extra storage space there." Well, you're in luck because building shelves into a wall is a fantastic way to add both functionality and style to your home. Whether you're a seasoned DIY enthusiast or just starting out, this project is a great way to put your skills to the test and create a custom storage solution that perfectly fits your space. In this guide, we'll walk you through the step-by-step process of building shelves into a wall, from planning and preparation to the finishing touches. Let's roll up our sleeves and get started!
Planning and Preparation
Before you start hammering and sawing, it's crucial to take the time to plan and prepare for your wall shelves project. Here's what you need to do:
-
Assess the Wall: Take a good look at the wall where you intend to install the shelves. Consider the size, location, and any potential obstacles such as electrical outlets or pipes.
-
Determine Shelf Size and Quantity: Decide on the size and number of shelves you want. This will depend on the available space and your storage needs.
-
Gather Tools and Materials: Make a list of all the tools and materials you'll need for the project. This may include a stud finder, level, measuring tape, saw, drill, screws, and the shelf material itself.
-
Check for Permits: Depending on your local regulations, you may need a permit for this type of home improvement project. Check with your local building department to ensure compliance.
-
Create a Detailed Plan: Sketch out a rough design of how you want your shelves to look. Consider factors such as spacing between shelves and the overall aesthetic you want to achieve.
By taking the time to plan and prepare, you'll set yourself up for a smoother and more successful shelf-building experience.
Choosing the Right Materials
When it comes to building shelves into a wall, selecting the right materials is essential for both the structural integrity and the overall aesthetic of the project. Here are some key considerations when choosing materials for your wall shelves:
-
Wood: Opting for high-quality, sturdy wood is crucial for the durability of your shelves. Hardwoods such as oak, maple, or cherry are excellent choices for a classic and timeless look, while pine and plywood offer affordability without compromising on strength.
-
Shelving Brackets: The brackets that support your shelves are just as important as the shelves themselves. Look for heavy-duty metal brackets that can bear the weight of your chosen items without bending or warping. Consider the style of the brackets as well, as they can add a decorative touch to your shelves.
-
Wall Anchors and Screws: Depending on the type of wall you're working with, you may need wall anchors to ensure a secure installation. Choose screws that are appropriate for the type of material in your wall, whether it's drywall, plaster, or masonry.
-
Finishing Materials: If you plan to paint or stain your shelves, be sure to select the appropriate finishing materials. Sandpaper, wood stain, paint, and varnish are all essential for achieving the desired look and protecting the wood from wear and tear.
-
Decorative Elements: If you want to add a personal touch to your shelves, consider decorative elements such as trim, molding, or decorative hardware. These details can elevate the overall appearance of your shelves and tie them in with the existing decor of the room.
By carefully selecting the right materials for your wall shelves, you can ensure that they not only serve their practical purpose but also enhance the visual appeal of your living space.
Measuring and Marking the Wall
Before you start cutting and installing your shelves, precise measurements and accurate markings are crucial for a successful outcome. Here's how to tackle this important step:
-
Measure the Wall: Use a measuring tape to determine the exact dimensions of the wall where the shelves will be installed. Take into account any baseboards, moldings, or other obstacles that may affect the placement of the shelves.
-
Locate Wall Studs: Use a stud finder to locate the wall studs. Securing the shelves to the studs will provide the necessary support for holding the weight of the items you plan to place on them. Mark the stud locations with a pencil.
-
Determine Shelf Placement: Based on your initial plan, decide on the height and spacing of the shelves. Use a level to ensure that the markings for each shelf are straight and even.
-
Mark the Shelf Outlines: Using a pencil, mark the outlines of each shelf on the wall. This will give you a visual guide for where to cut and install the shelf supports.
-
Double-Check Measurements: Before proceeding to the next step, double-check all measurements and markings to ensure accuracy. It's much easier to make adjustments at this stage than after the shelves are installed.
By taking the time to measure and mark the wall meticulously, you'll lay the groundwork for a seamless and professional-looking shelf installation.
Cutting and Installing the Shelves
Now comes the exciting part – cutting and installing the shelves. This step requires precision and careful attention to detail to ensure that your shelves fit perfectly and are securely attached to the wall. Here's how to tackle this crucial phase of the project:
-
Cut the Shelves: Using a saw appropriate for the type of wood you've chosen, carefully cut the shelves to the dimensions you measured and marked earlier. Take your time and use a steady hand to achieve clean, straight cuts.
-
Install the Shelf Supports: Depending on the design of your shelves, you may use brackets, cleats, or other support systems. Secure the supports to the wall, making sure to attach them to the previously marked stud locations for maximum stability.
-
Place the Shelves: With the supports in place, carefully position the shelves on top of them. Ensure that each shelf is level and sits securely on the supports. Use a level to double-check the alignment before proceeding.
-
Secure the Shelves: Once the shelves are in position, use screws to secure them to the supports. Be mindful of the weight capacity of your chosen brackets or supports and distribute the weight of the shelves' contents evenly.
-
Add Reinforcement (Optional): For extra stability, especially for longer shelves or heavy items, consider adding additional reinforcement such as L-brackets or corner braces. These can provide added support and peace of mind.
-
Finishing Touches: If you plan to paint or stain the shelves, now is the time to apply the finishing touches. Sand any rough edges, apply the chosen finish, and allow ample time for it to dry before placing items on the shelves.
By following these steps, you'll successfully cut and install your shelves, creating a functional and visually appealing storage solution that seamlessly integrates with your wall.
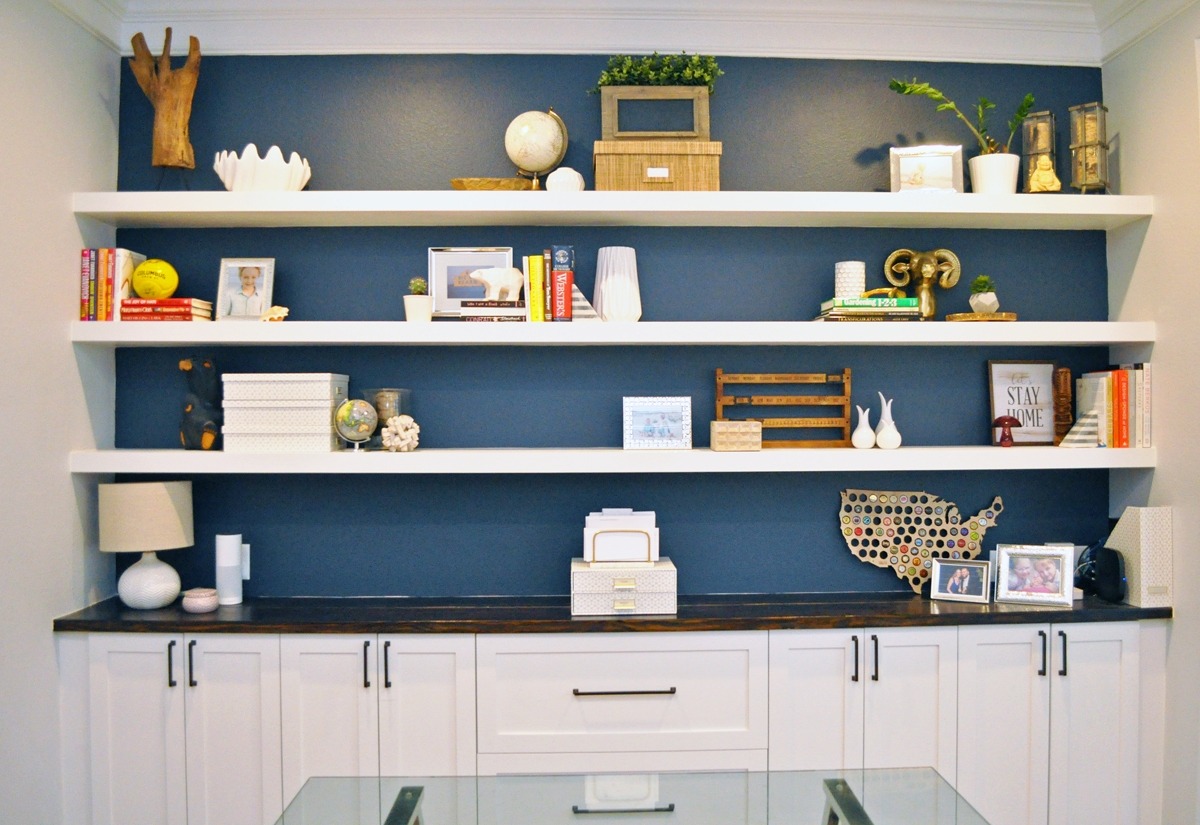
Finishing Touches and Decoration
Once the shelves are securely installed, it's time to add the finishing touches and inject some personality into your newly created storage space. Here's how to elevate the visual appeal of your wall shelves:
-
Paint or Stain: If you opted for unfinished wood or want to change the color of your shelves, now is the perfect time to apply paint or stain. Choose a color that complements the existing decor of the room and apply it evenly for a professional finish.
-
Trim and Molding: Consider adding decorative trim or molding to the front edge of the shelves for a polished look. This can also help conceal any gaps between the shelves and the wall, giving them a custom-built appearance.
-
Accessorize: Once the shelves are in place, it's time to add some decorative elements. Whether it's framed photos, potted plants, or stylish knick-knacks, accessorizing your shelves can bring them to life and make them an eye-catching feature of the room.
-
Lighting: For a touch of drama and functionality, consider incorporating lighting into your shelves. LED strip lights or small, battery-operated puck lights can be discreetly installed to illuminate the items on display and create a warm ambiance.
-
Organizational Containers: If your shelves are intended for practical storage, consider adding baskets, bins, or decorative boxes to keep items organized and visually appealing. This is especially useful for open shelving in kitchens or living areas.
-
Personal Touches: Don't forget to infuse your own personal style into the shelves. Whether it's a collection of vintage books, handmade pottery, or travel souvenirs, incorporating items that reflect your personality will make the shelves feel like a curated display rather than just a storage solution.
By paying attention to these finishing touches and decoration ideas, you can transform your wall shelves from a basic storage feature into a visually stunning and functional focal point in your home.
Conclusion
In conclusion, building shelves into a wall is a rewarding DIY project that can enhance both the functionality and aesthetics of your living space. By carefully planning and preparing, choosing the right materials, measuring and marking the wall accurately, cutting and installing the shelves with precision, and adding the finishing touches, you can create a custom storage solution that perfectly suits your needs and complements your home decor. Whether you're looking to display cherished items, organize everyday essentials, or simply add a decorative element to your walls, the process of building shelves into a wall allows for creativity, customization, and a sense of accomplishment. So, roll up your sleeves, gather your tools, and get ready to transform that empty wall into a stylish and practical storage feature that you can be proud of.