Home>Create & Decorate>DIY & Crafts>DIY Furniture Building: Create Your Own Custom Pieces

DIY & Crafts
DIY Furniture Building: Create Your Own Custom Pieces
Published: April 9, 2024

Senior Editor in Create & Decorate, Kathryn combines traditional craftsmanship with contemporary trends. Her background in textile design and commitment to sustainable crafts inspire both content and community.
Discover the joy of DIY furniture building with our expert tips and tutorials. Create unique, custom pieces for your home with our DIY & Crafts projects.
(Many of the links in this article redirect to a specific reviewed product. Your purchase of these products through affiliate links helps to generate commission for Twigandthistle.com, at no extra cost. Learn more)
Introduction
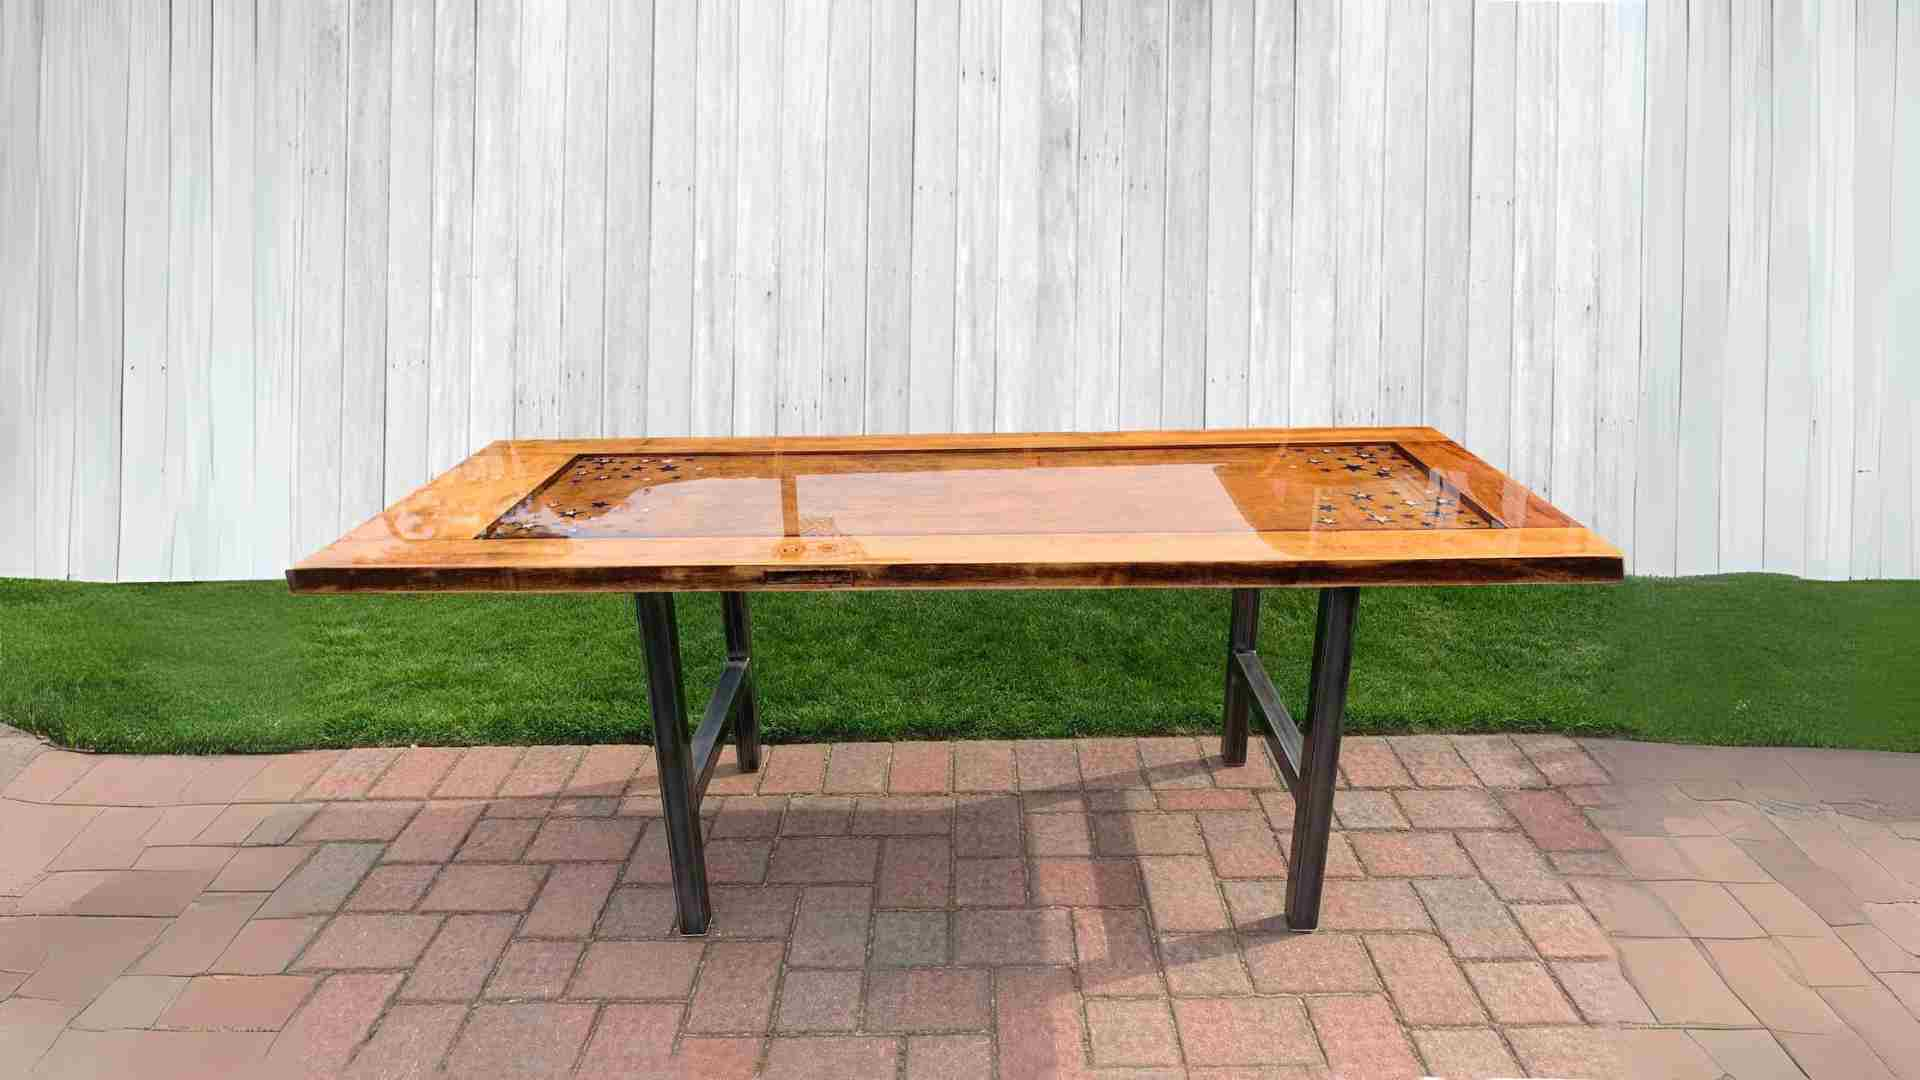
Are you tired of searching for the perfect furniture piece that fits your style and space? Why not create your own custom furniture instead? DIY furniture building allows you to unleash your creativity and build unique pieces that perfectly match your vision. Whether you're a seasoned woodworker or a beginner looking for a new project, crafting your own furniture can be a rewarding and cost-effective endeavor. In this article, we'll guide you through the process of DIY furniture building, from choosing the right materials to putting the finishing touches on your custom creations. Let's dive in and discover how you can bring your furniture design ideas to life!
Read more: How to Build a DIY Couch
Choosing the Right Materials
When embarking on a DIY furniture building project, selecting the right materials is crucial to the success and longevity of your custom piece. Here are some key considerations to keep in mind:
1. Wood Selection
Choosing the type of wood for your furniture is a critical decision. Hardwoods like oak, maple, and cherry are durable and lend a classic look to your piece. Softwoods such as pine and cedar are more affordable and can be stained to mimic the appearance of hardwood.
2. Hardware and Fasteners
Selecting high-quality hardware and fasteners is essential for ensuring the structural integrity of your furniture. Invest in sturdy screws, bolts, and brackets that are appropriate for the weight and function of your piece.
3. Decorative Elements
If your design includes decorative elements such as trim, molding, or embellishments, consider the aesthetic appeal and compatibility with the overall style of your furniture. Choose materials that complement the wood and enhance the visual appeal of the piece.
Read more: How to Build a DIY Hutch
4. Finishing Supplies
Don't overlook the importance of finishing supplies such as sandpaper, wood glue, and wood stain or paint. These materials play a significant role in achieving a professional-looking finish for your custom furniture.
By carefully considering these factors and selecting high-quality materials, you can set the foundation for a successful DIY furniture building project.
Designing Your Custom Piece
Designing your custom furniture piece is where your creativity truly takes center stage. Whether you're envisioning a sleek modern coffee table or a rustic farmhouse dining table, the design phase sets the tone for the entire project. Here are some essential steps to consider when bringing your furniture design ideas to life:
-
Inspiration and Research
Before diving into the design process, gather inspiration from various sources such as interior design magazines, online platforms like Pinterest, or even by visiting furniture stores. Take note of the styles, shapes, and features that resonate with you and align with your vision for the custom piece. -
Sketching and Planning
Start by sketching out your design ideas on paper. Consider the dimensions, proportions, and functionality of the furniture piece. This initial planning phase allows you to visualize the final product and make necessary adjustments before moving on to the construction phase. -
Consider Functionality
Think about how the furniture will be used in your space. Will it serve a specific purpose, such as storage or seating? Ensuring that the design aligns with the intended functionality is crucial for creating a piece that not only looks great but also serves its purpose effectively. -
Customization and Personalization
One of the most exciting aspects of DIY furniture building is the ability to customize the piece to your preferences. Whether it's adding unique details, incorporating personalized engravings, or choosing a specific wood grain pattern, infusing your personality into the design makes the piece truly one-of-a-kind. -
Seeking Feedback
Consider sharing your design sketches with friends, family, or online communities to gather feedback. Constructive input from others can provide valuable insights and help refine your design before you begin the building process.
By carefully considering these steps and allowing your creativity to flourish, you can craft a custom furniture design that reflects your style, meets your needs, and becomes a standout feature in your home.
Tools and Equipment Needed
When undertaking a DIY furniture building project, having the right tools and equipment is essential for achieving professional results. Here's a comprehensive list of the tools and equipment you'll need to bring your custom furniture piece to life:
-
Measuring Tools: Accurate measurements are crucial in furniture building. Invest in a quality tape measure, combination square, and straight edge to ensure precision in your cuts and assembly.
-
Cutting Tools: A reliable circular saw or table saw is essential for cutting wood to the desired dimensions. Additionally, a miter saw or handsaw can be used for angled cuts and trim work.
-
Joinery Tools: Depending on your design, you may need tools for creating joinery such as a pocket hole jig, doweling jig, or biscuit joiner. These tools enable you to create strong and seamless connections between wood pieces.
-
Drilling and Fastening Tools: A power drill with a variety of drill bits is indispensable for creating pilot holes and driving screws. Consider investing in a cordless drill for convenience and maneuverability.
-
Sanding Equipment: Achieving a smooth and polished finish requires sanding. A random orbital sander or sanding block, along with sandpaper of various grits, will help you prepare the wood surfaces for staining or painting.
-
Clamps and Assembly Tools: Clamps are essential for holding wood pieces together during assembly. Having a selection of bar clamps, pipe clamps, and spring clamps allows for flexibility in securing different parts of the furniture.
-
Finishing Tools: For applying wood stain or paint, brushes and foam rollers are necessary. Additionally, a wood finish applicator can help achieve an even and consistent coat of finish.
-
Safety Gear: Prioritize safety by wearing protective gear such as safety goggles, ear protection, and a dust mask. These items safeguard you from potential hazards and ensure a safe working environment.
By equipping yourself with these essential tools and equipment, you'll be well-prepared to tackle your DIY furniture building project with confidence and precision.
Step-by-Step Building Instructions
Now that you've gathered your materials, designed your custom piece, and equipped yourself with the necessary tools, it's time to dive into the step-by-step building process. Follow these detailed instructions to bring your DIY furniture project to fruition:
-
Prepare Your Workspace: Clear a spacious and well-lit area for your woodworking activities. Ensure that your work surface is level and stable to provide a safe and conducive environment for building.
-
Cutting and Shaping: Begin by carefully measuring and marking the wood according to your design specifications. Use your cutting tools, such as a circular saw or table saw, to make precise cuts. If your design includes angled cuts or intricate shapes, utilize a miter saw or jigsaw for accuracy.
-
Joinery and Assembly: Depending on your design, employ the appropriate joinery techniques to connect the wood pieces. Whether it's using pocket hole screws, dowels, or traditional mortise and tenon joints, ensure that the connections are secure and aligned.
-
Sanding and Smoothing: Once the assembly is complete, thoroughly sand all surfaces of the furniture piece. Start with a coarse grit sandpaper to remove any rough edges or imperfections, then progress to finer grits for a smooth and polished finish.
-
Finishing Touches: Apply your chosen wood finish, whether it's a stain, paint, or clear coat. Use brushes or foam rollers to ensure an even application, and follow the manufacturer's instructions for drying and curing times.
-
Hardware Installation: If your custom piece requires hardware such as drawer pulls, hinges, or decorative accents, carefully install these elements to complete the functionality and aesthetics of the furniture.
-
Quality Check: Once the finishing touches are in place, conduct a thorough quality check. Ensure that all joints are secure, the surfaces are smooth, and the overall construction meets your design expectations.
By following these step-by-step building instructions with precision and attention to detail, you'll be able to create a stunning custom furniture piece that reflects your craftsmanship and creativity.
Read more: DIY Buffet Table: How to Build Your Own
Finishing and Staining Your Furniture
When it comes to adding the final touches to your custom furniture piece, the finishing and staining process plays a pivotal role in enhancing its appearance and protecting the wood. Here's a detailed guide to achieving a professional finish for your DIY furniture:
-
Surface Preparation: Before applying any finish, it's essential to prepare the wood surface. Start by thoroughly sanding the entire piece with progressively finer grits of sandpaper. This process helps to smooth out imperfections, remove any blemishes, and create a clean canvas for the finish.
-
Choosing the Right Finish: There are various options for finishing your furniture, including wood stains, paints, varnishes, and oils. Each type of finish offers distinct benefits in terms of color enhancement, durability, and protection. Consider the aesthetic you want to achieve and the level of maintenance you're willing to commit to when selecting the appropriate finish.
-
Applying Wood Stain: If you opt for a stained finish to enhance the natural beauty of the wood, carefully apply the wood stain using a brush or cloth. Ensure even coverage and work in the direction of the wood grain to achieve a consistent color. Allow the stain to penetrate the wood for the recommended duration before wiping off any excess.
-
Sealing with Varnish or Polyurethane: To protect the stained or natural wood, consider applying a clear varnish or polyurethane finish. These protective coatings provide a durable and water-resistant layer that safeguards the wood from moisture, scratches, and UV damage. Apply multiple thin coats, sanding lightly between each coat for a smooth and lustrous finish.
-
Using Paint Finishes: If you prefer a painted finish for your furniture, select a high-quality wood paint that complements your design. Apply the paint evenly with a brush or roller, ensuring full coverage and smooth strokes. Consider adding multiple coats for a rich and vibrant color, allowing each coat to dry completely before applying the next.
-
Natural Oil Finishes: For a more natural and matte appearance, consider using oils such as tung oil or linseed oil. These finishes penetrate the wood, enhancing its natural grain and providing a low sheen. Apply the oil liberally, allowing it to soak into the wood before wiping off any excess and allowing it to cure.
-
Protective Measures: Regardless of the finish you choose, it's crucial to protect your work surface and apply the finish in a well-ventilated area. Additionally, follow the manufacturer's instructions for drying and curing times to ensure the finish sets properly.
By carefully selecting and applying the appropriate finish for your custom furniture piece, you can elevate its visual appeal, protect it from wear and tear, and create a stunning addition to your home decor.
Tips for Success
-
Plan Thoroughly: Before diving into your DIY furniture building project, take the time to plan every aspect, from the design and materials to the building process. A well-thought-out plan can help you anticipate challenges and ensure a smoother construction journey.
-
Invest in Quality Tools: While it may be tempting to cut costs on tools, investing in high-quality tools and equipment can make a significant difference in the outcome of your project. Quality tools not only enhance precision but also contribute to the safety and durability of your furniture.
-
Practice Precision: Accurate measurements and precise cuts are fundamental to the success of your furniture piece. Take your time to measure twice and cut once, ensuring that each component fits together seamlessly.
-
Embrace Patience: DIY furniture building is a labor of love that requires patience. From the design phase to the finishing touches, embracing patience allows you to focus on the details and achieve a professional result.
-
Seek Guidance and Resources: Don't hesitate to seek guidance from woodworking books, online tutorials, or local woodworking communities. Learning from experienced individuals and accessing valuable resources can provide insights and solutions to any challenges you may encounter.
-
Prioritize Safety: Safety should always be a top priority in any DIY project. Use protective gear, follow safety guidelines for tools, and maintain a clean and organized workspace to minimize the risk of accidents.
-
Test Assembly Before Finalizing: Before applying finishes or making permanent connections, conduct a test assembly of your furniture piece. This allows you to identify any potential issues and make adjustments before finalizing the construction.
-
Embrace Imperfections: Woodworking is an art, and embracing the natural imperfections of wood can add character to your custom piece. Don't be discouraged by minor flaws, as they can contribute to the unique charm of your creation.
-
Celebrate Milestones: Celebrate each milestone in your DIY furniture building journey, whether it's completing a challenging joint, achieving a smooth finish, or assembling the final piece. Recognizing your progress can keep you motivated and inspired throughout the project.
-
Enjoy the Process: Above all, enjoy the process of creating something with your own hands. Embrace the learning experience, relish the satisfaction of overcoming obstacles, and take pride in the unique furniture piece you've brought to life.
Conclusion
Embarking on a DIY furniture building journey opens up a world of creativity, craftsmanship, and personalization. From choosing the right materials to adding the finishing touches, each step in the process contributes to the creation of a unique and custom furniture piece that reflects your style and vision. By following the comprehensive guidelines provided in this article, you have gained valuable insights into the art of DIY furniture building. Whether you're a seasoned woodworker or a novice enthusiast, the satisfaction of crafting your own furniture and witnessing your designs come to life is a rewarding experience. As you apply the tips, techniques, and step-by-step instructions, may your DIY furniture projects bring joy, functionality, and a touch of handmade artistry to your living spaces. Embrace the journey, celebrate your achievements, and continue to explore the endless possibilities of creating your own custom furniture.


