
Home>Create & Decorate>DIY & Crafts>How To Build A Small Deck For Above Ground Pool
DIY & Crafts
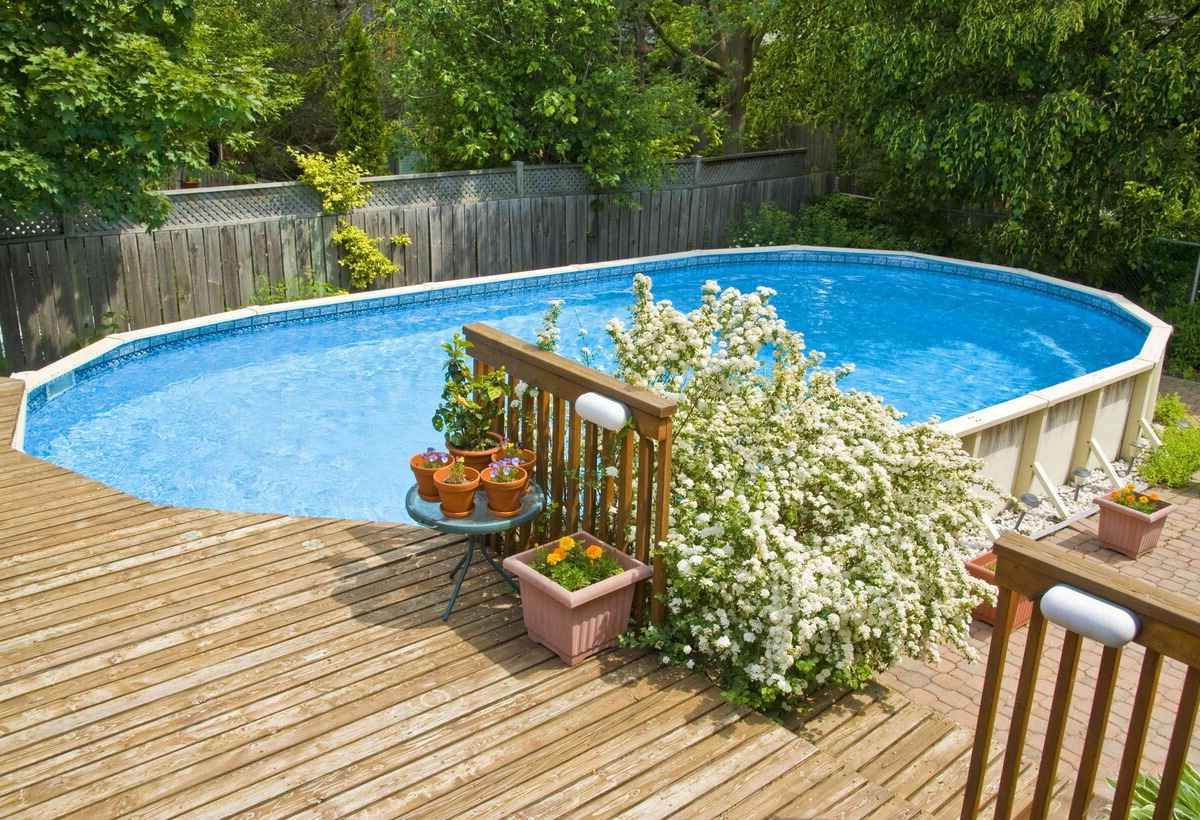
How To Build A Small Deck For Above Ground Pool
Published: February 23, 2024

Content Creator specializing in woodworking and interior transformations. Caegan's guides motivate readers to undertake their own projects, while his custom furniture adds a personal touch.
Learn how to create a DIY small deck for your above ground pool with our easy-to-follow guide. Enhance your outdoor space with this fun and practical project!
(Many of the links in this article redirect to a specific reviewed product. Your purchase of these products through affiliate links helps to generate commission for Twigandthistle.com, at no extra cost. Learn more)
Introduction
Building a small deck for an above ground pool can transform your outdoor space into a relaxing oasis where you can unwind, entertain guests, and create lasting memories with your loved ones. Whether you're a seasoned DIY enthusiast or a novice looking to embark on a fulfilling project, constructing a deck for your above ground pool can be a rewarding endeavor that adds both aesthetic appeal and functionality to your backyard.
By following a well-thought-out plan and utilizing the right materials and tools, you can create a sturdy and visually appealing deck that complements your pool and enhances the overall ambiance of your outdoor area. From the initial planning and preparation to the final touches, each step in the construction process plays a crucial role in ensuring that your small deck is not only structurally sound but also visually appealing and conducive to relaxation and enjoyment.
Throughout this comprehensive guide, we will walk you through the step-by-step process of building a small deck for your above ground pool. From gathering the necessary materials and tools to constructing the frame, installing the decking, and adding finishing touches, you will gain valuable insights and practical tips to help you navigate each phase of the construction process with confidence and precision.
Whether you envision a cozy space for lounging by the poolside, a platform for hosting outdoor gatherings, or a seamless extension of your outdoor living area, the possibilities for customization and personalization are endless. With careful planning and attention to detail, you can bring your vision to life and create a captivating outdoor retreat that reflects your unique style and meets your specific needs.
Embark on this exciting journey with us as we delve into the intricacies of building a small deck for your above ground pool. Get ready to unleash your creativity, hone your DIY skills, and embark on a fulfilling project that will elevate the allure and functionality of your outdoor space.
Step 1: Planning and Preparation
Before diving into the construction of your small deck for the above ground pool, meticulous planning and thorough preparation are essential to set the stage for a successful and seamless building process. This initial phase lays the groundwork for the entire project, ensuring that you have a clear vision, a well-defined strategy, and all the necessary resources at your disposal.
Design Considerations
Begin by envisioning the layout and design of your small deck. Consider factors such as the size and shape of your pool, the desired seating or lounging areas, and any additional features you wish to incorporate, such as built-in benches or planters. Take into account the natural flow of foot traffic and the relationship between the deck and the pool to optimize both functionality and aesthetics.
Legal and Safety Compliance
Check local building codes and regulations to ensure compliance with any requirements related to deck construction, safety standards, and property boundaries. Obtain any necessary permits or approvals before proceeding with the project to avoid potential setbacks or legal issues down the line.
Site Preparation
Evaluate the terrain surrounding your above ground pool to identify any potential challenges or considerations. Clear the area of any debris, vegetation, or obstacles that may impede the construction process. Take accurate measurements and assess the ground for levelness to determine the precise dimensions and placement of the deck.
Material Selection
Research and select suitable materials for your deck, taking into account factors such as durability, weather resistance, and aesthetic appeal. Consider options such as pressure-treated lumber, composite decking, or PVC decking, weighing the pros and cons of each material based on your specific preferences and budget.
Budgeting and Timeline
Establish a realistic budget for the project, factoring in the cost of materials, tools, and any professional assistance that may be required. Create a timeline that outlines the various stages of construction, allowing for flexibility and accounting for potential delays or unforeseen challenges.
Collaborate and Seek Inspiration
Engage in discussions with family members, friends, or professionals to gather diverse perspectives and valuable insights. Explore online resources, home improvement magazines, and social media platforms to gather inspiration and ideas for the design and layout of your small deck, tailoring it to suit your unique preferences and lifestyle.
By dedicating ample time to meticulous planning and thorough preparation, you will lay a solid foundation for the subsequent stages of the construction process, setting the stage for a smooth and rewarding journey toward bringing your small deck for the above ground pool to fruition.
Step 2: Gathering Materials and Tools
Gathering the necessary materials and tools is a pivotal phase in the construction of a small deck for an above ground pool. By ensuring that you have all the essential components and equipment at your disposal, you can streamline the building process and minimize disruptions, allowing for a more efficient and organized workflow.
Materials
-
Decking Material: Select the appropriate decking material based on your preferences and budget. Options may include pressure-treated lumber, composite decking, or PVC decking, each offering distinct advantages in terms of durability, maintenance, and aesthetic appeal.
-
Support Posts and Beams: Acquire sturdy support posts and beams to form the structural framework of the deck. Opt for pressure-treated lumber or other suitable materials capable of withstanding outdoor elements and supporting the weight of the deck.
-
Hardware: Gather an assortment of galvanized or stainless steel hardware, including screws, nails, and joist hangers, to secure the various components of the deck and ensure structural integrity.
-
Concrete Footings: Depending on the design and size of your deck, procure concrete footings to provide stable and secure support for the support posts, enhancing the overall stability and longevity of the structure.
-
Railing System: If your design incorporates a railing system, obtain the necessary components such as balusters, rails, and post caps, ensuring compliance with safety standards and aesthetic cohesion with the overall design.
-
Waterproofing and Sealant: Invest in a high-quality waterproofing and sealant product to protect the deck from moisture, UV exposure, and general wear and tear, prolonging its lifespan and maintaining its visual appeal.
Tools
-
Power Saw: A reliable power saw, such as a circular saw or miter saw, will facilitate precise and efficient cutting of lumber and decking materials, ensuring accurate dimensions and seamless assembly.
-
Drill/Driver: A versatile drill/driver equipped with appropriate bits will be indispensable for fastening components, drilling pilot holes, and accommodating various hardware requirements throughout the construction process.
-
Level: A sturdy level is essential for verifying the evenness and alignment of the deck components, ensuring a stable and visually pleasing end result.
-
Measuring Tape: Accurate measurements are crucial in every phase of the construction process, making a durable measuring tape an indispensable tool for ensuring precision and consistency.
-
Hammer and Rubber Mallet: These basic yet essential tools will aid in securing fasteners, adjusting components, and ensuring a snug fit during assembly.
By meticulously procuring the required materials and tools, you can set the stage for a smooth and efficient construction process, laying the groundwork for the subsequent phases of building your small deck for the above ground pool.
Step 3: Building the Frame
Building the frame serves as a critical phase in the construction of a small deck for an above ground pool, as it forms the structural backbone that supports the decking and ensures the overall stability and longevity of the deck. By meticulously assembling the frame with precision and attention to detail, you can lay a solid foundation for the subsequent stages of the construction process, setting the stage for a visually appealing and structurally sound end result.
Setting the Support Posts
Begin by marking the locations for the support posts around the perimeter of the pool, ensuring consistent spacing and alignment. Use a post hole digger to excavate holes at each marked location, accounting for the depth required to accommodate concrete footings for added stability. Position the support posts in the excavated holes, ensuring they are plumb and securely anchored in the concrete footings. Utilize temporary bracing to maintain the vertical alignment of the posts as the concrete sets, ensuring a stable and level foundation for the deck.
Installing the Beams and Joists
With the support posts in place, proceed to install the horizontal beams that will form the primary framework of the deck. Secure the beams to the support posts using appropriate hardware, ensuring a level and uniform alignment throughout. Subsequently, install the joists perpendicular to the beams, spacing them according to the design specifications and load requirements. Utilize joist hangers to secure the joists to the beams, promoting structural integrity and even weight distribution across the frame.
Verifying Levelness and Alignment
Utilize a reliable level to verify the horizontal alignment and levelness of the beams and joists, making any necessary adjustments to ensure a uniformly flat and stable framework. Accurate leveling is essential to prevent issues such as uneven decking and structural instability, laying the groundwork for a visually pleasing and structurally robust deck.
Incorporating Additional Features
If your design incorporates built-in benches, planters, or other custom features, this is the ideal stage to integrate them into the frame. Ensure that these elements are seamlessly integrated into the overall framework, enhancing both the functionality and aesthetic appeal of the deck.
By meticulously executing the process of building the frame, you establish a solid foundation for the subsequent phases of constructing your small deck for the above ground pool, paving the way for the installation of the decking and the addition of finishing touches that will bring your vision to life.
Step 4: Installing the Decking
With the frame meticulously constructed, the installation of the decking marks a pivotal phase in bringing your small deck for the above ground pool to fruition. This stage not only enhances the visual appeal of the deck but also contributes to its structural integrity and overall functionality. By methodically laying the decking with precision and attention to detail, you can transform the framework into a welcoming and resilient surface that complements the pool and elevates the outdoor ambiance.
Selecting the Decking Material
Before commencing the installation process, carefully select the appropriate decking material based on your preferences, budget, and desired aesthetic. Whether you opt for traditional pressure-treated lumber, low-maintenance composite decking, or PVC decking known for its durability, each material offers distinct advantages in terms of appearance, longevity, and maintenance requirements. Consider factors such as color, texture, and resistance to moisture and UV exposure, ensuring that the chosen decking material aligns with your vision for the deck.
Preparing and Placing the Deck Boards
Commence the installation by placing the first deck board perpendicular to the joists, ensuring a uniform overhang and consistent spacing between boards. Utilize corrosion-resistant screws or nails to secure the boards to the joists, maintaining a straight and even alignment throughout. Employ a spacer tool to achieve consistent gaps between the deck boards, promoting proper drainage and allowing for natural expansion and contraction of the material in response to environmental factors.
Cutting and Fitting
As you progress with the installation, you may encounter the need to cut deck boards to accommodate the specific dimensions and contours of the deck. Utilize a power saw to make precise cuts, ensuring seamless integration of the boards and a polished finish. Pay meticulous attention to detail when fitting the boards around obstacles such as support posts or custom features, ensuring a snug and visually appealing fit that enhances the overall aesthetic cohesion of the deck.
Securing and Finishing
Upon completing the placement of the deck boards, proceed to secure any loose ends and ensure that all boards are firmly fastened to the joists, promoting stability and longevity. Consider utilizing hidden fastening systems for a sleek and unblemished surface, or opt for visible fasteners that contribute to a rustic or traditional aesthetic, aligning with your design preferences. Finally, apply a high-quality waterproofing and sealant product to protect the decking from moisture, UV exposure, and general wear, safeguarding its visual appeal and structural integrity for years to come.
By meticulously executing the process of installing the decking, you breathe life into the framework, transforming it into a captivating and resilient surface that beckons relaxation and enjoyment. This phase sets the stage for the addition of finishing touches, bringing you one step closer to realizing your vision for a small deck that harmonizes with your above ground pool and enriches your outdoor living experience.
Step 5: Adding Finishing Touches
As you approach the final phase of constructing your small deck for the above ground pool, the addition of finishing touches holds the power to elevate the visual appeal, functionality, and overall ambiance of the outdoor space. This stage presents an opportunity to infuse personality, comfort, and practicality into the deck, transforming it into a captivating retreat that reflects your unique style and enhances your outdoor living experience.
Railing and Balustrades
If your design incorporates a railing system, meticulously install the balusters, rails, and post caps to create a secure and visually appealing perimeter around the deck. Whether you opt for sleek and modern metal balusters or classic wooden railings, ensure that the components are securely fastened and compliant with safety standards, providing a sense of enclosure and refinement to the deck.
Lighting Solutions
Integrate lighting elements to extend the functionality and allure of the deck into the evening hours. Consider options such as solar-powered post lights, LED step lighting, or string lights to create a warm and inviting atmosphere. Strategically placed lighting not only enhances safety and visibility but also adds a touch of enchantment to the outdoor space, allowing you to enjoy the deck long after the sun sets.
Seating and Furnishings
Incorporate comfortable seating options, such as lounge chairs, outdoor sofas, or built-in benches, to create inviting areas for relaxation and socializing. Select weather-resistant furnishings that harmonize with the overall design aesthetic, infusing the deck with comfort and versatility. Consider adding vibrant outdoor cushions, throw pillows, and decorative accents to infuse color and personality into the seating areas.
Greenery and Décor
Introduce potted plants, hanging baskets, or planter boxes to infuse the deck with natural beauty and a touch of tranquility. Select low-maintenance foliage and flowering plants that thrive in outdoor environments, adding a refreshing burst of greenery to the space. Additionally, adorn the deck with decorative elements such as outdoor rugs, lanterns, and weather-resistant artwork to infuse charm and character into the outdoor retreat.
Personalized Touches
Consider incorporating personalized elements that reflect your individual style and preferences. Whether it's a custom-built pergola, a designated grilling area, or a cozy fire pit, infuse the deck with features that cater to your lifestyle and enhance the overall functionality of the space. Embrace the opportunity to tailor the deck to your specific needs, creating a personalized oasis that resonates with your vision for outdoor relaxation and entertainment.
By thoughtfully integrating these finishing touches, you breathe life into the small deck, transforming it into a captivating and multifaceted extension of your outdoor living space. Each element contributes to the overall allure and functionality of the deck, culminating in a harmonious and inviting retreat that beckons you to unwind, entertain, and savor the outdoor experience.
Conclusion
As you reach the culmination of the construction journey, the realization of a small deck for your above ground pool stands as a testament to your dedication, creativity, and craftsmanship. The meticulous planning and preparation, the careful selection of materials and tools, the precise construction of the frame, the artful installation of the decking, and the thoughtful addition of finishing touches have collectively converged to bring your vision to life.
This small deck is more than a mere extension of your outdoor space; it is a reflection of your unique style, a testament to your DIY prowess, and a canvas for countless moments of relaxation and joy. The deck beckons with its inviting seating areas, its enchanting lighting, and its seamless integration with the surrounding landscape. It stands as a testament to the seamless fusion of form and function, offering a versatile platform for leisurely lounging, vibrant gatherings, and tranquil moments of solitude.
With each finishing touch, from the meticulously installed railing system to the carefully selected furnishings and greenery, you have imbued the deck with character, warmth, and practicality. It has evolved into a personalized sanctuary that resonates with your lifestyle and preferences, a space where you can bask in the sun's warmth, savor the serenity of the evening, and create cherished memories with family and friends.
As the deck becomes a focal point of your outdoor oasis, it embodies the spirit of craftsmanship and creativity, serving as a testament to your ability to transform a vision into a tangible and captivating reality. It stands as a reminder of the transformative power of DIY endeavors, the joy of creating something with your own hands, and the fulfillment that comes from shaping your surroundings to align with your aspirations.
As you step onto the completed deck, you are greeted not only by a visually stunning and structurally robust platform but also by a testament to your ingenuity and determination. It is a space where laughter mingles with the rustle of leaves, where the warmth of the sun meets the cool embrace of the evening breeze, and where the simple act of stepping outside becomes an immersive experience in comfort, beauty, and tranquility.
In the end, the small deck for your above ground pool is more than a construction project; it is a testament to the art of transformation, the joy of creation, and the enduring allure of outdoor living. It stands as a beacon of inspiration, inviting you to revel in the fruits of your labor, savor the beauty of your surroundings, and embrace the endless possibilities that unfold when creativity and craftsmanship converge.