
Home>Outdoors & Camping>BBQ & Grill>DIY Smoker: How To Build Your Own Smoker At Home
BBQ & Grill
DIY Smoker: How To Build Your Own Smoker At Home
Published: February 22, 2024

Content Creator for Outdoors & Camping, Sophie turns any yard into a sustainable paradise. Her dedication to DIY outdoor projects and volunteer work in community gardens shares joy and knowledge.
Learn how to build your own DIY smoker at home and take your BBQ and grill game to the next level with our step-by-step guide. Unlock the secrets to creating delicious smoked meats and flavorful dishes.
(Many of the links in this article redirect to a specific reviewed product. Your purchase of these products through affiliate links helps to generate commission for Twigandthistle.com, at no extra cost. Learn more)
Introduction
Are you a barbecue enthusiast who loves the rich, smoky flavor of slow-cooked meats? Have you ever considered building your own smoker at home? With the right materials and a bit of DIY spirit, you can create a custom smoker that suits your specific grilling needs. Whether you're a seasoned pitmaster or a novice backyard chef, embarking on a DIY smoker project can be a rewarding and cost-effective endeavor.
Building your own smoker allows you to tailor the design to your preferences, ensuring that it meets your unique cooking requirements. From the type of heat source to the size and shape of the smoking chamber, every aspect of the smoker can be customized to deliver the results you desire. Additionally, the satisfaction of crafting a functional smoker with your own hands adds an extra layer of enjoyment to the cooking process.
In this comprehensive guide, we will walk you through the step-by-step process of building your own smoker at home. From selecting the right materials to assembling the components, you'll gain valuable insights into the art of DIY smoker construction. Whether you're aiming to smoke succulent ribs, tender brisket, or flavorful vegetables, having a homemade smoker can elevate your outdoor cooking experience to new heights.
By the end of this guide, you'll be equipped with the knowledge and confidence to embark on your DIY smoker project. So, roll up your sleeves, gather your tools, and get ready to embark on a fulfilling journey of creating a personalized smoker that will be the envy of your friends and family at your next backyard barbecue gathering. Let's dive into the exciting world of DIY smoker construction and unleash your creativity in the realm of outdoor cooking.
Materials Needed
Before diving into the construction of your DIY smoker, it's essential to gather the necessary materials and tools. Building a smoker requires a combination of readily available items and some specific components to ensure the functionality and safety of the final product. Here's a comprehensive list of the materials you'll need to kickstart your DIY smoker project:
-
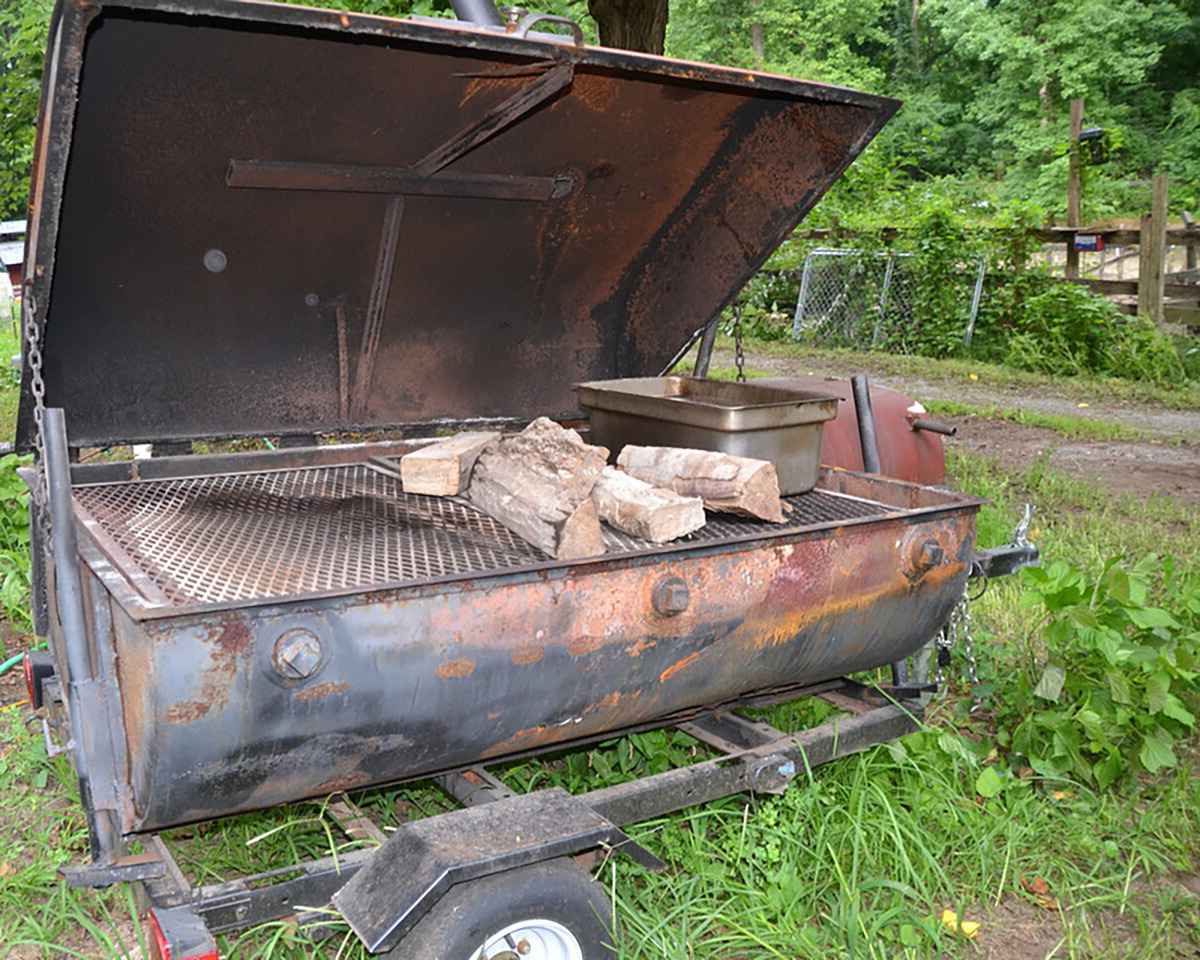
Container: The first and most crucial component is the container that will serve as the smoking chamber. You can repurpose various items such as a steel drum, a large metal box, or even a discarded refrigerator. Ensure that the container is made of durable, heat-resistant material and is spacious enough to accommodate the quantity of food you intend to smoke.
-
Heat Source: To generate the smoke and heat necessary for smoking your favorite meats, you'll need a heat source. This can be in the form of an electric hot plate, a propane burner, or a charcoal basket. The choice of heat source will depend on your preference and the level of control you want over the smoking process.
-
Grates and Hooks: For suspending and cooking the food, you'll need stainless steel grates or racks that fit inside the smoking chamber. Additionally, consider adding hooks for hanging items such as sausages or ribs, maximizing the available space and versatility of your DIY smoker.
-
Thermometer: Monitoring the temperature inside the smoker is crucial for achieving consistent and flavorful results. Invest in a reliable thermometer that can withstand high temperatures and provides accurate readings, allowing you to adjust the heat source as needed.
-
Ventilation Components: Proper airflow is essential for maintaining the ideal smoking conditions. You'll need vents or dampers to regulate the airflow and release excess smoke, preventing the buildup of stale smoke inside the chamber.
-
Insulation Materials: Depending on the type of container you're using, you may need insulation materials to ensure heat retention and stability. This can include heat-resistant gaskets, fireproof caulking, or ceramic insulation blankets.
-
Tools: As with any DIY project, having the right tools is essential. Make sure you have a drill with metal drill bits, a saw for cutting metal if necessary, wrenches, and safety equipment such as gloves and goggles.
By gathering these materials and tools, you'll be well-prepared to embark on the exciting journey of constructing your own smoker. With these essentials in hand, you can move on to the next steps of choosing a design and preparing the container for the transformation into a fully functional DIY smoker.
Step 1: Choosing a Design
Selecting the right design for your DIY smoker sets the foundation for a successful and enjoyable smoking experience. When it comes to choosing a design, several factors come into play, including your cooking preferences, available space, and the materials at your disposal. Here are some popular designs to consider:
Offset Smoker
The offset smoker, also known as a horizontal smoker, features a separate firebox attached to the side of the smoking chamber. This design allows for indirect heat and smoke to flow into the main chamber, enveloping the food in flavorful smoke. Offset smokers are ideal for smoking large cuts of meat and offer excellent heat control, making them a favorite among barbecue enthusiasts.
Vertical Smoker
Vertical smokers, often referred to as bullet smokers or drum smokers, are characterized by their tall, cylindrical shape. These smokers feature a fire pan at the bottom, with multiple racks for food placed above. Vertical smokers are known for their efficient use of space, making them suitable for smaller outdoor areas. They are also relatively easy to assemble and offer consistent heat distribution for even smoking.
Kamado-Style Smoker
Inspired by traditional Japanese kamado cookers, this design features a thick, ceramic shell that retains heat exceptionally well. Kamado-style smokers are versatile, allowing for both smoking and high-temperature grilling. Their efficient insulation and precise temperature control make them a popular choice for barbecue aficionados seeking versatility in their outdoor cooking equipment.
Custom Designs
For those with a creative flair and a penchant for customization, building a custom smoker from scratch offers endless possibilities. Whether repurposing an old appliance or constructing a unique smoking chamber from steel plates, custom designs provide the freedom to tailor the smoker to your specific needs and aesthetic preferences.
When choosing a design, consider factors such as the amount of food you typically smoke, the level of temperature control you desire, and the available space for the smoker. Additionally, think about the aesthetic appeal of the design and how it complements your outdoor cooking area.
By carefully evaluating these considerations, you can select a design that aligns with your cooking style and enhances your overall grilling experience. Once you've chosen a design that resonates with your vision, you can move on to the next step of preparing the container for the transformation into a fully functional DIY smoker.
Step 2: Preparing the Container
Preparing the container for your DIY smoker is a crucial step that sets the stage for the transformation of a simple vessel into a reliable smoking chamber. Whether you've chosen a repurposed steel drum, a discarded refrigerator, or another suitable container, proper preparation is essential to ensure optimal performance and safety.
Cleaning and Inspection
Before diving into the modifications, thoroughly clean the interior and exterior of the container to remove any residues, dirt, or contaminants. This step is particularly important if you're repurposing a used container. Use a mild detergent and a scrubbing brush to eliminate any lingering debris, and rinse the container thoroughly to ensure it's free from any cleaning agents.
Once cleaned, inspect the container for any signs of rust, corrosion, or damage. Address any issues by sanding away rust spots and applying a high-temperature, rust-resistant paint to safeguard the exterior. For containers with dents or structural damage, consider reinforcing weak areas with metal patches or welding, ensuring the integrity of the smoking chamber.
Creating Access Points
To facilitate the smoking process and accommodate essential components, such as the heat source and ventilation, you'll need to create access points on the container. Common access points include the addition of a door or hatch for loading and unloading food, as well as openings for the installation of vents, dampers, and the heat source.
When cutting openings, ensure precision and accuracy to maintain the structural integrity of the container. Use a metal cutting tool appropriate for the container's material, such as a reciprocating saw or angle grinder. Take measurements carefully and mark the areas for cutting before proceeding to create the necessary openings.
Sealing and Insulation
Proper sealing and insulation are vital for maintaining consistent temperatures and maximizing the efficiency of your DIY smoker. Apply a high-temperature silicone sealant around the access points to prevent smoke from escaping and to enhance heat retention. Additionally, consider adding insulation materials, such as fireproof caulking or ceramic insulation blankets, to minimize heat loss and stabilize the internal temperature.
By meticulously preparing the container, you lay the groundwork for a functional and reliable DIY smoker. The attention to detail in cleaning, inspecting, creating access points, and implementing sealing and insulation measures will contribute to the overall performance and longevity of your homemade smoker. With the container prepared, you're ready to progress to the next steps of installing the heat source and adding ventilation to bring your DIY smoker to life.
Step 3: Installing the Heat Source
Installing the heat source is a pivotal stage in the construction of your DIY smoker, as it directly influences the cooking process and the flavor profile of the smoked foods. The choice of heat source, whether it's an electric hot plate, a propane burner, or a charcoal basket, will determine the method of heat generation and the level of control you have over the smoking environment.
Electric Hot Plate
If you opt for an electric hot plate as the heat source for your DIY smoker, ensure that it is rated for outdoor use and can withstand the temperatures required for smoking. To install the hot plate, create a designated space within the smoking chamber where the hot plate can sit securely. This may involve cutting a hole in the container to accommodate the hot plate and wiring it to a suitable power source. Additionally, consider placing a heat-resistant barrier, such as a metal plate, between the hot plate and the interior surface of the container to minimize direct heat exposure.
Propane Burner
For those seeking efficient heat output and precise temperature control, a propane burner is a popular choice for DIY smokers. When installing a propane burner, ensure that it is positioned securely within the firebox or designated area adjacent to the smoking chamber. Connect the burner to a propane tank using a high-quality regulator and hose, following the manufacturer's guidelines for safe installation. It's essential to incorporate a reliable ignition system and a means of adjusting the flame to achieve the desired smoking temperature.
Charcoal Basket
Charcoal baskets offer a traditional and flavorful approach to generating heat and smoke in a DIY smoker. To install a charcoal basket, select a suitable location within the smoking chamber for housing the basket. This area should allow for adequate airflow and easy replenishment of charcoal during extended smoking sessions. Consider incorporating a mechanism for adjusting the airflow to regulate the charcoal burn rate and maintain consistent temperatures throughout the smoking process.
Regardless of the chosen heat source, prioritize safety measures such as proper ventilation to prevent the buildup of carbon monoxide and ensure the efficient release of smoke. Additionally, consider incorporating a heat deflector or baffle to distribute heat evenly within the smoking chamber, promoting uniform smoking and minimizing hot spots.
By thoughtfully installing the heat source, you lay the foundation for precise temperature control and the generation of flavorful smoke, setting the stage for the transformation of raw ingredients into delectably smoked masterpieces. With the heat source in place, the next step involves adding ventilation components to optimize the airflow within your DIY smoker.
Step 4: Adding Ventilation
Proper ventilation is a critical aspect of creating an efficient and controllable smoking environment within your DIY smoker. By strategically adding ventilation components, you can regulate the airflow, maintain optimal combustion conditions, and ensure the consistent circulation of flavorful smoke around the food being smoked.
Vent Placement
When adding ventilation to your DIY smoker, consider the strategic placement of intake and exhaust vents to achieve balanced airflow. Intake vents, typically located near the bottom of the smoking chamber, allow fresh air to enter, fueling the combustion process and promoting the circulation of smoke. Exhaust vents, positioned higher up on the smoker, facilitate the release of stale smoke and regulate the internal temperature. By carefully situating these vents, you can create a natural draft that encourages the steady flow of smoke through the chamber.
Adjustable Dampers
Incorporating adjustable dampers or vents provides the flexibility to fine-tune the airflow and temperature inside the smoker. By manipulating the dampers, you can regulate the intensity of the fire, adjust the smoke production, and maintain the desired cooking temperature. This level of control empowers you to adapt to changing outdoor conditions and achieve consistent results with different types of smoked foods.
Smokestack Design
The design and placement of the smokestack, or chimney, play a crucial role in directing smoke out of the smoker while preventing the intrusion of rain or debris. A well-designed smokestack should extend above the smoking chamber's highest point to create a natural draft that draws smoke upward and away from the food. Additionally, incorporating a rain cap or damper at the top of the smokestack helps prevent water ingress and allows for further control over the smoke release.
Sealing and Leakage Prevention
As you add ventilation components, pay close attention to the sealing of vents and dampers to minimize air leakage. Proper seals prevent the unwanted entry of excess oxygen, which can lead to temperature fluctuations and inefficient fuel consumption. Utilize high-temperature gaskets, heat-resistant silicone, or adjustable latches to create a tight seal, ensuring that the airflow remains regulated and consistent throughout the smoking process.
By thoughtfully integrating ventilation components into your DIY smoker, you establish the foundation for precise temperature control, efficient smoke circulation, and the creation of delectably smoked dishes. The strategic placement of vents, the incorporation of adjustable dampers, and the attention to sealing details contribute to a well-balanced smoking environment that enhances the flavor and texture of your smoked culinary creations. With ventilation in place, your DIY smoker is poised to deliver exceptional results, bringing the art of smoking to life in your outdoor cooking endeavors.
Step 5: Adding Racks and Hooks
The addition of racks and hooks within your DIY smoker is a pivotal step that transforms the empty smoking chamber into a versatile cooking space capable of accommodating a variety of foods. By strategically installing racks and hooks, you create a multi-tiered environment that maximizes the available space and allows for efficient smoking of different types of meats, vegetables, and other culinary delights.
Racks for Versatile Cooking
When adding racks to your DIY smoker, consider the dimensions of the smoking chamber and the types of foods you intend to smoke. Stainless steel racks provide a durable and easy-to-clean surface for placing items such as ribs, brisket, poultry, and seafood. Position the racks at varying heights to accommodate different cooking times and temperature requirements, allowing you to smoke a diverse array of foods simultaneously.
Utilizing Hooks for Hanging
Incorporating hooks within the smoking chamber offers a unique approach to smoking certain foods, particularly items that benefit from hanging and suspending during the smoking process. Sausages, bacon strips, and even whole poultry can be hung from sturdy hooks, allowing the smoke to envelop the items evenly and imparting a rich, smoky flavor throughout. Additionally, utilizing hooks maximizes the available space, enabling you to smoke larger quantities of food without overcrowding the racks.
Customization for Efficiency
Customizing the placement and configuration of racks and hooks allows you to optimize the smoking environment for efficiency and convenience. Consider the size and shape of the foods you frequently smoke, and adjust the positioning of the racks and hooks accordingly. By tailoring the layout to your specific cooking needs, you can streamline the smoking process and achieve consistent, flavorful results with every batch of smoked delicacies.
Maximizing Space and Capacity
The strategic placement of racks and hooks maximizes the available space within the smoking chamber, allowing you to smoke larger quantities of food without compromising on quality. By utilizing the vertical space through multi-tiered racks and hanging hooks, you can capitalize on the smoker's capacity, making it ideal for hosting gatherings and events where a generous spread of smoked dishes is desired.
Enhancing Versatility and Creativity
The addition of racks and hooks not only enhances the functionality of your DIY smoker but also sparks creativity in your outdoor cooking endeavors. Experiment with different arrangements of racks and hooks to discover innovative ways of smoking various foods, and embrace the versatility that this setup offers. Whether you're aiming to smoke traditional barbecue favorites or explore unconventional smoking techniques, the presence of racks and hooks opens the door to a world of culinary possibilities.
By thoughtfully adding racks and hooks to your DIY smoker, you create a dynamic and adaptable cooking space that caters to a wide range of smoking needs. The combination of versatile racks and hanging hooks provides the flexibility to smoke an assortment of foods while maximizing the smoker's capacity. With this essential step completed, your DIY smoker is primed to deliver exceptional results, empowering you to explore the art of smoking with boundless creativity and culinary flair.
Step 6: Testing and Using Your DIY Smoker
With your DIY smoker fully assembled, it's time to embark on an exciting journey of testing and utilizing this custom creation to infuse your culinary creations with rich, smoky flavors. Before diving into the full-fledged smoking experience, it's essential to conduct initial tests to ensure that your smoker operates as intended and delivers the desired results.
Initial Test Run
Begin by conducting an initial test run to gauge the performance of your DIY smoker. Start by preheating the smoker to the desired smoking temperature, allowing it to stabilize for a sufficient duration. Monitor the internal temperature using a reliable thermometer, ensuring that it remains consistent throughout the smoking chamber. This test run serves as an opportunity to identify and address any potential issues related to temperature control, ventilation, or heat distribution.
Wood and Smoke Selection
Selecting the right type of wood for smoking is crucial in imparting distinct flavors to your culinary creations. Experiment with a variety of hardwoods such as hickory, oak, apple, or mesquite to discover unique flavor profiles that complement different foods. Additionally, consider the form of the wood, whether it's chips, chunks, or pellets, to achieve the desired intensity of smoke. By exploring different wood options, you can tailor the smoking experience to suit your preferences and elevate the flavors of your smoked dishes.
Monitoring and Adjusting
During the test run and subsequent smoking sessions, pay close attention to the behavior of your DIY smoker. Monitor the smoke production, airflow, and temperature fluctuations, making adjustments as needed to maintain optimal smoking conditions. By actively engaging with the smoking process and fine-tuning the smoker's settings, you can achieve consistent and flavorful results with each smoking session.
Culinary Creativity
As you gain confidence in the operation of your DIY smoker, unleash your culinary creativity by experimenting with a diverse array of foods. From classic barbecue staples such as ribs, brisket, and pulled pork to innovative choices like smoked cheeses, vegetables, and fruits, the versatility of your DIY smoker allows for endless culinary exploration. Embrace the opportunity to craft unique smoked dishes that reflect your personal tastes and culinary aspirations.
Sharing the Experience
Finally, share the experience of using your DIY smoker with friends, family, and fellow barbecue enthusiasts. Host gatherings or intimate cookouts where you showcase the delectable creations that emerge from your custom smoker. By sharing the fruits of your smoking endeavors, you not only celebrate the art of outdoor cooking but also inspire others to embark on their own DIY smoker projects, fostering a community of passionate grillmasters and pitmasters.
With the testing phase complete and the full potential of your DIY smoker realized, you're poised to embark on a flavorful journey of outdoor cooking adventures. Whether it's a casual weekend barbecue or a special occasion, your DIY smoker stands ready to elevate the culinary experience and delight the palates of all who gather around its fragrant, smoky embrace.
Conclusion
In conclusion, the journey of building your own DIY smoker is a testament to the artistry and ingenuity that define the world of outdoor cooking. From the initial selection of materials to the final stages of testing and utilizing the smoker, every step is infused with creativity, craftsmanship, and a deep appreciation for the flavors that emanate from the smoking chamber.
As you reflect on the process of constructing your DIY smoker, it's evident that this endeavor transcends the mere assembly of components. It represents a personalized expression of your passion for grilling and smoking, as well as a commitment to crafting a culinary tool that aligns with your unique cooking style and preferences.
The DIY smoker you've created embodies versatility, adaptability, and the potential for endless culinary exploration. Its multi-tiered racks and strategically placed hooks offer a canvas for culinary creativity, allowing you to smoke an array of foods with precision and finesse. Whether you're aiming to infuse tender meats with rich, smoky aromas or experiment with unconventional smoking techniques, your DIY smoker stands as a testament to your dedication to the craft of outdoor cooking.
Furthermore, the process of building a DIY smoker fosters a sense of empowerment and accomplishment. As you meticulously prepared the container, installed the heat source, added ventilation, and fine-tuned the details, you honed your skills as a pitmaster and gained a deeper understanding of the intricacies of smoking. This hands-on experience not only enhances your proficiency in using the smoker but also instills a profound sense of pride in the custom creation that now graces your outdoor cooking space.
Moreover, the DIY smoker serves as a catalyst for community and shared experiences. Whether you're hosting gatherings, cookouts, or intimate barbecues, the aromatic allure of your smoker draws friends and family together, creating moments of joy and camaraderie around the tantalizing flavors that emerge from its depths. By sharing the fruits of your smoking endeavors, you inspire others to embark on their own culinary adventures, fostering a community of outdoor cooking enthusiasts united by a shared love for the art of smoking.
In essence, the journey of building and utilizing your DIY smoker transcends the realm of mere construction; it embodies a celebration of craftsmanship, creativity, and the joy of savoring delectably smoked dishes. As you continue to explore the endless possibilities that your DIY smoker offers, may it serve as a steadfast companion on your culinary odyssey, igniting the flames of passion and culinary discovery with every fragrant wisp of smoke.