Home>Create & Decorate>DIY & Crafts>DIY Speaker Box: Step-by-Step Guide To Building Your Own

DIY & Crafts
DIY Speaker Box: Step-by-Step Guide To Building Your Own
Published: February 24, 2024

Content Creator specializing in woodworking and interior transformations. Caegan's guides motivate readers to undertake their own projects, while his custom furniture adds a personal touch.
Learn how to build your own DIY speaker box with our step-by-step guide. Get creative with this fun DIY & Crafts project today!
(Many of the links in this article redirect to a specific reviewed product. Your purchase of these products through affiliate links helps to generate commission for Twigandthistle.com, at no extra cost. Learn more)
Introduction
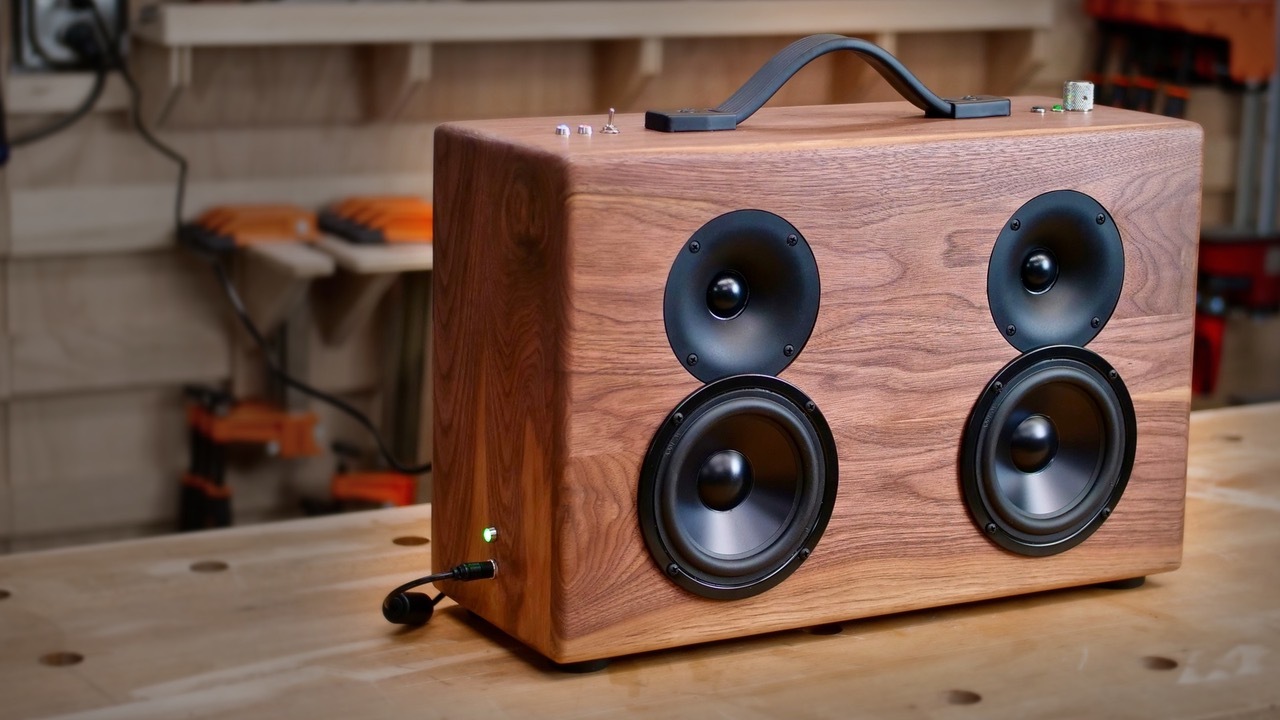
Are you ready to embark on an exciting journey of creating your very own speaker box? Building a DIY speaker box is not only a rewarding and fulfilling project, but it also allows you to customize the sound and design to suit your preferences. Whether you're a music enthusiast, a DIY aficionado, or someone looking to add a personal touch to their audio setup, this step-by-step guide will walk you through the process of constructing a high-quality speaker box from scratch.
By crafting your own speaker box, you have the freedom to tailor the sound output to your liking, experiment with different materials, and unleash your creativity in designing a unique enclosure. This project is an excellent opportunity to delve into the world of audio engineering and woodworking, all while enjoying the satisfaction of creating something functional and aesthetically pleasing.
Throughout this guide, you will learn how to select the right materials and tools, design the speaker box for optimal acoustics, cut and assemble the wood with precision, and install the speaker components with care. Additionally, you will gain insights into wiring the speakers and testing the sound output, ensuring that your DIY creation delivers impressive audio performance.
Whether you're a seasoned DIY enthusiast or a newcomer to the world of woodworking and audio systems, this guide is designed to be accessible and comprehensive. By following each step and embracing the hands-on nature of this project, you'll not only build a speaker box but also gain valuable skills and knowledge that can be applied to future DIY endeavors.
So, roll up your sleeves, gather your tools, and let's dive into the exciting process of crafting your very own DIY speaker box. Get ready to unleash your creativity, elevate your audio experience, and revel in the satisfaction of bringing your custom speaker box to life.
Read more: How to Build an Indoor Window Planter Box
Step 1: Gather Materials and Tools
Before diving into the construction of your DIY speaker box, it's crucial to gather all the necessary materials and tools to ensure a smooth and efficient building process. Here's a comprehensive list of items you'll need to kick-start your speaker box project:
Materials:
- MDF or Plywood: Select high-quality medium-density fiberboard (MDF) or plywood to construct the main body of the speaker box. These materials offer excellent acoustical properties and structural integrity.
- Speaker Drivers: Choose high-performance speaker drivers that align with your audio preferences and system requirements. Consider the size, power handling, and frequency response of the drivers.
- Speaker Box Insulation: Acquire polyfill or acoustic foam to line the interior of the speaker box, enhancing sound quality and reducing resonance.
- Wood Glue: Opt for a reliable wood glue to ensure strong and durable bonds between the wooden panels.
- Screws and Nails: Stock up on screws and nails of various sizes to secure the panels during assembly.
- Speaker Wire: Obtain high-quality speaker wire for connecting the speaker components and ensuring optimal electrical conductivity.
- Finishing Materials: If desired, gather paint, veneer, or laminate to add a decorative finish to the speaker box.
Tools:
- Circular Saw or Table Saw: A reliable saw is essential for cutting the MDF or plywood with precision. Ensure that the blade is suitable for cutting wood.
- Drill and Bits: A power drill with a set of drill bits will be indispensable for creating holes for screws and speaker components.
- Clamps: Invest in a variety of clamps to hold the wood panels securely during assembly, promoting accurate alignment.
- Screwdriver Set: A set of screwdrivers, including Phillips and flat-head types, will be necessary for driving screws into the wood.
- Sanding Tools: Sandpaper or a power sander will aid in smoothing the edges and surfaces of the wooden panels for a professional finish.
- Measuring Tape and Square: Accurate measurements and precise angles are crucial, making a measuring tape and square indispensable tools.
- Safety Gear: Prioritize safety by wearing protective gear, including goggles, gloves, and a dust mask, especially during cutting and sanding.
By ensuring that you have all the required materials and tools at your disposal, you'll be well-prepared to commence the construction of your DIY speaker box. With these essentials in hand, you can proceed to the next step of designing the speaker box to bring your audio vision to life.
Step 2: Designing Your Speaker Box
Designing your speaker box is a critical phase that sets the stage for the overall performance and aesthetics of your DIY creation. By carefully planning the dimensions, internal layout, and porting of the speaker box, you can optimize the acoustics and tailor the sound output to your preferences. Here's a detailed breakdown of the key considerations and steps involved in designing your custom speaker box:
Read more: How to Build Cedar Window Boxes
1. Determine Speaker Box Dimensions:
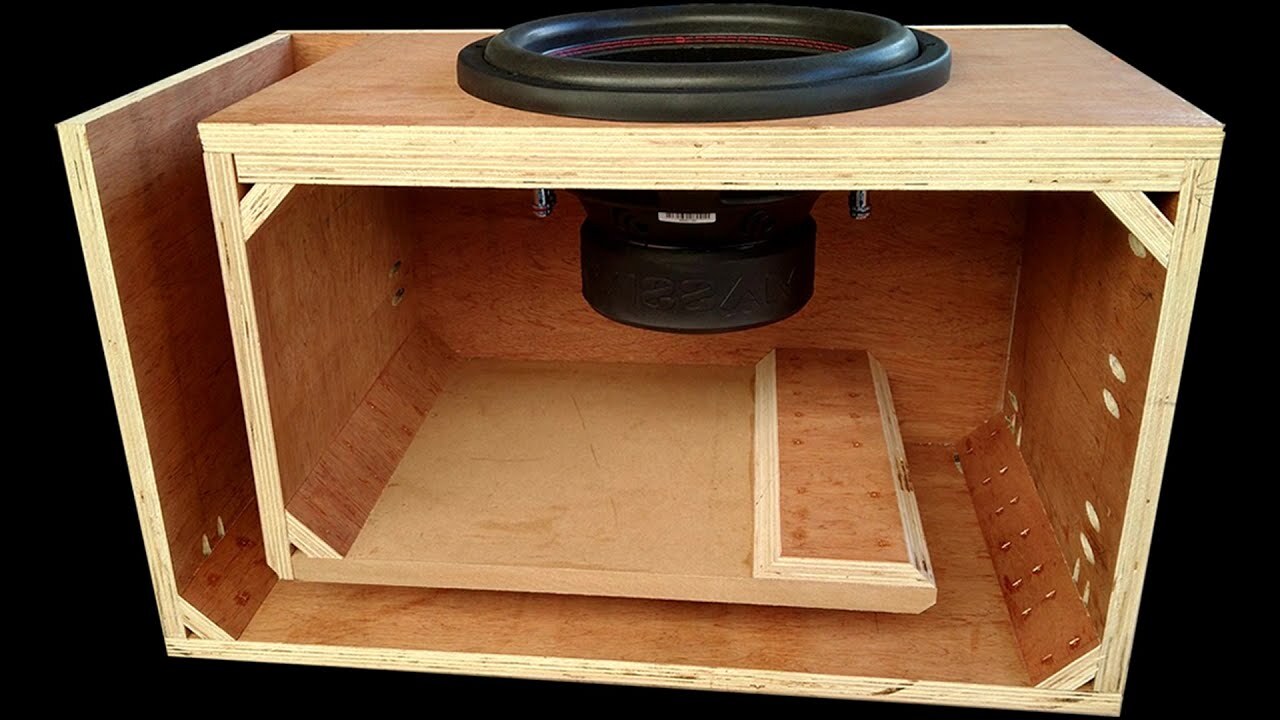
Begin by selecting the appropriate dimensions for your speaker box, taking into account the size and specifications of the speaker drivers. The internal volume of the enclosure directly influences the bass response and overall sound quality. Utilize speaker box design software or online calculators to determine the optimal internal volume based on the specific characteristics of your speaker drivers.
2. Choose Enclosure Type:
Decide on the type of speaker box enclosure that aligns with your audio goals. Options include sealed enclosures, ported (vented) enclosures, and bandpass enclosures, each offering distinct acoustic characteristics. Consider the desired bass response, efficiency, and frequency response when selecting the enclosure type.
3. Internal Bracing and Damping:
Incorporate internal bracing within the speaker box to enhance structural rigidity and minimize unwanted resonances. Additionally, consider implementing damping materials such as polyfill or acoustic foam to absorb internal reflections and optimize the sound reproduction.
4. Port Design (If Applicable):
If opting for a ported enclosure, carefully design the port dimensions and placement to achieve the desired bass tuning and airflow. Calculations for port length and diameter should align with the specific requirements of your speaker drivers and enclosure volume.
Read more: DIY Chuck Box Plans: How to Build Your Own
5. Material Selection and Finishing:
Choose the type of material finish for the exterior of the speaker box, whether it's painting, veneering, or laminating. Additionally, consider the visual aesthetics and integration of the speaker box with your existing audio setup or room decor.
6. Acoustic Considerations:
Factor in the acoustic environment where the speaker box will be placed. If the speaker box will be positioned near walls or in a confined space, adjustments to the design may be necessary to account for boundary effects and room interactions.
By meticulously designing your speaker box with attention to these crucial elements, you can create a custom enclosure that not only delivers exceptional sound performance but also reflects your personal style and audio preferences. With the design phase complete, you're now ready to move on to the next step of cutting and assembling the wood to bring your speaker box to fruition.
Step 3: Cutting and Assembling the Wood
With the design blueprint in hand, it's time to bring your speaker box to life by cutting and assembling the wood with precision and care. This phase is where the meticulous planning from the design stage translates into tangible progress, shaping the physical form of your DIY creation. Here's a detailed walkthrough of the essential steps involved in cutting and assembling the wood for your custom speaker box:
-
Accurate Measurements: Begin by carefully measuring and marking the dimensions of the wood panels according to the design specifications. Utilize a measuring tape and square to ensure precise measurements, and double-check the dimensions before making any cuts.
-
Cutting the Panels: Using a circular saw or table saw, proceed to cut the MDF or plywood panels with accuracy. It's crucial to follow the marked lines closely and maintain a steady hand to achieve clean and straight cuts. Remember to prioritize safety by wearing protective gear and securing the wood panels firmly during cutting.
-
Panel Assembly: Once the panels are cut to the required dimensions, it's time to assemble the speaker box enclosure. Apply a high-quality wood glue along the edges of the panels and use clamps to hold them together securely. Ensure that the panels are aligned correctly as per the design plan, and allow the glue to dry thoroughly for strong and durable bonds.
-
Reinforcement and Bracing: Consider incorporating internal bracing within the speaker box to enhance its structural integrity. This may involve adding additional support panels or braces at strategic points to minimize vibrations and strengthen the overall construction.
-
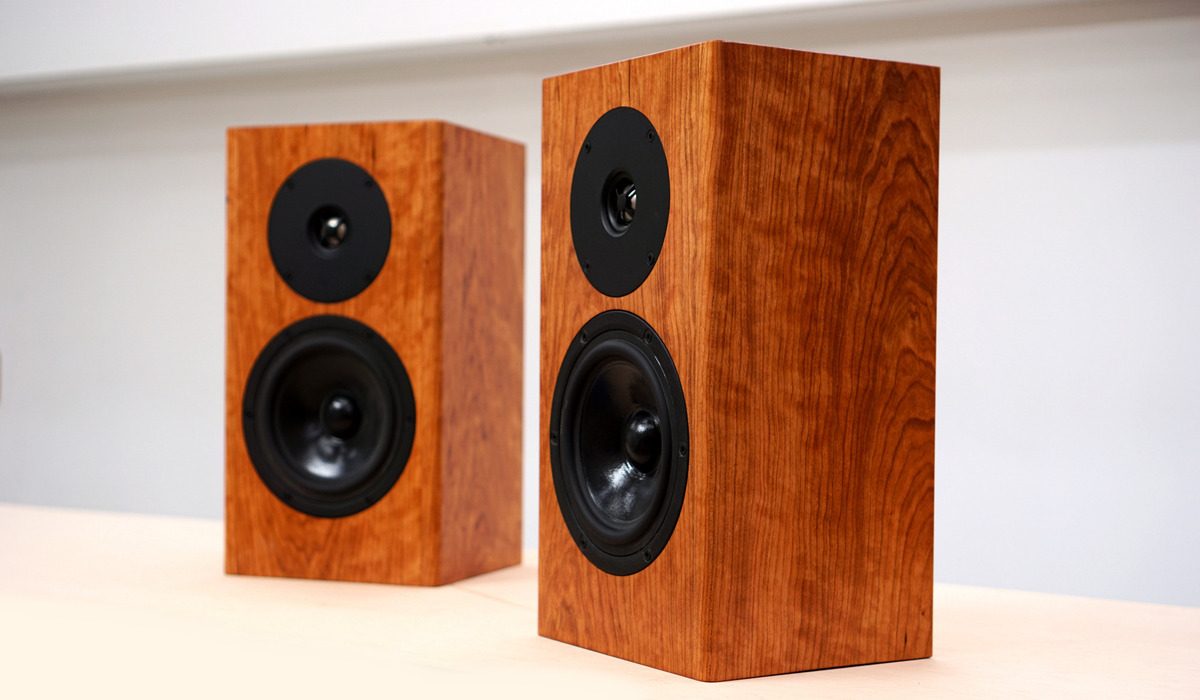
Cut-Outs and Speaker Mounting: Create precise cut-outs in the front panel of the speaker box to accommodate the speaker drivers. Use a jigsaw or router for this task, ensuring that the cut-outs align perfectly with the dimensions of the speakers. Once the cut-outs are complete, mount the speaker drivers securely in place, following the manufacturer's guidelines.
-
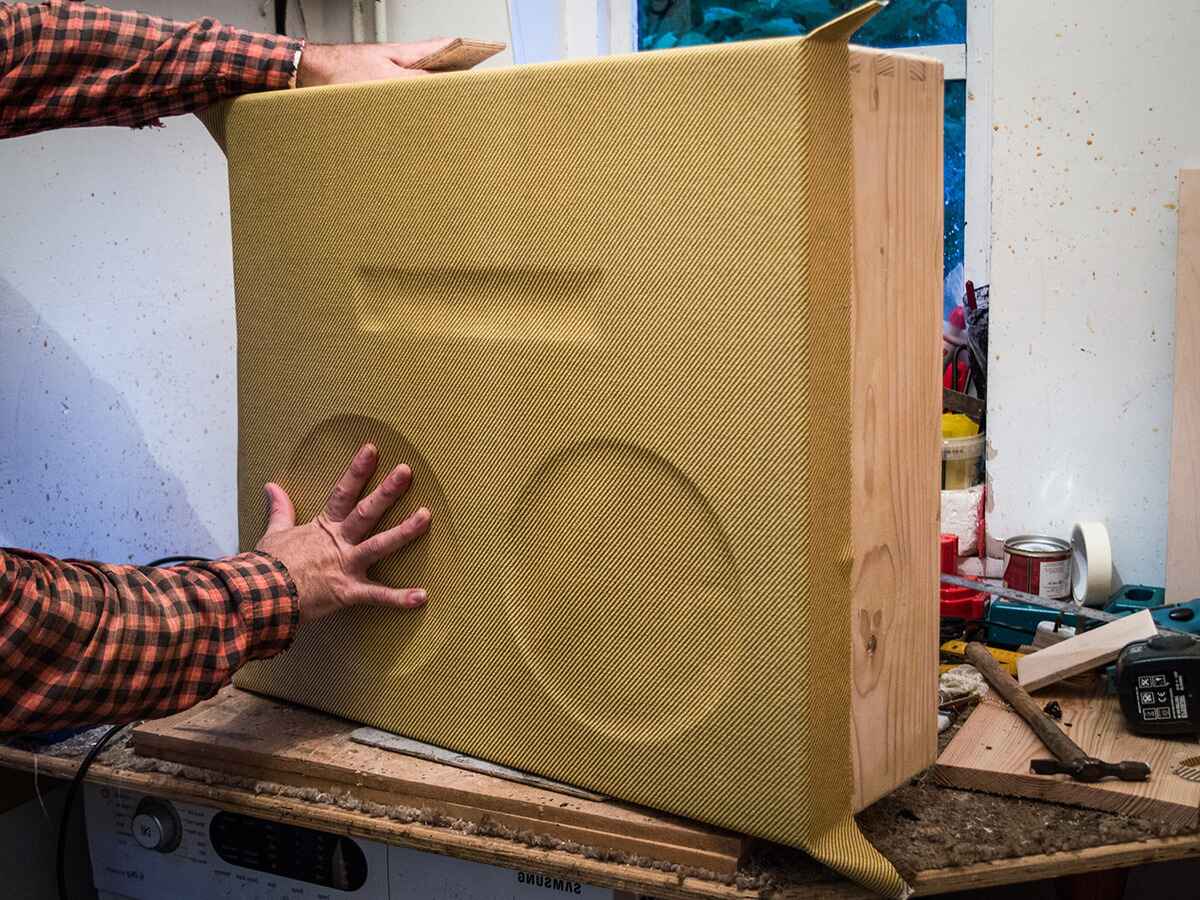
Finishing Touches: After the assembly is complete, sand the edges and surfaces of the speaker box to achieve a smooth and professional finish. This step is essential for ensuring that the speaker box not only sounds great but also looks visually appealing.
By meticulously executing the cutting and assembly process, you'll witness your custom speaker box taking shape, ready to deliver impressive audio performance. With the woodwork phase accomplished, you're now poised to move on to the exciting stage of installing the speaker components and bringing your DIY creation one step closer to completion.
Step 4: Installing the Speaker Components
With the wooden enclosure assembled, it's time to focus on installing the speaker components to bring your DIY speaker box to life. This pivotal step involves integrating the high-performance speaker drivers, crossovers, and other essential elements into the enclosure, setting the stage for exceptional audio reproduction. Here's a detailed walkthrough of the process involved in installing the speaker components with precision and care:
-
Speaker Driver Placement: Begin by carefully positioning the speaker drivers within the designated cut-outs in the front panel of the speaker box. Ensure that the drivers fit snugly and align perfectly with the openings to guarantee a seamless and professional appearance. Take into account the orientation and alignment of the drivers to optimize sound dispersion and coherence.
-
Securing the Drivers: Once the speaker drivers are positioned correctly, secure them in place using appropriate mounting hardware. Follow the manufacturer's guidelines for mounting the drivers, utilizing screws or mounting brackets to ensure a firm and stable attachment. This step is crucial for minimizing vibrations and ensuring that the drivers remain securely in place during operation.
-
Crossover Integration: If your speaker system incorporates a crossover network to divide the audio signal between the drivers, carefully integrate the crossover components into the speaker box. Position the crossover circuitry in a suitable location within the enclosure, ensuring that it remains protected and insulated from potential damage or interference.
-
Wiring Connections: With the speaker drivers and crossover in place, proceed to make the necessary wiring connections. Utilize high-quality speaker wire to establish the electrical connections between the amplifier or audio source and the speaker components. Pay close attention to maintaining proper polarity and ensuring secure connections to prevent signal loss or distortion.
-
Acoustic Insulation: Consider incorporating acoustic insulation materials within the speaker box to minimize internal reflections and enhance sound quality. Strategically place polyfill or acoustic foam to absorb unwanted resonances and optimize the overall acoustic performance of the enclosure.
-
Testing and Fine-Tuning: Once the speaker components are installed and wired, conduct a thorough testing phase to ensure that everything functions as intended. Connect the speaker box to an audio source and evaluate the sound output, making any necessary adjustments to optimize the performance and tonal balance.
By meticulously executing the installation of the speaker components, you'll transform the inert enclosure into a dynamic and capable audio system, poised to deliver exceptional sound quality and immersive listening experiences. With the speaker components seamlessly integrated, you're now ready to proceed to the final phase of wiring and testing the speaker, bringing your DIY creation to fruition.
Read more: How to Build a DIY Pulley System for Garage
Step 5: Wiring and Testing the Speaker
Wiring and testing the speaker represents the pivotal stage where the culmination of meticulous construction and component integration transitions into the realization of audio performance. This phase involves the precise wiring of the speaker components and the comprehensive testing of the sound output, ensuring that your DIY creation delivers exceptional audio quality. Here's a detailed breakdown of the essential steps involved in wiring and testing the speaker with precision and care:
-
Electrical Connections: Begin by carefully connecting the speaker components to the amplifier or audio source using high-quality speaker wire. Pay close attention to maintaining proper polarity and ensuring secure connections to minimize signal loss and distortion. Utilize wire strippers to prepare the wire ends and terminate them with connectors for reliable electrical contact.
-
Amplifier Setup: If utilizing an external amplifier, configure the amplifier settings to align with the specifications of the speaker drivers and the desired audio performance. Adjust the gain, crossover frequencies, and equalization parameters as per the recommended guidelines to optimize the amplifier's interaction with the speaker system.
-
Polarity Check: Prior to finalizing the wiring connections, perform a polarity check to ensure that all speaker drivers are in phase and operating cohesively. This involves verifying that the positive and negative terminals of each driver are correctly aligned with the corresponding terminals on the amplifier or crossover, promoting coherent sound reproduction.
-
Sound Testing: Once the wiring connections are established, conduct a comprehensive sound test to evaluate the performance of the speaker system. Play a diverse range of audio tracks across different genres and sonic characteristics to assess the tonal balance, imaging, and overall fidelity of the sound output. Listen for clarity, detail, and dynamic range to gauge the speaker's performance across various audio content.
-
Frequency Response Analysis: Utilize audio measurement tools or software to analyze the frequency response of the speaker system. This involves conducting frequency sweeps and measurements to assess the output across the audible spectrum, identifying any anomalies or irregularities in the frequency response. Make adjustments as necessary to achieve a balanced and accurate frequency output.
-
Room Placement Optimization: Consider the placement of the speaker box within the listening environment, taking into account factors such as room acoustics, speaker positioning, and listener seating. Experiment with different placement configurations to optimize sound dispersion, imaging, and bass response, ensuring that the speaker system interacts harmoniously with the listening space.
By meticulously executing the wiring and testing phase, you'll witness the culmination of your DIY speaker box project, as it transforms into a fully functional and high-performance audio system. With the sound testing and optimization complete, you can now immerse yourself in the captivating audio experiences delivered by your custom-built speaker box, reaping the rewards of your dedication and craftsmanship.
Conclusion
Congratulations on successfully completing the exhilarating journey of building your very own DIY speaker box. Throughout this comprehensive guide, you've delved into the intricacies of selecting materials, designing the enclosure, cutting and assembling the wood, integrating speaker components, and fine-tuning the audio performance. As you stand back and admire the tangible manifestation of your creativity and craftsmanship, it's essential to reflect on the significance of this endeavor and the valuable insights gained along the way.
By embarking on this DIY speaker box project, you've not only crafted a personalized audio system but also honed your skills in woodworking, acoustics, and electrical connections. The hands-on experience of meticulously measuring, cutting, and assembling the wood panels has provided a tangible sense of accomplishment, underscoring the satisfaction that comes with bringing a vision to life through practical craftsmanship.
Furthermore, the process of designing the speaker box has offered a deeper understanding of acoustic principles, enclosure types, and the impact of internal bracing and damping on sound quality. By meticulously planning the dimensions, porting, and material finishes, you've gained insights into tailoring the audio characteristics to suit your preferences, elevating your appreciation for the art and science of speaker design.
The integration of speaker components and the meticulous wiring and testing phase have provided a firsthand glimpse into the intricacies of audio reproduction, signal coherence, and frequency response analysis. Through this process, you've cultivated a deeper appreciation for the nuances of sound reproduction and the critical role of precise component integration in achieving exceptional audio fidelity.
As you revel in the immersive audio experiences delivered by your custom speaker box, it's important to recognize the enduring value of this project. Beyond the tangible outcome of a high-performance audio system, this endeavor has fostered a sense of creativity, resourcefulness, and technical proficiency, equipping you with valuable skills that extend beyond the realm of DIY audio projects.
Ultimately, the completion of your DIY speaker box stands as a testament to your ingenuity, perseverance, and passion for audio craftsmanship. Whether you're enjoying your favorite music, immersing yourself in cinematic soundscapes, or simply savoring the clarity and depth of audio content, your custom speaker box serves as a tangible reminder of the power of hands-on creation and the limitless potential of DIY endeavors.
So, as you bask in the captivating sound emanating from your custom-built speaker box, take pride in the knowledge that you've not only constructed an exceptional audio system but also embarked on a transformative journey of creativity, learning, and the sheer joy of bringing your unique vision to fruition. Cheers to your DIY triumph, and may the immersive audio experiences offered by your custom speaker box continue to inspire and delight for years to come.


