
Home>Create & Decorate>DIY & Crafts>How To Build A 12 X 12 Deck
DIY & Crafts
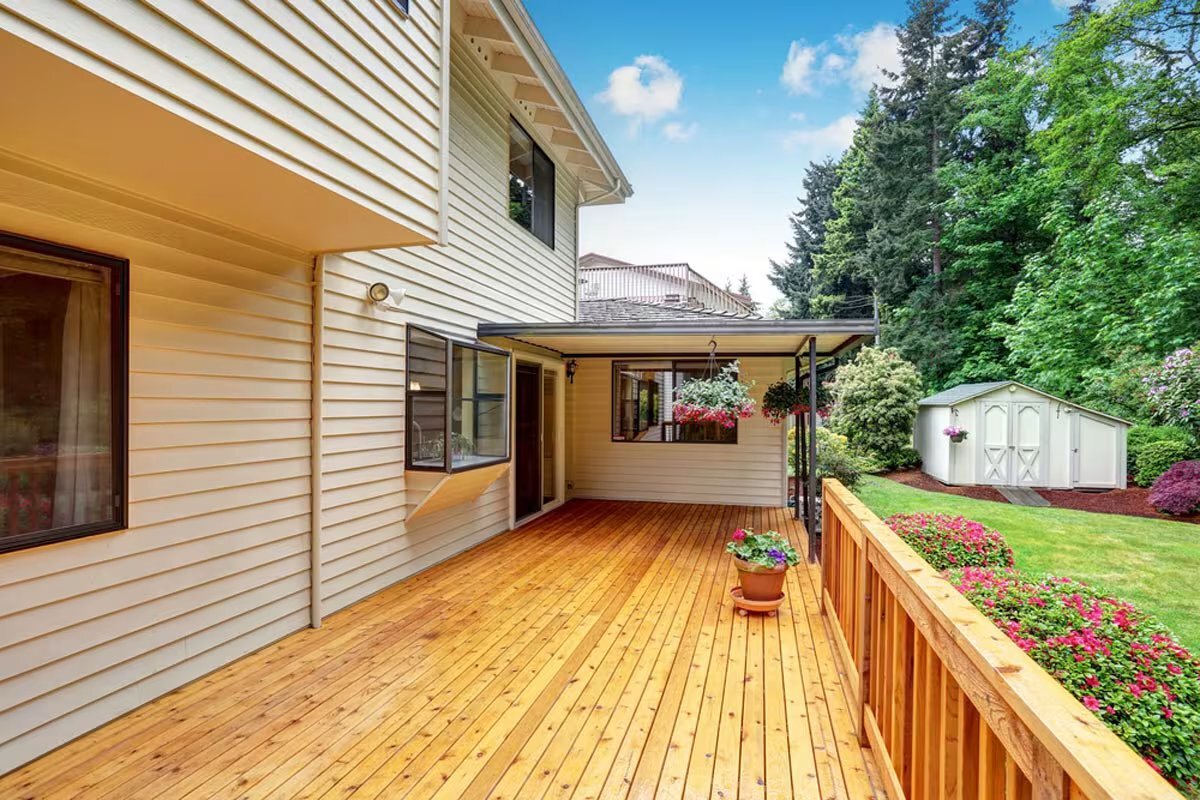
How To Build A 12 X 12 Deck
Published: February 23, 2024

Senior Editor in Create & Decorate, Kathryn combines traditional craftsmanship with contemporary trends. Her background in textile design and commitment to sustainable crafts inspire both content and community.
Learn how to build a 12 x 12 deck with our easy DIY & Crafts guide. Create a beautiful outdoor space with step-by-step instructions and tips.
(Many of the links in this article redirect to a specific reviewed product. Your purchase of these products through affiliate links helps to generate commission for Twigandthistle.com, at no extra cost. Learn more)
Introduction
Building a 12 x 12 deck can be a rewarding and fulfilling DIY project that adds both aesthetic appeal and functional space to your home. Whether you envision it as a cozy spot for morning coffee, a gathering place for family barbecues, or simply an outdoor retreat, a well-constructed deck can transform your outdoor living experience.
In this comprehensive guide, we will walk you through the step-by-step process of building a 12 x 12 deck, from initial planning to the finishing touches. By following these instructions, you can create a sturdy and inviting outdoor space that complements your lifestyle and enhances the value of your home.
Constructing a deck requires careful planning, precise measurements, and the use of appropriate materials and tools. Throughout this guide, we will provide detailed insights and practical tips to help you navigate each stage of the construction process with confidence. Whether you are an experienced DIY enthusiast or a novice builder, this guide will equip you with the knowledge and skills necessary to bring your deck-building vision to life.
From laying the foundation to installing the decking boards and adding the finishing touches, each step plays a crucial role in ensuring the structural integrity and visual appeal of your deck. By understanding the intricacies of each phase and following the recommended best practices, you can create a durable and visually appealing outdoor space that will be enjoyed for years to come.
So, roll up your sleeves, gather your tools, and let's embark on this exciting journey of building a 12 x 12 deck that will become a cherished extension of your home. With careful attention to detail and a willingness to embrace the process, you can turn your outdoor oasis dreams into a stunning reality.
Step 1: Planning and Preparation
Before diving into the physical construction of your 12 x 12 deck, meticulous planning and thorough preparation are essential for a successful outcome. This initial phase sets the stage for the entire project, ensuring that you have a clear vision, necessary permits, and a well-thought-out strategy to guide you through each subsequent step.
Design Considerations
Begin by envisioning how you intend to use your deck. Will it serve as an outdoor dining area, a relaxation space, or a combination of both? Consider the furniture, fixtures, and amenities you plan to incorporate, as this will influence the deck's layout and size. Take into account the natural elements surrounding your property, such as sunlight exposure, prevailing winds, and any scenic views you wish to preserve or enhance.
Legal and Safety Compliance
Check with your local building department to determine if there are any zoning restrictions, building codes, or permit requirements for constructing a deck. Adhering to these regulations is crucial for ensuring the safety and legality of your project. Additionally, familiarize yourself with any underground utility lines or potential obstacles that may impact the deck's location.
Budget and Materials
Establish a realistic budget for your deck project, factoring in the cost of materials, tools, and any professional assistance you may require. Research various decking materials, such as pressure-treated lumber, composite decking, or tropical hardwoods, and consider their durability, maintenance requirements, and aesthetic appeal. Take accurate measurements of the proposed deck area to determine the quantity of materials needed.
Sketch and Layout
Create a rough sketch or use a deck design software to visualize the layout and dimensions of your 12 x 12 deck. This will help you determine the placement of stairs, railings, and any additional features. Consider the traffic flow and accessibility from your home to the deck, ensuring a seamless transition between indoor and outdoor spaces.
Site Preparation
Clear the designated area of any vegetation, debris, or obstructions that may impede the construction process. Level the ground and assess the soil conditions to ensure stability and proper drainage. If necessary, consult a professional to address any grading or drainage concerns before proceeding with the construction.
By dedicating ample time and attention to the planning and preparation phase, you can lay a solid foundation for the successful execution of your 12 x 12 deck project. Thoughtful consideration of design, legal compliance, budgeting, materials, and site preparation will set the stage for a smooth transition into the subsequent stages of construction.
Step 2: Gathering Materials and Tools
With the planning phase complete, the next crucial step in building your 12 x 12 deck is gathering the necessary materials and tools. This stage requires careful consideration of the quality, quantity, and compatibility of the items you will be using. By ensuring that you have all the essential components and equipment at your disposal, you can streamline the construction process and minimize potential delays.
Decking Materials
The choice of decking materials significantly impacts the durability, appearance, and maintenance requirements of your deck. Common options include pressure-treated lumber, cedar, composite decking, and tropical hardwoods. Consider the aesthetic appeal, longevity, and environmental impact of each material before making a selection. Additionally, calculate the required quantity based on the dimensions of your deck and any design considerations, such as diagonal or herringbone patterns.
Structural Components
Key structural elements, such as support posts, beams, and joists, form the backbone of your deck's stability and load-bearing capacity. Ensure that these components are made from pressure-treated or rot-resistant lumber to withstand outdoor conditions. Accurately calculate the number and dimensions of these structural elements based on the deck design and local building codes.
Fasteners and Hardware
Selecting the appropriate fasteners, connectors, and hardware is essential for securely assembling the various components of your deck. Stainless steel or galvanized screws and nails are recommended to prevent corrosion and ensure structural integrity. Additionally, consider the specific hardware required for attaching the ledger board to your home, securing the support posts, and connecting the joists and decking boards.
Tools and Equipment
Equipping yourself with the right tools and equipment is vital for executing the construction process efficiently and accurately. Essential tools may include a circular saw, power drill, level, tape measure, framing square, and adjustable wrenches. Depending on the complexity of your design, specialized tools such as a jigsaw, miter saw, or post hole digger may also be necessary. Renting or purchasing a sturdy wheelbarrow can facilitate the transportation of heavy materials across the construction site.
Safety Gear
Prioritize safety by obtaining appropriate personal protective equipment, including work gloves, safety glasses, hearing protection, and a dust mask. These items will safeguard you from potential hazards associated with handling construction materials and operating power tools.
By meticulously gathering the required materials and tools, you can set the stage for a smooth and efficient construction process. Attention to detail in selecting decking materials, structural components, fasteners, hardware, tools, and safety gear will contribute to the overall success and longevity of your 12 x 12 deck.
Step 3: Building the Foundation
The foundation of a deck is a critical element that provides stability and support for the entire structure. Properly constructing the foundation is essential for ensuring the longevity and structural integrity of your 12 x 12 deck. This phase involves creating a solid base that can withstand the weight of the deck and the forces exerted on it, such as foot traffic, furniture, and environmental factors.
Marking the Layout
Begin by marking the perimeter of the deck using batter boards and string. This will define the exact dimensions and layout of the deck, allowing for precise excavation and construction. Use a tape measure and carpenter's square to ensure that the corners are square and the layout is symmetrical.
Excavation and Footings
Excavate the marked area to a depth that complies with local building codes and frost line requirements. The depth of the footings is crucial for preventing frost heave in colder climates. Typically, this involves digging below the frost line and creating cylindrical holes for the footings. The diameter and depth of the footings should align with engineering specifications based on the anticipated load of the deck.
Installing Footing Forms
Once the holes are excavated, install footing forms to contain the concrete that will form the footings. These forms should be level and positioned to the required depth. Use a spirit level to ensure that the forms are plumb and accurately aligned with the layout of the deck.
Pouring Concrete
Mix and pour concrete into the footing forms, ensuring that it completely fills the cavities and forms a smooth, level surface. Use a screed or trowel to level the concrete and remove any air pockets. Allow the concrete to cure according to the manufacturer's recommendations before proceeding to the next stage of construction.
Attaching the Ledger Board
With the footings in place, attach a ledger board to the exterior wall of the house, ensuring that it is level and securely anchored. The ledger board provides crucial support for the deck and facilitates the attachment of the joists.
Inspecting and Reinforcing
Once the foundation is established, conduct a thorough inspection to verify that the footings, forms, and ledger board are structurally sound and compliant with building codes. Reinforce the footings and make any necessary adjustments to ensure that the foundation is robust and capable of supporting the weight of the deck.
By meticulously executing the foundation-building phase, you establish a solid groundwork for the subsequent stages of deck construction. The careful attention to detail and adherence to structural standards will contribute to the overall safety, stability, and longevity of your 12 x 12 deck.
Step 4: Installing the Support Posts and Beams
With the foundation set, the next pivotal step in building your 12 x 12 deck involves installing the support posts and beams. These structural elements play a crucial role in bearing the weight of the deck and ensuring its stability and longevity. Proper installation of the support posts and beams is essential for creating a robust framework that can withstand the demands of outdoor use and environmental factors.
Positioning the Support Posts
Begin by determining the placement of the support posts based on the layout of your deck and the engineering specifications. Use a post hole digger to excavate holes at designated intervals along the perimeter of the deck. The depth and diameter of the holes should align with local building codes and the load-bearing requirements of your specific design.
Setting the Support Posts
Once the holes are prepared, set the support posts into the excavated holes, ensuring that they are plumb and aligned with the layout of the deck. Use a spirit level to verify the vertical alignment of each post, making adjustments as necessary to achieve precise positioning. Backfill the holes with concrete, tamping it down to secure the posts in place and provide additional stability.
Attaching the Beams
With the support posts in position, it's time to attach the beams that will form the primary framework of the deck. The beams are typically positioned horizontally and parallel to the ledger board, providing essential support for the joists and decking boards. Secure the beams to the support posts using appropriate fasteners and hardware, ensuring a strong and stable connection.
Verifying Alignment and Level
Once the support posts and beams are installed, carefully verify their alignment and levelness to guarantee the structural integrity of the deck framework. Use a level and measuring tape to confirm that the beams are uniformly positioned and parallel to the ledger board. Make any necessary adjustments to ensure that the framework is precisely aligned and ready to support the subsequent components of the deck.
Reinforcement and Inspection
After the installation is complete, reinforce the connections between the support posts and beams to enhance the overall stability of the deck framework. Conduct a thorough inspection to ensure that all components are securely fastened and compliant with structural standards. Address any potential issues or discrepancies to fortify the framework and prepare for the next phase of construction.
By meticulously executing the installation of the support posts and beams, you establish a sturdy and reliable framework that forms the backbone of your 12 x 12 deck. The careful attention to detail and adherence to structural standards will contribute to the overall safety, stability, and longevity of your outdoor living space.
Step 5: Attaching the Joists
With the support posts and beams securely in place, the next pivotal phase in constructing your 12 x 12 deck involves attaching the joists. These essential components form the framework onto which the decking boards will be installed, providing crucial support and stability for the entire deck structure. Properly attaching the joists is fundamental to ensuring the structural integrity and load-bearing capacity of your deck.
Selecting and Preparing the Joists
Begin by selecting high-quality, pressure-treated lumber or engineered joists that are suitable for outdoor use and capable of withstanding the anticipated load of the deck. The dimensions and spacing of the joists should align with the design specifications and local building codes. Prior to installation, inspect the joists for any defects or warping, ensuring that they are structurally sound and free from any imperfections that could compromise their integrity.
Positioning and Securing the Joists
Position the joists perpendicular to the beams, ensuring that they are uniformly spaced according to the predetermined layout. Use joist hangers or metal connectors to secure the joists to the beams, providing a strong and reliable attachment that distributes the load evenly across the framework. Utilize appropriate fasteners, such as galvanized nails or screws, to ensure a secure and durable connection between the joists and the beams.
Ensuring Levelness and Alignment
As each joist is installed, meticulously verify its levelness and alignment to guarantee a uniformly flat and stable framework for the decking boards. Use a spirit level and measuring tape to confirm that the joists are precisely positioned and maintain consistent elevation across the entire deck surface. Make any necessary adjustments to ensure that the joists are level and aligned with the predetermined layout, addressing any discrepancies promptly to maintain structural integrity.
Reinforcement and Inspection
Once all the joists are securely attached and aligned, reinforce the connections and inspect the entire framework to ensure that it complies with structural standards and design specifications. Pay close attention to the attachment points between the joists and the beams, verifying that they are securely fastened and capable of supporting the anticipated load. Address any potential issues or deficiencies to fortify the framework and prepare for the subsequent phase of deck construction.
By meticulously executing the attachment of the joists, you establish a robust and reliable framework that forms the foundation for the decking boards and contributes to the overall stability and longevity of your 12 x 12 deck. The careful attention to detail and adherence to structural standards will ensure a solid and durable platform for your outdoor living space.
Step 6: Laying the Decking Boards
Laying the decking boards is a pivotal phase in the construction of your 12 x 12 deck, as it transforms the structural framework into a functional and visually appealing outdoor living space. The careful selection, positioning, and installation of the decking boards are essential for creating a durable and inviting deck surface that will withstand the elements and provide a welcoming environment for outdoor activities and relaxation.
Selecting Decking Materials
Begin by selecting high-quality decking boards that are well-suited for outdoor use and capable of withstanding the rigors of foot traffic, weather exposure, and environmental factors. Common options include pressure-treated lumber, cedar, composite decking, and tropical hardwoods, each offering distinct advantages in terms of durability, maintenance requirements, and aesthetic appeal. Consider the visual impact, longevity, and maintenance considerations of each material before making a selection that aligns with your design preferences and lifestyle needs.
Positioning and Alignment
Carefully position the first decking board, ensuring that it is parallel to the ledger board and uniformly spaced from the house. Use appropriate spacers or shims to maintain consistent gaps between the boards, allowing for proper drainage and expansion. Verify that the first board is level and securely fastened to the framework, providing a stable foundation for the subsequent boards. Subsequent boards should be installed with precision, maintaining uniform spacing and alignment to create a visually pleasing and structurally sound deck surface.
Fastening and Securing
Utilize stainless steel or galvanized screws to fasten the decking boards to the joists, ensuring a secure and durable attachment that withstands outdoor conditions. Pre-drilling pilot holes can prevent splitting and ensure precise placement of the fasteners. Pay close attention to the ends of the boards, ensuring that they are properly supported and securely fastened to prevent warping or movement over time. Additionally, consider using hidden fastening systems for a clean and seamless deck surface, free from visible screws or nails.
Finishing Touches
As the decking boards are installed, periodically inspect the surface for any imperfections, warping, or irregularities. Address any issues promptly to maintain a uniform and visually appealing deck surface. Consider applying a protective finish or sealant to the decking boards to enhance their longevity and resistance to moisture, UV exposure, and wear. This finishing touch can elevate the aesthetic appeal of the deck while providing essential protection against the elements.
By meticulously laying the decking boards, you transform the structural framework into a functional and visually appealing outdoor living space that enhances the beauty and usability of your home. The careful attention to detail and adherence to best practices in material selection, positioning, fastening, and finishing will contribute to the overall durability, aesthetics, and enjoyment of your 12 x 12 deck.
Step 7: Adding the Railing and Stairs
The final phase of constructing your 12 x 12 deck involves adding the essential elements of railing and stairs, which not only contribute to the safety and functionality of the deck but also enhance its visual appeal. The careful installation of sturdy and aesthetically pleasing railings, along with well-designed and secure stairs, completes the transformation of the deck into a welcoming and accessible outdoor living space.
Installing the Railing
Begin by selecting railing materials that complement the overall design of your deck while providing the necessary safety and support. Common options include wood, metal, composite, or vinyl railings, each offering unique aesthetic and maintenance characteristics. Ensure that the chosen railing system complies with local building codes and safety standards, particularly in terms of height, spacing of balusters or spindles, and load-bearing capacity.
Position the railing posts at designated intervals along the perimeter of the deck, ensuring that they are securely anchored to the underlying framework. Use appropriate fasteners and hardware to establish a strong connection between the railing posts and the deck structure, providing stability and support for the railing system. Verify that the railing posts are plumb and aligned, making any necessary adjustments to ensure uniformity and structural integrity.
Install the balusters or spindles between the railing posts, maintaining consistent spacing and alignment to prevent entrapment hazards and ensure the safety of the railing system. Utilize secure fastening methods to attach the balusters to the railing posts, creating a robust and visually appealing barrier around the deck perimeter. Consider adding decorative elements or trim to the railing system to enhance its aesthetic appeal and complement the overall design of the deck.
Constructing the Stairs
Design and construct the stairs with careful attention to safety, functionality, and visual harmony with the deck. Determine the optimal location and configuration of the stairs, considering factors such as traffic flow, accessibility, and adherence to building codes. Ensure that the stair dimensions, rise, run, and tread depth comply with safety standards and provide a comfortable and secure transition between the deck and the surrounding area.
Install stringers to support the stairs, ensuring that they are securely attached to the deck structure and provide stable and uniform support for the treads. Position the treads and risers with precision, ensuring consistent dimensions and alignment to create a safe and visually appealing staircase. Utilize appropriate fasteners and hardware to secure the treads and risers to the stringers, providing a durable and reliable connection that withstands regular use and environmental exposure.
Complete the stairs by adding a sturdy and well-anchored handrail, providing essential support and guidance for individuals using the stairs. The handrail should be positioned at a comfortable height and extend along the entire length of the stairs, ensuring safety and accessibility. Verify that the handrail complies with local building codes and safety standards, and consider incorporating decorative elements or finishes to enhance its visual appeal.
By meticulously adding the railing and stairs, you complete the construction of your 12 x 12 deck, creating a safe, functional, and visually appealing outdoor living space that enriches the enjoyment and utility of your home. The careful attention to detail and adherence to safety and design standards ensure that the railing and stairs not only enhance the aesthetics of the deck but also provide essential safety and accessibility for you and your guests.
Conclusion
Congratulations on successfully completing the construction of your 12 x 12 deck! This transformative DIY project has not only added valuable outdoor living space to your home but has also provided a canvas for countless memorable moments with family and friends. As you reflect on the journey from planning and preparation to the final touches, it's evident that the dedication and attention to detail invested in each phase have culminated in the creation of a functional, visually appealing, and enduring outdoor oasis.
Your meticulous planning and preparation set the stage for a smooth and well-executed construction process. By considering design elements, legal compliance, budgeting, materials, and site preparation, you ensured that every aspect of the project was thoughtfully addressed. This comprehensive approach has resulted in a deck that seamlessly integrates with your home and landscape, enhancing the overall aesthetic and functionality of your outdoor space.
The careful selection and gathering of materials and tools have played a pivotal role in the successful realization of your deck-building vision. From decking materials and structural components to fasteners, hardware, and safety gear, your attention to quality and compatibility has laid the groundwork for a durable and reliable outdoor living space that will stand the test of time.
The meticulous execution of each construction phase, from building the foundation to attaching the joists, laying the decking boards, and adding the railing and stairs, has resulted in a deck that not only meets but exceeds structural and aesthetic expectations. The precision and care invested in every detail, from the alignment of support posts to the finishing of the decking boards, have contributed to the creation of a visually stunning and structurally sound outdoor retreat.
As you step back and admire the completed deck, take pride in the craftsmanship and dedication that have gone into its construction. Your commitment to excellence and your willingness to embrace the challenges of this DIY endeavor have resulted in a space that reflects your vision and enhances your lifestyle.
With the 12 x 12 deck now ready to host gatherings, provide moments of relaxation, and serve as an extension of your home, it's time to savor the rewards of your hard work. Whether it's enjoying a quiet morning coffee, hosting lively gatherings, or simply unwinding in the serenity of your outdoor sanctuary, your new deck stands as a testament to your creativity, perseverance, and DIY prowess. Cheers to the memories waiting to be made on your stunning new deck!