
Home>Create & Decorate>DIY & Crafts>How To Build A 10X10 Deck For A Hot Tub
DIY & Crafts
How To Build A 10X10 Deck For A Hot Tub
Published: February 23, 2024

Content Creator specializing in woodworking and interior transformations. Caegan's guides motivate readers to undertake their own projects, while his custom furniture adds a personal touch.
Learn how to build a 10x10 deck for a hot tub with our DIY & Crafts guide. Create a relaxing outdoor space with our step-by-step instructions.
(Many of the links in this article redirect to a specific reviewed product. Your purchase of these products through affiliate links helps to generate commission for Twigandthistle.com, at no extra cost. Learn more)
Introduction
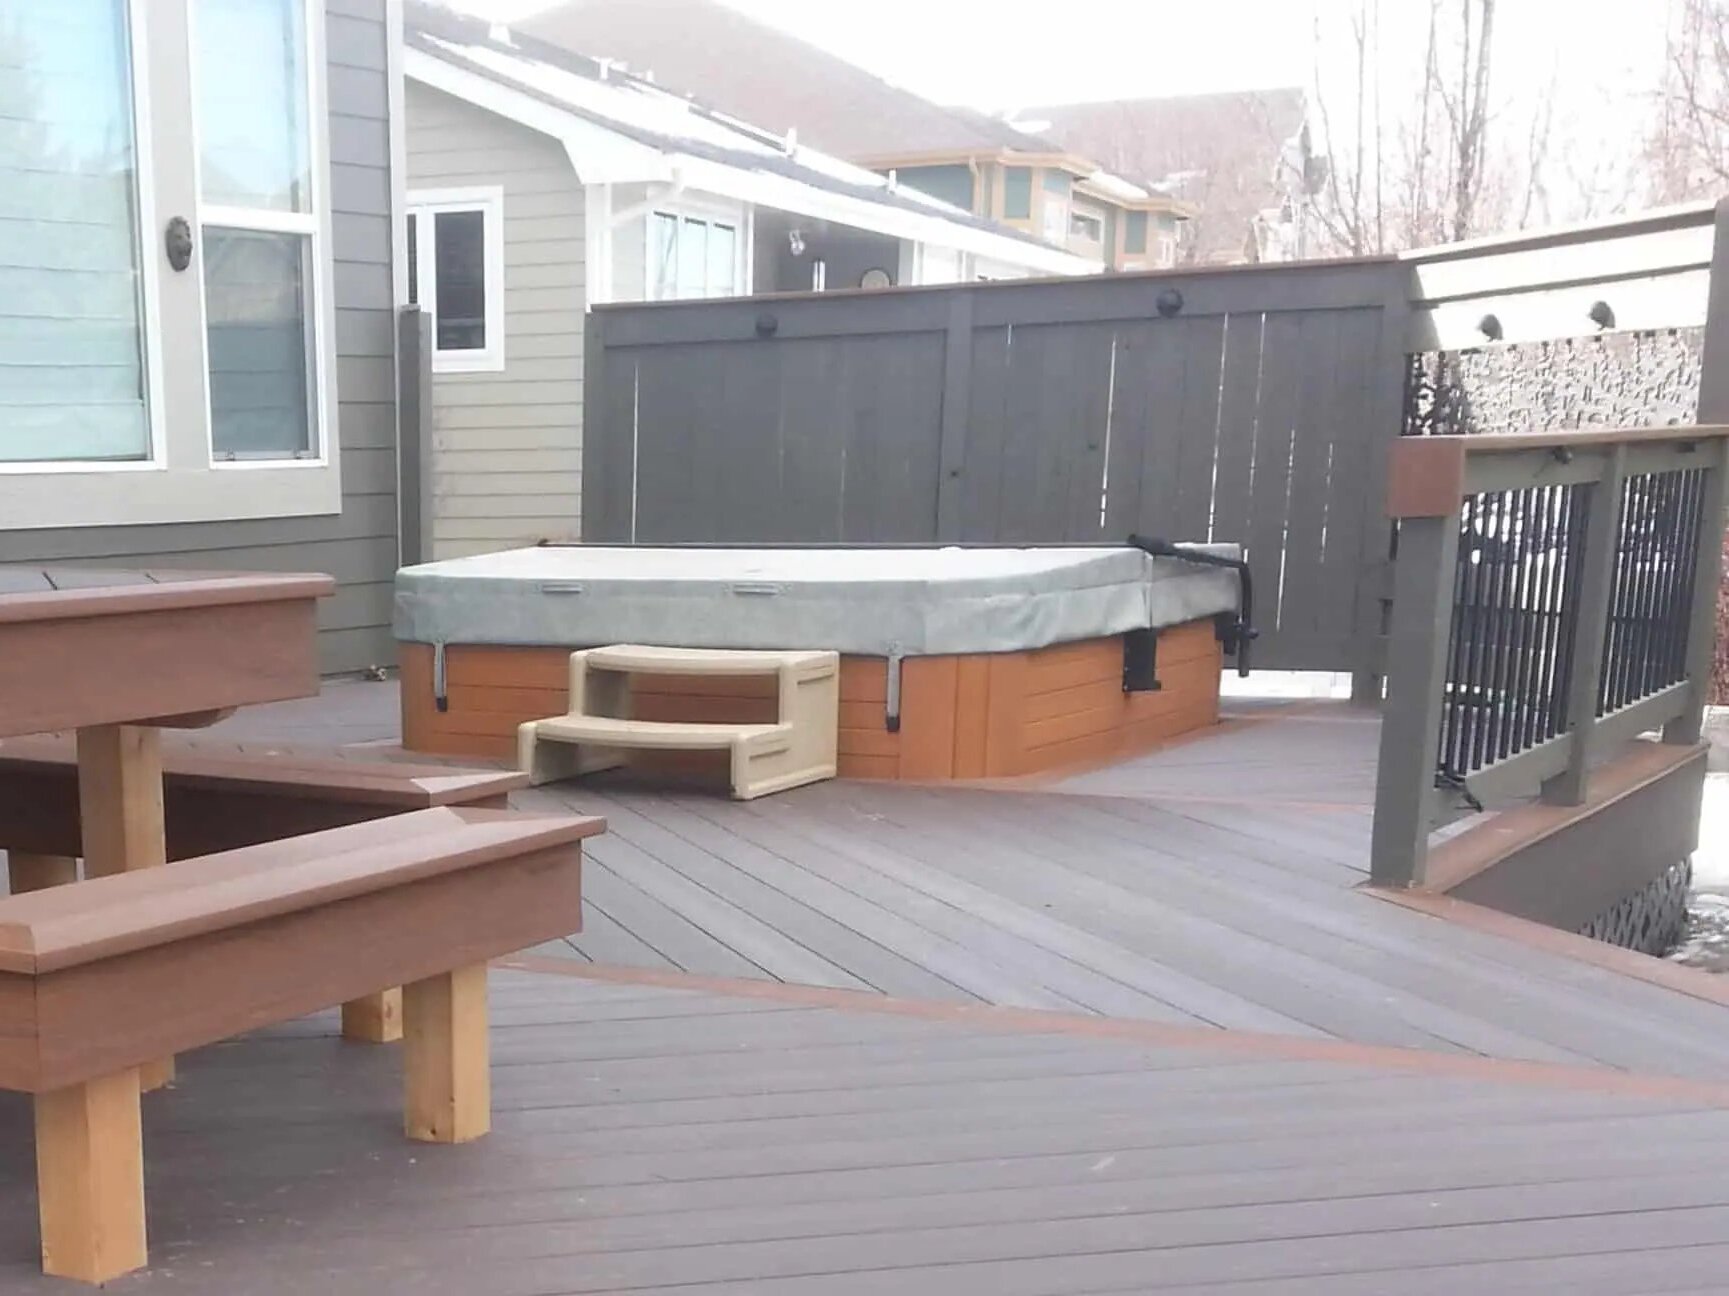
Building a 10×10 deck for a hot tub is an exciting and rewarding DIY project that can enhance the functionality and aesthetics of your outdoor space. Whether you're looking to create a relaxing retreat for unwinding after a long day or a social hub for entertaining friends and family, a well-constructed deck can serve as the perfect foundation for your hot tub oasis.
In this comprehensive guide, we will walk you through the step-by-step process of planning, designing, and building a sturdy and visually appealing 10×10 deck tailored to accommodate a hot tub. From selecting the ideal location for your deck to adding the finishing touches, you'll gain valuable insights and practical tips to help you embark on this fulfilling endeavor with confidence.
By following the expert advice and detailed instructions provided in this guide, you'll be equipped with the knowledge and skills necessary to tackle each phase of the project effectively. Whether you're a seasoned DIY enthusiast or a novice looking to expand your home improvement repertoire, this guide is designed to empower you to create a stunning and functional outdoor space that seamlessly integrates a hot tub into its design.
So, roll up your sleeves, gather your tools, and let's dive into the exciting journey of building a 10×10 deck for your hot tub. With careful planning, precision, and a touch of creativity, you'll soon be basking in the satisfaction of having constructed a captivating outdoor retreat that complements your lifestyle and elevates your home's appeal.
Step 1: Planning and Designing Your Deck
Before embarking on the construction of your 10×10 deck for a hot tub, meticulous planning and thoughtful design are essential to ensure a successful and functional end result. This initial phase sets the foundation for the entire project, guiding decisions on layout, materials, and overall aesthetic. Here's a detailed breakdown of the key considerations and steps involved in planning and designing your deck:
-
Assess Your Space: Begin by evaluating the available space in your backyard or outdoor area. Consider the dimensions of the hot tub and any additional features you wish to incorporate, such as seating areas or planters. This assessment will help determine the optimal location and size for your deck.
-
Check Local Regulations: Before proceeding with your deck plans, it's crucial to check local building codes and regulations. Some areas may have specific requirements regarding deck construction, such as permits, setback distances, and load-bearing considerations. Adhering to these regulations is vital to ensure the safety and compliance of your project.
-
Define Your Deck's Purpose: Determine how you intend to use the deck. Will it primarily serve as a private relaxation space for the hot tub, or do you envision it as a multifunctional outdoor entertainment area? Clarifying the intended purpose will influence design choices and layout configurations.
-
Create a Design Sketch: Sketch out a rough design of your deck, considering the placement of the hot tub, seating areas, and any desired features. This visual representation will help you conceptualize the layout and identify potential challenges or opportunities for customization.
-
Select Suitable Materials: Research and select suitable materials for your deck, taking into account factors such as durability, maintenance requirements, and aesthetic appeal. Pressure-treated lumber, composite decking, and cedar are popular choices known for their longevity and visual appeal.
-
Consider Accessibility: If your deck will accommodate a hot tub, ensure that it provides easy and safe access to the tub. Incorporating steps, ramps, or integrated seating with built-in stairs can enhance accessibility and convenience.
-
Evaluate Sun and Shade: Assess the sun and shade patterns in your outdoor space to determine the ideal orientation of your deck. Consider how sunlight will interact with the hot tub and seating areas throughout the day, aiming to strike a balance between comfort and exposure.
By meticulously planning and designing your deck, you lay the groundwork for a successful construction phase, setting the stage for a well-executed and visually appealing outdoor retreat. With these considerations in mind, you'll be well-prepared to move on to the next phase of the project: gathering materials and tools.
Step 2: Gathering Materials and Tools
Gathering the necessary materials and tools is a crucial step in preparing for the construction of your 10×10 deck for a hot tub. By ensuring that you have all the essential components and equipment at your disposal, you can streamline the building process and minimize potential delays. Here's a comprehensive overview of the materials and tools you'll need to gather before commencing the construction phase:
Materials:
- Lumber: Select high-quality, pressure-treated lumber for the structural framework of the deck. The primary components include joists, beams, and posts, which form the sturdy foundation for the deck's structure.
- Decking Boards: Choose durable and visually appealing decking boards to create the surface of the deck. Options such as composite decking or cedar boards offer longevity and aesthetic versatility.
- Hardware: Acquire the necessary hardware, including galvanized screws, nails, and joist hangers, to secure the structural elements of the deck and ensure stability and longevity.
- Concrete Footings: If your deck will be elevated, gather concrete mix and form tubes to create sturdy footings that support the weight of the deck and hot tub.
- Hot Tub Base: Depending on the hot tub's specifications, you may need to prepare a stable and level base, such as a concrete pad or reinforced deck platform, to support the weight of the hot tub.
Tools:
- Power Saw: A circular saw or miter saw will be essential for cutting lumber to the required dimensions with precision and accuracy.
- Drill/Driver: A power drill with screwdriver bits is indispensable for fastening hardware and assembling the various components of the deck.
- Level: Ensure that you have a reliable carpenter's level to verify the evenness and alignment of the deck's structural elements during assembly.
- Measuring Tools: Tape measures, framing squares, and angle finders are essential for taking accurate measurements and ensuring the precise alignment of the deck components.
- Safety Gear: Prioritize safety by equipping yourself with protective gear, including safety glasses, work gloves, and hearing protection, to safeguard against potential hazards during construction.
By proactively gathering the required materials and tools, you set the stage for a smooth and efficient construction process. With these essential components and equipment at your disposal, you'll be well-prepared to move on to the next phase: preparing the site for deck construction.
Step 3: Preparing the Site
Preparing the site for the construction of your 10×10 deck for a hot tub is a critical phase that sets the groundwork for the structural integrity and longevity of your outdoor retreat. This preparatory stage involves a series of essential tasks aimed at ensuring a stable and level foundation for the deck, as well as accommodating the specific requirements of the hot tub installation. Here's a detailed breakdown of the key steps involved in preparing the site for your deck construction:
-
Clearing and Leveling: Begin by clearing the designated area of any vegetation, debris, or obstacles that may impede the construction process. Use a shovel, rake, or powered equipment to level the ground, ensuring that the site is free from uneven terrain and obstructions. A level and well-prepared surface is essential for the stability and structural integrity of the deck.
-
Marking the Layout: Use marking paint, stakes, or string to outline the precise dimensions and layout of the deck on the cleared site. This visual guide will help you visualize the footprint of the deck and ensure that it aligns with your initial design plans.
-
Excavation and Footings: If your deck will be elevated or supported by footings, excavate the designated areas to the specified depth for installing concrete footings. Follow local building codes and regulations regarding footing depth and diameter, ensuring that the footings will adequately support the weight of the deck and hot tub.
-
Installing Support Posts: If your deck design includes support posts, set them in place within the excavated areas, ensuring that they are plumb and securely anchored. Use temporary bracing to maintain the vertical alignment of the posts as you proceed with the construction process.
-
Verifying Alignment and Level: Use a carpenter's level and string lines to verify the alignment and levelness of the support posts and footings. This meticulous attention to detail is crucial for ensuring that the deck structure will be stable and evenly positioned.
-
Hot Tub Placement: If the hot tub will be integrated into the deck design, ensure that the designated area for the hot tub is accurately marked and prepared. Consider factors such as access to electrical outlets, drainage, and structural support for the hot tub's weight.
By meticulously preparing the site for deck construction, you establish a solid foundation for the subsequent phases of the project, ensuring that the structural elements are positioned with precision and stability. With the site preparation complete, you'll be ready to progress to the next phase: building the frame of the deck.
Step 4: Building the Frame
Building the frame of your 10×10 deck for a hot tub marks a pivotal phase in the construction process, laying the groundwork for the structural integrity and stability of the entire deck. This phase involves assembling the foundational framework that will support the decking boards and accommodate the weight of the hot tub. Here's a comprehensive overview of the key steps involved in building the frame of your deck:
-
Installing the Ledger Board: Begin by attaching a ledger board to the exterior wall of your home or the designated support structure. The ledger board serves as the anchor point for the deck frame and provides crucial support for the deck's outer joists. Ensure that the ledger board is securely fastened using lag screws or through-bolts, following best practices for ledger board installation to guarantee stability and load-bearing capacity.
-
Setting the Inner Joists: With the ledger board in place, proceed to set the inner joists perpendicular to the ledger, creating the primary framework for the deck. Space the joists according to the design specifications, typically 16 inches on center, and secure them to the ledger board using joist hangers or appropriate fasteners. Carefully verify the alignment and levelness of the joists to ensure a uniform and stable foundation for the deck.
-
Adding Rim Joists and Beams: Install rim joists along the outer edges of the inner joists to enclose the deck framework and provide additional structural support. Depending on the design and load requirements, incorporate beams or additional support posts to reinforce the frame and distribute the weight of the deck and hot tub evenly. Ensure that all connections are secure and that the frame is structurally sound.
-
Verifying Squareness and Level: Prior to proceeding with further construction, verify the squareness and levelness of the deck frame using diagonal measurements and a carpenter's level. This meticulous attention to detail is essential for ensuring that the deck frame is uniformly aligned and ready to support the decking boards and hot tub.
-
Considerations for Hot Tub Support: If the deck will accommodate a hot tub, reinforce the frame in the specific area designated for the hot tub's placement. Ensure that the frame is engineered to support the weight of the hot tub, accounting for factors such as water capacity and the anticipated load when the hot tub is in use.
By meticulously executing the process of building the frame, you establish a robust and stable foundation for the subsequent phases of deck construction. With the frame in place, you'll be well-prepared to progress to the next phase: installing the decking to bring your vision of a stunning hot tub deck to life.
Step 5: Installing the Decking
With the sturdy frame of your 10×10 deck for a hot tub in place, the next crucial phase involves the installation of the decking, which will form the surface of your outdoor retreat. This phase marks a significant step toward realizing your vision of a functional and visually appealing deck tailored to accommodate a hot tub. Here's a detailed breakdown of the key steps involved in installing the decking:
-
Selecting the Decking Material: Begin by selecting the appropriate decking material that aligns with your aesthetic preferences, maintenance requirements, and durability expectations. Whether you opt for traditional pressure-treated lumber, low-maintenance composite decking, or natural cedar boards, ensure that the chosen material complements the overall design of your outdoor space.
-
Laying the Decking Boards: Commence the installation process by laying the decking boards perpendicular to the joists, starting from one end of the deck and working your way across. Use appropriate spacing tools, such as deck spacers or nails, to ensure consistent gaps between the boards, promoting proper drainage and ventilation.
-
Securing the Decking: Utilize galvanized decking screws or nails to securely fasten the decking boards to the joists, ensuring a firm and stable attachment. Pay careful attention to the alignment and uniformity of the boards, striving for a visually pleasing and structurally sound deck surface.
-
Trimming and Finishing: As you progress with the installation, trim the decking boards to fit the designated perimeter of the deck, ensuring clean and precise edges. Consider incorporating decorative elements, such as picture framing or diagonal patterns, to enhance the visual appeal of the deck surface.
-
Preventing Water Damage: Prioritize the installation of appropriate flashing and waterproofing measures to safeguard the structural integrity of the deck. Pay particular attention to areas where the decking boards intersect with the ledger board and the perimeter of the deck, implementing effective water diversion techniques to prevent moisture-related issues.
-
Considerations for Hot Tub Placement: If the deck will accommodate a hot tub, ensure that the decking is installed to support the weight of the hot tub and provide a stable and level surface. Verify that the decking is engineered to withstand the anticipated load and consider reinforcing the area beneath the hot tub for added support.
By meticulously executing the process of installing the decking, you bring your vision of a captivating hot tub deck to fruition, creating a welcoming and functional outdoor space that seamlessly integrates the hot tub into its design. With the decking in place, you'll be poised to progress to the final phase: adding the finishing touches to elevate the aesthetic and functionality of your deck oasis.
Step 6: Adding the Finishing Touches
As you approach the final phase of building your 10×10 deck for a hot tub, adding the finishing touches is where the magic happens. This stage allows you to infuse personality, functionality, and visual appeal into your outdoor oasis, transforming it into a welcoming and inviting space for relaxation and entertainment. Here's a detailed exploration of the essential steps involved in adding the finishing touches to your hot tub deck:
1. Railing and Balustrades
Consider incorporating railing and balustrades to enhance safety and aesthetics. Whether you opt for sleek metal railings, classic wooden balusters, or transparent glass panels, the addition of these features can define the perimeter of the deck while providing a sense of security and style.
2. Lighting Solutions
Illuminate your deck with strategically placed lighting to extend its functionality into the evening hours. From soft ambient lighting to accentuate the hot tub area to pathway lights and overhead fixtures, thoughtful lighting solutions can create a captivating ambiance while ensuring safety and visibility.
3. Seating and Storage
Integrate built-in seating or benches into your deck design to provide comfortable seating options for relaxation and socializing. Additionally, consider incorporating storage solutions such as under-deck compartments or built-in benches with lift-up seats to stow away cushions, towels, and other essentials.
4. Landscaping and Greenery
Enhance the natural appeal of your deck by incorporating potted plants, planter boxes, or vertical gardens. The strategic placement of greenery can soften the deck's edges, create privacy, and infuse a refreshing touch of nature into the outdoor space.
5. Personalized Accents
Add personalized accents such as decorative outdoor rugs, throw pillows, and weather-resistant artwork to infuse your unique style into the deck. These accents can inject color, texture, and personality, creating a cohesive and inviting atmosphere.
6. Maintenance Considerations
Implement maintenance considerations such as applying protective sealants or stains to the decking, inspecting and tightening hardware, and establishing a regular cleaning routine to preserve the deck's beauty and longevity.
By meticulously attending to these finishing touches, you elevate the functionality, safety, and visual appeal of your hot tub deck, creating a harmonious and inviting outdoor retreat. With the completion of this phase, your 10×10 deck for a hot tub will stand as a testament to your craftsmanship and vision, ready to enrich your lifestyle and provide endless moments of relaxation and enjoyment.
Conclusion
In conclusion, the journey of building a 10×10 deck for a hot tub is a fulfilling and transformative endeavor that culminates in the creation of a captivating outdoor retreat. From the initial stages of planning and design to the meticulous execution of construction and finishing touches, every phase of the project contributes to the realization of a functional and visually appealing space tailored to accommodate a hot tub.
Throughout the process, careful consideration of factors such as space assessment, local regulations, and deck purpose guides the decision-making, ensuring that the deck aligns with both practical requirements and personal preferences. The gathering of materials and tools sets the stage for a streamlined construction phase, while the preparatory site work establishes a stable foundation for the deck's structural integrity.
Building the frame and installing the decking form the core of the construction process, where precision and attention to detail are paramount. The incorporation of finishing touches, including railing, lighting, seating, and personalized accents, adds depth and character to the deck, elevating its functionality and visual appeal.
As the final hammer strikes and the finishing touches are put in place, the 10×10 deck for a hot tub emerges as a testament to craftsmanship, creativity, and dedication. It stands ready to enrich the homeowner's lifestyle, providing a welcoming space for relaxation, social gatherings, and moments of tranquility amidst the beauty of the outdoors.
Ultimately, the completion of this project represents not only the physical manifestation of a well-constructed deck but also the fulfillment of a vision—a vision of an outdoor sanctuary where the soothing waters of a hot tub harmonize with the natural surroundings, creating a haven for rejuvenation and connection.
With the comprehensive guide and expert insights provided, DIY enthusiasts and homeowners alike are empowered to embark on this rewarding journey with confidence, knowing that each phase of the project is supported by valuable knowledge and practical tips. The 10×10 deck for a hot tub stands as a testament to the transformative power of DIY craftsmanship, enriching homes and lifestyles with its timeless allure and functional elegance.