
Home>Create & Decorate>DIY & Crafts>Build Your Own Barn Style Shed With These Plans
DIY & Crafts
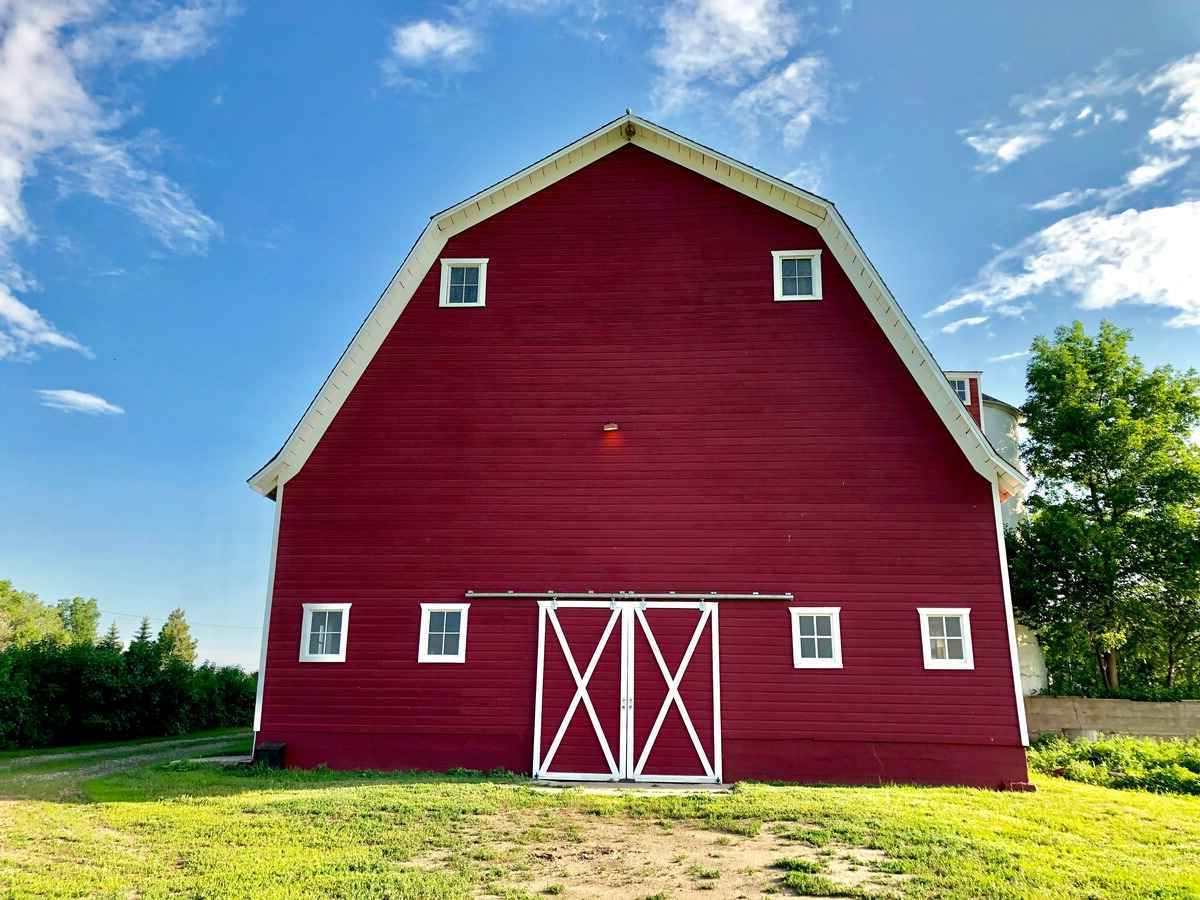
Build Your Own Barn Style Shed With These Plans
Published: February 27, 2024

Content Creator specializing in woodworking and interior transformations. Caegan's guides motivate readers to undertake their own projects, while his custom furniture adds a personal touch.
Discover the best DIY barn style shed plans to build your own shed. Get creative with these DIY & Crafts projects and start building today!
(Many of the links in this article redirect to a specific reviewed product. Your purchase of these products through affiliate links helps to generate commission for Twigandthistle.com, at no extra cost. Learn more)
Introduction
Are you ready to embark on an exciting DIY project that will not only enhance your property but also provide valuable storage space? Building a barn-style shed can be a rewarding and practical endeavor, allowing you to unleash your creativity while adding a charming and functional structure to your backyard. Whether you're a seasoned DIY enthusiast or a novice looking for a fulfilling challenge, constructing your own barn-style shed is an achievable goal with the right guidance and resources.
In this comprehensive guide, we will walk you through the step-by-step process of building a barn-style shed, from selecting the ideal location to adding the finishing touches. You'll discover valuable insights, expert tips, and detailed instructions that will empower you to create a sturdy and visually appealing shed that meets your specific needs.
By following these plans, you'll have the opportunity to customize your shed to match your property's aesthetic and your personal preferences. Whether you envision a rustic retreat nestled in a corner of your garden or a versatile storage space that complements your home's architecture, the flexibility of these plans allows for a personalized approach to shed construction.
Throughout this journey, you'll gain valuable skills in carpentry, construction, and project management, all while enjoying the satisfaction of bringing your vision to life. With careful planning, attention to detail, and a willingness to embrace the process, you'll soon find yourself with a stunning barn-style shed that stands as a testament to your dedication and craftsmanship.
So, roll up your sleeves, gather your tools, and let's dive into the exciting world of DIY shed construction. Whether you're seeking a practical storage solution, a cozy workshop, or a charming addition to your property, this guide will equip you with the knowledge and inspiration needed to make your barn-style shed dreams a reality.
Choosing the Right Location
Selecting the ideal location for your barn-style shed is a crucial first step in the construction process. The placement of your shed will not only impact its visual appeal but also its functionality and longevity. Here's a detailed guide to help you make an informed decision:
-
Assessing the Landscape: Begin by surveying your property to identify potential locations for the shed. Consider the natural topography, drainage patterns, and existing landscaping features. Look for a spot that is relatively level and well-drained to ensure a stable foundation and minimize the risk of water damage.
-
Local Regulations: Check with your local building authorities or homeowner's association to understand any zoning restrictions or building codes that may dictate the placement of structures on your property. Compliance with these regulations is essential to avoid potential legal issues in the future.
-
Accessibility: Evaluate the accessibility of the chosen location. Ensure that there is sufficient space for maneuvering construction materials, equipment, and tools. Additionally, consider how the shed's placement may impact the flow of foot traffic in your yard or garden.
-
Sunlight and Ventilation: Take note of the sun's path throughout the day and the prevailing wind direction. Position the shed in a way that maximizes natural light and airflow, which can contribute to a more comfortable interior environment and help prevent moisture-related issues.
-
Aesthetic Considerations: Think about how the shed will complement the overall aesthetics of your property. Consider sightlines from your home and neighboring properties, aiming for a location that enhances the visual appeal of your outdoor space.
-
Functionality: Determine the intended use of the shed. If it will primarily serve as a storage space, consider placing it in a convenient yet discreet location. For those planning to use the shed as a workshop or hobby space, proximity to utilities such as electricity and water may be a key factor.
-
Future Landscaping Plans: If you have long-term landscaping plans for your property, take those into account when choosing the shed's location. Consider how the shed will integrate with future garden beds, pathways, or outdoor living areas.
By carefully considering these factors, you can confidently select a location that aligns with your practical needs, regulatory requirements, and aesthetic preferences. Once you've identified the perfect spot for your barn-style shed, you'll be ready to move on to the next phase of the construction process.
Gathering Materials and Tools
Before diving into the construction of your barn-style shed, it's essential to gather all the necessary materials and tools to ensure a smooth and efficient building process. By having everything at your disposal, you can minimize interruptions and focus on bringing your shed to life. Here's a comprehensive list of materials and tools you'll need to get started:
Materials
- Lumber: Purchase high-quality lumber for framing, siding, and trim. Opt for pressure-treated or weather-resistant wood to enhance the shed's durability.
- Fasteners: Stock up on nails, screws, and other fastening hardware in various sizes to accommodate different construction tasks.
- Roofing Materials: Depending on your design preferences, acquire asphalt shingles, metal roofing panels, or other suitable roofing materials. Don't forget underlayment and flashing to ensure a watertight roof.
- Foundation Components: If you're building a raised shed, gather concrete blocks, gravel, and pressure-treated beams for the foundation. For a concrete slab foundation, arrange for concrete mix and reinforcement mesh.
- Siding and Trim: Select siding materials such as plywood, T1-11, or board-and-batten siding, along with trim pieces to add a polished look to the shed's exterior.
- Doors and Windows: If your shed design includes windows and doors, procure these components along with the necessary hardware for installation.
- Moisture Barrier: Invest in a high-quality moisture barrier to protect the shed from water infiltration and moisture-related issues.
Tools
- Power Tools: Ensure you have a circular saw, power drill, and nail gun for efficient cutting and fastening operations.
- Hand Tools: Gather a comprehensive set of hand tools including hammers, screwdrivers, chisels, levels, and measuring tapes for precise and detailed work.
- Ladders and Scaffolding: Depending on the shed's height, secure sturdy ladders or scaffolding to facilitate safe access during construction.
- Safety Gear: Prioritize safety by obtaining protective gear such as goggles, gloves, and dust masks to safeguard yourself during construction activities.
- Workbench and Sawhorses: Set up a sturdy workbench and sawhorses to provide a stable and organized workspace for assembly and construction tasks.
- Painting Supplies: If you plan to paint or stain the shed, gather brushes, rollers, and other painting supplies in the desired colors.
By proactively gathering these materials and tools, you'll set the stage for a productive and enjoyable construction experience. With everything in place, you can confidently move on to the next phase of building your barn-style shed: laying the foundation.
Building the Foundation
The foundation serves as the backbone of your barn-style shed, providing stability and protection against ground moisture. Depending on your preferences and local building codes, you can choose from several foundation options, including concrete slabs, concrete blocks, or skids. Here's a detailed overview of the foundation-building process:
Site Preparation
Before commencing foundation construction, ensure the chosen site is clear of any debris, vegetation, or obstacles. Use a shovel and rake to level the ground, removing any rocks or protrusions that could disrupt the foundation's integrity. If you're building on uneven terrain, consider using a transit level to establish a consistent foundation height across the shed's footprint.
Concrete Slab Foundation
For a permanent and robust foundation, a concrete slab offers exceptional durability and resistance to moisture. Begin by marking the perimeter of the shed on the prepared site, then excavate the area to a depth that accommodates the concrete thickness and provides adequate clearance for reinforcing materials. Install formwork along the excavated perimeter, ensuring it is level and securely braced. Next, pour and level the concrete mix, embedding reinforcement mesh or rebar to enhance structural strength. Allow the concrete to cure according to the manufacturer's recommendations before proceeding with the shed's construction.
Concrete Block or Skid Foundation
If you prefer a raised foundation, concrete blocks or skids offer a versatile and cost-effective solution. Position concrete blocks or pressure-treated skids at regular intervals to support the shed's floor framing. Use a spirit level to ensure the blocks or skids are aligned and level, providing a stable base for the shed's structure. Additionally, consider adding gravel or compacted stone beneath the blocks or skids to improve drainage and prevent moisture accumulation.
Anchoring and Moisture Protection
Regardless of the foundation type, anchoring the shed to the foundation is essential for structural stability, especially in areas prone to high winds or seismic activity. Utilize anchor bolts, straps, or other approved fastening methods to secure the shed to the foundation, minimizing the risk of displacement during adverse weather conditions. To safeguard the shed against ground moisture, apply a moisture barrier between the foundation and the shed's floor framing, effectively preventing water infiltration and potential rot.
By meticulously executing the foundation-building process, you'll establish a solid and reliable base for your barn-style shed, setting the stage for the subsequent phases of construction. With the foundation in place, you're ready to embark on the exciting journey of framing and erecting the structure, bringing your vision of a functional and visually appealing shed one step closer to reality.
Constructing the Frame
The process of constructing the frame is a pivotal phase in building a barn-style shed, as it lays the groundwork for the shed's structural integrity and overall stability. This phase involves assembling the framework that will support the shed's walls, roof, and doors, forming the skeleton of the structure. Here's a detailed overview of the steps involved in constructing the frame:
Wall Framing
Begin by laying out the bottom plates of the shed walls on the foundation, ensuring they are square and properly aligned. Next, position the wall studs at regular intervals along the bottom plates, securing them in place with nails or screws. Depending on the shed's design, you may incorporate window and door openings into the wall framing, carefully framing these openings to accommodate the installation of doors and windows at a later stage.
Roof Trusses or Rafters
The roof structure plays a critical role in providing support and protection for the shed. Depending on your design preferences, you can opt for pre-built roof trusses or construct rafters on-site. If using pre-built trusses, carefully position and secure them to the top plates of the shed walls, ensuring they are evenly spaced and aligned. For on-site rafter construction, accurately cut and assemble the rafters, taking care to maintain consistent angles and dimensions to ensure a uniform and stable roof structure.
Bracing and Reinforcement
To enhance the frame's stability and resistance to lateral forces, incorporate diagonal bracing within the wall framing and roof structure. Diagonal braces help distribute loads and prevent the frame from racking or shifting, particularly in regions prone to high winds or seismic activity. Additionally, consider reinforcing critical joints and connections with metal brackets or hardware to further fortify the frame against external forces.
Floor Framing (If Applicable)
If your shed design includes a raised floor, proceed to construct the floor framing atop the foundation. Utilize pressure-treated joists and rim joists to form a sturdy and level platform, ensuring adequate support for the shed's interior floor and exterior walls. Secure the floor framing to the foundation or skids, verifying its levelness and structural integrity before proceeding with subsequent construction tasks.
By meticulously executing the frame construction process, you'll establish a robust and well-engineered framework that forms the backbone of your barn-style shed. With the frame in place, you're poised to advance to the next stages of shed construction, including adding the roof, siding, doors, and windows, bringing your vision of a functional and visually appealing shed closer to fruition.
Adding the Roof and Siding
With the frame of your barn-style shed securely in place, the next crucial step is to add the roof and siding, transforming the skeletal structure into a weatherproof and visually appealing enclosure. This phase of the construction process involves meticulous attention to detail and precision to ensure a durable and aesthetically pleasing finish for your shed.
Roof Installation
Roof Sheathing
Begin by installing the roof sheathing, which serves as the base for the roof covering. Use plywood or oriented strand board (OSB) to cover the roof framing, ensuring a solid and uniform substrate for the roofing material. Secure the sheathing to the roof framing with nails or screws, paying close attention to proper fastening spacing and edge alignment to promote structural integrity and prevent roof deflection.
Roofing Material
Select the roofing material that best suits your design preferences and functional requirements. Whether you opt for traditional asphalt shingles, durable metal roofing panels, or alternative roofing options, carefully follow the manufacturer's installation guidelines to achieve a watertight and long-lasting roof. Pay attention to proper overlap, fastening methods, and flashing details to safeguard the shed against water infiltration and ensure optimal weather resistance.
Roof Ventilation
Incorporate adequate roof ventilation to promote air circulation and prevent moisture buildup in the attic or upper space of the shed. Install ridge vents, soffit vents, or gable vents as per the shed's design and local climate considerations, enhancing the shed's overall durability and interior comfort.
Siding Installation
Siding Selection
Choose the siding material that aligns with your aesthetic vision and complements the architectural style of your property. Whether you prefer the classic appeal of horizontal lap siding, the rustic charm of board-and-batten siding, or the versatility of T1-11 plywood panels, ensure the selected siding material offers durability and visual appeal.
Siding Application
Carefully measure and cut the siding panels to fit the shed's exterior walls, accounting for door and window openings as necessary. Install the siding according to the manufacturer's recommendations, ensuring proper overlap, alignment, and fastening to create a seamless and weather-resistant cladding for the shed. Pay attention to corner details, trim installation, and moisture management to maintain the structural integrity and visual cohesiveness of the siding installation.
By meticulously executing the roof and siding installation, you'll elevate your barn-style shed from a bare framework to a fully enclosed and weather-protected structure. With the roof providing reliable overhead protection and the siding enhancing the shed's exterior aesthetics, you're one step closer to realizing your vision of a functional and visually appealing shed that complements your property and meets your specific needs.
Installing Doors and Windows
The installation of doors and windows marks a significant milestone in the construction of a barn-style shed, as it introduces elements of functionality, accessibility, and natural light into the structure. Careful attention to detail and precision is essential to ensure proper fitting, weatherproofing, and aesthetic integration of these essential components. Here's a detailed overview of the process involved in installing doors and windows:
Door Installation
-
Selecting the Doors: Choose doors that align with the shed's design and intended use. Whether opting for a traditional hinged door, a sliding barn door, or a roll-up door for larger openings, ensure the selected doors offer durability, security, and visual appeal.
-
Preparing the Door Opening: Prior to installation, carefully frame the door opening within the shed's wall framing, ensuring it accommodates the dimensions of the selected door. Verify the squareness and alignment of the door opening to facilitate a seamless installation process.
-
Installing the Door: Position the door within the opening, ensuring it operates smoothly and aligns properly with the surrounding wall structure. Secure the door in place using appropriate hinges, fasteners, and hardware, paying attention to proper clearance and weather sealing to prevent air and water infiltration.
-
Weatherproofing and Trim: Apply weather-stripping and door seals to create a tight seal between the door and the surrounding frame, minimizing heat loss and preventing moisture ingress. Additionally, install trim around the door's perimeter to enhance its visual appeal and provide a finished look to the entrance.
Window Installation
-
Choosing the Windows: Select windows that complement the shed's architectural style and provide adequate natural light and ventilation. Consider factors such as window size, operability, and energy efficiency to meet the shed's functional and aesthetic requirements.
-
Preparing the Window Openings: Frame the window openings within the shed's wall framing, ensuring they align with the selected window dimensions and accommodate proper flashing and weatherproofing details. Verify the squareness and levelness of the openings to facilitate a seamless window installation process.
-
Installing the Windows: Carefully position the windows within the prepared openings, ensuring they fit securely and operate smoothly. Secure the windows in place using appropriate fasteners and hardware, ensuring proper alignment and sealing to prevent air and water infiltration.
-
Flashing and Trim: Apply flashing around the perimeter of the windows to create a watertight seal and prevent moisture intrusion. Install exterior trim to enhance the visual appeal of the windows and provide a polished finish to the shed's exterior.
By meticulously executing the installation of doors and windows, you'll enhance the functionality, aesthetics, and livability of your barn-style shed, creating a welcoming and well-appointed space that aligns with your vision and practical needs. With the doors providing convenient access and the windows infusing natural light and ventilation, your shed will evolve into a versatile and inviting structure that adds value to your property.
Finishing Touches
With the structural elements of your barn-style shed in place, it's time to shift focus to the finishing touches that will elevate the overall functionality, aesthetics, and longevity of the structure. This phase involves attention to detail and thoughtful additions that enhance the shed's usability and visual appeal, ensuring that it seamlessly integrates with your property and meets your specific needs.
Exterior Trim and Molding
Incorporate exterior trim and molding to add character and refinement to the shed's exterior. Consider decorative trim pieces around doors, windows, and corners, enhancing the architectural charm of the structure. Additionally, fascia boards and soffit trim can provide a polished look while offering protection against weather elements.
Paint or Stain
Choose a high-quality exterior paint or stain to protect the shed from the elements while adding a personal touch to its appearance. Select colors that complement your property's palette and architectural style, ensuring a cohesive and visually appealing integration with the surroundings.
Interior Finishing
If the shed will serve as a workshop, storage space, or hobby area, consider interior finishing touches such as shelving, workbenches, and storage solutions. Organize the interior space to maximize functionality and efficiency, creating a welcoming and practical environment for your intended use.
Gutters and Downspouts
Install gutters and downspouts to manage rainwater runoff and prevent soil erosion around the shed. Proper drainage solutions contribute to the shed's long-term structural integrity and protect the surrounding landscape from water-related damage.
Lighting and Electrical
If the shed will be used for extended periods, consider installing lighting fixtures and electrical outlets. Whether for evening tasks or general illumination, well-planned lighting enhances usability and safety. Consult a qualified electrician to ensure proper wiring and compliance with electrical codes.
Landscaping Integration
Integrate the shed into your property's landscaping by adding pathways, plantings, or hardscaping elements that enhance its visual appeal. Thoughtful landscaping around the shed can create a harmonious connection with the surrounding outdoor space.
Security and Access
Implement security features such as locks, motion-sensing lights, and secure windows to safeguard the shed and its contents. Additionally, ensure convenient access by considering pathways, ramps, or steps that facilitate easy entry and exit.
By attending to these finishing touches, you'll transform your barn-style shed into a fully realized and purposeful addition to your property. Each detail contributes to the shed's functionality, durability, and aesthetic integration, ensuring that it stands as a testament to your craftsmanship and attention to detail. With the finishing touches in place, your barn-style shed will serve as a valuable and versatile asset, ready to fulfill your storage, workspace, or recreational needs for years to come.
Conclusion
As you reach the culmination of your barn-style shed construction journey, it's essential to reflect on the remarkable achievement and the transformative impact it brings to your property. The completion of a DIY project of this scale signifies not only the tangible creation of a functional structure but also the acquisition of valuable skills, the cultivation of perseverance, and the fulfillment of a vision brought to life.
Your barn-style shed stands as a testament to your dedication, craftsmanship, and ingenuity. It embodies the fusion of practicality and aesthetics, offering a versatile space that seamlessly integrates with your property while serving a myriad of purposes. Whether it's a shelter for gardening tools, a workshop for creative endeavors, or a retreat for relaxation, the shed represents a personalized sanctuary within your outdoor space.
Beyond its utilitarian value, the shed becomes a focal point of pride and satisfaction, a tangible symbol of your ability to conceive, plan, and execute a substantial construction project. The memories created during its construction, the moments of problem-solving, and the shared experiences with friends and family contribute to the shed's intrinsic value as a cherished part of your property.
Furthermore, the completion of the barn-style shed marks the beginning of a new chapter, offering endless possibilities for customization, organization, and utilization. As you tailor the interior space to your specific needs, explore storage solutions, and infuse your personal touch through decor and functional additions, the shed evolves into a dynamic and adaptable asset that grows alongside your lifestyle.
Moreover, the knowledge and expertise gained throughout the construction process extend far beyond the completion of the shed. The skills acquired in carpentry, construction, and project management become part of your repertoire, empowering you to undertake future endeavors with confidence and proficiency. The shed serves as a tangible reminder of your capabilities and resilience, inspiring future DIY projects and creative pursuits.
In conclusion, the construction of a barn-style shed transcends the mere act of building a structure; it represents a transformative journey of creativity, perseverance, and skill development. As you stand back and admire the finished shed, take pride in the realization of your vision and the enduring impact it brings to your property and your life. Embrace the possibilities that the shed offers, and let it stand as a testament to your unwavering commitment to craftsmanship and the pursuit of a fulfilling DIY endeavor.