
Home>Create & Decorate>DIY & Crafts>How To Build A Gazebo
DIY & Crafts
How To Build A Gazebo
Published: February 27, 2024

Senior Editor in Create & Decorate, Kathryn combines traditional craftsmanship with contemporary trends. Her background in textile design and commitment to sustainable crafts inspire both content and community.
Learn how to build a gazebo with our step-by-step DIY guide. Get creative with your DIY & Crafts projects and create a stunning outdoor space. Start building today!
(Many of the links in this article redirect to a specific reviewed product. Your purchase of these products through affiliate links helps to generate commission for Twigandthistle.com, at no extra cost. Learn more)
Introduction
Building a gazebo in your backyard can transform the outdoor space into a charming retreat where you can relax, entertain, and enjoy the beauty of nature. A gazebo serves as a focal point, adding elegance and functionality to your property. Whether you envision it as a cozy spot for morning coffee or a picturesque setting for gatherings, constructing a gazebo is a rewarding DIY project that allows you to customize the design to suit your preferences.
A gazebo is more than just a structure; it's a symbol of tranquility and a place to create lasting memories with family and friends. As you embark on this endeavor, you'll have the opportunity to unleash your creativity and craftsmanship, resulting in a stunning addition to your outdoor living space. From the initial planning stages to the final touches, each step of the construction process is an opportunity to bring your vision to life and showcase your handiwork.
In the following sections, we will guide you through the step-by-step process of building a gazebo, covering everything from planning and designing to assembling the structure and adding the finishing touches. By following these comprehensive instructions and tips, you'll gain the knowledge and confidence to tackle this project with enthusiasm and achieve a remarkable outcome. So, roll up your sleeves, gather your tools, and let's embark on this exciting journey to create a captivating gazebo that will elevate the charm and functionality of your outdoor space.
Step 1: Planning and Designing Your Gazebo
Before diving into the physical construction of your gazebo, meticulous planning and thoughtful design are essential to ensure a successful and satisfying outcome. This initial phase sets the stage for the entire project, allowing you to envision the gazebo's style, size, and placement within your outdoor space.
Research and Inspiration
Begin by gathering inspiration from various sources such as home improvement magazines, online platforms, and local garden centers. Explore different gazebo styles, materials, and architectural details to identify elements that resonate with your vision. Consider the overall aesthetic of your property and how the gazebo can complement the existing landscape and structures.
Purpose and Functionality
Define the purpose of your gazebo. Will it serve as a tranquil retreat for relaxation, a focal point for outdoor gatherings, or a sheltered space for dining? Understanding its primary function will guide the design process and influence decisions regarding size, seating capacity, and additional features such as built-in benches or a serving area.
Location and Layout
Carefully assess your outdoor space to determine the ideal location for the gazebo. Take into account factors such as sunlight exposure, views, privacy, and proximity to existing amenities. Consider creating a focal point by placing the gazebo at the end of a garden path or in a central area that draws attention. Additionally, sketch out potential layouts to visualize how the gazebo will integrate with the surrounding landscape.
Design Considerations
Explore different design elements such as roof styles, railing details, and decorative accents to personalize the gazebo. Whether you prefer a classic octagonal shape, a contemporary rectangular design, or a custom layout, the design phase allows you to tailor the gazebo to reflect your unique style and preferences. Pay attention to architectural details that harmonize with your home's aesthetic, ensuring a cohesive and visually appealing result.
Permits and Regulations
Check local building codes and regulations to determine if permits are required for constructing a gazebo. Understanding these requirements and obtaining necessary approvals in advance will prevent potential setbacks and ensure compliance with legal standards.
Collaboration and Professional Input
If desired, consult with a landscape designer, architect, or contractor to refine your gazebo plans and benefit from their expertise. Their insights can provide valuable guidance on structural considerations, material selection, and optimizing the gazebo's functionality within your outdoor space.
By investing time and attention into the planning and design phase, you'll lay a solid foundation for the construction process and set the stage for bringing your gazebo vision to life. This thoughtful approach will ultimately contribute to a well-executed and harmonious addition to your outdoor environment.
Step 2: Gathering Materials and Tools
The successful construction of a gazebo hinges on the availability of the right materials and tools. As you embark on this phase of the project, meticulous planning and attention to detail are crucial to ensure a smooth and efficient building process. By acquiring high-quality materials and essential tools, you'll be well-equipped to bring your gazebo vision to fruition.
Materials
-
Lumber: Select pressure-treated or cedar lumber for durability and resistance to outdoor elements. The specific quantity and dimensions will depend on the size and design of your gazebo.
-
Hardware: Gather a comprehensive assortment of galvanized or stainless steel screws, nails, bolts, and brackets to secure the structural components and ensure long-lasting stability.
-
Concrete: Acquire concrete mix for the foundation footings, providing a solid and stable base for the gazebo structure.
-
Roofing Materials: Depending on your design preferences, gather roofing materials such as shingles, metal panels, or thatch to protect the gazebo from the elements.
-
Decorative Elements: Consider embellishments such as lattice panels, decorative trims, and post caps to add character and charm to the gazebo.
-
Finishing Touches: Plan for exterior wood stain, sealant, or paint to enhance the aesthetics and protect the wood from weathering.
Tools
-
Power Tools: Ensure you have a reliable circular saw, drill/driver, and a sturdy hammer to facilitate precise cutting, drilling, and fastening of materials.
-
Measuring and Marking Tools: A tape measure, carpenter's square, and chalk line will aid in accurate measurements and layout markings during construction.
-
Level and Plumb Line: These tools are essential for ensuring that the gazebo components are installed perfectly level and vertically aligned.
-
Digging and Mixing Tools: Shovels, a post-hole digger, and a mixing trough or wheelbarrow will be indispensable for excavating the foundation footings and preparing concrete.
-
Ladder or Scaffolding: Depending on the gazebo's height, a stable ladder or scaffolding will facilitate safe access during assembly and installation.
-
Safety Gear: Prioritize safety by equipping yourself with protective eyewear, work gloves, and a dust mask to safeguard against potential hazards during construction.
By methodically procuring the necessary materials and tools, you'll establish a solid foundation for the construction phase and streamline the assembly process. Attention to detail in selecting high-quality materials and ensuring the availability of essential tools will contribute to the successful realization of your gazebo project.
Step 3: Preparing the Site
Preparing the site for your gazebo construction is a critical phase that sets the stage for the structural integrity and longevity of the entire project. This step involves a series of essential tasks aimed at creating a stable and level foundation, ensuring proper drainage, and optimizing the site for the assembly of the gazebo structure.
Clearing and Marking the Area
Begin by clearing the designated area of any debris, vegetation, or obstacles that may impede the construction process. Use a string or rope to outline the perimeter of the gazebo's footprint, providing a visual guide for the site preparation tasks. This step is crucial for establishing the precise location and dimensions of the gazebo within your outdoor space.
Excavating Foundation Footings
Using the dimensions outlined in your gazebo plans, carefully excavate the foundation footings at the marked locations. The depth and diameter of the footings will depend on the specific requirements dictated by your design and local building codes. Typically, this involves digging below the frost line to ensure stability and prevent shifting due to ground movement.
Assessing Drainage and Soil Composition
Evaluate the site's drainage patterns to identify any potential water accumulation or runoff issues. It's essential to ensure that the gazebo site is situated on well-draining soil to prevent water-related damage to the structure over time. Additionally, assess the soil composition to determine its load-bearing capacity, which is crucial for supporting the gazebo's foundation and overall structural stability.
Leveling and Compacting the Ground
Once the footings are excavated, focus on leveling the ground within the designated area to create a uniform base for the foundation. Use a compacting tool, such as a hand tamper or plate compactor, to firmly pack the soil and create a stable surface. This step is vital for preventing settling and ensuring that the foundation remains level and secure.
Installing Drainage and Weed Barrier
Incorporate a layer of gravel at the bottom of the footings to facilitate drainage and minimize moisture retention. Additionally, consider installing a weed barrier fabric to prevent weed growth and maintain a clean and well-maintained appearance around the gazebo. These measures contribute to the long-term preservation of the site and the structural integrity of the gazebo.
Verifying Alignment and Dimensions
Before proceeding to the next construction phase, verify that the excavated footings align with the gazebo plans and adhere to the specified dimensions. Use a tape measure and level to confirm the accuracy of the layout, ensuring that the foundation is precisely positioned according to the intended design.
By meticulously executing the site preparation tasks, you'll establish a solid groundwork for the subsequent stages of gazebo construction. This conscientious approach to site preparation is instrumental in ensuring the stability, durability, and overall success of your gazebo project.
Step 4: Building the Foundation
The foundation serves as the fundamental support system for your gazebo, anchoring it securely to the ground and providing stability against external forces. This phase of construction is pivotal in ensuring the long-term durability and structural integrity of the gazebo, making it essential to execute with precision and attention to detail.
Setting the Footings
Commence the foundation construction by setting the footings in the excavated locations, aligning them with the predetermined layout and dimensions. The footings, typically made of concrete, play a crucial role in distributing the gazebo's weight evenly and preventing settling or shifting over time. Ensure that the footings are level and precisely positioned according to the gazebo plans, using a spirit level and string lines for accuracy.
Pouring and Curing Concrete
Once the footings are in place, proceed to pour concrete into the excavated holes, filling them to the appropriate depth and ensuring that the concrete surface remains level with the ground. Use a concrete mix with the recommended strength and composition, and employ proper techniques to eliminate air pockets and achieve a uniform consistency. Allow the concrete to cure thoroughly, following the manufacturer's guidelines for optimal strength and stability.
Installing Anchor Brackets
After the concrete has cured, install anchor brackets or post bases on top of the footings to secure the gazebo posts. These brackets provide a solid connection between the gazebo structure and the foundation, offering additional reinforcement and resistance against uplift forces. Use corrosion-resistant fasteners to attach the brackets securely to the footings, ensuring a robust and reliable anchoring system.
Positioning Support Posts
With the anchor brackets in place, position the support posts onto the brackets, ensuring that they are plumb and securely fastened. The support posts, typically constructed from pressure-treated lumber, form the vertical framework of the gazebo and play a pivotal role in supporting the entire structure. Use a level to verify the vertical alignment of the posts and make any necessary adjustments to achieve a perfectly upright orientation.
Verifying Structural Stability
Upon completing the foundation construction, conduct a thorough assessment of the entire support system to verify its structural stability and integrity. Confirm that the footings, concrete, anchor brackets, and support posts collectively form a robust and level foundation that can effectively bear the weight of the gazebo structure. Address any discrepancies or deficiencies promptly to ensure a solid foundation for the subsequent phases of gazebo assembly.
By meticulously executing the foundation construction phase, you establish a reliable and enduring base for the gazebo, laying the groundwork for the seamless progression of the project. The meticulous attention to detail and adherence to best practices in foundation construction are instrumental in ensuring the structural resilience and longevity of your gazebo.
Step 5: Assembling the Gazebo Structure
With the solid foundation in place, the assembly of the gazebo structure marks a significant milestone in the construction process, bringing your vision to life in tangible form. This phase involves the meticulous integration of structural components, including the framework, roof elements, and decorative details, culminating in the emergence of a captivating outdoor retreat.
Erecting the Framework
Commence the assembly by positioning the pre-cut gazebo components, including the rafters, beams, and braces, according to the layout specified in your plans. Utilize the assistance of a reliable level and measuring tools to ensure precise alignment and spacing between the structural elements. Secure the framework components using corrosion-resistant fasteners, such as galvanized screws or nails, to establish a sturdy and well-connected framework.
Installing Roofing Elements
Once the framework is in place, proceed to install the selected roofing materials, whether it be shingles, metal panels, or thatch, based on your design preferences. Carefully follow the manufacturer's guidelines and best practices for roofing installation, ensuring proper overlap, fastening, and weatherproofing to safeguard the gazebo interior from the elements. The roofing phase represents a pivotal step in providing shelter and protection while enhancing the aesthetic appeal of the gazebo.
Incorporating Decorative Accents
Infuse character and charm into the gazebo by incorporating decorative accents such as lattice panels, trim details, and post caps. These embellishments not only add visual interest but also contribute to the overall ambiance and personality of the structure. Thoughtfully integrate these decorative elements to harmonize with the gazebo's design theme and create a captivating focal point within your outdoor space.
Verifying Structural Integrity
Throughout the assembly process, prioritize the verification of structural integrity at each stage, ensuring that all components are securely fastened and aligned according to the specified dimensions. Regular assessments using a level, plumb line, and visual inspections are essential to confirm the stability and precision of the assembled structure. Address any discrepancies promptly to uphold the structural resilience and longevity of the gazebo.
Embracing Progress and Creativity
As you witness the gazebo structure taking shape, embrace the progress and exercise creativity in fine-tuning the details. Consider personalized touches such as integrated seating, lighting fixtures, or functional amenities to tailor the gazebo to your unique preferences and lifestyle. This phase provides an opportunity to infuse your personality and creativity into the structure, transforming it into a personalized haven within your outdoor environment.
By methodically executing the assembly of the gazebo structure, you bring your vision to fruition, creating a captivating and functional outdoor retreat. The meticulous integration of framework, roofing, and decorative elements, coupled with a keen focus on structural integrity, paves the way for the final phase of adding roofing and finishing touches, ultimately culminating in the realization of a remarkable and inviting gazebo.
Step 6: Adding Roofing and Finishing Touches
With the gazebo structure assembled, the focus shifts to the pivotal phase of adding roofing and incorporating the finishing touches, culminating in the transformation of the framework into a captivating and functional outdoor haven.
Roofing Installation
The installation of the gazebo's roofing material represents a critical step in providing shelter, protection, and aesthetic cohesion to the structure. Whether opting for traditional shingles, durable metal panels, or rustic thatch, meticulous attention to detail is essential to ensure a weatherproof and visually appealing roof. Each roofing material requires specific installation techniques, including proper overlap, secure fastening, and weatherproofing measures to safeguard the interior space from the elements. Carefully following manufacturer guidelines and best practices for roofing installation guarantees a durable and resilient roof that complements the overall design of the gazebo.
Sealing and Staining
To enhance the longevity and visual appeal of the gazebo, applying a protective sealant or wood stain is a crucial step. This not only safeguards the wood from weathering, moisture, and UV exposure but also enriches the natural beauty of the lumber, accentuating its grain and texture. Selecting a high-quality sealant or stain formulated for exterior use and applying it according to the manufacturer's recommendations ensures optimal protection and aesthetic enhancement, contributing to the gazebo's long-term durability and visual allure.
Functional and Aesthetic Additions
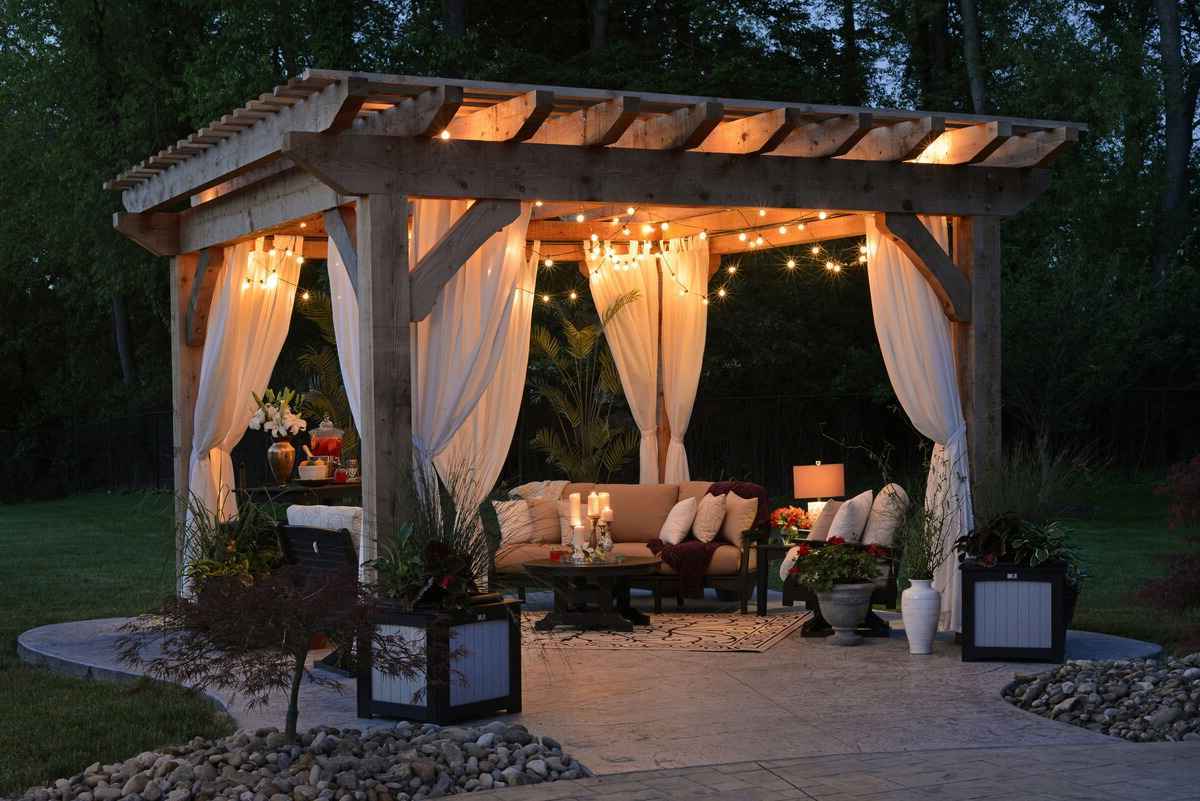
Incorporating functional and aesthetic additions further elevates the gazebo's charm and usability. Consider integrating built-in seating, such as benches or swings, to enhance comfort and functionality. Additionally, the strategic placement of lighting fixtures, such as string lights or lanterns, can create a warm and inviting ambiance, extending the gazebo's utility into the evening hours. Thoughtfully selected decor, such as potted plants, outdoor cushions, or decorative accents, infuses personality and character, transforming the gazebo into a personalized retreat that reflects your unique style and preferences.
Final Inspections and Touch-Ups
Upon completing the roofing and finishing touches, conduct a comprehensive inspection of the entire gazebo structure. Verify the integrity of the roofing installation, ensuring proper alignment, weatherproofing, and secure fastening. Address any potential touch-ups or adjustments promptly to uphold the structural resilience and visual appeal of the gazebo. This meticulous attention to detail guarantees a polished and inviting outdoor space that is ready to be enjoyed and admired for years to come.
By meticulously executing the addition of roofing and finishing touches, the gazebo evolves from a framework into a captivating and functional outdoor retreat. The integration of roofing materials, protective treatments, and personalized enhancements culminates in the realization of a remarkable and inviting gazebo, tailored to your unique preferences and lifestyle.
Conclusion
In conclusion, the construction of a gazebo represents a fulfilling journey that combines meticulous planning, skilled craftsmanship, and creative expression to bring forth a captivating outdoor sanctuary. From the initial stages of envisioning the gazebo's design to the final touches that infuse personality and functionality, each phase of the construction process contributes to the creation of a remarkable and inviting structure.
The planning and design phase sets the tone for the entire project, allowing for thoughtful consideration of the gazebo's purpose, location, and aesthetic elements. This crucial stage lays the groundwork for a well-integrated structure that harmonizes with the surrounding landscape and fulfills its intended function as a tranquil retreat or a focal point for outdoor gatherings.
Gathering the necessary materials and tools with precision and attention to quality ensures that the construction process proceeds smoothly and efficiently. The careful selection of durable lumber, corrosion-resistant hardware, and appropriate roofing materials forms the basis for a resilient and enduring gazebo that withstands the test of time.
The meticulous site preparation and foundation construction are pivotal in establishing a stable and level base for the gazebo, ensuring its structural integrity and longevity. By adhering to best practices in excavation, drainage assessment, and concrete pouring, the foundation becomes a reliable support system that anchors the gazebo securely to the ground.
The assembly of the gazebo structure represents a transformative phase, where the framework takes shape, and the vision begins to materialize. The integration of structural components, roofing materials, and decorative accents breathes life into the structure, creating a captivating and functional outdoor haven that reflects the builder's creativity and attention to detail.
Adding roofing and finishing touches elevates the gazebo to its full potential, providing shelter, protection, and personalized enhancements that enhance its charm and usability. The application of protective sealants, the integration of functional amenities, and the meticulous installation of roofing materials culminate in the realization of a remarkable and inviting gazebo, tailored to the builder's unique preferences and lifestyle.
In essence, the construction of a gazebo transcends the physical act of building; it embodies the fusion of creativity, craftsmanship, and personal expression. As the gazebo takes its place within the outdoor environment, it becomes a testament to the builder's dedication, vision, and ability to transform a concept into a tangible and enduring retreat. Whether it serves as a tranquil escape, a gathering space, or a picturesque backdrop, the gazebo stands as a testament to the art of construction and the creation of timeless outdoor sanctuaries.