
Home>Create & Decorate>DIY & Crafts>How To Build A Truss
DIY & Crafts
How To Build A Truss
Published: February 23, 2024

Content Creator specializing in woodworking and interior transformations. Caegan's guides motivate readers to undertake their own projects, while his custom furniture adds a personal touch.
Learn how to build a truss with our step-by-step DIY guide. Perfect for DIY & Crafts enthusiasts looking to tackle a new project.
(Many of the links in this article redirect to a specific reviewed product. Your purchase of these products through affiliate links helps to generate commission for Twigandthistle.com, at no extra cost. Learn more)
Introduction
Building a truss can be a rewarding and practical DIY project for anyone looking to add structural support to a roof, bridge, or other architectural features. Whether you're a seasoned DIY enthusiast or a beginner eager to take on a new challenge, constructing a truss can be a fulfilling endeavor that combines creativity, engineering, and craftsmanship.
Trusses are essential components in various construction projects, providing stability and strength to the overall structure. By understanding the principles of truss design and construction, you can embark on a journey to create a durable and reliable framework that meets your specific needs.
In this comprehensive guide, we will delve into the intricacies of building a truss, from the initial design phase to the final installation. You will gain valuable insights into the fundamental concepts of truss engineering, learn about the different types of trusses, and discover the step-by-step process of crafting and installing a truss with precision and accuracy.
Whether you're planning to build a truss for a small shed, a residential property, or a custom woodworking project, this guide will equip you with the knowledge and confidence to tackle the task with enthusiasm. By the end of this journey, you will have the expertise to create a sturdy and well-crafted truss that not only serves its functional purpose but also adds a touch of craftsmanship to your construction endeavors.
So, roll up your sleeves, gather your tools, and let's embark on this truss-building adventure together. Get ready to unleash your creativity and engineering prowess as we explore the art and science of constructing trusses from the ground up.
Understanding Trusses
Trusses are structural frameworks composed of interconnected elements that form triangular units. These units are designed to efficiently support loads by distributing them along their various members. Understanding the fundamental principles of trusses is crucial for anyone embarking on a truss-building project.
Types of Trusses
Trusses come in a variety of designs, each tailored to specific structural requirements. Common types include the King Post Truss, Queen Post Truss, Howe Truss, Pratt Truss, and Warren Truss. Each type offers distinct advantages in terms of load-bearing capacity, span capabilities, and aesthetic appeal.
Truss Components
Key components of a truss include the top and bottom chords, web members, and connection points. The top chord, or top member, is the upper horizontal element, while the bottom chord serves as the lower counterpart. Web members, typically arranged in a diagonal pattern, connect the top and bottom chords, forming the triangular configuration that gives trusses their strength.
Load Distribution
Trusses excel at efficiently distributing loads. When external forces such as gravity, wind, or snow act upon a structure, trusses transfer these forces along their members, effectively minimizing the impact on the overall framework. This load-sharing capability is a defining feature of trusses and is essential for maintaining structural integrity.
Advantages of Trusses
Trusses offer several advantages, making them a popular choice in construction. They are lightweight yet remarkably strong, allowing for efficient material usage and cost-effectiveness. Additionally, trusses can span long distances without requiring intermediate supports, making them ideal for creating open and spacious interior environments.
Engineering Principles
The design and engineering of trusses involve meticulous calculations to ensure optimal performance. Factors such as member sizes, angles, and joint connections are carefully considered to achieve the desired strength and stability. Understanding these engineering principles is essential for creating trusses that meet safety standards and structural requirements.
By grasping the intricacies of truss design and functionality, you can lay a solid foundation for your truss-building endeavor. With this knowledge in hand, you are well-equipped to move on to the next phase: designing a truss that aligns with your specific project needs.
Designing a Truss
Designing a truss is a critical phase that requires careful consideration of structural requirements, load-bearing capacities, and aesthetic preferences. Whether you're planning to construct a truss for a residential roof, a bridge, or a custom woodworking project, the design phase sets the stage for a successful and functional end result.
Assessing Structural Needs
The first step in designing a truss is to assess the specific structural needs of the intended application. Consider the span requirements, anticipated loads, and environmental factors such as wind and snow loads. Understanding these parameters is essential for determining the appropriate truss type and configuration that will effectively support the intended structure.
Choosing the Truss Type
Based on the structural assessment, select the most suitable truss type for the project. Each truss type offers unique advantages in terms of load-bearing capabilities, span capacities, and architectural appeal. For example, a King Post Truss may be ideal for smaller spans, while a Pratt Truss or Warren Truss could be more suitable for longer spans and heavier loads.
Determining Member Sizes and Angles
Once the truss type is chosen, the next step is to calculate the sizes and angles of the truss members. This involves precise engineering calculations to ensure that the members can effectively withstand the anticipated loads while maintaining the desired overall truss configuration. Factors such as material strength, deflection limits, and joint connections play a crucial role in determining the optimal member sizes and angles.
Incorporating Aesthetic Elements
While functionality and structural integrity are paramount, the design phase also presents an opportunity to incorporate aesthetic elements into the truss. Consider architectural details, such as decorative end profiles or exposed joinery, that can enhance the visual appeal of the truss while complementing the overall design scheme of the structure it supports.
Utilizing Design Software and Tools
In modern truss design, advanced software and engineering tools can aid in the precise calculation and visualization of truss configurations. Utilizing these resources can streamline the design process, allowing for accurate simulations and adjustments to optimize the truss for performance and efficiency.
Seeking Professional Input
For complex or large-scale projects, consulting with a structural engineer or a truss design specialist can provide valuable insights and ensure that the truss design meets all necessary structural and safety standards. Professional input can help validate the design choices and address any technical considerations that may arise during the design phase.
By meticulously addressing these design considerations, you can lay the groundwork for a well-crafted and structurally sound truss that aligns with the specific requirements of your project. With the design phase complete, the next steps involve selecting suitable materials and commencing the construction of the truss, bringing the envisioned design to life with precision and craftsmanship.
Choosing Materials
Selecting the appropriate materials is a pivotal aspect of truss construction, directly influencing the structural integrity, durability, and overall performance of the completed framework. When choosing materials for a truss, several key factors must be carefully considered to ensure that the selected components align with the design specifications and project requirements.
Wood Selection
Wood is a popular choice for truss construction due to its strength, versatility, and aesthetic appeal. When selecting wood for trusses, it is essential to consider the species, grade, and moisture content of the lumber. Different wood species offer varying levels of strength and durability, with options such as Douglas fir, spruce, and pine commonly used in truss fabrication. Additionally, choosing lumber with the appropriate grade and moisture content is crucial for ensuring the structural stability and longevity of the truss.
Engineered Wood Products
In modern truss construction, engineered wood products such as laminated veneer lumber (LVL), glued laminated timber (glulam), and parallel strand lumber (PSL) offer enhanced strength and dimensional stability compared to traditional lumber. These engineered wood products are manufactured to precise specifications, providing consistent performance and structural reliability. Incorporating engineered wood products into truss construction can offer advantages in terms of load-bearing capacity and design flexibility.
Metal Components
For projects requiring exceptional strength and resistance to environmental factors, metal components such as steel or aluminum may be utilized in truss construction. Steel trusses are renowned for their high load-bearing capabilities and durability, making them suitable for applications where heavy loads or long spans are a consideration. Aluminum trusses, on the other hand, offer lightweight yet robust solutions, ideal for projects where weight reduction is a priority without compromising structural integrity.
Fasteners and Connectors
The selection of appropriate fasteners and connectors is integral to the overall performance and stability of the truss. High-quality nails, screws, bolts, and metal connectors are essential for securely joining truss members, ensuring that the framework maintains its structural integrity under varying loads and environmental conditions. Utilizing corrosion-resistant fasteners and connectors is particularly important for outdoor or exposed truss applications, safeguarding against deterioration and potential structural compromise.
Environmental Considerations
When choosing materials for truss construction, it is essential to consider the environmental factors that the truss will be exposed to. Factors such as moisture levels, temperature fluctuations, and potential exposure to chemicals or corrosive elements should be taken into account when selecting materials. Choosing materials that are resistant to decay, mold, and insect damage is crucial for ensuring the long-term durability and performance of the truss in its intended environment.
By thoughtfully considering these material selection factors, you can make informed decisions that align with the design specifications, structural requirements, and environmental considerations of your truss project. The careful selection of materials sets the stage for the subsequent phases of cutting, assembling, and installing the truss, culminating in the realization of a robust and well-crafted structural framework.
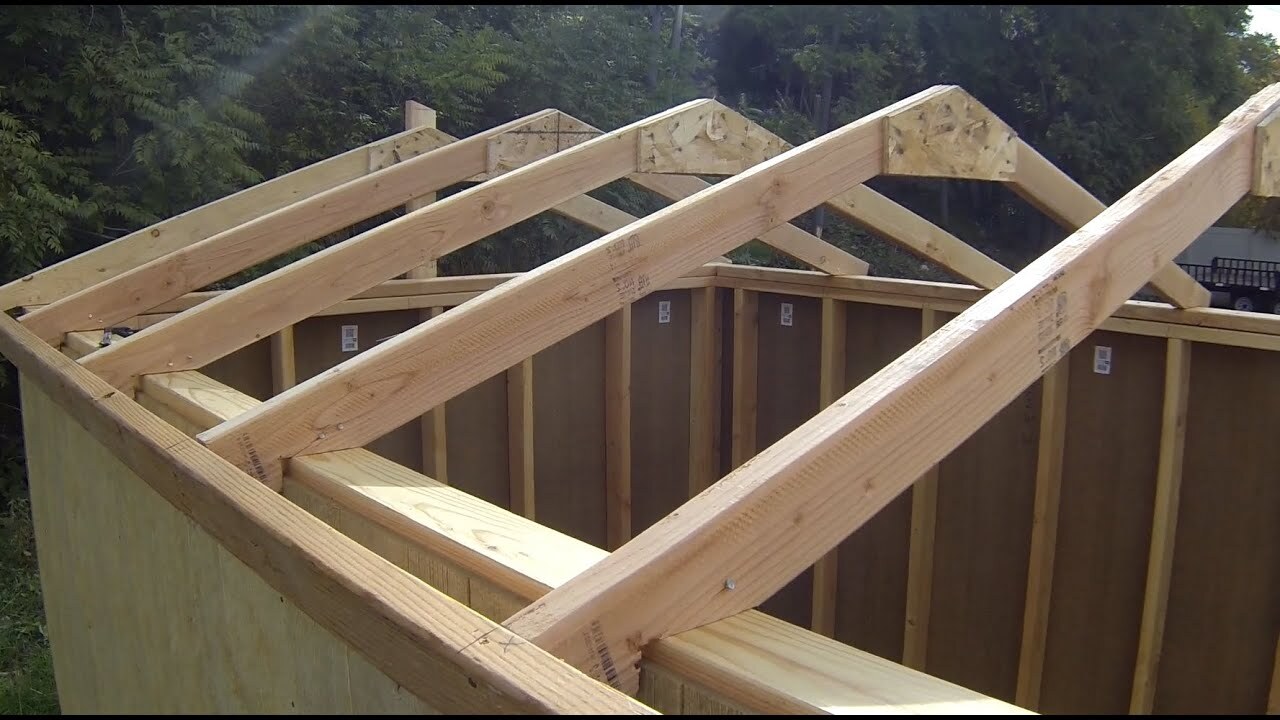
Cutting and Assembling the Truss
The process of cutting and assembling a truss is a pivotal stage that transforms design concepts into tangible structural elements. This phase involves precise measurements, meticulous cutting of truss members, and the methodical assembly of these components to form the final truss framework.
Cutting the Members
Before commencing the cutting process, it is essential to refer to the detailed truss design to determine the exact dimensions and angles for each truss member. Accurate measurements are crucial, as even minor discrepancies can impact the overall integrity and alignment of the truss. Utilizing specialized cutting tools such as a circular saw, miter saw, or a handsaw equipped with a miter box ensures clean and precise cuts, maintaining the structural accuracy of the truss components.
Marking and Labeling
To streamline the assembly process, marking and labeling each truss member according to its designated position within the truss configuration is imperative. This practice minimizes confusion during assembly and facilitates the seamless integration of the components. Clear and consistent labeling, often utilizing a combination of alphanumeric codes and directional indicators, allows for efficient identification and organization of the truss members.
Jig Setup
Creating a dedicated assembly jig or template serves as a valuable aid in ensuring the accurate alignment and positioning of truss members during assembly. The jig, constructed to match the specific truss design, provides a stable framework for arranging and securing the members, allowing for systematic assembly while maintaining the intended truss geometry.
Assembly Process
With the truss members cut, marked, and the assembly jig in place, the process of assembling the truss begins. Careful attention is given to aligning the members according to the design specifications, ensuring that the top and bottom chords, web members, and connection points are accurately positioned and securely fastened. Utilizing high-quality fasteners and connectors, such as nails, screws, or metal plates, reinforces the structural integrity of the truss framework.
Quality Checks
Throughout the assembly process, regular quality checks are conducted to verify the dimensional accuracy, alignment, and overall integrity of the truss. These checks may involve using measuring tools, such as a framing square or a level, to confirm that the truss members are precisely positioned and that the assembled framework adheres to the intended design parameters.
Final Adjustments
Upon completing the initial assembly, any necessary adjustments or fine-tuning of the truss framework are addressed to ensure that the final structure meets the design specifications. This may involve minor realignment of members, additional fastening, or trimming to achieve the desired fit and structural coherence.
By meticulously executing the cutting and assembly process, you can transform raw materials into a meticulously crafted truss framework that embodies precision, durability, and structural reliability. With the truss assembly complete, the final phase involves the installation of the truss, bringing the culmination of your craftsmanship and engineering prowess to fruition.
Installing the Truss
The installation of a truss marks the culmination of meticulous planning, precise craftsmanship, and engineering expertise. This phase involves carefully positioning and securing the completed truss framework within the intended structure, whether it be a roof, bridge, or another architectural element. The installation process is critical, as it directly impacts the structural integrity and long-term performance of the truss-supported framework.
Pre-Installation Preparation
Before commencing the installation, thorough preparations are essential to ensure a seamless and efficient process. This includes assessing the site conditions, verifying the alignment and structural readiness of the supporting elements, and confirming that all necessary equipment and safety measures are in place. Additionally, coordinating the installation team and establishing clear communication channels are vital for a coordinated and safe installation process.
Lifting and Placement
Depending on the scale and design of the truss, specialized lifting equipment such as cranes or hoists may be utilized to carefully hoist the truss into position. The lifting process demands precision and coordination to avoid damage to the truss or the surrounding structures. Once lifted, the truss is methodically maneuvered into its designated placement, aligning it with the predetermined support points and ensuring a snug fit within the overall framework.
Securing and Bracing
Upon positioning the truss, securing it to the supporting structure is paramount. This involves fastening the truss to the load-bearing elements, such as walls or columns, using appropriate connectors and fasteners. Additionally, temporary bracing may be employed to stabilize the truss during the installation process, safeguarding against unintended movement or displacement.
Alignment and Adjustment
Ensuring the precise alignment of the installed truss is crucial for maintaining the structural integrity of the overall framework. Careful adjustments may be made to fine-tune the truss position, ensuring that it seamlessly integrates with the surrounding structural elements. This meticulous alignment process contributes to the stability and load-bearing capacity of the truss-supported structure.
Inspection and Verification
Following the installation, a comprehensive inspection is conducted to verify the integrity of the truss installation. This inspection encompasses assessing the connections, verifying the alignment, and confirming that the truss is securely integrated into the overall structure. Any necessary adjustments or corrective measures are promptly addressed to guarantee the structural soundness of the installed truss.
Completion and Handover
With the truss securely installed and verified, the installation process nears completion. Final checks and documentation may be carried out to certify the successful installation of the truss, ensuring compliance with safety standards and structural requirements. The completed installation represents the realization of the truss-building endeavor, culminating in a robust and reliable framework that embodies craftsmanship and engineering excellence.
By meticulously executing the installation process, the truss becomes an integral component of the overall structure, providing essential support and contributing to the structural integrity of the architectural ensemble. With the truss successfully installed, the project transitions into its next phase, where the framework is poised to fulfill its functional and aesthetic roles within the built environment.
Conclusion
In conclusion, the journey of building a truss encompasses a blend of creativity, engineering precision, and hands-on craftsmanship. From the initial stages of understanding truss principles to the final installation, each phase of the truss-building process contributes to the creation of a robust and reliable structural framework.
Throughout this comprehensive guide, we have explored the intricate facets of truss construction, delving into the fundamental concepts of truss engineering, the design considerations, material selection, and the meticulous processes of cutting, assembling, and installing a truss. By gaining a deeper understanding of truss design and construction, DIY enthusiasts and aspiring builders are equipped with the knowledge and confidence to embark on their truss-building endeavors.
The art and science of truss construction extend beyond mere structural support; it embodies a fusion of functionality and aesthetics. The careful selection of truss types, precise engineering calculations, and the incorporation of aesthetic elements contribute to the creation of trusses that not only serve their intended purpose but also enhance the visual appeal of the structures they support.
As the truss takes its place within the built environment, whether as a vital component of a roof, a bridge, or a custom woodworking project, it stands as a testament to the dedication and skill invested in its creation. The installation of the truss marks the culmination of meticulous planning, precise craftsmanship, and engineering expertise, ensuring that the framework seamlessly integrates with the surrounding architectural elements.
Ultimately, the completion of a truss-building project represents more than the assembly of timber, steel, or engineered wood products; it embodies the realization of a vision, the embodiment of structural integrity, and the fusion of artistry and engineering. Whether it's a small-scale DIY project or a large-scale construction endeavor, the process of building a truss offers a profound sense of accomplishment and the satisfaction of contributing to the built environment.
As DIY enthusiasts and builders continue to explore the realms of construction and craftsmanship, the knowledge and skills gained from the truss-building journey serve as a foundation for future projects, inspiring the creation of enduring and impactful structures that stand as testaments to human ingenuity and creativity. With each truss built, a legacy of craftsmanship and engineering excellence is woven into the fabric of the built environment, shaping the landscapes we inhabit and the stories we tell through the structures we create.