Home>Create & Decorate>DIY & Crafts>How To Build Trusses For A Shed

DIY & Crafts
How To Build Trusses For A Shed
Published: February 29, 2024

Content Creator specializing in woodworking and interior transformations. Caegan's guides motivate readers to undertake their own projects, while his custom furniture adds a personal touch.
Learn how to build trusses for a shed with our DIY & Crafts guide. Step-by-step instructions for creating sturdy and reliable trusses. Start your shed project today!
(Many of the links in this article redirect to a specific reviewed product. Your purchase of these products through affiliate links helps to generate commission for Twigandthistle.com, at no extra cost. Learn more)
Introduction
Building a shed can be a rewarding and practical DIY project, providing valuable storage space and enhancing the aesthetics of your property. When embarking on this endeavor, constructing trusses for the shed is a crucial aspect that demands careful attention. Trusses are essential structural components that support the roof, ensuring its stability and durability. By understanding the process of building trusses, you can confidently undertake this project and create a sturdy and reliable shed.
In this comprehensive guide, we will delve into the intricate art of constructing trusses for a shed. From unraveling the fundamentals of trusses to outlining the materials and tools required, we will equip you with the knowledge and insights needed to embark on this endeavor. Whether you are a seasoned DIY enthusiast or a novice craftsman, this guide will empower you to tackle the task of building trusses with confidence and precision.
As we journey through the steps of building trusses, you will gain a deeper understanding of the structural principles that underpin this essential component of shed construction. By following the detailed instructions and leveraging the tips provided, you will be well-equipped to navigate the intricacies of truss assembly and installation. With a focus on clarity and practicality, this guide aims to demystify the process of building trusses, enabling you to embark on your shed-building project with enthusiasm and assurance.
So, roll up your sleeves, gather your tools, and prepare to embark on a fulfilling and rewarding journey of constructing trusses for your shed. With the right guidance and a can-do spirit, you can transform raw materials into robust trusses that will form the backbone of your shed's roof. Let's dive into the world of truss construction and set the stage for a successful and gratifying DIY endeavor.
Read more: How To Build A Truss
Understanding Trusses
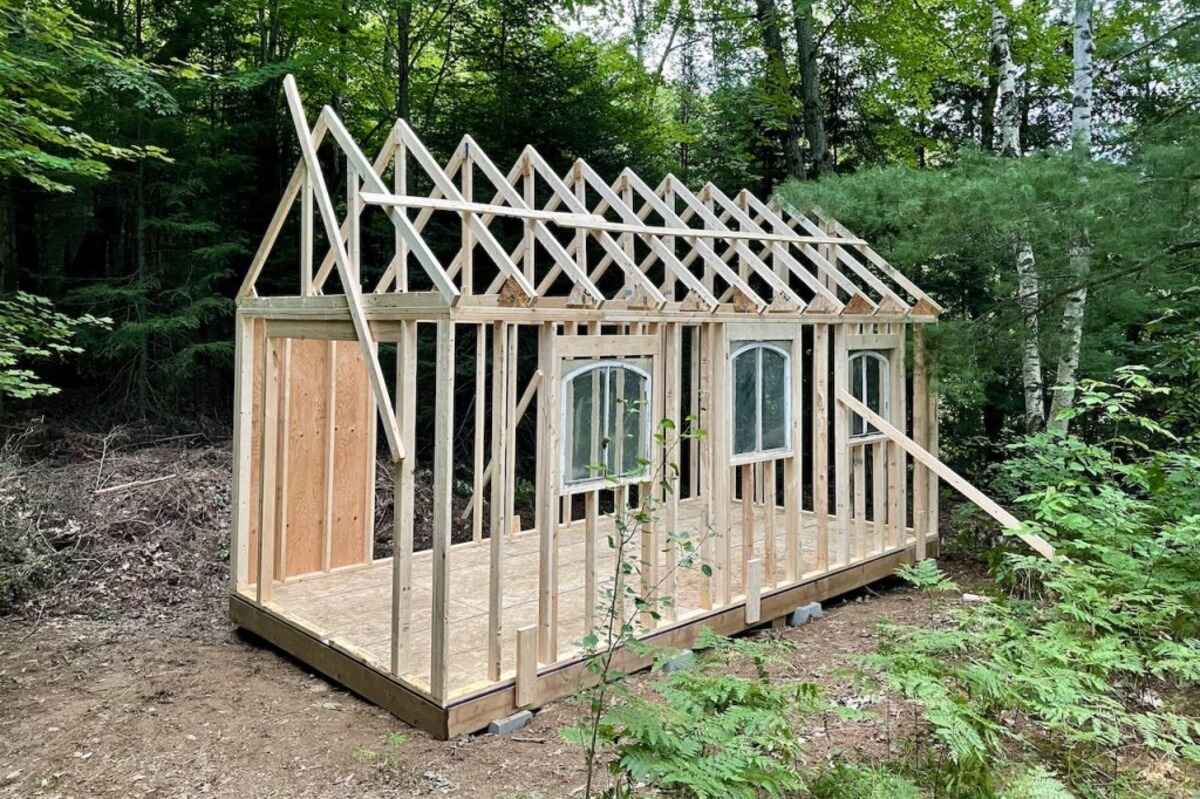
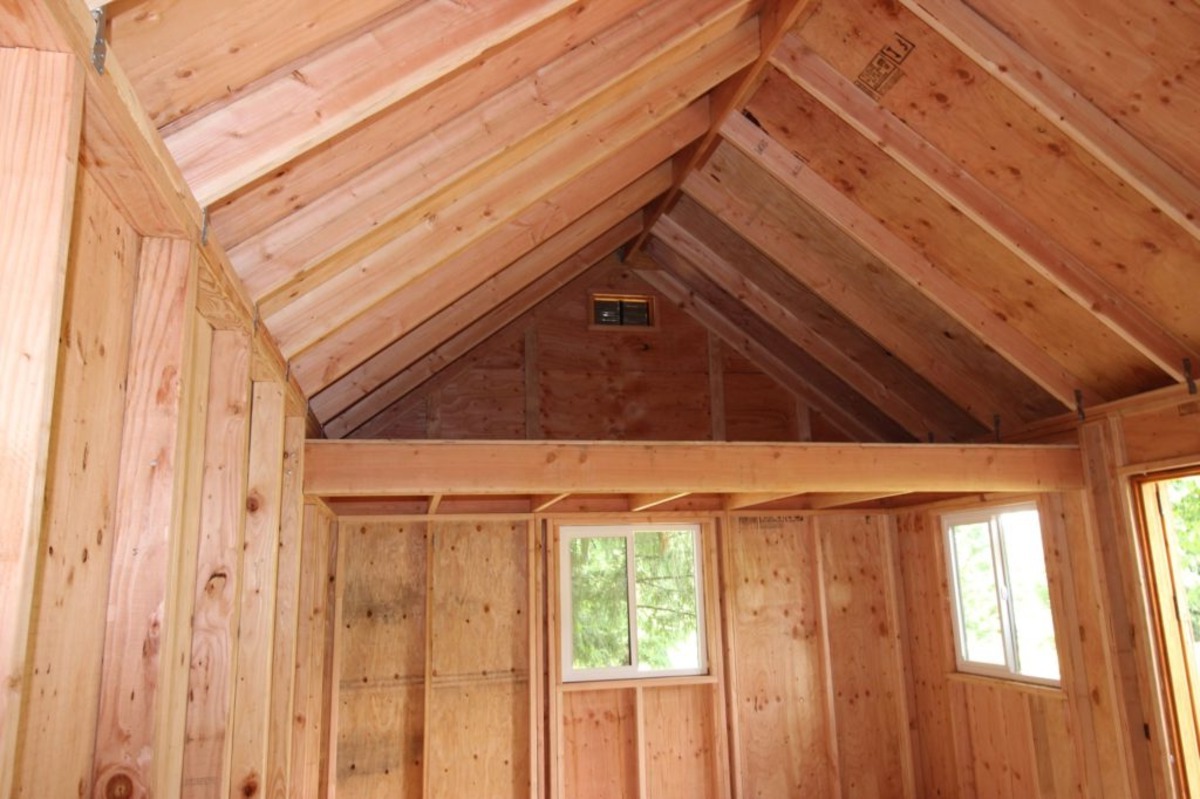
Trusses are integral components of a shed's roof structure, providing essential support and stability. Understanding the anatomy and function of trusses is pivotal to the successful construction of a durable and reliable shed. These triangular frameworks are meticulously engineered to distribute the weight of the roof evenly, ensuring that the structure can withstand various loads and environmental factors.
Anatomy of Trusses
Trusses typically consist of several key elements, including top chords, bottom chords, webs, and plates. The top chords, also known as rafters, form the uppermost part of the truss and bear the brunt of the roof's weight. Conversely, the bottom chords provide crucial reinforcement and help maintain the truss's structural integrity. Webs, which are diagonal and vertical members, connect the top and bottom chords, effectively transferring the load throughout the truss. Plates, often made of steel or timber, secure the joints and connections, enhancing the overall stability of the truss.
Function of Trusses
Trusses play a pivotal role in ensuring the structural soundness of a shed's roof. By distributing the weight of the roof evenly across the truss framework, they prevent excessive stress on individual components, thereby minimizing the risk of structural failure. Additionally, trusses are designed to withstand various forces, including gravity, wind, and snow loads, making them indispensable for maintaining the shed's resilience in diverse weather conditions.
Types of Trusses
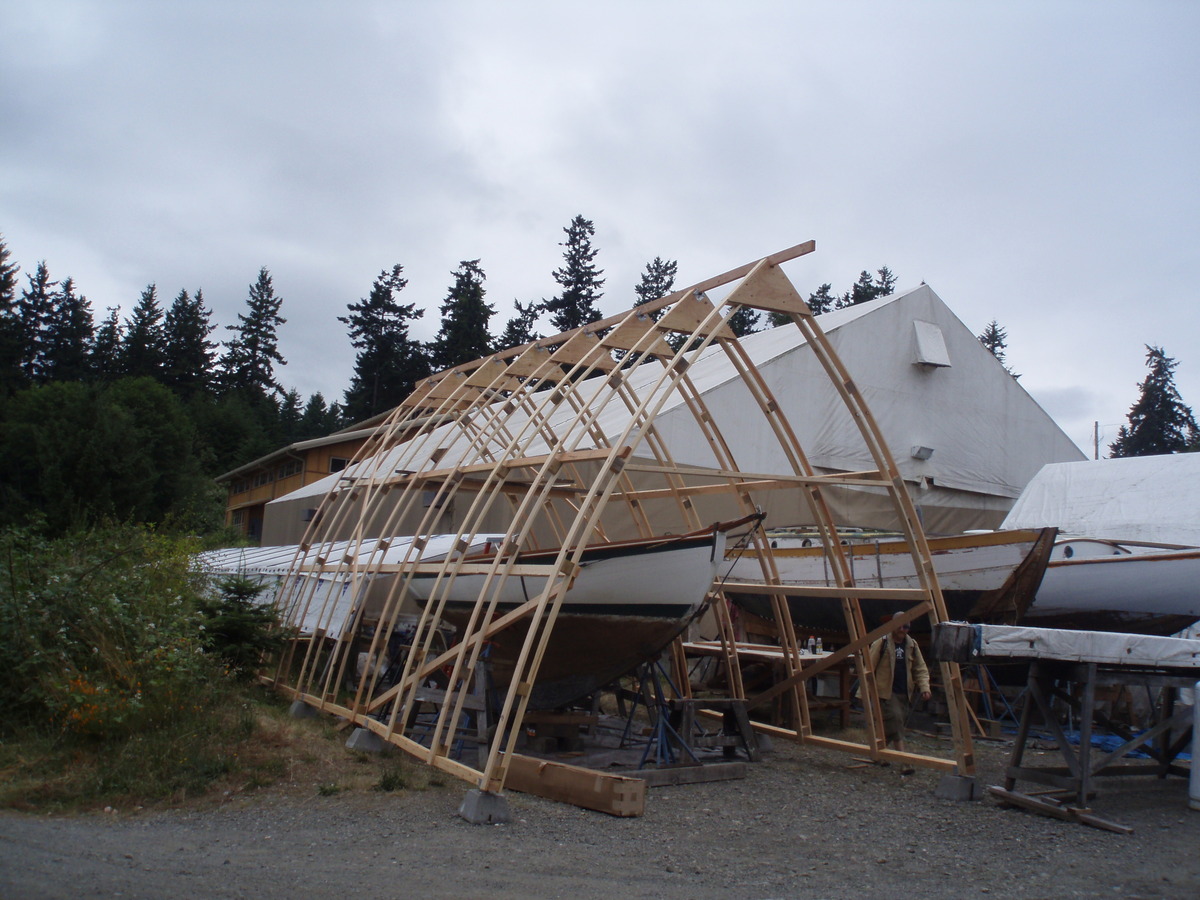
Several truss designs cater to different architectural and functional requirements. Common variations include king post trusses, queen post trusses, and scissor trusses, each offering unique advantages in terms of load-bearing capacity and aesthetic appeal. Understanding the distinct characteristics of these truss types empowers shed builders to select the most suitable design for their specific needs, ensuring optimal performance and visual appeal.
By comprehending the intricate dynamics of trusses, shed builders can appreciate their pivotal role in upholding the structural integrity of the roof. This foundational knowledge forms the bedrock for the subsequent stages of truss construction, enabling craftsmen to approach the task with precision and insight. With a firm grasp of truss fundamentals, you are poised to embark on the practical aspects of building trusses for your shed, equipped with a deeper appreciation for these essential structural elements.
Read more: How To Build A Shed
Materials and Tools Needed
When embarking on the construction of trusses for your shed, it is essential to gather the requisite materials and tools to ensure a smooth and efficient building process. By assembling the following items, you can lay a solid foundation for the construction of sturdy and reliable trusses:
Materials:
-
Lumber: Select high-quality lumber, such as 2×4 or 2×6 boards, to serve as the primary building material for the trusses. The dimensions of the lumber will depend on the specific design and load requirements of your shed.
-
Plywood or OSB (Oriented Strand Board): These materials are essential for creating gussets, which are plates used to reinforce the joints of the trusses. Opt for sturdy plywood or OSB with adequate thickness to ensure structural integrity.
-
Metal Brackets or Plates: These components are crucial for securing the joints of the trusses, enhancing their stability and load-bearing capacity. Choose durable metal brackets or plates designed for truss construction.
-
Fasteners: Stock up on galvanized nails, screws, or specialized truss connectors to securely fasten the components of the trusses. Using corrosion-resistant fasteners is vital for ensuring the long-term durability of the truss structure.
-
Wood Glue: Investing in high-quality wood glue is advisable for reinforcing the connections between truss components, adding an extra layer of strength to the assembly.
-
Safety Equipment: Prioritize safety by obtaining protective gear, including goggles, gloves, and a dust mask, to safeguard yourself during the construction process.
Tools:
-
Circular Saw: A reliable circular saw will facilitate the precise cutting of lumber and plywood, allowing you to tailor the components to the required dimensions with accuracy.
-
Power Drill: A versatile power drill equipped with appropriate drill bits is indispensable for creating pilot holes, driving screws, and assembling the truss components.
-
Hammer: A sturdy hammer is essential for driving nails and securing fasteners during the truss assembly process.
-
Measuring Tape: Accurate measurements are paramount in truss construction, making a quality measuring tape an indispensable tool for ensuring precision and consistency.
-
Speed Square: This tool aids in marking and verifying the accuracy of angled cuts, contributing to the overall structural integrity of the trusses.
-
Workbench or Sawhorses: A stable work surface is essential for assembling and aligning the truss components, with a workbench or sawhorses providing the necessary support for this task.
By procuring these materials and tools, you can establish a well-equipped workspace and set the stage for a successful truss-building endeavor. With the essential resources at your disposal, you are poised to embark on the next phase of the construction process, ready to bring your shed's trusses to fruition with confidence and precision.
Steps to Build Trusses
-
Design Planning: Begin by meticulously planning the design of the trusses, taking into account the specific dimensions and load requirements of your shed. Utilize architectural software or traditional drafting techniques to create detailed schematics that outline the configuration of the truss components, including the top and bottom chords, webs, and gussets. Pay careful attention to the pitch and span of the roof, as these factors will influence the angle and length of the truss members.
-
Precise Measurements: Accurate measurements form the cornerstone of successful truss construction. Use a measuring tape and a speed square to mark and cut the lumber to the exact dimensions specified in your design plans. Ensure that the top and bottom chords, as well as the webs, are cut with precision to guarantee the structural integrity of the trusses.
-
Cutting the Components: Employ a circular saw to make precise cuts on the lumber, following the measurements outlined in your design plans. Pay close attention to the angles and lengths of the truss members, as even minor discrepancies can impact the overall stability and load-bearing capacity of the trusses.
-
Assembling the Truss Components: Lay out the cut lumber on a stable work surface, such as a workbench or sawhorses, and begin assembling the truss components according to the design specifications. Use wood glue and fasteners to secure the joints, ensuring that the connections are robust and reliable. Incorporate metal brackets or plates at the critical junctions to reinforce the truss structure and enhance its resilience.
-
Adding Gussets: Cut plywood or OSB into gussets, which are plates used to reinforce the joints of the trusses. Apply wood glue to the gussets and affix them to the truss joints, ensuring that they are securely fastened with nails or screws. The addition of gussets significantly strengthens the connections within the trusses, contributing to their overall stability and durability.
-
Quality Assurance: Thoroughly inspect each truss to verify the accuracy of the assembly and the integrity of the connections. Confirm that the trusses adhere to the design specifications and meet the structural requirements of the shed. Address any discrepancies or deficiencies promptly to uphold the quality of the truss assembly.
-
Replication: Repeat the above steps to construct additional trusses, ensuring uniformity and consistency across the entire set. Maintaining standardized dimensions and assembly techniques is crucial for achieving a cohesive and reliable truss system that will effectively support the shed's roof.
-
Finishing Touches: Once all trusses are assembled, conduct a final assessment to confirm their structural soundness. Make any necessary adjustments or reinforcements to optimize the trusses for installation.
By meticulously following these steps, you can methodically construct trusses that embody precision, strength, and reliability, laying the groundwork for a robust and enduring shed structure.
Read more: How To Build An Office Shed
Installing Trusses in Shed
With the meticulously constructed trusses at your disposal, the next pivotal phase of the shed-building journey involves the strategic installation of these essential components. The process of installing trusses demands careful planning, precision, and a keen eye for detail to ensure that the shed's roof structure is imbued with strength and stability.
Preparing the Shed Framework
Before commencing the installation of trusses, it is imperative to prepare the shed framework to accommodate these crucial structural elements. Ensure that the walls of the shed are structurally sound and capable of supporting the weight of the trusses and the roof. Additionally, verify that the top plates of the shed walls are level and securely anchored, providing a stable foundation for the trusses.
Positioning the Trusses
Carefully hoist each truss into position, aligning them according to the layout specified in the shed's design plans. Utilize temporary bracing to secure the trusses in place, preventing any shifting or misalignment during the installation process. Pay meticulous attention to the spacing between the trusses, ensuring uniformity and adherence to the predetermined layout.
Securing the Trusses
Once the trusses are correctly positioned, fasten them to the shed walls using appropriate hardware and fasteners. Utilize metal truss hangers or brackets to secure the connection points between the trusses and the shed walls, reinforcing the structural integrity of the entire assembly. Confirm that each truss is securely anchored and aligned, mitigating the risk of displacement or instability.
Read more: How To Build Shed Foundation
Bracing and Alignment
Implement temporary bracing between the installed trusses to maintain their alignment and prevent lateral movement. This bracing serves as a crucial safeguard during the subsequent stages of roof sheathing and ensures that the trusses remain steadfast and properly aligned as the roof structure takes shape.
Quality Assurance
Conduct a comprehensive inspection of the installed trusses, verifying their alignment, stability, and adherence to the shed's design specifications. Address any discrepancies or irregularities promptly, rectifying any issues that may compromise the structural integrity of the truss system.
Advancing to Roof Sheathing
With the trusses securely installed and aligned, the stage is set for the next phase of the shed construction process, which involves the application of roof sheathing. This critical step will further fortify the shed's roof structure, culminating in a robust and resilient framework that is primed to withstand the elements and provide enduring protection.
By meticulously executing the installation of trusses, you are laying the groundwork for a shed that embodies structural excellence and reliability. With the trusses firmly in place, the vision of a functional and durable shed is steadily materializing, paving the way for the culmination of your labor and expertise in a tangible and gratifying achievement.
Conclusion
In conclusion, the process of building trusses for a shed encapsulates a harmonious blend of precision, craftsmanship, and structural acumen. From unraveling the fundamental principles of trusses to meticulously assembling and installing these vital components, the journey of shed construction is a testament to the artistry and ingenuity inherent in the realm of DIY endeavors.
As the final truss is secured in place, the shed begins to embody the culmination of meticulous planning, unwavering dedication, and the transformative power of craftsmanship. Each truss stands as a testament to the artistry and precision that underpin the construction process, symbolizing the fusion of form and function in a tangible manifestation of structural excellence.
The completion of the truss installation heralds the dawn of a new chapter in the shed-building odyssey, marking the transition from individual components to a unified structure that exudes resilience and purpose. The shed, with its sturdy trusses forming the backbone of the roof, stands as a testament to the transformative power of DIY craftsmanship, embodying the vision and dedication of its creator.
As the final truss is secured in place, the shed begins to embody the culmination of meticulous planning, unwavering dedication, and the transformative power of craftsmanship. Each truss stands as a testament to the artistry and precision that underpin the construction process, symbolizing the fusion of form and function in a tangible manifestation of structural excellence.
In the grand tapestry of DIY and crafts, the construction of trusses for a shed represents a profound convergence of technical prowess and creative vision. It is a testament to the enduring allure of hands-on craftsmanship and the transformative potential of raw materials shaped by human ingenuity.
With the trusses firmly in place, the shed stands as a testament to the transformative power of DIY craftsmanship, embodying the vision and dedication of its creator. It is a tangible symbol of resilience, functionality, and the enduring spirit of creation that permeates the world of DIY and crafts.
In the grand tapestry of DIY and crafts, the construction of trusses for a shed represents a profound convergence of technical prowess and creative vision. It is a testament to the enduring allure of hands-on craftsmanship and the transformative potential of raw materials shaped by human ingenuity.
As the final truss is secured in place, the shed begins to embody the culmination of meticulous planning, unwavering dedication, and the transformative power of craftsmanship. Each truss stands as a testament to the artistry and precision that underpin the construction process, symbolizing the fusion of form and function in a tangible manifestation of structural excellence.
The completion of the truss installation heralds the dawn of a new chapter in the shed-building odyssey, marking the transition from individual components to a unified structure that exudes resilience and purpose. The shed, with its sturdy trusses forming the backbone of the roof, stands as a testament to the transformative power of DIY craftsmanship, embodying the vision and dedication of its creator.
In the grand tapestry of DIY and crafts, the construction of trusses for a shed represents a profound convergence of technical prowess and creative vision. It is a testament to the enduring allure of hands-on craftsmanship and the transformative potential of raw materials shaped by human ingenuity.
With the trusses firmly in place, the shed stands as a testament to the transformative power of DIY craftsmanship, embodying the vision and dedication of its creator. It is a tangible symbol of resilience, functionality, and the enduring spirit of creation that permeates the world of DIY and crafts.

