Home>Create & Decorate>DIY & Crafts>Shed Loft DIY: How To Build A Loft In Your Shed

DIY & Crafts
Shed Loft DIY: How To Build A Loft In Your Shed
Published: February 27, 2024

Senior Editor in Create & Decorate, Kathryn combines traditional craftsmanship with contemporary trends. Her background in textile design and commitment to sustainable crafts inspire both content and community.
Learn how to create extra space in your shed with a DIY loft. Get step-by-step instructions for building a loft in your shed with our easy DIY & Crafts guide.
(Many of the links in this article redirect to a specific reviewed product. Your purchase of these products through affiliate links helps to generate commission for Twigandthistle.com, at no extra cost. Learn more)
Introduction
Are you looking to maximize the space in your shed and create a cozy retreat or functional storage area? Building a loft in your shed can be a fantastic solution. A shed loft not only provides additional storage space but also offers a versatile area for various activities, such as crafting, reading, or simply unwinding in a peaceful environment.
In this comprehensive guide, we will walk you through the step-by-step process of building a loft in your shed. Whether you're a seasoned DIY enthusiast or a novice looking to embark on your first major project, this guide will equip you with the knowledge and confidence to tackle this endeavor.
By following the instructions and tips provided, you'll be able to transform your shed into a multi-functional space that meets your specific needs. From planning and gathering materials to constructing the frame, installing flooring, and adding safety features, we've got you covered every step of the way.
So, roll up your sleeves, gather your tools, and get ready to embark on an exciting journey of transforming your shed into a practical and inviting space. Let's dive into the details and unleash your creativity as we guide you through the process of building a loft in your shed.
Read more: How to Build a DIY Loft Bed
Planning Your Shed Loft
Before diving into the physical construction of your shed loft, it's crucial to start with a well-thought-out plan. This initial phase sets the foundation for a successful and efficient build, ensuring that your loft meets your specific needs and complements the existing layout of your shed.
Assessing Your Space
Begin by assessing the available space in your shed. Measure the dimensions of the area where you intend to build the loft, taking into account the height, width, and depth. This assessment will help you determine the maximum size of the loft and ensure that it fits seamlessly within the shed's interior.
Defining the Purpose
Consider the intended purpose of your shed loft. Are you aiming to create a storage area for seasonal items, a cozy reading nook, a crafting space, or a combination of functionalities? Clearly defining the purpose will guide the design and layout of the loft, influencing decisions related to size, access points, and additional features.
Safety Considerations
Safety should be a top priority when planning your shed loft. Evaluate the structural integrity of the shed to ensure that it can support the weight of the loft and its intended use. Additionally, consider factors such as adequate lighting, ventilation, and accessibility to ensure a safe and comfortable environment within the loft.
Read more: How to Build a Closet Loft Bed
Accessibility and Entry Points
Think about how you will access the loft. Will you incorporate a ladder, staircase, or pull-down attic stairs? The choice of entry point should align with the intended use of the loft and the available space within the shed. Accessibility is key to maximizing the functionality of the loft and ensuring ease of use.
Design and Aesthetic
Explore design ideas that resonate with your personal style and the overall aesthetic of your shed. Whether you prefer a rustic, modern, or eclectic look, the design of the loft can enhance the visual appeal of the shed while serving its practical purpose. Consider elements such as railing styles, flooring materials, and decorative touches to infuse personality into the space.
Budget and Timeline
Establish a realistic budget for the loft project, factoring in materials, tools, and any professional assistance that may be required. Additionally, outline a timeline for the project, taking into consideration your availability, skill level, and any external factors that may impact the construction process.
By carefully planning the layout, purpose, safety features, accessibility, design, budget, and timeline, you'll set the stage for a successful shed loft project. This preparatory phase lays the groundwork for a smooth and rewarding construction journey, ensuring that the end result aligns with your vision and functional requirements.
Gathering Materials and Tools
Gathering the necessary materials and tools is a crucial step in preparing for the construction of a shed loft. By ensuring that you have all the required items at your disposal, you can streamline the building process and minimize interruptions. Here's a comprehensive list of materials and tools you'll need to embark on this exciting DIY project:
Read more: How To Build A Loft Bed With Stairs
Materials
-
Lumber: Select high-quality lumber for constructing the loft frame, ensuring it is sturdy and capable of supporting the intended load. Consider the dimensions and quantity needed based on your loft design and measurements.
-
Plywood or OSB (Oriented Strand Board): These materials are ideal for creating the loft flooring. Choose a thickness that provides sufficient support and durability for the loft space.
-
Fasteners: Stock up on screws, nails, and other fastening hardware to secure the structural components and flooring in place. Opt for corrosion-resistant fasteners if your shed is exposed to moisture.
-
Safety Equipment: Prioritize safety by obtaining protective gear such as goggles, gloves, and a dust mask. These items are essential for safeguarding yourself during the construction process.
-
Insulation (Optional): If you plan to use the loft for extended periods, consider adding insulation to regulate temperature and enhance comfort. Insulation materials such as fiberglass batts or foam boards can help create a more climate-controlled environment.
-
Finishing Materials: Depending on your design preferences, gather paint, stain, or sealant to add a decorative finish to the loft components. Additionally, consider any decorative elements or trim to personalize the space.
Tools
-
Measuring Tools: Accurate measurements are essential for precision during construction. Equip yourself with a tape measure, level, and square to ensure the components are aligned and properly positioned.
-
Power Tools: Essential power tools include a drill/driver, circular saw, and jigsaw for cutting and assembling the lumber and plywood. These tools expedite the construction process and ensure clean, precise cuts.
-
Safety Tools: In addition to personal protective equipment, have a fire extinguisher on hand in case of emergencies. It's important to prioritize safety throughout the project.
-
Ladder or Scaffolding: Depending on the height of your shed, a sturdy ladder or scaffolding will facilitate access to the loft construction area, enabling you to work safely at elevated levels.
-
Workbench and Clamps: A dedicated workbench and clamps provide a stable surface for assembling and securing components, enhancing efficiency and accuracy during the construction process.
By gathering these materials and tools, you'll be well-equipped to commence the construction of your shed loft. This comprehensive preparation sets the stage for a smooth and productive building experience, allowing you to focus on bringing your loft vision to life.
Building the Loft Frame
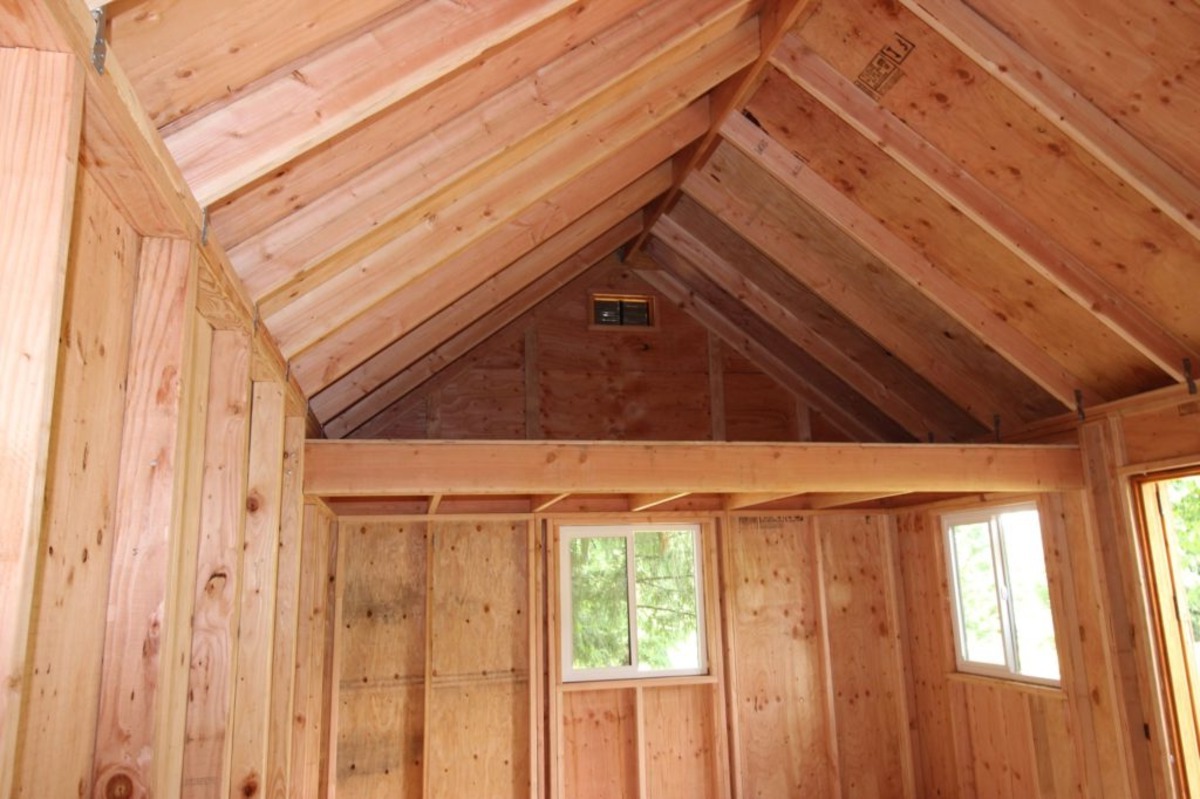
The construction of the loft frame forms the structural backbone of your shed loft, providing stability and support for the elevated space. This phase involves assembling the framework that will define the shape and dimensions of the loft, laying the groundwork for subsequent additions such as flooring and safety features.
Step 1: Measure and Cut the Lumber
Begin by measuring and cutting the lumber according to the dimensions outlined in your loft plan. Use a tape measure, square, and circular saw to ensure precise cuts that align with the design specifications. The main components of the frame include the horizontal joists, vertical supports, and perimeter framing, all of which contribute to the overall stability of the loft structure.
Read more: DIY Loft Bed with Closet Ideas
Step 2: Assemble the Frame Components
With the lumber cut to size, assemble the frame components on a flat, level surface. Utilize a workbench and clamps to secure the pieces in position, ensuring that the joints are flush and the angles are square. A drill/driver and screws/nails will be essential for fastening the frame elements together securely. Pay close attention to the alignment and integrity of the frame during assembly to guarantee its structural integrity.
Step 3: Install the Frame in the Shed
Once the frame components are securely assembled, it's time to position the frame within the shed according to your predetermined layout. Enlist the help of a partner to assist with lifting and maneuvering the frame into place, ensuring that it fits snugly and aligns with the designated area for the loft. Use a level to confirm that the frame is plumb and level, making any necessary adjustments to achieve a stable and balanced installation.
Step 4: Secure the Frame to the Shed Structure
To reinforce the stability of the loft frame, secure it to the existing shed structure using appropriate fasteners. Depending on the shed's construction, this may involve attaching the frame to wall studs, ceiling joists, or other load-bearing elements. Ensure that the connections are robust and capable of supporting the anticipated load of the loft and its intended use.
Step 5: Double-Check for Stability
Before proceeding to the next phase of loft construction, perform a thorough inspection of the frame to verify its stability and structural integrity. Test the frame for any signs of wobbling or shifting, addressing any issues promptly to preempt potential complications during subsequent construction stages.
By meticulously executing the process of building the loft frame, you establish a solid foundation for the remainder of the shed loft project. The careful attention to detail and precision during this phase sets the stage for a successful and durable loft structure, bringing you one step closer to realizing your vision for a functional and inviting shed loft space.
Read more: How To Build A Shed
Installing the Loft Flooring
With the loft frame securely in place, the next critical step in the construction process is installing the loft flooring. The flooring not only enhances the functionality and aesthetics of the loft but also contributes to its structural integrity. Whether you envision a sturdy platform for storage or a comfortable surface for various activities, the installation of the loft flooring demands attention to detail and precision.
Step 1: Measure and Cut the Flooring Material
Begin by measuring the dimensions of the loft frame to determine the exact size of the flooring material required. Plywood or oriented strand board (OSB) are popular choices for loft flooring due to their strength and durability. Using a tape measure and circular saw, carefully cut the plywood or OSB panels to fit the dimensions of the loft frame accurately. Precision in cutting the flooring material is crucial to ensure a seamless and secure fit within the frame.
Step 2: Position and Secure the Flooring Panels
Once the flooring panels are cut to size, position them within the loft frame, ensuring a snug and even placement. Use screws or nails to secure the panels to the frame, creating a stable and level surface. Pay attention to the spacing of fasteners, ensuring that they are adequately distributed to prevent warping or movement of the flooring over time. Additionally, consider applying construction adhesive between the panels and the frame for added stability.
Step 3: Reinforce the Edges and Seams
To further fortify the loft flooring, reinforce the edges and seams of the panels. Install additional support beams or blocking along the perimeter of the flooring to prevent flexing and provide uniform weight distribution. Secure the edges and seams with screws or nails, ensuring that the entire flooring surface is robust and capable of accommodating the intended use of the loft.
Step 4: Finishing Touches
Once the loft flooring is securely installed, consider applying a protective finish to enhance its longevity and visual appeal. Depending on your preferences, you may opt to paint, stain, or seal the flooring to protect it from moisture and wear. Additionally, adding a non-slip coating can improve safety, especially if the loft will be used frequently.
By meticulously following these steps, you'll successfully install the loft flooring, bringing your shed loft one step closer to completion. The solid and level flooring sets the stage for the final phase of adding safety features and personalizing the loft to create a functional and inviting space within your shed.
Adding Safety Features
Safety is paramount when creating a loft in your shed. Incorporating essential safety features not only ensures a secure environment but also provides peace of mind for anyone utilizing the space. From preventing accidental falls to addressing potential hazards, the implementation of safety measures is a critical aspect of the shed loft construction process.
Railing and Guardrails
Installing sturdy railing and guardrails along the edges of the loft is a fundamental safety consideration. These barriers serve as protective boundaries, preventing accidental falls and providing stability for individuals accessing the loft. When constructing the railing, ensure that it meets local building codes and standards for height, spacing, and structural integrity. Additionally, consider the aesthetic appeal of the railing, as it can contribute to the overall visual appeal of the loft.
Secure Access Points
The method of accessing the loft, whether it's a ladder, staircase, or pull-down stairs, should be designed with safety in mind. Ensure that the access point is securely anchored and provides stable footing for individuals ascending and descending from the loft. If using a ladder, consider installing handrails or incorporating anti-slip treads to enhance safety and ease of use.
Read more: How To Build A Shed Floor
Adequate Lighting
Proper lighting within the loft area is essential for visibility and safety. Incorporate adequate lighting fixtures to illuminate the space, especially if the loft will be used for tasks or activities that require clear visibility. Consider energy-efficient LED lighting or natural lighting options to create a well-lit and inviting environment while minimizing electricity consumption.
Fire Safety Precautions
Integrating fire safety measures is crucial for protecting the shed loft and its occupants. Install smoke detectors and, if applicable, fire extinguishers within close proximity to the loft area. Additionally, ensure that the shed is equipped with functional fire escape routes and that the loft construction materials are fire-resistant or treated with fire-retardant coatings.
Structural Stability Inspection
Before finalizing the shed loft construction, conduct a thorough inspection of the structural stability of the entire assembly. Verify that the loft frame, flooring, and any additional components are securely fastened and capable of supporting the intended load. Address any signs of instability or structural concerns promptly to mitigate potential safety risks.
By prioritizing safety features throughout the construction process, you create a secure and welcoming loft space within your shed. These measures not only safeguard the well-being of individuals using the loft but also contribute to the overall functionality and longevity of the structure. With safety at the forefront, your shed loft becomes a reliable and enjoyable extension of your living or storage space.
Decorating and Personalizing Your Loft
With the structural elements in place, it's time to infuse your shed loft with personality and style, transforming it into a space that reflects your unique preferences and serves your specific needs. The process of decorating and personalizing your loft allows you to unleash your creativity and create a welcoming environment that aligns with your vision. Whether you intend to use the loft for relaxation, crafting, or storage, the following considerations will guide you in adding the finishing touches to your newly constructed space.
Read more: How To Build Large Shed
Flooring and Wall Treatments
Consider enhancing the visual appeal of the loft by selecting flooring materials that complement the overall aesthetic of the shed. Whether you opt for hardwood, laminate, or carpet, the flooring choice can significantly impact the ambiance of the space. Additionally, explore wall treatments such as paint, wallpaper, or decorative paneling to add character and warmth to the interior. Embrace colors and patterns that resonate with your personal style, creating a cohesive and inviting atmosphere within the loft.
Functional and Stylish Furnishings
Select furnishings that optimize the functionality of the loft while contributing to its visual appeal. Whether it's a comfortable seating area, a sturdy worktable, or versatile storage solutions, the right furnishings can elevate the usability of the space. Consider incorporating multi-functional pieces that maximize the available square footage, allowing the loft to accommodate various activities without feeling cramped or cluttered.
Personal Touches and Decor
Infuse the loft with personal touches and decorative elements that reflect your interests and passions. Display artwork, photographs, or collections that hold sentimental value, adding a sense of familiarity and warmth to the space. Additionally, consider incorporating plants, decorative lighting, and textiles to introduce texture and visual interest, creating a cozy and inviting ambiance within the loft.
Organizational Solutions
For lofts intended for storage purposes, implementing effective organizational solutions is essential. Explore shelving, bins, and storage containers that optimize vertical space and keep items neatly arranged. By prioritizing organization, you can maximize the functionality of the loft while maintaining a clutter-free environment.
Read more: How To Build A Small Shed
Customization for Specific Activities
If the loft serves a specific purpose, such as a crafting area or a reading nook, tailor the space to accommodate those activities. Integrate specialized storage for craft supplies, install task lighting for optimal visibility, or create a cozy reading corner with a comfortable chair and well-stocked bookshelves. Customizing the loft to align with your hobbies and interests ensures that it becomes a dedicated and enjoyable space tailored to your needs.
By focusing on these aspects of decorating and personalizing your loft, you'll transform the newly constructed space into a harmonious and functional extension of your shed. Embrace your creativity, infuse the loft with elements that resonate with you, and create a space that enhances your lifestyle and brings joy to your daily activities.
Conclusion
In conclusion, the process of building a loft in your shed is a rewarding endeavor that offers a multitude of benefits, ranging from increased storage capacity to the creation of a versatile and personalized space. By embarking on this DIY project, you have the opportunity to maximize the functionality of your shed while unleashing your creativity to craft a space that aligns with your specific needs and preferences.
Throughout the journey of planning, gathering materials, constructing the frame, installing the flooring, adding safety features, and personalizing the loft, you've demonstrated a commitment to creating a space that is not only practical but also aesthetically pleasing and safe. The careful consideration of safety measures, the precision in constructing the frame, and the attention to detail in personalizing the loft have culminated in the transformation of your shed into a multifunctional and inviting area.
As you reflect on the completion of your shed loft project, it's important to celebrate the achievement of enhancing your living or storage space. The loft serves as a testament to your ingenuity and determination, showcasing your ability to transform a basic shed into a customized and purposeful extension of your home.
Moving forward, the loft stands ready to accommodate a myriad of activities, whether it's providing a tranquil retreat for relaxation, a dedicated space for pursuing hobbies, or a practical storage area for seasonal items. Its versatility and adaptability make it a valuable addition to your property, enriching your daily life and offering a space that evolves with your changing needs.
As you enjoy the fruits of your labor, take pride in the craftsmanship and personalization that have gone into creating the shed loft. Whether you've crafted a cozy reading nook, a functional crafting area, or an efficient storage solution, the loft stands as a testament to your creativity and resourcefulness.
In essence, the completion of your shed loft project marks not only the physical construction of a space but also the realization of a vision. It represents the embodiment of your aspirations for a more functional, organized, and personalized environment within your shed. With the loft now ready to serve its purpose, you can look forward to the countless moments of enjoyment and productivity it will facilitate in the days and years to come.

