
Home>Create & Decorate>DIY & Crafts>Easy DIY Shed Build
DIY & Crafts
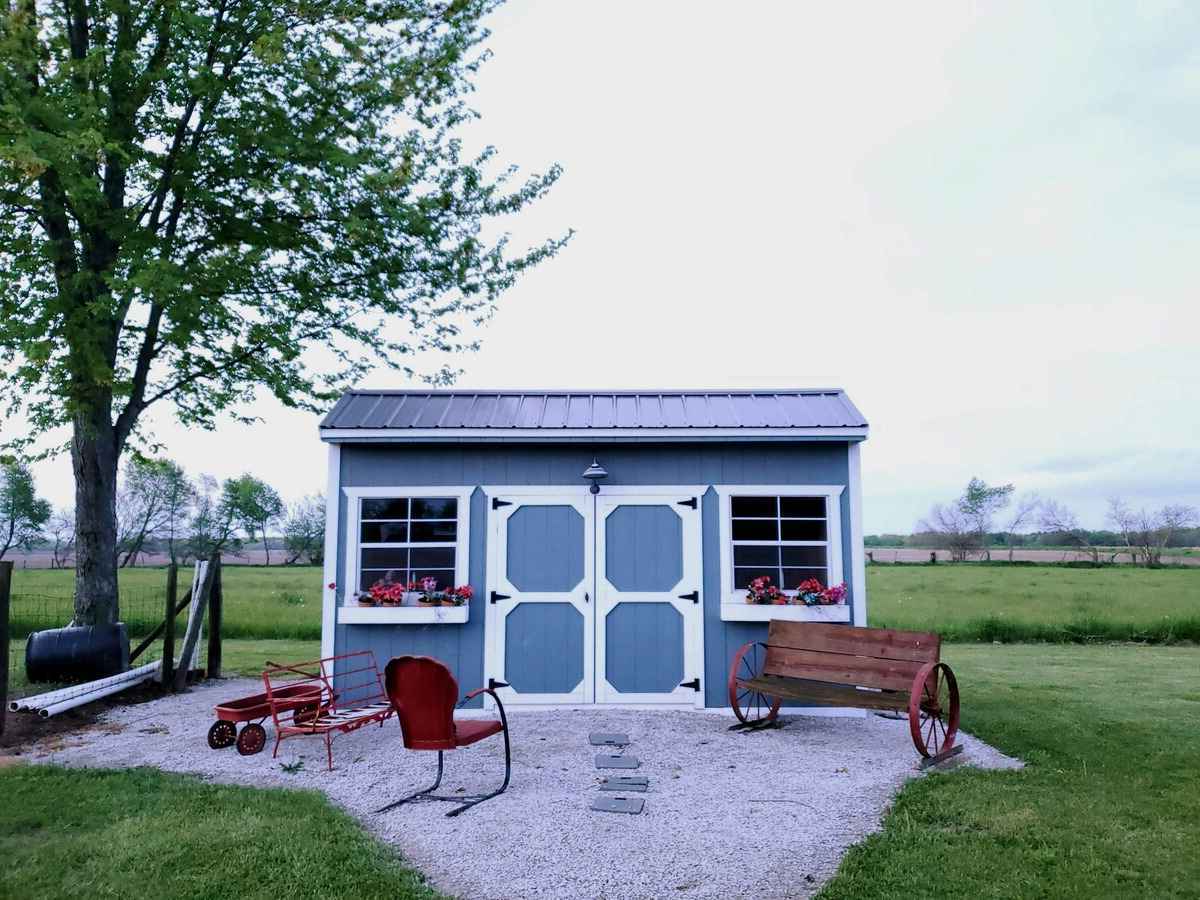
Easy DIY Shed Build
Published: February 27, 2024

Content Creator specializing in woodworking and interior transformations. Caegan's guides motivate readers to undertake their own projects, while his custom furniture adds a personal touch.
Learn how to build your own shed with our easy DIY guide. Get creative with DIY & Crafts and create the perfect storage solution for your home.
(Many of the links in this article redirect to a specific reviewed product. Your purchase of these products through affiliate links helps to generate commission for Twigandthistle.com, at no extra cost. Learn more)
Introduction
Building your own shed can be a rewarding and cost-effective project that adds both functionality and charm to your property. Whether you need extra storage space for gardening tools, outdoor equipment, or a workshop for DIY projects, a DIY shed can be a valuable addition to your home. Not only does it provide a practical solution for storage and organization, but it also offers an opportunity to unleash your creativity and craftsmanship.
Embarking on a DIY shed build allows you to customize the design and size to perfectly suit your needs and preferences. From choosing the materials and colors to deciding on the layout and features, every aspect of the shed can be tailored to reflect your personal style and practical requirements. Moreover, the sense of accomplishment that comes with constructing a functional structure with your own hands is truly unparalleled.
In this comprehensive guide, we will walk you through the step-by-step process of building a DIY shed, covering everything from planning and preparation to the finishing touches. Whether you're a seasoned DIY enthusiast or a novice looking to take on a new challenge, this guide will equip you with the knowledge and confidence to tackle this project with ease.
By the end of this guide, you will have the skills and understanding to embark on your own DIY shed build, creating a space that not only serves a practical purpose but also stands as a testament to your creativity and resourcefulness. So, roll up your sleeves, gather your tools, and let's dive into the exciting world of DIY shed construction.
Planning and Preparation
Before diving into the physical construction of your DIY shed, thorough planning and preparation are essential for a successful and smooth building process. This phase sets the foundation for the entire project, ensuring that you have a clear vision of your shed's design, size, and functionality. Here's a detailed breakdown of the key steps involved in the planning and preparation stage:
-
Define Your Shed's Purpose: Begin by identifying the primary purpose of your shed. Will it be used for storing gardening tools, housing outdoor equipment, or serving as a dedicated workspace? Understanding the intended use of the shed will help you determine its size, layout, and necessary features.
-
Check Local Regulations: Before proceeding, it's crucial to check with your local building authorities or homeowner's association to understand any zoning restrictions, building codes, or permit requirements for constructing a shed on your property. Compliance with these regulations is vital to avoid potential legal issues in the future.
-
Select an Appropriate Design: Explore various shed designs and styles to find one that complements your property and meets your functional needs. Consider factors such as roof type, door placement, and window options to create a design that aligns with your aesthetic preferences and practical requirements.
-
Create a Detailed Plan: Sketch out a detailed plan for your shed, including precise measurements, a layout of the interior space, and a list of materials needed. This plan will serve as a roadmap throughout the construction process, guiding you through each step and ensuring that you stay organized and on track.
-
Gather Necessary Tools and Equipment: Take inventory of the tools and equipment required for the build, such as a saw, hammer, drill, level, and measuring tape. Ensuring that you have all the necessary tools on hand will prevent unnecessary delays and interruptions during the construction phase.
-
Estimate Material Costs: Research and estimate the costs of the materials needed for the shed, including lumber, roofing materials, siding, and hardware. Having a clear understanding of the material costs will help you establish a realistic budget for the project and avoid any financial surprises along the way.
By meticulously addressing these crucial aspects during the planning and preparation stage, you will set the stage for a successful DIY shed build. This thoughtful approach will not only streamline the construction process but also contribute to the overall quality and functionality of the finished shed.
Choosing the Right Location
Selecting the optimal location for your DIY shed is a critical decision that significantly impacts its functionality, longevity, and overall aesthetic appeal. The right location ensures that the shed seamlessly integrates with your property while serving its intended purpose effectively. Here's a detailed exploration of the key considerations when choosing the right location for your DIY shed:
Assessing Accessibility and Convenience
The first factor to consider is accessibility. Evaluate the proximity of the shed to your home, garden, or other areas where you frequently need access. Placing the shed in a convenient location reduces the time and effort required to retrieve tools, equipment, or stored items, enhancing the practicality of the structure.
Sunlight and Shade
Take note of the sunlight and shade patterns in your yard throughout the day. Position the shed in an area that receives adequate natural light, especially if you plan to use it as a workspace or for potting plants. Additionally, consider the impact of shade from nearby trees or structures to prevent excessive heat buildup inside the shed.
Ground Stability and Drainage
Ensure that the chosen location offers stable ground conditions to support the shed's foundation. Avoid areas prone to standing water or poor drainage, as these can lead to structural issues and moisture-related damage over time. If necessary, make any required adjustments to the ground to create a level and well-drained foundation for the shed.
Property Boundaries and Regulations
Respect property boundaries and adhere to local regulations when determining the shed's location. Maintain a safe distance from property lines and neighboring structures to comply with zoning laws and building codes. Familiarize yourself with setback requirements and any restrictions related to outbuildings on your property.
Visual Harmony and Landscaping
Consider the visual impact of the shed's placement on your property's overall aesthetic. Aim to integrate the shed harmoniously with the existing landscaping and architectural elements. Strategic placement can enhance the visual appeal of your outdoor space while minimizing any potential obstructions or visual clutter.
Future Expansion and Land Use
Anticipate future expansion or changes to your property when selecting the shed's location. Choose a spot that allows for potential expansion or modifications without disrupting the overall layout of your yard. Additionally, consider the long-term use of the surrounding land to ensure that the shed's location aligns with any future landscaping or outdoor projects.
By carefully evaluating these factors and selecting a location that aligns with your practical needs and property dynamics, you can set the stage for a successful and harmonious integration of your DIY shed into your outdoor space. The right location not only enhances the functionality of the shed but also contributes to the overall visual appeal and cohesiveness of your property.
Gathering Materials and Tools
Gathering the necessary materials and tools is a crucial step in preparing for your DIY shed build. Having the right supplies on hand ensures a smooth and efficient construction process, allowing you to focus on bringing your shed to life. Here's a detailed breakdown of the essential materials and tools required for your project:
Materials
-
Lumber: The primary building material for the shed's frame and structural components. Select high-quality, pressure-treated lumber for durability and longevity.
-
Roofing Materials: Choose appropriate roofing materials such as shingles, metal panels, or corrugated sheets based on your design preferences and climate considerations.
-
Siding: Opt for siding materials that complement your property's aesthetic, such as wood, vinyl, or composite siding. Ensure the chosen siding offers weather resistance and low maintenance.
-
Foundation Materials: Depending on your chosen foundation type, gather concrete blocks, gravel, or concrete mix to establish a stable and level base for the shed.
-
Hardware and Fasteners: Stock up on nails, screws, bolts, and other fasteners required for assembling the shed's components. Additionally, ensure you have the necessary brackets, hinges, and connectors for structural support.
-
Insulation and Moisture Barrier: If you plan to insulate the shed for temperature control, gather insulation materials and a moisture barrier to protect the interior from moisture buildup.
-
Windows and Doors: If your shed design includes windows and doors, procure these components along with the necessary hardware for installation.
-
Paint and Finishing Supplies: If you intend to paint or finish the exterior of the shed, gather high-quality exterior paint, primer, and any additional finishing supplies.
Tools
-
Circular Saw: Essential for cutting lumber and plywood to the required dimensions.
-
Hammer and Nail Gun: Both manual and pneumatic options for driving nails and securing components.
-
Power Drill: Equipped with drill bits and screwdriver attachments for efficient assembly and fastening.
-
Level and Square: Ensure accurate and precise alignment of structural elements during construction.
-
Measuring Tape: A reliable measuring tool for taking accurate dimensions and ensuring symmetrical construction.
-
Work Gloves and Safety Gear: Prioritize safety with protective gloves, goggles, and appropriate footwear for the construction environment.
-
Ladder or Scaffolding: Depending on the shed's height, secure a stable and secure platform for working at elevated heights.
-
Roofing Tools: If installing the roof yourself, gather tools such as a roofing nailer, utility knife, and a chalk line for precise installation.
By gathering these materials and tools in advance, you'll be well-prepared to commence the construction of your DIY shed with confidence and efficiency. This proactive approach minimizes interruptions and ensures that the building process progresses smoothly, bringing you closer to the realization of your custom-built shed.
Building the Foundation
The foundation of a DIY shed serves as the anchor for the entire structure, providing stability and support to withstand various environmental factors. Building a solid foundation is essential for ensuring the longevity and structural integrity of the shed. Here's a detailed exploration of the key steps involved in constructing a sturdy and reliable foundation for your DIY shed.
Selecting the Foundation Type
The first decision to make when building the foundation is selecting the appropriate type based on your specific needs and the shed's design. Common foundation options include concrete slabs, concrete blocks, and skids. Each type offers distinct advantages in terms of durability, cost, and ease of construction. Consider factors such as soil composition, local climate, and intended shed usage when determining the most suitable foundation type for your project.
Site Preparation
Before laying the foundation, thorough site preparation is crucial to ensure a level and stable base for the shed. Clear the designated area of any debris, vegetation, or obstacles that may impede the construction process. Use a shovel or a skid steer to excavate the site, removing topsoil and creating a level surface for the foundation. Additionally, consider incorporating proper drainage measures to prevent water accumulation around the shed's base.
Building the Foundation Framework
For a concrete foundation, construct a wooden framework to contain the concrete mix and establish the desired dimensions of the slab. Ensure that the framework is precisely leveled and squared to avoid irregularities in the foundation. If opting for concrete blocks or skids, position and align them according to the shed's layout, ensuring uniform spacing and stability.
Pouring and Curing Concrete
If you've chosen a concrete slab foundation, the next step involves pouring the concrete mix into the prepared framework. Use a wheelbarrow or concrete mixer to transport the mix and distribute it evenly within the framework. Smooth the surface with a screed board to achieve a level finish. Allow the concrete to cure according to the manufacturer's recommendations, providing adequate time for it to harden and attain its full strength.
Securing the Foundation
Once the foundation material has been placed and set, it's essential to secure it against shifting or settling. For concrete slabs, consider embedding anchor bolts or metal brackets within the concrete to facilitate secure attachment of the shed's frame. For block or skid foundations, use appropriate fasteners to anchor the shed's base securely to the foundation, ensuring a solid connection.
By meticulously following these steps and paying attention to detail during the foundation construction phase, you'll establish a robust and reliable base for your DIY shed. A well-built foundation sets the stage for the subsequent stages of shed construction, ensuring a level and durable platform for the structure.
Constructing the Frame
Constructing the frame of a DIY shed marks a pivotal phase in the building process, laying the groundwork for the overall structure and defining its shape and stability. The frame serves as the skeleton of the shed, providing support for walls, roof, and doors while ensuring structural integrity. Here's a detailed exploration of the key steps involved in constructing the frame of your DIY shed.
Laying the Groundwork
Begin by assembling the necessary lumber and structural components, ensuring that all materials are of high quality and suitable for outdoor use. The frame typically consists of vertical wall studs, horizontal top and bottom plates, and additional framing members to support doors, windows, and roof trusses. Take precise measurements and cut the lumber to the required dimensions, ensuring accuracy and uniformity in the framing elements.
Wall Framing
With the lumber prepared, proceed to construct the wall frames on a level surface, following the dimensions outlined in your shed plan. Use a level and square to ensure that the frames are perfectly plumb and square, which is essential for the overall stability and alignment of the shed. Secure the framing members together using appropriate fasteners, such as nails or screws, to create sturdy and rigid wall frames.
Roof Trusses
If your shed design incorporates a pitched roof, the next step involves constructing roof trusses to support the roof structure. Carefully follow the design specifications to create trusses that provide adequate slope and load-bearing capacity. Ensure that the trusses are securely connected to the top plates of the wall frames, forming a cohesive framework that can withstand the weight of the roof and any external elements.
Door and Window Openings
As part of the framing process, frame openings for doors and windows according to the predetermined locations in your shed plan. Pay close attention to precise measurements and alignment to ensure that the openings accommodate the intended door and window sizes. Additionally, reinforce the surrounding framing members to provide sufficient support for the installation of doors and windows.
Structural Reinforcement
To enhance the overall strength and stability of the frame, consider incorporating additional bracing and reinforcement at key junctions and corners. Diagonal bracing can be added to walls and trusses to resist lateral forces and prevent swaying or shifting. Additionally, ensure that all connections and joints are securely fastened to create a solid and resilient frame structure.
By meticulously following these steps and paying attention to detail during the frame construction phase, you'll establish a robust and reliable framework for your DIY shed. The completed frame sets the stage for the subsequent stages of shed construction, providing a solid foundation for the installation of siding, roofing, and interior finishes.
Adding Siding and Roofing
Once the frame of your DIY shed is in place, the next crucial step is adding siding and roofing to enclose the structure and provide protection from the elements. This phase not only enhances the shed's visual appeal but also contributes to its durability and weather resistance. Here's a detailed exploration of the key considerations and steps involved in adding siding and roofing to your DIY shed.
Siding Installation
Begin by selecting the appropriate siding material that aligns with your aesthetic preferences and climate considerations. Common siding options include wood, vinyl, metal, and composite materials, each offering unique benefits in terms of durability, maintenance, and visual appeal. Prioritize siding materials that offer weather resistance and longevity, ensuring that your shed remains well-protected for years to come.
Before installing the siding, ensure that the exterior surface of the shed is properly prepared. This may involve applying a moisture barrier or sheathing to create a stable and weatherproof substrate for the siding. Once the surface is ready, carefully measure and cut the siding panels to fit the dimensions of the shed's walls, ensuring precise alignment and a uniform appearance.
Secure the siding panels to the frame using appropriate fasteners, following the manufacturer's guidelines for installation. Pay attention to proper overlap and joint sealing to prevent moisture infiltration and maintain the shed's integrity. Additionally, consider incorporating ventilation features to promote air circulation behind the siding, reducing the risk of moisture buildup and potential damage.
Roofing Installation
Selecting the right roofing material is crucial for ensuring long-term protection and weatherproofing for your shed. Common roofing options include asphalt shingles, metal panels, corrugated sheets, and roofing tiles, each offering distinct advantages in terms of durability, aesthetics, and climate suitability. Consider factors such as slope, local weather conditions, and maintenance requirements when choosing the roofing material for your shed.
Before installing the roofing material, it's essential to prepare the roof surface by applying underlayment to provide an additional layer of protection against moisture and ensure a watertight seal. If your shed design includes roof vents or skylights, incorporate these features into the roofing structure at this stage, ensuring proper flashing and sealing to prevent leaks.
Carefully install the chosen roofing material according to the manufacturer's instructions, paying attention to proper overlap, fastening, and edge detailing. Ensure that the roofing material is securely attached to the underlying structure, providing reliable protection against wind, rain, and other environmental factors. Additionally, consider adding gutter systems and downspouts to manage water runoff and prevent potential water damage around the shed's perimeter.
By meticulously following these steps and selecting high-quality siding and roofing materials, you'll enhance the functionality and visual appeal of your DIY shed while ensuring long-term durability and weather resistance. The completed siding and roofing installation not only transforms the shed into a fully enclosed and protected space but also contributes to its overall aesthetic charm and structural integrity.
Installing Doors and Windows
The installation of doors and windows in your DIY shed is a pivotal phase that adds functionality, natural light, and aesthetic appeal to the structure. Properly installed doors provide convenient access to the interior space, while windows contribute to ventilation, illumination, and a welcoming ambiance. Here's a detailed exploration of the key considerations and steps involved in installing doors and windows for your DIY shed.
Door Installation
Begin by selecting high-quality doors that align with your shed's design, size, and functional requirements. Common options include pre-hung exterior doors, sliding barn doors, or custom-built doors, each offering distinct benefits in terms of accessibility, security, and visual appeal. Prioritize doors constructed from durable and weather-resistant materials to ensure longevity and reliable performance.
Before installing the door, ensure that the door opening in the shed's frame is properly prepared. This may involve adding additional framing members or adjusting the opening dimensions to accommodate the chosen door. Verify that the door frame is square and level, essential for smooth operation and a proper seal when the door is closed.
Carefully position the door within the opening, ensuring even spacing around the frame and smooth operation of hinges or sliding mechanisms. Secure the door in place using appropriate fasteners, ensuring that it is plumb, level, and securely anchored to the surrounding framing members. Test the door's operation to confirm smooth opening and closing, making any necessary adjustments to ensure a proper fit and seal.
Window Installation
Select windows that complement your shed's design and provide adequate natural light and ventilation. Common window styles include single-hung, double-hung, casement, or fixed windows, each offering unique benefits in terms of functionality and visual appeal. Prioritize windows with energy-efficient features and durable frames to enhance the shed's comfort and longevity.
Prepare the window openings in the shed's walls by ensuring that they are properly framed and flashed to prevent water infiltration. Carefully position the windows within the openings, ensuring a snug fit and proper alignment with the surrounding siding and framing. Secure the windows in place using appropriate fasteners, ensuring that they are level, plumb, and securely anchored to the structure.
After installing the windows, apply weatherproofing and sealing materials around the perimeter to create a watertight and airtight seal. This step is crucial for preventing moisture infiltration and maintaining the shed's interior comfort and structural integrity. Test the windows for smooth operation and proper sealing, making any necessary adjustments to ensure optimal performance.
By meticulously following these steps and paying attention to detail during the installation of doors and windows, you'll enhance the functionality, comfort, and visual appeal of your DIY shed. The completed installation not only provides convenient access and natural light but also contributes to the overall charm and livability of the shed, creating a welcoming and functional space for various activities and storage needs.
Finishing Touches
With the structural elements in place, the finishing touches phase brings your DIY shed to its full potential, adding both practical and aesthetic details that elevate its functionality and visual appeal. This phase encompasses a range of tasks that contribute to the overall completion and refinement of the shed, ensuring that it meets your specific needs and reflects your personal style.
Exterior Finishes
Applying exterior finishes such as paint, stain, or protective coatings not only enhances the shed's visual appeal but also provides essential protection against the elements. Choose high-quality exterior finishes that offer durability and weather resistance, ensuring that your shed maintains its appearance and structural integrity over time. Consider color schemes and design elements that harmonize with your property's aesthetic, creating a cohesive and attractive outdoor structure.
Interior Organization
Organizing the interior space of your shed maximizes its functionality and usability. Install shelving, storage racks, and hooks to accommodate tools, equipment, and other items, promoting efficient organization and easy access. Consider customizing the interior layout to suit your specific storage needs, creating designated areas for different categories of items and optimizing the available space for practical use.
Lighting and Electrical
Incorporating lighting and electrical features enhances the shed's usability, especially for tasks that extend into the evening hours. Install overhead lighting fixtures or task lighting to illuminate the interior space, creating a well-lit environment for various activities. If applicable, consider adding electrical outlets for powering tools, charging devices, or running small appliances, further enhancing the shed's versatility and convenience.
Landscaping and Surroundings
Integrating the shed into its surrounding landscape adds a final touch of cohesiveness and visual appeal to your outdoor space. Consider landscaping around the shed with plantings, pathways, or decorative elements that complement its design and contribute to a harmonious overall aesthetic. Additionally, ensure that the area around the shed is properly graded and landscaped to promote drainage and prevent water accumulation near the structure.
Personalization and Customization
Adding personal touches and custom details to the shed allows you to infuse it with your unique style and preferences. Consider incorporating decorative elements, signage, or architectural embellishments that reflect your personality and enhance the shed's character. Whether it's a custom-built workbench, a decorative weathervane, or a personalized nameplate, these details add a distinct charm to your DIY creation.
By attending to these finishing touches with care and attention to detail, you'll bring your DIY shed to its full potential, creating a space that not only serves practical purposes but also stands as a testament to your creativity and craftsmanship. The completion of these final tasks marks the transformation of your shed from a construction project to a fully realized and functional addition to your property.
Conclusion
In conclusion, embarking on a DIY shed build is a gratifying journey that combines practicality, creativity, and craftsmanship. From the initial planning and preparation to the final finishing touches, every step of the construction process offers an opportunity to transform raw materials into a functional and personalized space. By taking on this project, you not only gain valuable storage or workspace but also cultivate a sense of pride and accomplishment in creating a structure with your own hands.
Throughout the construction process, careful attention to detail and thoughtful decision-making are essential. From selecting the right location and materials to meticulously constructing the frame and adding siding and roofing, each phase contributes to the overall quality and durability of the shed. Moreover, the installation of doors and windows, along with the incorporation of finishing touches, elevates the shed from a mere structure to a fully functional and visually appealing addition to your property.
Beyond the practical aspects, the DIY shed build fosters a deeper connection to your outdoor space and property. It allows you to tailor the design, layout, and features to align with your specific needs and preferences, creating a space that seamlessly integrates with your lifestyle. Whether it's organizing tools, pursuing hobbies, or simply enjoying a tranquil retreat, the DIY shed becomes a versatile and personalized extension of your home.
Furthermore, the skills and knowledge gained from undertaking a DIY shed build are invaluable. From mastering construction techniques to problem-solving and project management, the experience equips you with a range of practical skills that extend beyond the realm of shed construction. These skills can be applied to future DIY projects, home improvements, or even professional endeavors, making the DIY shed build a rewarding and educational endeavor.
In essence, the completion of a DIY shed build represents more than just the construction of a physical structure. It symbolizes the fulfillment of a vision, the expression of creativity, and the cultivation of practical skills. It stands as a testament to resourcefulness, determination, and the joy of creating something meaningful with your own hands. As you step back and admire the finished shed, you'll not only see a functional space but also the embodiment of your dedication and ingenuity, making the DIY shed build a truly fulfilling and enriching experience.