
Home>Home & Furniture>Garage & Basement>How To Build A Shed On A Concrete Slab
Garage & Basement
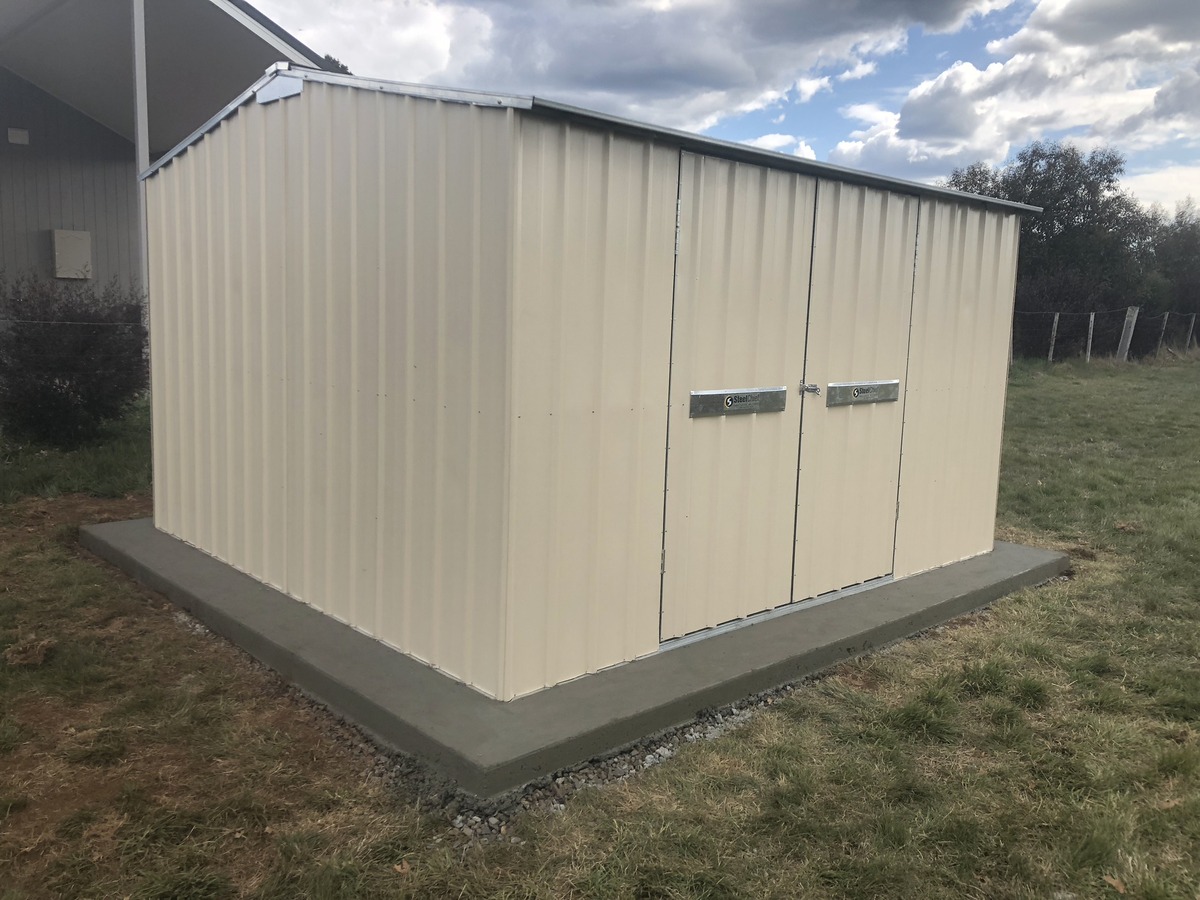
How To Build A Shed On A Concrete Slab
Published: February 20, 2024
Editor-in-Chief with a decade in home renovation and a passion for vintage furniture. Diane is known for her weekend treasure hunts at flea markets, enriching our content with unique style insights.
Learn how to build a sturdy shed on a concrete slab in your garage or basement with our step-by-step guide. Get expert tips and advice for a successful project.
(Many of the links in this article redirect to a specific reviewed product. Your purchase of these products through affiliate links helps to generate commission for Twigandthistle.com, at no extra cost. Learn more)
Introduction
Building a shed on a concrete slab is a practical and durable solution for creating a sturdy foundation for your outdoor storage space. Whether you're a seasoned DIY enthusiast or a novice looking to embark on a new project, constructing a shed on a concrete slab offers numerous benefits. From providing a stable base to protecting your belongings from moisture and pests, a well-built concrete slab can significantly enhance the longevity and functionality of your shed.
In this comprehensive guide, we will walk you through the step-by-step process of building a shed on a concrete slab. From initial planning and site preparation to the final touches, you will gain valuable insights and practical tips to ensure a successful and rewarding construction project. By following these detailed instructions and leveraging the right tools and materials, you can create a robust foundation and a functional shed that meets your storage needs.
Embarking on this endeavor requires careful planning, attention to detail, and a willingness to invest time and effort into the construction process. However, the end result will be a well-constructed shed that provides a secure and organized space for storing your tools, equipment, and outdoor essentials. Whether you envision a small storage shed for your gardening supplies or a larger structure for housing your lawn care equipment, the principles outlined in this guide can be tailored to suit your specific requirements.
As we delve into each step of the construction process, you will discover the importance of precision, safety measures, and adherence to local building codes. Additionally, we will explore the essential tools and materials needed to execute each phase of the project with confidence and efficiency. By the end of this guide, you will be equipped with the knowledge and skills to embark on your shed-building journey, empowered to transform your outdoor space into a functional and organized oasis.
Step 1: Planning and Preparation
Before embarking on the construction of a shed on a concrete slab, thorough planning and preparation are essential to ensure a successful and efficient building process. This initial phase sets the foundation for the entire project, encompassing crucial considerations such as site selection, shed design, and compliance with local regulations.
Site Selection:
The first step in planning involves selecting an optimal location for the shed and concrete slab. Consider factors such as ground elevation, drainage, and proximity to existing structures. Ensure that the chosen site is level and free from obstructions, allowing for easy access and optimal functionality of the shed.
Shed Design and Size:
Determine the size and design of the shed based on your storage needs and available space. Consider the dimensions of the concrete slab, ensuring it accommodates the shed's footprint while allowing for adequate clearance around the structure. Additionally, select a shed design that complements the aesthetics of your property and meets any homeowner association guidelines or local building codes.
Obtain Necessary Permits:
Check with local authorities to determine if building permits are required for constructing a shed and concrete slab. Compliance with zoning regulations and building codes is crucial to avoid potential legal issues and ensure the structural integrity of the project. Obtain the necessary permits and approvals before proceeding with the construction process.
Budget and Material Planning:
Create a comprehensive budget that accounts for all aspects of the project, including materials, tools, labor, and any unforeseen expenses. Research the required materials for the concrete slab and shed construction, ensuring that they align with your budget and quality standards. Consider consulting with professionals or experienced DIY enthusiasts to gain insights into cost-effective material options and construction techniques.
Timeline and Project Schedule:
Develop a realistic timeline for the project, taking into account factors such as weather conditions, availability of materials, and personal commitments. Establish a project schedule that outlines specific milestones and tasks, allowing for a systematic and organized approach to the construction process. Factor in additional time for potential delays or adjustments to the original plan.
Safety Considerations:
Prioritize safety by identifying potential hazards and implementing necessary precautions. Ensure that all individuals involved in the construction process are equipped with the appropriate personal protective equipment (PPE) and are aware of safety protocols. Consider enlisting the assistance of experienced professionals for tasks that require specialized skills or equipment.
By meticulously planning and preparing for the construction of a shed on a concrete slab, you can lay the groundwork for a smooth and successful building process. This proactive approach sets the stage for efficient execution and paves the way for a structurally sound and visually appealing outdoor storage solution.
Step 2: Gathering Materials and Tools
Gathering the necessary materials and tools is a critical aspect of preparing for the construction of a shed on a concrete slab. By ensuring that you have all the essential components and equipment at your disposal, you can streamline the building process and minimize potential delays. From concrete and lumber to specialized tools, each item plays a pivotal role in bringing your shed construction project to fruition.
Materials
-
Concrete: Acquire high-quality concrete mix in sufficient quantities to form the foundation slab. Consider factors such as the slab's dimensions and thickness when calculating the required amount of concrete.
-
Rebar or Wire Mesh: Reinforcing the concrete slab with rebar or wire mesh enhances its strength and durability. Procure the appropriate amount of reinforcement material based on the dimensions of the slab.
-
Lumber: Select pressure-treated lumber for framing the shed walls, floor joists, and roof structure. Ensure that the lumber is of suitable dimensions and quality to support the intended shed design.
-
Fasteners: Stock up on nails, screws, and other fastening hardware required for assembling the shed components and securing the concrete formwork.
-
Moisture Barrier: Invest in a moisture barrier, such as polyethylene sheeting, to prevent moisture from seeping into the shed's floor and compromising the integrity of stored items.
-
Shed Siding and Roofing Materials: Depending on your shed design, acquire siding panels, shingles, or other roofing materials to enclose and protect the structure.
-
Anchor Bolts or Post Brackets: If the shed will be anchored to the concrete slab, obtain anchor bolts or post brackets to securely attach the shed to the foundation.
-
Concrete Sealer: Consider purchasing a concrete sealer to protect the finished slab from moisture and prolong its lifespan.
Tools
-
Concrete Mixer or Wheelbarrow: Depending on the volume of concrete needed, a concrete mixer or wheelbarrow can facilitate the mixing and transportation of concrete to the slab site.
-
Trowel and Float: These tools are essential for smoothing and leveling the concrete surface during the slab construction process.
-
Circular Saw and Power Drill: A circular saw and power drill are indispensable for cutting lumber and assembling the shed components with precision.
-
Level and Square: Ensure that you have a reliable level and square for accurately aligning and positioning the shed framework and concrete formwork.
-
Hammer, Nail Gun, and Screwdriver: These tools are essential for fastening lumber, siding, and roofing materials during the shed assembly phase.
-
Safety Gear: Prioritize safety by equipping yourself with protective gear, including gloves, safety glasses, and a dust mask, to safeguard against potential hazards.
By proactively gathering the required materials and tools, you can set the stage for a seamless and efficient construction process. This comprehensive preparation ensures that you have everything you need to embark on the next phase of building a sturdy shed on a durable concrete slab.
Step 3: Preparing the Site
Preparing the site for building a shed on a concrete slab is a crucial phase that sets the foundation for the structural integrity and longevity of the entire project. This step involves meticulous attention to detail and adherence to specific guidelines to ensure that the site is primed for the construction of a stable and durable foundation.
Clearing and Leveling the Ground
The initial task in site preparation involves clearing the designated area of any debris, vegetation, or obstructions. This process ensures a clean and unobstructed canvas for constructing the concrete slab. Additionally, the ground must be leveled to eliminate any unevenness or slopes that could compromise the integrity of the slab. Utilizing a level and appropriate earth-moving tools, such as a shovel or a grading rake, is essential for achieving a uniformly level surface.
Marking the Shed and Slab Layout
Once the ground is cleared and leveled, marking the layout of the shed and concrete slab is pivotal for precise construction. Use stakes, string lines, or marking paint to outline the dimensions of the shed and the corresponding concrete slab. Accurate measurements and alignment are critical at this stage to ensure that the shed will fit seamlessly onto the slab and align with any existing structures or property boundaries.
Excavating and Compacting the Soil
Excavation of the site involves digging a trench to accommodate the depth of the concrete slab. The depth of the trench will depend on factors such as local building codes, frost line considerations, and the intended use of the shed. Once the trench is excavated, compacting the soil using a plate compactor or hand tamper is essential to create a stable base for the concrete. Compaction minimizes the risk of settling or shifting over time, contributing to the long-term stability of the slab.
Installing Formwork and Reinforcement
Formwork, typically constructed from lumber or metal, is used to contain the concrete during pouring and shaping. It is essential to install the formwork according to the precise dimensions outlined in the shed and slab layout. Additionally, incorporating reinforcement, such as rebar or wire mesh, within the formwork enhances the structural strength and load-bearing capacity of the concrete slab. Careful placement and securing of the reinforcement material are critical to ensure its effectiveness in reinforcing the concrete.
Addressing Drainage Considerations
Proper drainage is vital for preserving the integrity of the concrete slab and preventing water accumulation around the shed. Incorporating a slight slope in the slab design or implementing drainage channels can effectively direct water away from the shed, minimizing the risk of moisture-related issues. Attention to drainage considerations during site preparation contributes to the long-term resilience of the shed and its foundation.
By meticulously executing the site preparation phase, you establish a solid groundwork for the subsequent construction stages. This proactive approach sets the stage for a smooth and efficient building process, ensuring that the shed and concrete slab are positioned for optimal functionality and longevity.
Step 4: Building the Concrete Slab
Building the concrete slab forms the cornerstone of the shed construction process, providing a stable and durable foundation for the structure. This phase requires precision, attention to detail, and adherence to established concrete construction practices to ensure the integrity and longevity of the slab.
Concrete Mixing and Pouring
The process commences with the meticulous mixing of the concrete, ensuring the correct ratio of cement, aggregate, and water to achieve the desired consistency. Whether utilizing a concrete mixer or a wheelbarrow, thorough mixing is essential to produce a homogenous concrete mixture. Once mixed, the concrete is carefully poured into the prepared formwork, ensuring even distribution and complete coverage of the designated area.
Smoothing and Leveling
After the concrete is poured, it is meticulously smoothed and leveled using a trowel and float. This critical step involves achieving a uniform surface with the appropriate slope for drainage, if applicable. Careful attention is paid to eliminating air pockets and achieving a consistent finish that meets the specified thickness and slope requirements.
Curing and Protection
Upon completing the initial smoothing and leveling, the curing process begins to promote the concrete's strength and durability. Curing involves maintaining optimal moisture levels and protecting the slab from rapid drying or extreme temperature fluctuations. Utilizing curing compounds or covering the slab with plastic sheeting facilitates the gradual and controlled curing process, enhancing the concrete's resilience.
Reinforcement Integration
If rebar or wire mesh reinforcement was incorporated during the formwork installation, ensuring its proper positioning within the concrete is essential. The reinforcement enhances the slab's load-bearing capacity and resistance to cracking, contributing to its long-term structural integrity. Careful integration and alignment of the reinforcement within the concrete matrix are pivotal for maximizing its effectiveness.
Finishing Touches
As the concrete cures, any finishing touches, such as creating control joints or applying a concrete sealer, may be implemented to enhance the slab's performance and aesthetics. Control joints help mitigate the potential for cracking by accommodating concrete shrinkage, while a quality concrete sealer provides protection against moisture infiltration and prolongs the slab's lifespan.
By meticulously executing each step of the concrete slab construction process, you establish a robust foundation that forms the backbone of the shed's structural integrity. This meticulous approach ensures that the concrete slab meets the highest standards of quality and functionality, setting the stage for the seamless integration of the shed onto its durable and stable base.
Step 5: Constructing the Shed
With the concrete slab in place, the focus shifts to the construction of the shed, where careful attention to detail and precise execution are paramount. This phase encompasses the assembly of the shed's framework, installation of siding and roofing materials, and the integration of essential components to create a functional and visually appealing structure.
Framing the Shed
The construction process begins with framing the shed, a pivotal step that lays the groundwork for the overall stability and structural integrity of the structure. Utilizing pressure-treated lumber, the framework is meticulously assembled according to the predetermined shed design and dimensions. Each component, including the walls, floor joists, and roof trusses, is securely fastened and aligned to ensure a sturdy and level framework.
Installing Siding and Roofing
Once the framework is in place, the installation of siding and roofing materials follows, providing essential protection and aesthetic appeal to the shed. Whether opting for durable vinyl siding, traditional wood panels, or other siding options, meticulous attention is paid to ensure precise alignment and weatherproofing. Similarly, the installation of roofing materials, such as shingles or metal roofing panels, is executed with precision to safeguard the shed against the elements and enhance its visual appeal.
Incorporating Doors and Windows
The integration of doors and windows into the shed design enhances its functionality and accessibility. Careful consideration is given to the placement and installation of doors, ensuring smooth operation and secure closure. Windows are strategically positioned to maximize natural light and ventilation within the shed, contributing to a comfortable and well-lit interior space.
Interior Finishing and Customization
As the structural components take shape, interior finishing touches and customization further elevate the shed's utility and aesthetics. From adding shelving and storage solutions to implementing electrical wiring for lighting and power outlets, each customization is tailored to meet the specific storage and usage needs of the shed. Attention to detail in interior finishing ensures a well-organized and functional space for storing tools, equipment, and other essentials.
Securing the Shed to the Slab
To fortify the shed's stability and resistance to external forces, securing the structure to the concrete slab is essential. Anchor bolts or post brackets are utilized to firmly attach the shed to the foundation, mitigating the risk of displacement and enhancing overall structural integrity.
Embracing Creativity and Personalization
Throughout the construction process, opportunities abound for infusing creativity and personalization into the shed's design. Whether adding decorative elements, custom paint finishes, or landscaping around the shed, these personal touches contribute to a unique and inviting outdoor space.
By meticulously executing each phase of shed construction, from framing to customization, a well-crafted and functional outdoor storage solution emerges. The seamless integration of the shed onto the durable concrete slab culminates in a versatile and visually appealing structure that enhances the functionality and aesthetics of the outdoor environment.
Step 6: Finishing Touches
As the construction of the shed nears completion, attention turns to the crucial phase of adding finishing touches that enhance the functionality, aesthetics, and longevity of the structure. This stage encompasses a range of meticulous details and final adjustments that elevate the shed from a mere storage space to a well-crafted and visually appealing outdoor asset.
Exterior and Trim Detailing
The exterior of the shed is meticulously finished with attention to trim detailing, ensuring seamless transitions between siding panels, corners, and edges. Trim elements, such as fascia boards, corner moldings, and soffits, are installed with precision to provide a polished and cohesive appearance. Additionally, exterior paint or stain application enhances the shed's visual appeal while providing essential protection against weathering and UV exposure.
Weatherproofing and Sealing
To safeguard the shed against the elements, weatherproofing measures are implemented to seal gaps, joints, and potential entry points for moisture and pests. Caulking and sealing around windows, doors, and siding components prevent water infiltration, while ensuring a tight and secure envelope for the shed. Attention to weatherproofing contributes to the long-term durability and resilience of the structure.
Ventilation and Air Circulation
Incorporating adequate ventilation solutions within the shed promotes air circulation and mitigates the risk of moisture buildup and stale air. Vents or louvers are strategically installed to facilitate the exchange of air, contributing to a healthy and well-maintained interior environment. Proper ventilation is essential for preserving the condition of stored items and preventing the development of mold or mildew.
Landscaping and Surroundings
The area surrounding the shed is thoughtfully landscaped to integrate the structure harmoniously into the outdoor environment. From planting shrubs and flowers to creating pathways and decorative features, landscaping enhances the visual appeal of the shed's surroundings. Attention to landscaping details creates an inviting and aesthetically pleasing outdoor space.
Lighting and Accessibility
The installation of exterior lighting fixtures, such as wall sconces or motion-activated lights, enhances the shed's accessibility and security. Well-placed lighting ensures safe navigation around the shed during evening hours while adding a welcoming ambiance to the outdoor space. Additionally, pathways and access points are optimized for ease of use and functionality, ensuring convenient entry and exit from the shed.
Personalization and Customization
Finally, the finishing touches phase provides an opportunity for personalization and customization, allowing the addition of unique elements that reflect individual preferences and style. Whether incorporating decorative accents, signage, or personalized touches, these details infuse the shed with character and charm, creating a space that resonates with the owner's personality and vision.
By meticulously attending to these finishing touches, the shed transcends its utilitarian purpose, evolving into a thoughtfully crafted and inviting outdoor retreat. Each detail contributes to the overall functionality, durability, and visual appeal of the shed, culminating in a well-rounded and purposeful addition to the outdoor landscape.
Conclusion
In conclusion, the process of building a shed on a concrete slab encompasses a series of meticulous steps, from initial planning and site preparation to the construction of a durable and functional structure. By embarking on this endeavor with careful consideration and attention to detail, individuals can transform their outdoor space into a versatile and organized oasis that meets their storage needs while enhancing the overall aesthetics of their property.
The journey begins with thorough planning and preparation, where site selection, shed design, compliance with local regulations, and budget considerations lay the groundwork for a successful construction project. This proactive approach sets the stage for efficient execution and ensures that the construction process unfolds seamlessly.
Gathering the necessary materials and tools is a critical aspect of preparing for the construction of a shed on a concrete slab. By ensuring that all essential components and equipment are readily available, individuals can streamline the building process and minimize potential delays, setting the stage for a smooth and efficient construction process.
The site preparation phase plays a pivotal role in establishing a stable and durable foundation for the shed. Clearing and leveling the ground, marking the shed and slab layout, excavating and compacting the soil, and addressing drainage considerations are essential steps that contribute to the long-term resilience of the shed and its foundation.
Building the concrete slab forms the cornerstone of the shed construction process, providing a stable and durable foundation for the structure. This phase requires precision, attention to detail, and adherence to established concrete construction practices to ensure the integrity and longevity of the slab.
With the concrete slab in place, the focus shifts to the construction of the shed, where careful attention to detail and precise execution are paramount. This phase encompasses the assembly of the shed's framework, installation of siding and roofing materials, and the integration of essential components to create a functional and visually appealing structure.
As the construction of the shed nears completion, attention turns to the crucial phase of adding finishing touches that enhance the functionality, aesthetics, and longevity of the structure. This stage encompasses a range of meticulous details and final adjustments that elevate the shed from a mere storage space to a well-crafted and visually appealing outdoor asset.
In essence, building a shed on a concrete slab is a rewarding and transformative endeavor that empowers individuals to create a durable, functional, and visually appealing outdoor storage solution. By following the comprehensive guide outlined in this article and leveraging the right tools, materials, and construction techniques, individuals can embark on their shed-building journey with confidence and enthusiasm, ultimately reaping the rewards of a well-constructed and purposeful outdoor space.