
Home>Knowledge & Skills>Masonry & Tilework>How To Build A Fieldstone Wall With Mortar
Masonry & Tilework
How To Build A Fieldstone Wall With Mortar
Published: March 6, 2024

Our Editor-in-Chief brings a fresh perspective with his expertise in modern home technologies and eco-friendly solutions. Philip bridges tradition with innovation across a wide range of DIY topics.
Learn how to build a durable fieldstone wall with mortar in this comprehensive guide. Perfect for your masonry and tilework projects.
(Many of the links in this article redirect to a specific reviewed product. Your purchase of these products through affiliate links helps to generate commission for Twigandthistle.com, at no extra cost. Learn more)
Introduction
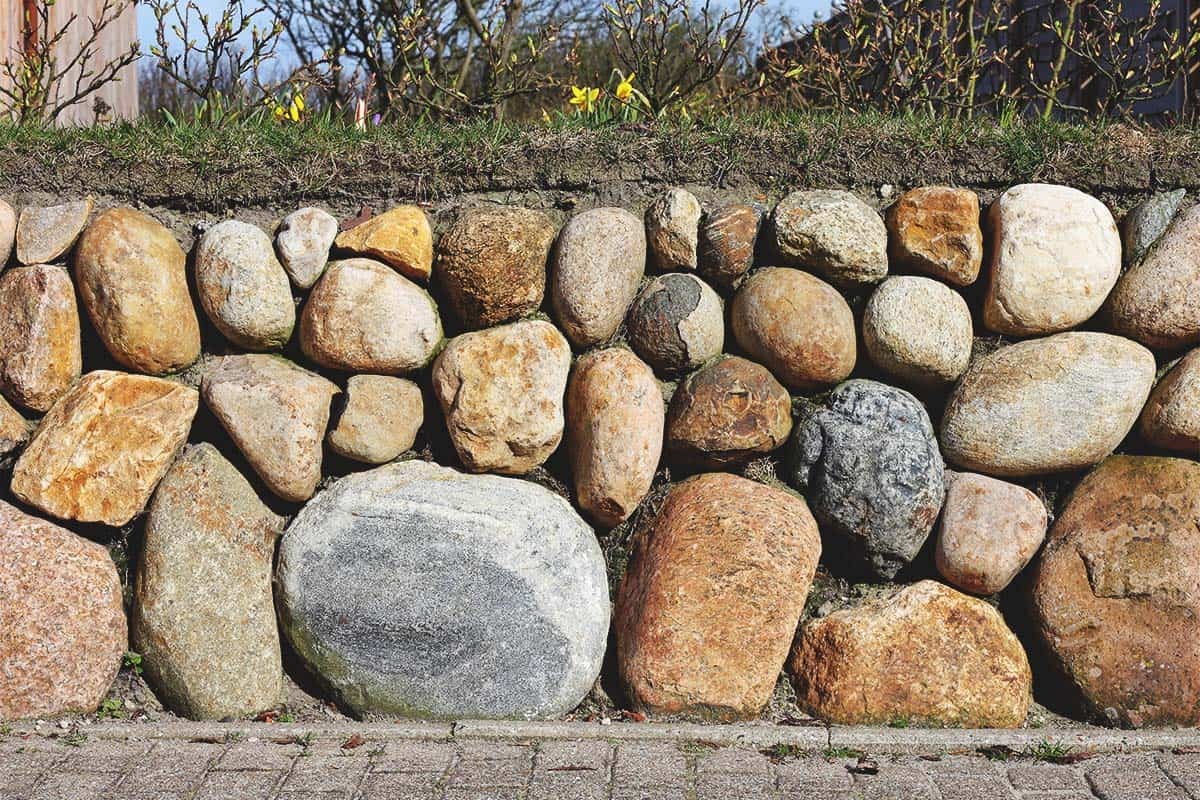
So, you want to learn how to build a fieldstone wall with mortar? You've come to the right place! Building a fieldstone wall can add a touch of rustic charm and natural beauty to your property. Whether you're looking to create a decorative garden wall, a retaining wall, or a boundary wall, using fieldstones and mortar can give your outdoor space a timeless and classic look. In this guide, we'll walk you through the step-by-step process of building a fieldstone wall with mortar, from choosing the right fieldstones to putting the finishing touches on your masterpiece. Let's get started!
Choosing the Right Fieldstones
When it comes to building a fieldstone wall with mortar, choosing the right fieldstones is crucial for the structural integrity and aesthetic appeal of your wall. Here's how to select the perfect fieldstones for your project:
-
Size and Shape: Look for fieldstones that are relatively flat on at least one side. This will make them easier to stack and mortar together, creating a more stable wall.
-
Color and Texture: Consider the overall look you want to achieve. Fieldstones come in a variety of colors and textures, so choose stones that complement the surrounding landscape and architecture.
-
Quality: Inspect each stone for cracks, chips, or irregularities. You want fieldstones that are durable and free from major flaws to ensure a strong and visually appealing wall.
-
Quantity: Estimate the number of fieldstones you'll need based on the size and height of your wall. It's always better to have a few extra stones on hand to accommodate for variations in size and shape.
-
Local Sourcing: If possible, source your fieldstones locally. This not only reduces transportation costs but also ensures that the stones are well-suited to your region's climate and environment.
By carefully considering these factors, you can choose the right fieldstones that will set the foundation for a stunning and long-lasting fieldstone wall.
Preparing the Site
Before you start stacking and mortaring your fieldstones, it's essential to properly prepare the site for the wall. Here's a step-by-step guide to getting the site ready for your fieldstone wall:
-
Clear the Area: Remove any vegetation, debris, or obstacles from the area where the wall will be built. This includes rocks, roots, and any other obstructions that could affect the stability of the wall.
-
Mark the Layout: Use stakes and string to outline the dimensions and shape of the wall. This will help you visualize the final placement of the stones and ensure that the wall is built to the correct specifications.
-
Excavate the Trench: Dig a trench along the marked layout to create a stable foundation for the wall. The trench should be wide enough to accommodate the first course of stones and deep enough to provide stability and support.
-
Add a Base Layer: Fill the bottom of the trench with a layer of crushed stone or gravel. This will help with drainage and prevent water from accumulating behind the wall, which could cause structural issues over time.
-
Compact the Base: Use a hand tamper or a mechanical compactor to firmly compact the base layer. This will create a solid and level foundation for the first course of fieldstones.
-
Install Drainage: If your wall will be retaining soil or water, consider adding drainage pipes or gravel behind the wall to prevent water buildup and potential damage.
By thoroughly preparing the site for your fieldstone wall, you'll ensure that the foundation is strong, stable, and well-suited to support the weight of the stones. This will set the stage for a successful and long-lasting fieldstone wall that enhances the beauty and functionality of your outdoor space.
Mixing the Mortar
Mixing the mortar is a critical step in building a fieldstone wall with mortar. The mortar acts as the adhesive that holds the fieldstones together, providing strength and stability to the wall. Here's a detailed guide on how to mix the mortar for your project:
-
Gather the Materials: Before you start mixing the mortar, gather all the necessary materials, including Portland cement, hydrated lime, sand, and water. It's essential to use the right proportions of these ingredients to create a high-quality mortar mix.
-
Choose the Right Ratio: The ratio of Portland cement, hydrated lime, and sand will depend on the specific requirements of your project. A common ratio for fieldstone wall mortar is 1 part Portland cement, 1/4 part hydrated lime, and 3-4 parts sand. This mixture provides a good balance of strength and workability.
-
Mixing the Dry Ingredients: In a large wheelbarrow or mixing container, combine the dry ingredients – Portland cement, hydrated lime, and sand. Use a shovel or hoe to blend the materials thoroughly, ensuring an even distribution of each component.
-
Add Water Gradually: Once the dry ingredients are mixed, gradually add water to the mixture. Use a hose or bucket to add water while continuously mixing the mortar. The goal is to achieve a workable consistency that is not too dry or too wet.
-
Test the Consistency: To test the consistency of the mortar, use a trowel to scoop up a small amount of the mixture. The mortar should hold its shape without slumping or oozing, but it should also be pliable and easy to work with. Adjust the water or dry ingredients as needed to achieve the desired consistency.
-
Allow the Mortar to Rest: After mixing the mortar, let it rest for a few minutes to allow the ingredients to fully combine. This resting period, known as slaking, helps improve the workability and adhesive properties of the mortar.
-
Avoid Overmixing: It's important not to overmix the mortar, as this can cause the ingredients to separate and weaken the overall strength of the mixture. Mix only the amount of mortar that can be used within a reasonable timeframe to prevent waste and maintain quality.
By following these steps and paying attention to the details of mixing the mortar, you can ensure that you have a high-quality mortar mix that is well-suited for building a durable and visually appealing fieldstone wall.
Laying the Foundation
Laying the foundation is a crucial step in the process of building a fieldstone wall with mortar. The foundation provides the base on which the entire structure rests, so it's essential to approach this step with care and precision. Here's a detailed guide on how to lay the foundation for your fieldstone wall:
-
Set the First Course: Start by laying the first course of fieldstones directly on the compacted base layer in the trench. Position the stones so that they are level from front to back and side to side, using a level and rubber mallet to make adjustments as needed.
-
Apply Mortar: Once the first course is in place, use a trowel to spread a layer of mortar on top of the stones. The mortar should be applied in a consistent thickness to ensure a strong bond between the stones and provide stability to the wall.
-
Add Subsequent Courses: Continue adding fieldstones and mortar to build subsequent courses, staggering the joints between stones to create a stable and visually appealing pattern. As you build upward, periodically check for level and plumb to maintain the integrity of the wall.
-
Cut and Shape Stones: In some cases, you may need to cut or shape fieldstones to fit specific areas of the wall. A masonry saw or chisel can be used to trim stones to the desired size and shape, allowing for a precise and snug fit within the wall.
-
Backfill and Compact: Once the wall reaches the desired height, backfill any space behind the wall with soil or gravel, and compact it to provide additional support and stability. This step is especially important for retaining walls or walls that will be subjected to heavy loads.
-
Cure the Mortar: Allow the mortar to cure for the recommended time, typically 24-48 hours, before applying any additional pressure or weight to the wall. This curing period allows the mortar to achieve its maximum strength and durability.
By following these steps and paying attention to the details of laying the foundation, you can ensure that your fieldstone wall is built on a solid and stable base, setting the stage for a beautiful and long-lasting addition to your outdoor space.
Building the Wall
Now that the foundation is in place, it's time to start building the fieldstone wall in earnest. This is where the true artistry and craftsmanship come into play. Here's a detailed guide on how to build the wall and bring your vision to life:
-
Select and Place Stones: Carefully select each stone for its placement in the wall. Consider the size, shape, and color of the stones to create an aesthetically pleasing and structurally sound arrangement. Start by placing the larger, flatter stones at the base of the wall to provide a stable and level foundation.
-
Apply Mortar: Using a trowel, apply a layer of mortar to the top of the first course of stones. The mortar should be of consistent thickness and applied evenly to ensure a strong bond between the stones. As you add subsequent courses, continue to apply mortar between the stones, pressing them firmly into place.
-
Stagger Joints: To enhance the stability and visual appeal of the wall, stagger the joints between stones as you build upward. This means that the vertical joints in one course should be offset from the joints in the course below. Staggering the joints creates a stronger and more cohesive structure.
-
Maintain Level and Plumb: Throughout the building process, use a level and a plumb line to ensure that the wall remains straight, level, and vertically aligned. Making adjustments as needed will help prevent leaning or unevenness in the finished wall.
-
Create a Sloping Wall: If you're building a freestanding wall, consider creating a slight slope to the wall. This can help improve its stability and resistance to external forces such as wind and soil pressure. A slope of approximately 1 inch for every foot of height is often recommended.
-
Fill Gaps and Voids: As you build the wall, fill any gaps or voids between the stones with mortar. This not only enhances the structural integrity of the wall but also creates a more polished and professional appearance.
-
Add Decorative Touches: For a truly unique and personalized touch, consider incorporating decorative elements into the wall. This could include special stones, patterns, or even small niches for planting or displaying decorative items.
By following these steps and taking the time to build the wall with care and attention to detail, you can create a stunning and enduring fieldstone wall that adds beauty and character to your outdoor space.
Finishing Touches
As you near the completion of your fieldstone wall, it's time to add the finishing touches that will elevate its appearance and functionality. Here's a detailed guide on how to put the final touches on your fieldstone wall:
-
Clean the Surface: Once the mortar has set, use a stiff brush or a wire brush to remove any excess mortar or debris from the surface of the stones. This will reveal the natural beauty of the fieldstones and give the wall a clean and polished look.
-
Pointing and Tooling: Pointing refers to the process of finishing the mortar joints between the stones. Use a pointing trowel to smooth and shape the mortar joints, ensuring a uniform and professional finish. Tooling the joints with a jointing tool can add a decorative touch and further enhance the overall appearance of the wall.
-
Seal the Wall (Optional): Depending on the specific requirements of your project, you may choose to seal the fieldstone wall to protect it from the elements and enhance its longevity. There are various sealants available that can help prevent water penetration and protect the stones from staining or discoloration.
-
Add Capstones (If Desired): For a refined and polished look, consider adding capstones to the top of the wall. Capstones provide a finishing edge and can help protect the top course of stones from damage and weathering. They also add a touch of elegance to the overall design.
-
Landscaping and Grading: Once the wall is complete, consider landscaping the surrounding area and grading the terrain to complement the new addition. Planting shrubs, flowers, or ground cover near the wall can soften its appearance and integrate it seamlessly into the landscape.
-
Lighting and Accessories: To showcase your fieldstone wall and create a welcoming ambiance, consider adding outdoor lighting fixtures or decorative accessories. Well-placed lighting can highlight the texture and color of the stones, while accessories such as planters or decorative elements can add personality to the space.
By attending to these finishing touches, you can ensure that your fieldstone wall is not only structurally sound but also visually striking and well-integrated into its surroundings. These details will elevate the overall impact of your project and create a space that you can truly be proud of.
Conclusion
Congratulations! You've successfully learned the art of building a fieldstone wall with mortar. By following the step-by-step guide provided in this article, you've gained the knowledge and skills needed to create a stunning and durable fieldstone wall that will enhance the beauty and functionality of your outdoor space. From choosing the right fieldstones to adding the finishing touches, each step in the process has been carefully outlined to help you achieve a professional and long-lasting result. Now, armed with this newfound expertise, you can confidently embark on your fieldstone wall project, knowing that you have the know-how to bring your vision to life. So, gather your materials, roll up your sleeves, and get ready to build a fieldstone wall that will stand the test of time and become a focal point of admiration for years to come. Happy building!